

Grow Rainbow Chard at Home and transform your garden into a vibrant, edible masterpiece! Have you ever dreamed of stepping outside your door and harvesting a rainbow of colors for your dinner plate? Well, dream no more! This DIY guide will unlock the secrets to cultivating stunning Rainbow Chard right in your own backyard, balcony, or even windowsill.
Rainbow Chard, with its jewel-toned stalks of red, orange, yellow, and white, isn’t just a pretty face. It’s a nutritional powerhouse packed with vitamins and minerals. Historically, chard has been cultivated for centuries, with roots tracing back to ancient Greece and Rome, where it was valued for its medicinal properties and culinary versatility. Imagine, you’ll be participating in a long and rich history of growing your own food!
But why should you bother with this particular DIY project? In today’s world, knowing where your food comes from is more important than ever. Plus, store-bought Rainbow Chard can be expensive and often lacks the freshness and flavor of homegrown varieties. I’m going to show you how easy and rewarding it is to grow Rainbow Chard at home, saving you money, reducing your carbon footprint, and adding a splash of color to your life. Get ready to roll up your sleeves and let’s get gardening!
Growing Rainbow Chard: A Colorful Guide for Your Garden
Hey there, fellow gardening enthusiasts! I’m so excited to share my experience with growing rainbow chard. It’s not only incredibly easy but also adds a vibrant splash of color to your garden and your plate. Trust me, even if you’re a beginner, you can totally nail this!
Why Rainbow Chard?
Before we dive in, let’s talk about why rainbow chard is such a fantastic choice:
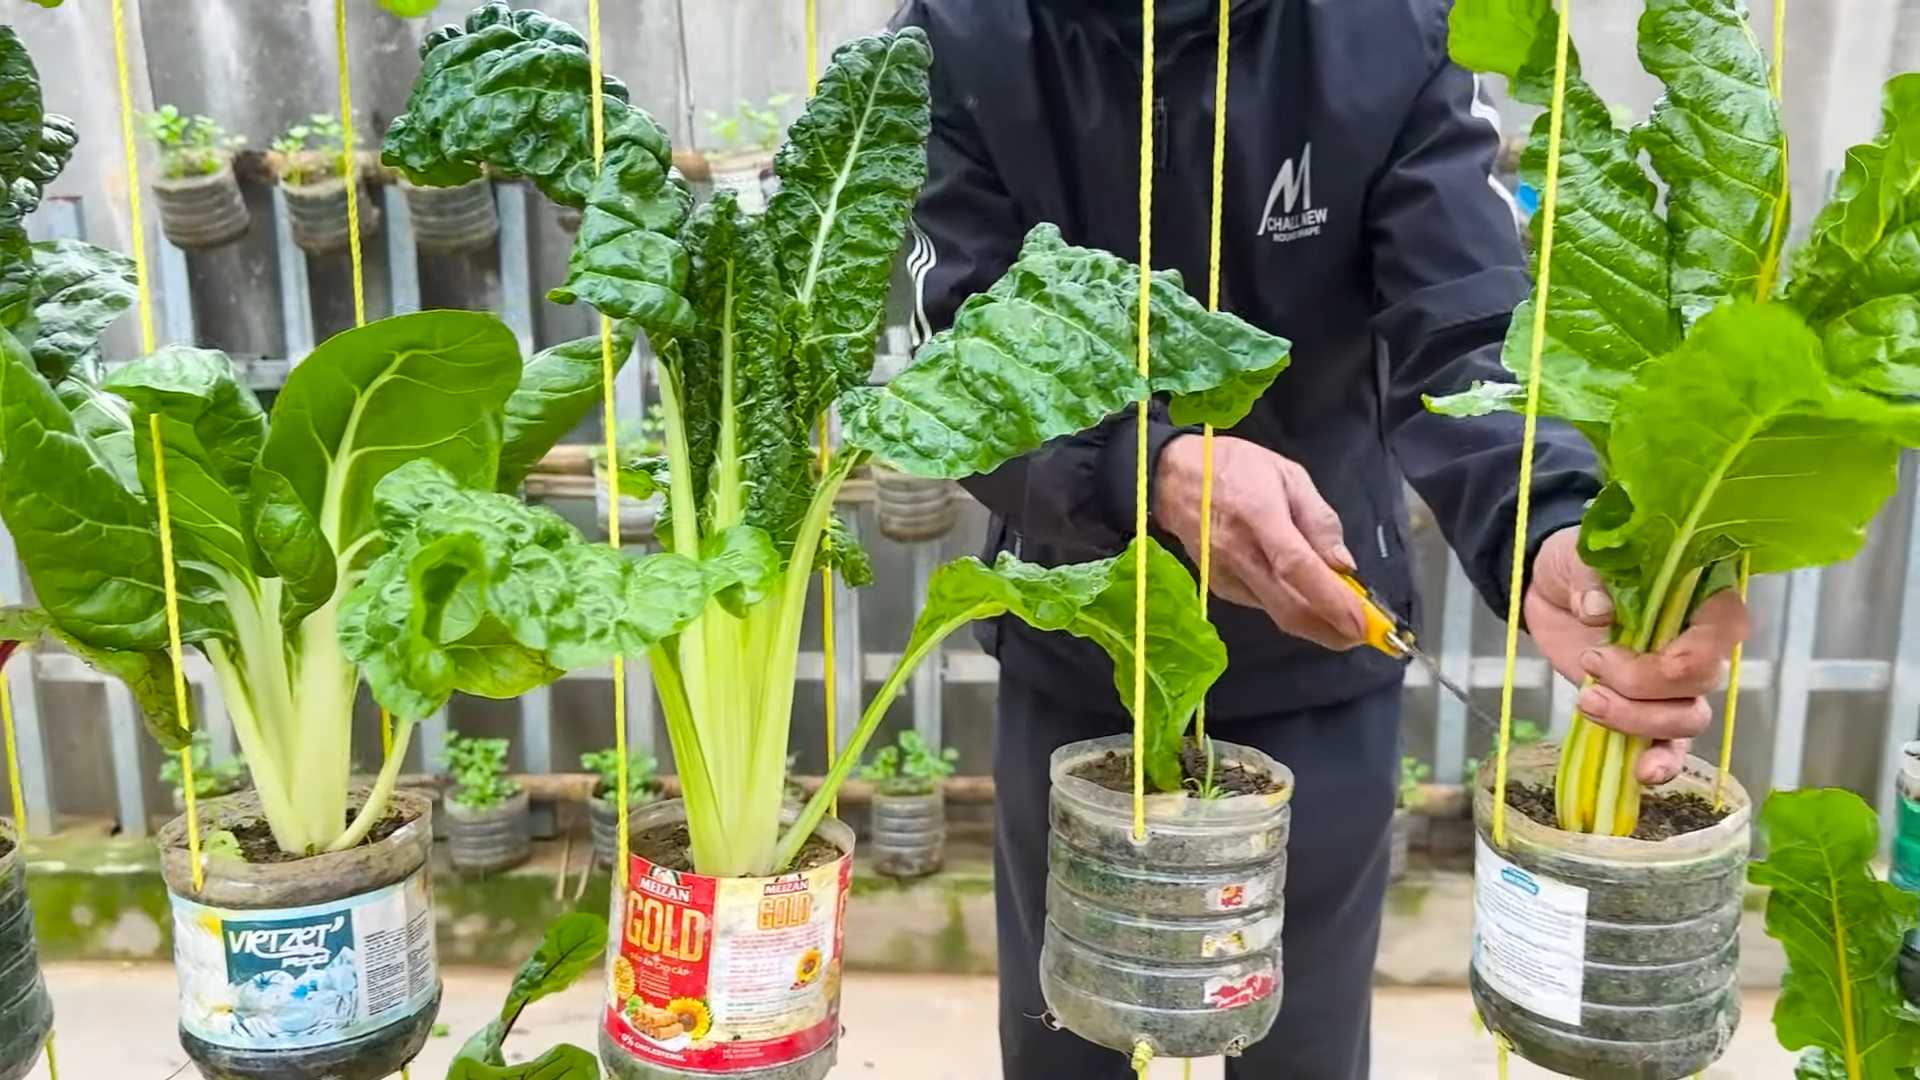
* Visual Appeal: The stems come in a dazzling array of colors – red, yellow, orange, pink, and white. It’s like having edible artwork in your garden!
* Nutritional Powerhouse: Chard is packed with vitamins A, C, and K, as well as minerals like magnesium and potassium. It’s a superfood disguised as a pretty plant.
* Easy to Grow: Seriously, it’s one of the most forgiving vegetables out there. It tolerates a wide range of conditions and is relatively pest-resistant.
* Versatile in the Kitchen: You can use it in salads, soups, stir-fries, or even as a substitute for spinach. The possibilities are endless!
* Continuous Harvest: You can harvest outer leaves as needed, and the plant will keep producing more throughout the growing season.
Getting Started: What You’ll Need
Okay, let’s gather our supplies. Here’s what you’ll need to get your rainbow chard journey started:
* Rainbow Chard Seeds: You can find these at most garden centers or online. Look for a mix of colors for the full rainbow effect!
* Potting Soil (if starting indoors) or Garden Soil (if planting directly): Make sure it’s well-draining and rich in organic matter.
* Seed Trays or Small Pots (if starting indoors): These will give your seedlings a head start.
* Gardening Gloves: To keep your hands clean and protected.
* Watering Can or Hose: For keeping your plants hydrated.
* Fertilizer (optional): A balanced fertilizer can help boost growth, but it’s not essential.
* Trowel or Garden Fork: For preparing the soil.
* A Sunny Spot: Chard loves sunshine!
Phase 1: Starting Your Seeds (Indoors or Outdoors)
You have two options here: starting your seeds indoors for a head start or directly sowing them in your garden. I personally prefer starting indoors, especially if you live in an area with a shorter growing season.
Starting Seeds Indoors:
1. Prepare Your Seed Trays: Fill your seed trays or small pots with potting soil. Gently press down to remove any air pockets.
2. Sow the Seeds: Make a small indentation (about 1/4 inch deep) in the soil. Place 2-3 seeds in each indentation. This increases the chances of at least one seed germinating.
3. Cover the Seeds: Lightly cover the seeds with soil.
4. Water Gently: Use a watering can with a gentle rose attachment to water the soil. You want to moisten the soil without disturbing the seeds.
5. Provide Warmth and Light: Place the seed trays in a warm location (around 65-75°F) with plenty of light. A sunny windowsill or a grow light works well.
6. Keep the Soil Moist: Check the soil daily and water as needed to keep it consistently moist but not waterlogged.
7. Thin the Seedlings: Once the seedlings have developed a few true leaves (the second set of leaves), thin them out, leaving only the strongest seedling in each pot.
Direct Sowing Outdoors:
1. Prepare the Soil: Choose a sunny spot in your garden and loosen the soil with a trowel or garden fork. Remove any rocks, weeds, or debris.
2. Amend the Soil: If your soil is poor, amend it with compost or other organic matter to improve drainage and fertility.
3. Create Rows or Beds: Create rows or beds for your chard plants, spacing them about 12-18 inches apart.
4. Sow the Seeds: Make a shallow trench (about 1/2 inch deep) in the soil. Sow the seeds about 1 inch apart.
5. Cover the Seeds: Lightly cover the seeds with soil.
6. Water Gently: Water the soil gently to moisten it.
7. Keep the Soil Moist: Keep the soil consistently moist until the seeds germinate.
8. Thin the Seedlings: Once the seedlings have developed a few true leaves, thin them out, leaving the strongest seedlings about 12-18 inches apart.
Phase 2: Transplanting (If Starting Indoors)
Once your seedlings have grown a few inches tall and have a well-developed root system, it’s time to transplant them into your garden.
1. Harden Off the Seedlings: Before transplanting, you need to “harden off” the seedlings. This means gradually exposing them to outdoor conditions to help them adjust. Start by placing them outside for a few hours each day, gradually increasing the time over a week or two.
2. Prepare the Planting Site: Choose a sunny spot in your garden and prepare the soil as described in the “Direct Sowing Outdoors” section.
3. Dig Holes: Dig holes that are slightly larger than the root balls of your seedlings, spacing them about 12-18 inches apart.
4. Carefully Remove the Seedlings: Gently remove the seedlings from their pots, being careful not to damage the roots.
5. Place the Seedlings in the Holes: Place the seedlings in the holes, making sure the top of the root ball is level with the soil surface.
6. Fill the Holes: Fill the holes with soil and gently press down to secure the seedlings.
7. Water Thoroughly: Water the seedlings thoroughly to help them establish their roots.
Phase 3: Caring for Your Rainbow Chard
Now that your chard is planted, it’s time to provide it with the care it needs to thrive.
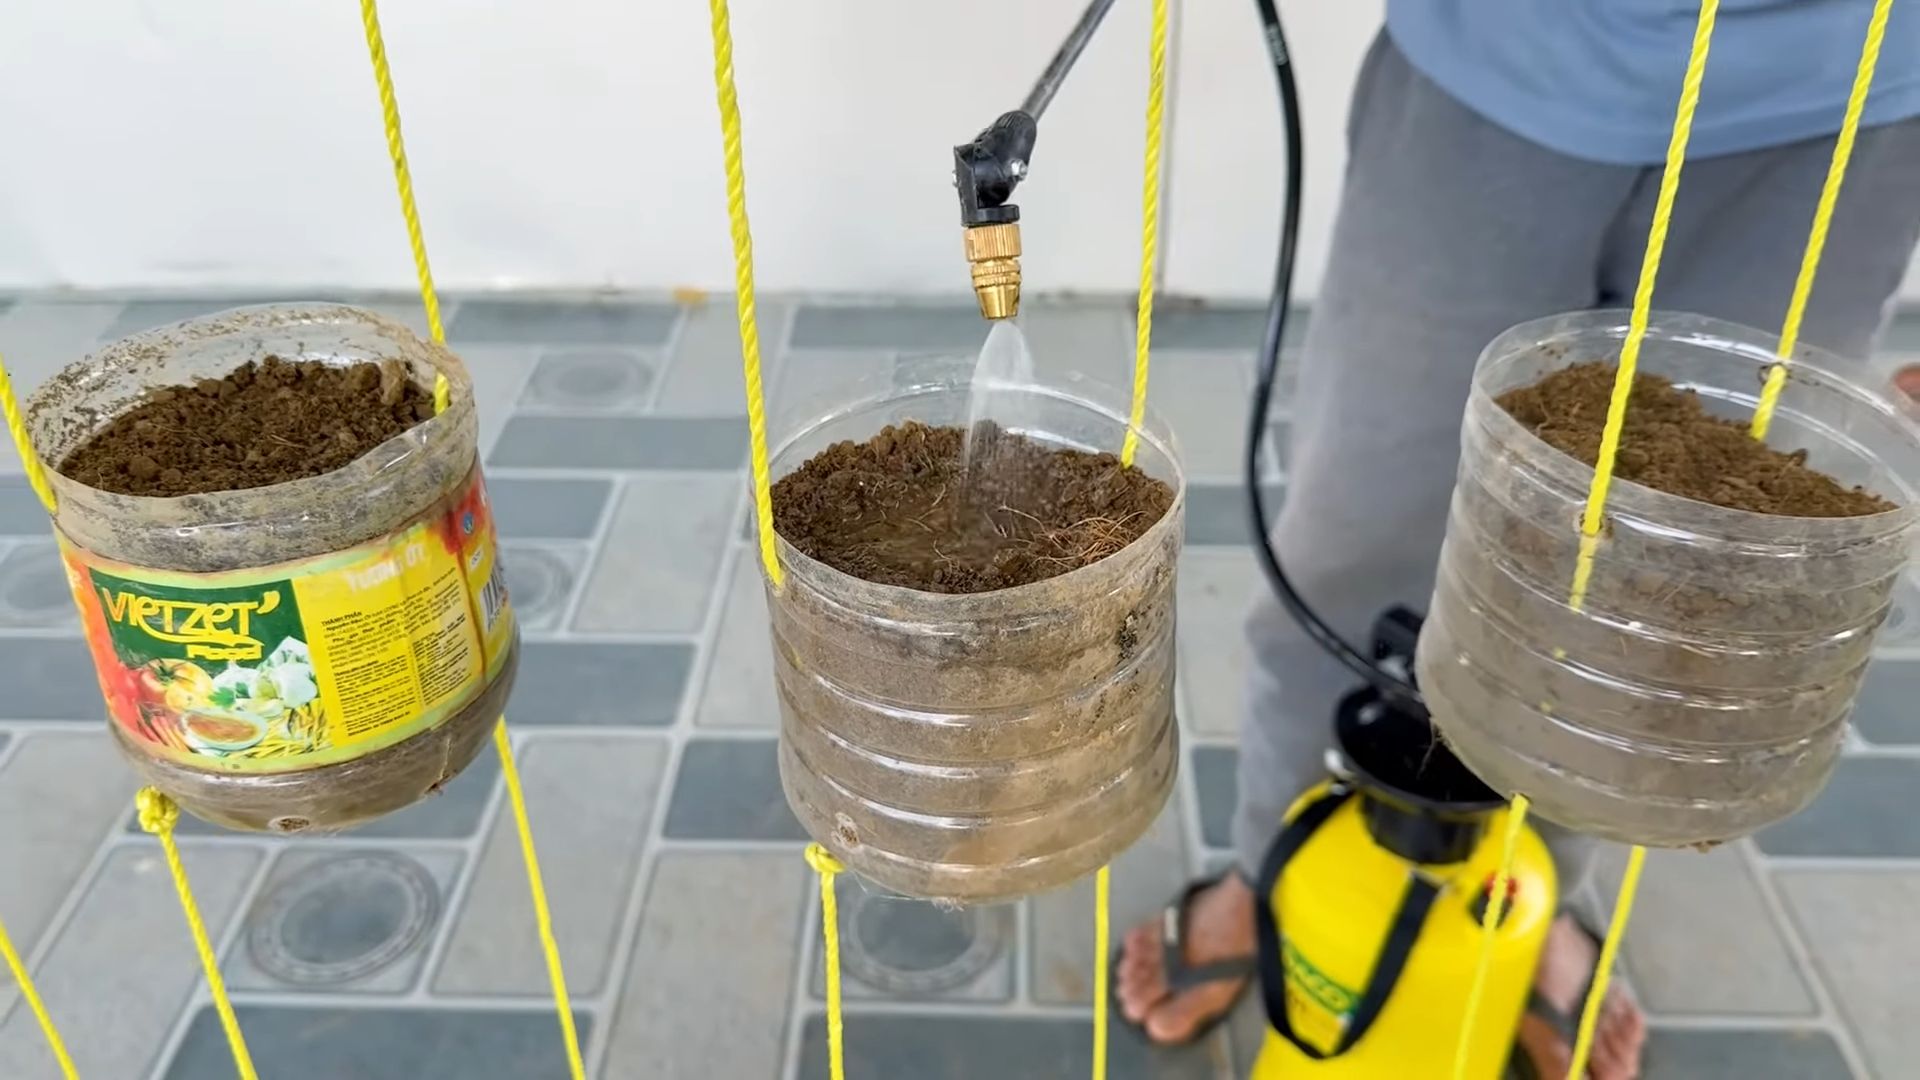
1. Watering: Water your chard regularly, especially during dry periods. Aim to keep the soil consistently moist but not waterlogged.
2. Fertilizing (Optional): If you want to give your chard a boost, you can fertilize it every few weeks with a balanced fertilizer. Follow the instructions on the fertilizer package.
3. Weeding: Keep the area around your chard plants free of weeds. Weeds can compete with your chard for nutrients and water.
4. Mulching (Optional): Mulching around your chard plants can help retain moisture, suppress weeds, and regulate soil temperature. Use organic mulch such as straw, wood chips, or shredded leaves.
5. Pest Control: Chard is relatively pest-resistant, but it can occasionally be affected by pests such as aphids or slugs. If you notice any pests, you can try spraying them with insecticidal soap or hand-picking them off the plants.
6. Bolting: In hot weather, chard may bolt, which means it starts to produce flowers and seeds. This can make the leaves taste bitter. To prevent bolting, try to provide your chard with some shade during the hottest part of the day. You can also harvest the leaves regularly to encourage new growth.
Phase 4: Harvesting Your Rainbow Chard
The best part! You can start harvesting your rainbow chard leaves as soon as they are large enough to eat, usually about 6-8 weeks after planting.
1. Harvest Outer Leaves: Use a sharp knife or scissors to cut the outer leaves near the base of the plant. Leave the inner leaves intact so they can continue to grow.
2. Harvest Regularly: Harvesting regularly will encourage the plant to produce more leaves.
3. Enjoy Your Harvest: Wash the leaves thoroughly and use them in your favorite recipes.
Tips and Tricks for Success
Here are a few extra tips to help you grow the best rainbow chard ever:
* Choose the Right Location: Chard prefers a sunny location with well-draining soil.
* Amend the Soil: If your soil is poor, amend it with compost or other organic matter to improve drainage and fertility.
* Water Regularly: Keep the soil consistently moist but not waterlogged.
* Fertilize (Optional): Fertilize every few weeks with a balanced fertilizer.
* Harvest Regularly: Harvesting regularly will encourage the plant to produce more leaves.
* Protect from Pests: Keep an eye out for pests and take action if necessary.
* Enjoy the Colors: Don’t forget to admire the beautiful colors of your rainbow chard!
Troubleshooting
Even with the best care, you
Conclusion
So, there you have it! Growing rainbow chard at home is not only achievable, but it’s also a deeply rewarding experience that brings a burst of color and nutrition right to your kitchen. Forget those wilted, overpriced bunches at the grocery store. With a little effort and the right conditions, you can cultivate your own vibrant supply of this leafy green, ensuring freshness and flavor that store-bought chard simply can’t match.
Why is this DIY trick a must-try? Because it empowers you to take control of your food source, reduces your carbon footprint, and provides you with a constant supply of a superfood packed with vitamins, minerals, and antioxidants. Imagine stepping out into your garden or onto your balcony and harvesting the exact amount of rainbow chard you need for a salad, a stir-fry, or a vibrant side dish. The satisfaction is unparalleled.
But the benefits don’t stop there. Growing your own rainbow chard allows you to experiment with different varieties and growing methods. Want to try a container garden on your patio? Go for it! Prefer to dedicate a raised bed to your chard? Excellent! You can even succession plant, sowing seeds every few weeks to ensure a continuous harvest throughout the growing season.
Consider these variations to personalize your rainbow chard growing experience:
* Microgreens: Harvest young rainbow chard leaves as microgreens for a concentrated burst of flavor and nutrients in salads and sandwiches.
* Companion Planting: Plant rainbow chard alongside other vegetables like carrots, onions, and beans to deter pests and improve soil health.
* Seed Saving: Allow some of your rainbow chard plants to bolt (go to seed) and collect the seeds for future planting, ensuring a sustainable supply.
* Different Varieties: Explore different rainbow chard varieties, such as ‘Bright Lights’ or ‘Fordhook Giant,’ to discover your favorite colors and flavors.
We wholeheartedly encourage you to embark on this exciting journey of growing rainbow chard at home. It’s a simple, cost-effective, and incredibly satisfying way to enhance your diet and connect with nature. Don’t be intimidated if you’re a beginner gardener. Rainbow chard is relatively easy to grow, and with a little patience and attention, you’ll be reaping the rewards in no time.
And most importantly, we want to hear about your experiences! Share your photos, tips, and challenges in the comments below. Let’s create a community of rainbow chard enthusiasts and learn from each other’s successes and failures. Together, we can transform our gardens and our plates with the vibrant beauty and nutritional power of homegrown rainbow chard. So, grab your seeds, prepare your soil, and get ready to grow some rainbow magic!
Frequently Asked Questions (FAQ)
What is the best time of year to plant rainbow chard?
Rainbow chard is a cool-season crop, meaning it thrives in temperatures between 60°F and 70°F (15°C and 21°C). The best time to plant rainbow chard depends on your climate. In areas with mild winters, you can plant it in the fall for a winter or early spring harvest. In colder climates, plant it in the spring after the last frost. You can also start seeds indoors 4-6 weeks before the last frost and transplant them outdoors once the weather warms up. For a continuous harvest, consider succession planting, sowing seeds every 2-3 weeks.
How much sunlight does rainbow chard need?
Rainbow chard needs at least 6 hours of sunlight per day to thrive. However, in hotter climates, it can benefit from some afternoon shade to prevent the leaves from scorching. If you’re growing rainbow chard indoors, provide it with supplemental lighting, such as a grow light, to ensure it gets enough light.
What kind of soil is best for growing rainbow chard?
Rainbow chard prefers well-drained, fertile soil that is rich in organic matter. The ideal soil pH is between 6.0 and 7.0. Before planting, amend the soil with compost or well-rotted manure to improve its fertility and drainage. You can also add a slow-release fertilizer to provide the plants with essential nutrients. If you’re growing rainbow chard in containers, use a high-quality potting mix that is specifically formulated for vegetables.
How often should I water rainbow chard?
Rainbow chard needs consistent moisture to thrive. Water deeply and regularly, especially during hot, dry weather. Aim to keep the soil consistently moist but not waterlogged. Check the soil moisture regularly by sticking your finger into the soil. If the top inch of soil feels dry, it’s time to water. Mulching around the plants can help to retain moisture and suppress weeds.
What are some common pests and diseases that affect rainbow chard?
Rainbow chard is generally resistant to pests and diseases, but it can be susceptible to certain problems, such as aphids, flea beetles, slugs, and snails. To prevent pest problems, inspect your plants regularly and remove any pests by hand. You can also use insecticidal soap or neem oil to control infestations. Diseases that can affect rainbow chard include leaf spot and downy mildew. To prevent these diseases, ensure good air circulation around the plants and avoid overhead watering. If you notice any signs of disease, remove the affected leaves immediately.
How do I harvest rainbow chard?
You can start harvesting rainbow chard leaves when they are about 6 inches long. Harvest the outer leaves first, leaving the inner leaves to continue growing. You can harvest rainbow chard continuously throughout the growing season. To harvest, simply cut the leaves off at the base of the plant with a sharp knife or scissors. Avoid damaging the central bud, as this will allow the plant to continue producing new leaves.
Can I eat the stems of rainbow chard?
Yes, the stems of rainbow chard are edible and delicious! They have a slightly different texture and flavor than the leaves, but they are equally nutritious. You can cook the stems in the same way as you would cook the leaves, or you can sauté them separately for a more tender texture. The stems can be used in stir-fries, soups, stews, and other dishes.
How do I store rainbow chard?
To store rainbow chard, wash the leaves thoroughly and pat them dry. Wrap the leaves in a damp paper towel and store them in a plastic bag in the refrigerator. Rainbow chard will keep for up to a week in the refrigerator. You can also freeze rainbow chard for longer storage. To freeze, blanch the leaves in boiling water for 2 minutes, then plunge them into ice water to stop the cooking process. Drain the leaves thoroughly and pack them into freezer bags or containers. Frozen rainbow chard will keep for up to 12 months.
Is rainbow chard nutritious?
Yes, rainbow chard is an incredibly nutritious vegetable. It is an excellent source of vitamins A, C, and K, as well as minerals like potassium, magnesium, and iron. It is also a good source of fiber and antioxidants. Rainbow chard is low in calories and fat, making it a healthy addition to any diet. Eating rainbow chard can help to improve your overall health and well-being.
Leave a Comment