

Grow red radishes winter? Absolutely! You might think fresh, crunchy radishes are a distant memory once the frosty weather sets in, but I’m here to tell you that with a few clever tricks, you can enjoy these peppery delights even when the snow is falling. For centuries, cultures around the world have found ways to extend their growing seasons, from ancient Roman greenhouses to ingenious cold frames. This resourcefulness stems from a deep connection to the land and a desire for fresh, nutritious food year-round.
Let’s face it, supermarket produce in winter can be a bit… lackluster. Wouldn’t it be amazing to add a burst of homegrown flavor to your salads and snacks? That’s where these DIY hacks come in! I’m going to share some simple, effective methods to help you grow red radishes winter, regardless of your gardening experience. Whether you have a sunny windowsill, a small greenhouse, or even just a well-lit corner in your basement, you can cultivate these vibrant veggies. Get ready to ditch the bland and embrace the bold taste of homegrown radishes all winter long!
Winterradieschen selbst anbauen: Ein DIY-Leitfaden für knackige Ernte im Winter
Hallo Gartenfreunde! Wer sagt, dass man im Winter auf frisches Gemüse verzichten muss? Mit ein bisschen Planung und den richtigen Tricks könnt ihr auch in der kalten Jahreszeit knackige, rote Radieschen ernten. Ich zeige euch, wie es geht!
Was ihr für den Winterradieschen-Anbau braucht
Bevor wir loslegen, hier eine Liste mit allem, was ihr benötigt:
* Radieschensamen: Wählt eine Sorte, die für den Anbau im Gewächshaus oder unter Vlies geeignet ist. Sorten wie ‘Raxe’ oder ‘Sora’ sind gute Optionen.
* Anzuchterde: Diese ist feiner und nährstoffärmer als normale Gartenerde und ideal für die Keimung.
* Pflanzgefäße: Töpfe, Schalen oder ein Mini-Gewächshaus – alles ist möglich, solange es ausreichend Platz bietet.
* Drainagematerial: Blähton, Kies oder Tonscherben, um Staunässe zu vermeiden.
* Vlies oder Folie: Zum Abdecken der Pflanzen bei starkem Frost.
* Gießkanne oder Sprühflasche: Für die Bewässerung.
* (Optional) Pflanzenlampe: Wenn ihr wenig Tageslicht habt.
* (Optional) Dünger: Ein organischer Flüssigdünger für Gemüse.
Die Vorbereitung: Der Grundstein für eine erfolgreiche Ernte
Eine gute Vorbereitung ist das A und O. Hier sind die Schritte, die ihr beachten solltet:
1. Die Wahl des Standorts: Radieschen brauchen Licht! Sucht euch einen hellen Standort aus, idealerweise ein Südfenster. Wenn das Tageslicht nicht ausreicht, könnt ihr mit einer Pflanzenlampe nachhelfen.
2. Die Pflanzgefäße vorbereiten: Reinigt eure Töpfe oder Schalen gründlich. Legt eine Schicht Drainagematerial auf den Boden, um Staunässe zu verhindern. Füllt die Gefäße dann mit Anzuchterde.
3. Die Erde vorbereiten: Lockert die Anzuchterde auf und befeuchtet sie leicht. Sie sollte feucht, aber nicht nass sein.
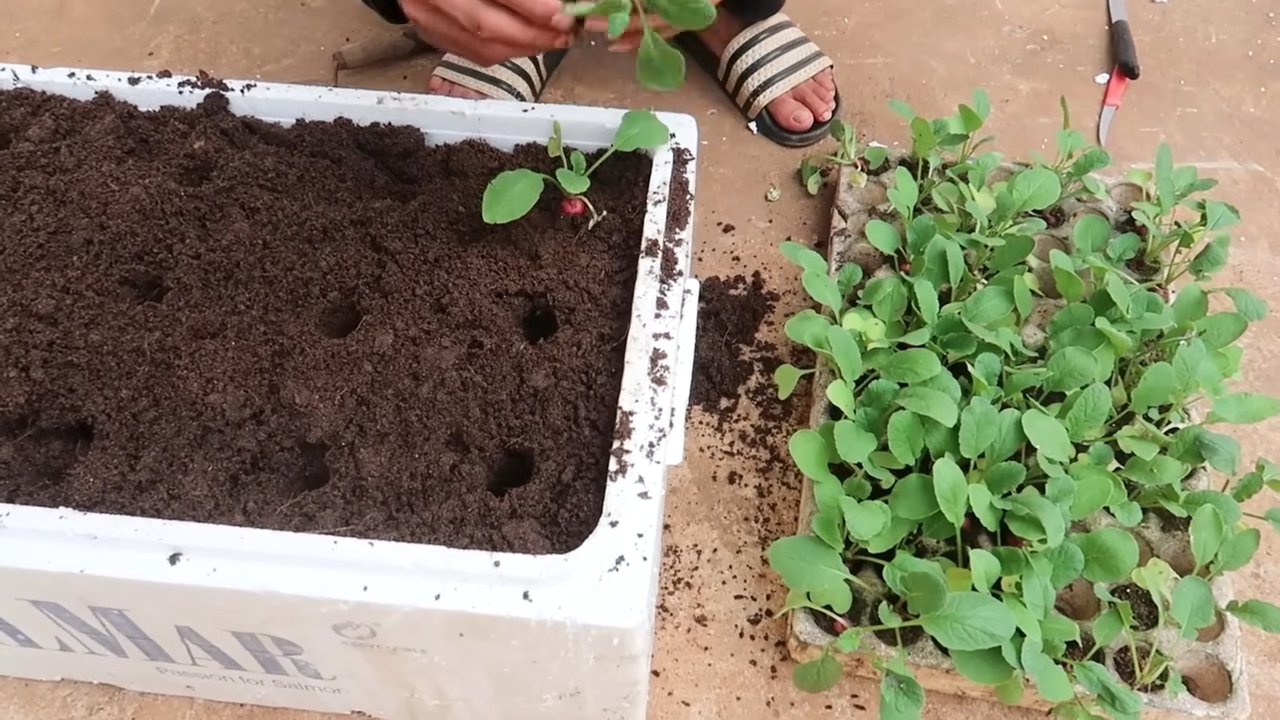
Die Aussaat: So kommen die Samen in die Erde
Jetzt wird es spannend! Die Aussaat ist der erste Schritt zur eigenen Radieschenernte.
1. Die Samen aussäen: Drückt mit dem Finger kleine Mulden in die Erde, etwa 1-2 cm tief. Legt in jede Mulde 2-3 Samen.
2. Die Samen bedecken: Bedeckt die Samen mit einer dünnen Schicht Erde und drückt sie leicht an.
3. Angießen: Gießt die Erde vorsichtig an, am besten mit einer Sprühflasche, damit die Samen nicht weggeschwemmt werden.
4. Für Wärme sorgen: Stellt die Pflanzgefäße an einen warmen Ort (ca. 18-20°C). Eine Abdeckung mit Folie oder einem Mini-Gewächshaus kann helfen, die Temperatur und Luftfeuchtigkeit zu erhöhen.
Die Pflege: Damit eure Radieschen prächtig gedeihen
Nach der Aussaat ist die richtige Pflege entscheidend. Hier sind die wichtigsten Punkte:
1. Die Bewässerung: Haltet die Erde gleichmäßig feucht, aber vermeidet Staunässe. Gießt am besten morgens, damit die Blätter abtrocknen können.
2. Die Belüftung: Lüftet regelmäßig, um Schimmelbildung zu vermeiden. Nehmt die Folie oder den Deckel des Mini-Gewächshauses für einige Stunden am Tag ab.
3. Das Vereinzeln: Sobald die Keimlinge einige Zentimeter groß sind, könnt ihr sie vereinzeln. Entfernt die schwächsten Pflanzen, sodass die verbleibenden genügend Platz zum Wachsen haben. Der Abstand zwischen den Pflanzen sollte etwa 2-3 cm betragen.
4. Die Düngung (optional): Wenn die Radieschen gut wachsen, ist eine Düngung nicht unbedingt notwendig. Wenn ihr aber das Gefühl habt, dass sie etwas Unterstützung brauchen, könnt ihr einen organischen Flüssigdünger für Gemüse verwenden. Achtet darauf, die Dosierungsanleitung zu befolgen.
5. Schutz vor Frost: Bei starkem Frost solltet ihr die Pflanzen mit Vlies oder Folie abdecken.
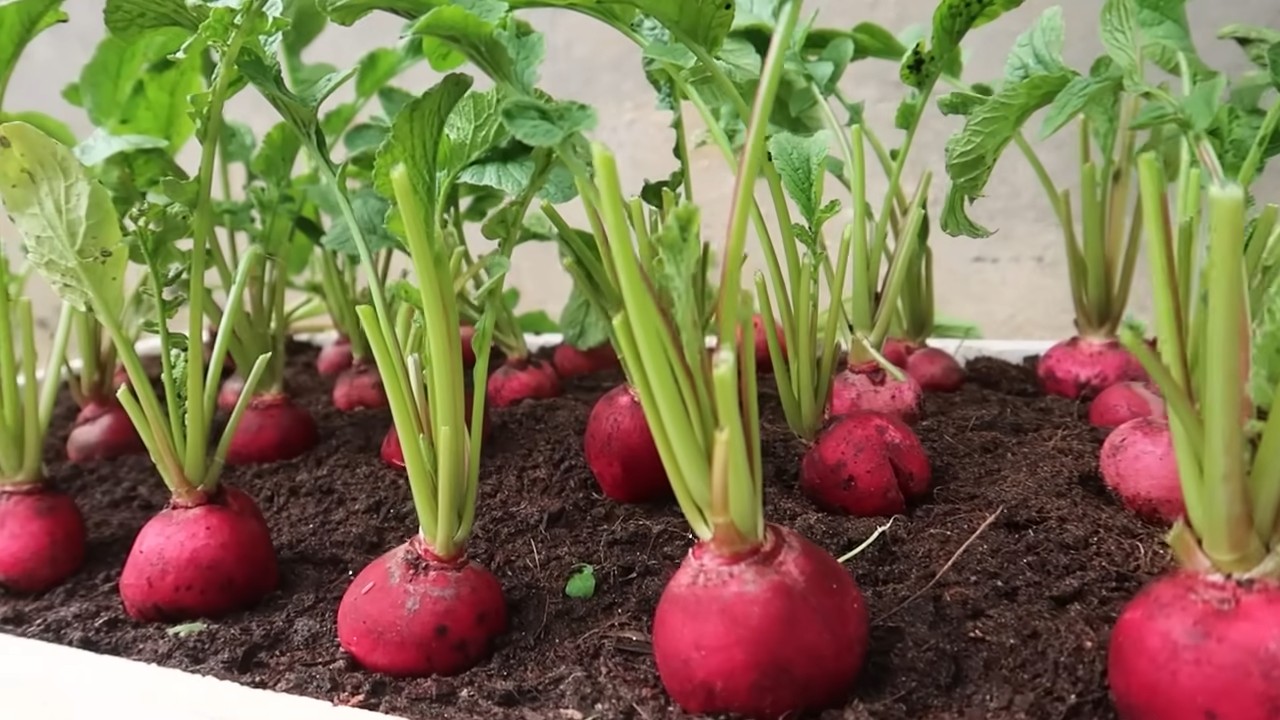
Die Ernte: Der Lohn für eure Mühe
Nach etwa 4-6 Wochen könnt ihr eure selbstgezogenen Radieschen ernten!
1. Den richtigen Zeitpunkt erkennen: Die Radieschen sind erntereif, wenn sie eine Größe von etwa 2-3 cm erreicht haben. Ihr könnt sie vorsichtig aus der Erde ziehen oder mit einem Messer abschneiden.
2. Die Ernte: Zieht die Radieschen vorsichtig aus der Erde. Wenn sie sich schwer lösen lassen, könnt ihr die Erde etwas auflockern.
3. Die Lagerung: Entfernt die Blätter und bewahrt die Radieschen im Kühlschrank auf. Sie halten sich dort einige Tage.
Zusätzliche Tipps für eine erfolgreiche Winterradieschen-Ernte
Hier sind noch ein paar zusätzliche Tipps, die euch helfen können:
* Die richtige Sorte wählen: Achtet darauf, eine Sorte zu wählen, die für den Anbau im Winter geeignet ist. Diese Sorten sind in der Regel robuster und wachsen auch bei weniger Licht gut.
* Für ausreichend Licht sorgen: Radieschen brauchen viel Licht. Wenn ihr nicht genügend Tageslicht habt, solltet ihr eine Pflanzenlampe verwenden.
* Auf die Temperatur achten: Die ideale Temperatur für den Anbau von Radieschen liegt zwischen 15 und 20°C. Achtet darauf, dass es nicht zu kalt oder zu warm ist.
* Schädlinge und Krankheiten: Achtet auf Schädlinge und Krankheiten. Wenn ihr Probleme habt, könnt ihr biologische Schädlingsbekämpfungsmittel verwenden.
* Regelmäßig ernten: Erntet die Radieschen regelmäßig, damit sie nicht zu groß und holzig werden.
Häufige Fehler vermeiden
Auch beim Radieschenanbau im Winter können Fehler passieren. Hier sind einige der häufigsten Fehler und wie ihr sie vermeiden könnt:
* Zu wenig Licht: Radieschen brauchen viel Licht, um gut zu wachsen. Wenn sie zu wenig Licht bekommen, werden sie lang und dünn.
* Zu viel Wasser: Staunässe kann zu Wurzelfäule führen. Achtet darauf, dass die Erde gut drainiert ist und gießt nicht zu viel.
* Zu wenig Platz: Wenn die Radieschen zu eng stehen, können sie sich nicht richtig entwickeln. Vereinzelnt die Pflanzen rechtzeitig.
* Falsche Sorte: Nicht alle Radieschensorten sind für den Anbau im Winter geeignet. Wählt eine Sorte, die speziell für den Anbau im Gewächshaus oder unter Vlies gezüchtet wurde.
Fazit: Frische Radieschen auch im Winter
Mit ein bisschen Mühe und den richtigen Tipps könnt ihr auch im Winter frische, knackige Radieschen ernten. Es ist ein tolles Gefühl, selbstgezogenes Gemüse zu genießen, auch wenn draußen Schnee liegt. Probiert es aus und lasst euch von eurer eigenen Winterradieschen-Ernte überraschen! Viel Erfolg!
Conclusion
So, there you have it! Growing red radishes in winter doesn’t have to be a pipe dream. With a little planning, the right setup, and this simple DIY trick, you can enjoy the crisp, peppery bite of freshly harvested radishes even when the snow is falling outside. This isn’t just about having access to fresh produce; it’s about connecting with the natural world, even in the depths of winter. It’s about the satisfaction of nurturing something from seed to table, and about adding a vibrant splash of color and flavor to your winter meals.
This DIY method is a must-try for several reasons. First, it’s incredibly cost-effective. You’re likely to have many of the materials already on hand, and even if you need to purchase a few items, the overall investment is minimal compared to buying radishes from the store all winter long. Second, it’s space-efficient. You don’t need a sprawling garden to make this work; a small corner of a sunny room or a well-lit basement will do just fine. Third, it’s a fantastic way to extend your growing season and enjoy fresh, homegrown produce for a longer period.
But perhaps the most compelling reason to try this DIY radish-growing trick is the sheer joy of it. Watching those tiny seeds sprout and grow into vibrant red globes is a rewarding experience, especially during the often-dreary winter months. It’s a reminder that life continues, even when the world outside seems dormant.
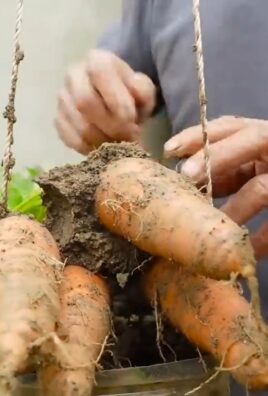
Don’t be afraid to experiment with different radish varieties. While we’ve focused on red radishes, you can also try growing white icicle radishes, black Spanish radishes, or even colorful Easter egg radishes. Each variety offers a unique flavor and texture, so you can find the perfect radish to suit your taste. You can also experiment with different growing mediums, such as coconut coir or vermiculite, to see which works best for you.
Consider adding companion plants to your indoor radish garden. Herbs like chives or parsley can help deter pests and improve the flavor of your radishes. You can also plant flowers like marigolds to attract beneficial insects.
Remember to monitor your radishes closely for signs of pests or diseases. If you notice any problems, address them promptly to prevent them from spreading. With a little care and attention, you can enjoy a bountiful harvest of fresh, homegrown radishes all winter long.
We’re confident that you’ll find this DIY trick to be a simple, effective, and rewarding way to grow red radishes in winter. So, gather your supplies, plant your seeds, and get ready to enjoy the taste of fresh radishes, even when the weather outside is frightful.
We encourage you to try this DIY trick and share your experience with us. Let us know what worked well for you, what challenges you faced, and any tips or tricks you discovered along the way. Your feedback will help us improve this guide and make it even more helpful for other gardeners. Share your photos and stories on social media using [Your Hashtag] and let’s inspire others to grow their own food, even in the winter! Happy growing!
FAQ
Can I really grow red radishes indoors during the winter?
Absolutely! While radishes are often associated with spring and summer gardens, they are surprisingly well-suited for indoor growing, even during the winter months. They are fast-growing and don’t require a lot of space, making them ideal for indoor containers. The key is to provide them with enough light, consistent moisture, and well-draining soil. With the right conditions, you can enjoy a continuous harvest of fresh radishes throughout the winter.
What kind of lighting do radishes need to grow indoors in winter?
Radishes need at least 6 hours of direct sunlight per day to thrive. If you don’t have a sunny window, you can supplement with grow lights. Fluorescent or LED grow lights are both good options. Place the lights about 6-12 inches above the plants and keep them on for 12-16 hours per day. Proper lighting is crucial, especially during the shorter days of winter, to ensure healthy growth and prevent leggy, weak plants.
What type of container and soil should I use for growing radishes indoors?
Choose a container that is at least 6 inches deep to allow the radishes to develop properly. Make sure the container has drainage holes to prevent waterlogging. As for soil, use a well-draining potting mix that is rich in organic matter. You can also add some compost or aged manure to the soil to provide extra nutrients. Avoid using garden soil, as it can be too heavy and may contain pests or diseases.
How often should I water my indoor radish plants?
Radishes need consistent moisture to grow well. Water them regularly, keeping the soil evenly moist but not soggy. Check the soil moisture daily and water when the top inch feels dry to the touch. Avoid overwatering, as this can lead to root rot. Also, be sure to provide adequate drainage to prevent water from pooling in the bottom of the container.
How long does it take for radishes to grow indoors?
One of the great things about radishes is that they are fast-growing. Most varieties mature in just 3-4 weeks. You can start harvesting them when the roots are about 1 inch in diameter. To ensure a continuous harvest, sow new seeds every 1-2 weeks. This is called succession planting, and it’s a great way to keep your indoor radish garden productive throughout the winter.
What are some common problems I might encounter when growing radishes indoors, and how can I fix them?
Some common problems include pests, diseases, and nutrient deficiencies. Pests like aphids and flea beetles can be controlled with insecticidal soap or neem oil. Diseases like damping-off can be prevented by using sterile potting mix and avoiding overwatering. Nutrient deficiencies can be addressed by fertilizing with a balanced liquid fertilizer. Regularly inspect your plants for any signs of problems and address them promptly to prevent them from spreading.
Can I eat the radish greens?
Yes, absolutely! Radish greens are edible and nutritious. They have a peppery flavor similar to the roots. You can add them to salads, soups, or stir-fries. Just be sure to wash them thoroughly before eating. Harvesting some of the outer leaves can also encourage the radishes to grow larger.
How do I know when my radishes are ready to harvest?
Radishes are typically ready to harvest when the roots are about 1 inch in diameter. You can gently brush away some of the soil around the base of the plant to check the size of the roots. If they are the size you want, you can pull them up. Don’t let them get too big, as they can become woody and bitter.
What are some creative ways to use my homegrown radishes?
Besides eating them raw in salads or as a snack, you can also use radishes in a variety of other dishes. Try roasting them with other root vegetables, pickling them for a tangy condiment, or adding them to tacos or sandwiches for a crunchy, peppery kick. You can even use the greens to make pesto or add them to smoothies for a nutritional boost. The possibilities are endless!
Is growing red radishes winter organically possible indoors?
Yes, growing red radishes organically indoors is definitely achievable. Use organic potting mix, organic fertilizers, and natural pest control methods. Avoid using synthetic pesticides or herbicides. With a little extra care and attention, you can enjoy a bountiful harvest of delicious, organically grown radishes all winter long.

Leave a Comment