

Grow Snap Peas Indoors? Absolutely! Imagine plucking fresh, crisp snap peas right from your own indoor garden, even when the weather outside is frightful. Forget those bland, store-bought veggies – we’re talking about a burst of homegrown sweetness at your fingertips.
For centuries, humans have cultivated gardens, adapting their techniques to suit various climates and spaces. While traditionally an outdoor crop, the desire for fresh produce year-round has led to innovative indoor gardening solutions. Think of it as bringing a little piece of springtime into your home, no matter the season!
But why should you bother learning how to grow snap peas indoors? Well, for starters, it’s incredibly rewarding! Plus, it gives you complete control over the growing environment, meaning you can avoid harmful pesticides and herbicides. More importantly, it’s a fantastic way to enjoy fresh, healthy snacks and add a vibrant touch of green to your living space. I’m going to show you some simple DIY tricks and hacks that will have you harvesting your own delicious snap peas in no time. Get ready to unleash your inner gardener!
Growing Snap Peas Indoors: A Complete DIY Guide
Okay, so you want to grow snap peas indoors? Awesome! It’s totally doable, and honestly, there’s nothing quite like munching on fresh, homegrown snap peas in the middle of winter. I’ve done it myself, and I’m here to walk you through the whole process, step-by-step. Let’s get started!
What You’ll Need
Before we dive in, let’s gather everything you’ll need. This will save you a ton of time and frustration later on.
* Snap Pea Seeds: Choose a variety that’s known for being compact or bush-type. These tend to do better indoors. I personally like ‘Sugar Ann’ or ‘Bush Champion’.
* Large Pots or Containers: At least 6-8 inches deep and wide. Snap peas need room for their roots to spread.
* Well-Draining Potting Mix: Avoid using garden soil, as it can compact and not drain well in containers. A good quality potting mix is key.
* Grow Lights: Snap peas need a lot of light, especially indoors. A fluorescent or LED grow light is essential.
* Trellis or Support System: Even bush varieties benefit from some support. A small trellis, bamboo stakes, or even sturdy twigs will work.
* Watering Can or Spray Bottle: For gentle watering.
* Optional: Seed Starting Tray and Dome: For starting seeds indoors before transplanting.
* Optional: Liquid Fertilizer: A balanced liquid fertilizer to feed your plants once they start growing.
Starting Your Snap Peas
You have two options here: direct sowing into your pots or starting seeds in a tray and transplanting later. I usually prefer starting in a tray because it gives me more control over germination.
Option 1: Direct Sowing
1. Prepare Your Pots: Fill your pots with the well-draining potting mix, leaving about an inch of space at the top.
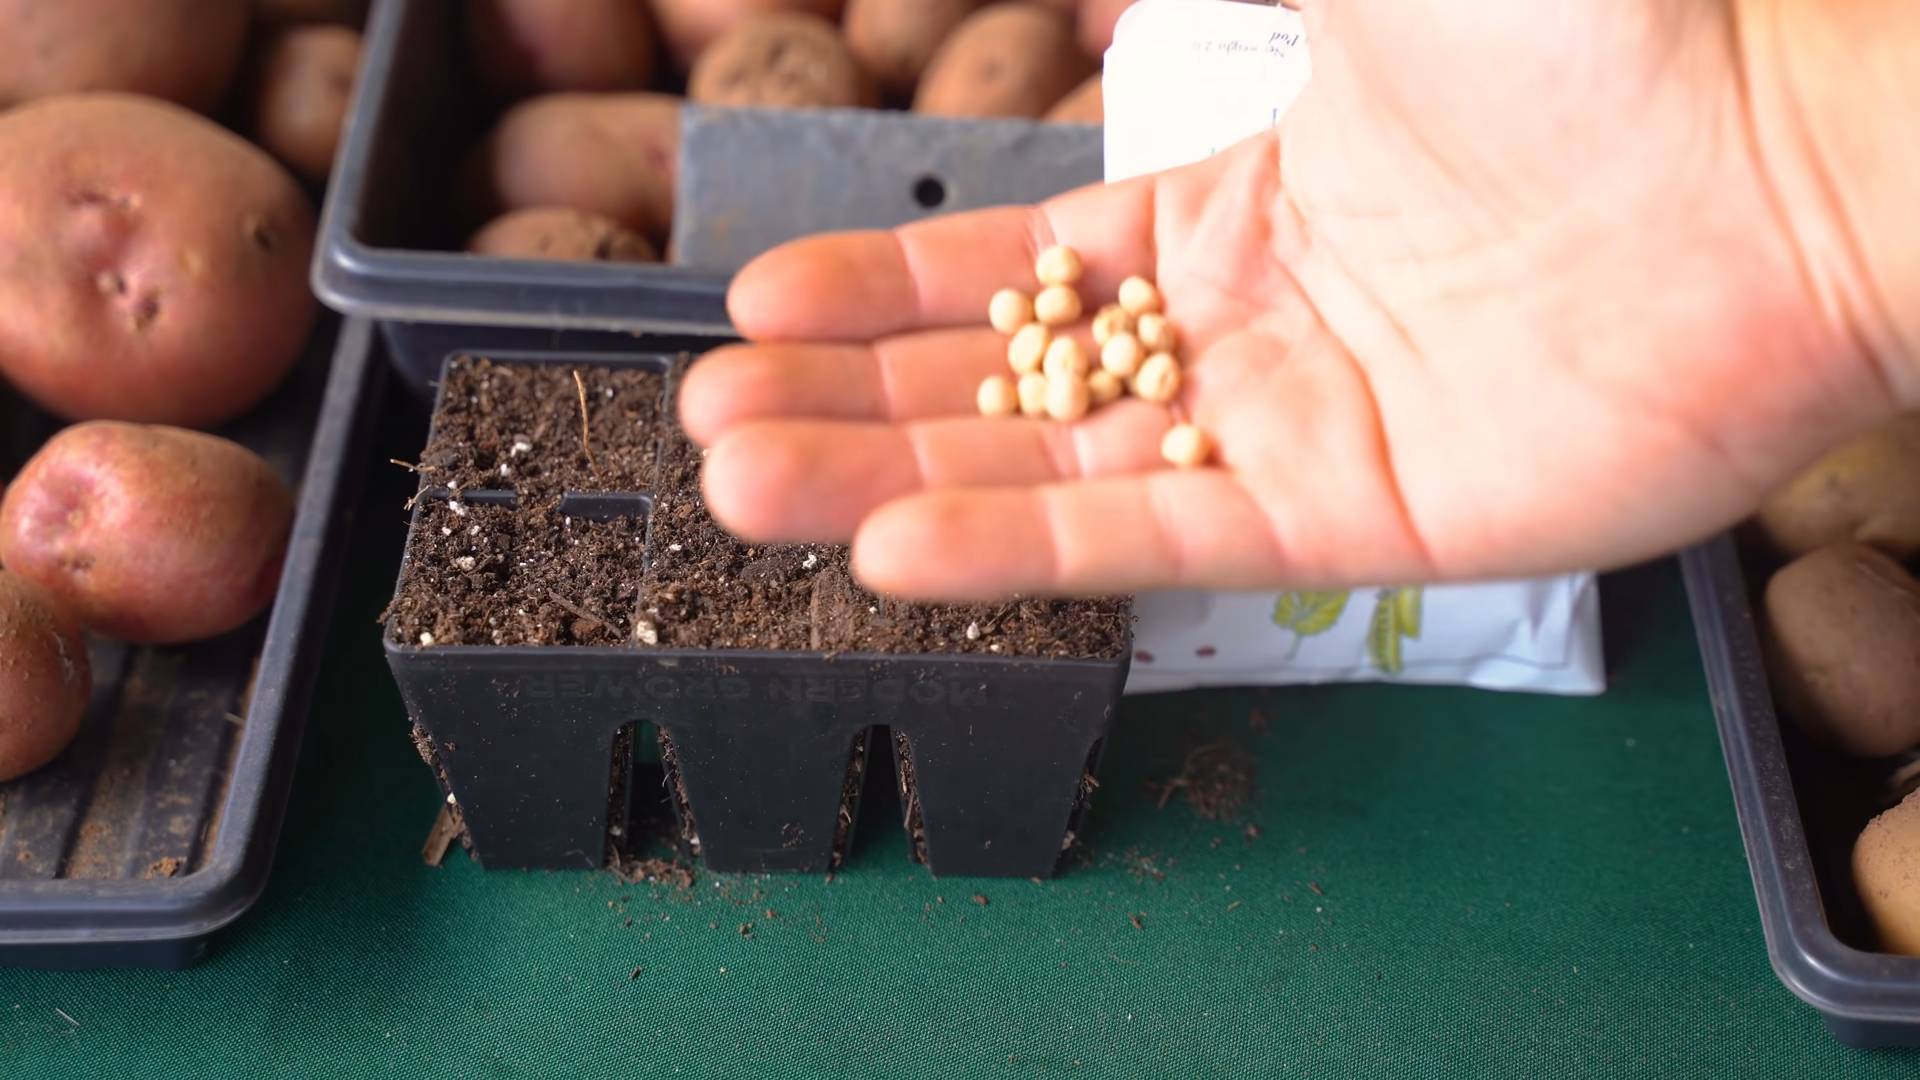
2. Sow the Seeds: Make small holes about 1 inch deep and 2 inches apart. Place 2-3 seeds in each hole. This increases your chances of germination.
3. Cover the Seeds: Gently cover the seeds with potting mix and lightly water the soil.
4. Keep the Soil Moist: Water regularly to keep the soil consistently moist, but not soggy.
5. Provide Light: Place the pots under your grow lights.
Option 2: Starting Seeds in a Tray (My Preferred Method)
1. Prepare the Seed Starting Tray: Fill the cells of your seed starting tray with the potting mix.
2. Sow the Seeds: Make a small indentation in each cell and place 1-2 seeds in each.
3. Cover the Seeds: Gently cover the seeds with potting mix.
4. Water the Tray: Water the tray gently, making sure the soil is evenly moist.
5. Cover with a Dome: Place the dome over the tray to create a humid environment. This helps with germination.
6. Provide Light: Place the tray under your grow lights.
7. Monitor Germination: Check the tray daily. Seeds should germinate in about 7-14 days.
8. Remove the Dome: Once the seeds have germinated, remove the dome to prevent fungal diseases.
Transplanting (If You Started in a Tray)
Once your seedlings have developed a few sets of true leaves (the leaves that look like miniature pea leaves), it’s time to transplant them into your larger pots.
1. Prepare Your Pots: Fill your pots with the well-draining potting mix, leaving about an inch of space at the top.
2. Gently Remove Seedlings: Carefully remove the seedlings from the seed starting tray. Try to disturb the roots as little as possible. I use a small spoon or fork to help lift them out.
3. Plant the Seedlings: Make a hole in the potting mix in your pot and gently place the seedling in the hole. Make sure the top of the root ball is level with the soil surface.
4. Space the Seedlings: If you’re planting multiple seedlings in one pot, space them about 2-3 inches apart.
5. Water Thoroughly: Water the transplanted seedlings thoroughly.
Caring for Your Indoor Snap Peas
Now comes the fun part – watching your snap peas grow! Here’s what you need to do to keep them happy and healthy.
1. Light: Snap peas need at least 6-8 hours of direct light per day. If you’re using grow lights, keep them on for 12-16 hours a day. Adjust the height of the lights as your plants grow, keeping them a few inches above the foliage.
2. Watering: Water regularly to keep the soil consistently moist, but not soggy. Overwatering can lead to root rot. Check the soil moisture by sticking your finger about an inch into the soil. If it feels dry, it’s time to water.
3. Temperature: Snap peas prefer cooler temperatures, around 60-70°F (15-21°C). Avoid placing them near heat sources.
4. Humidity: While snap peas don’t need extremely high humidity, they do benefit from some moisture in the air. You can increase humidity by misting the plants with water or placing a tray of water near them.
5. Fertilizing: Once your plants start growing, feed them with a balanced liquid fertilizer every 2-3 weeks. Follow the instructions on the fertilizer label.
6. Support: As your snap peas grow, they’ll need some support. Install a trellis, bamboo stakes, or other support system to help them climb. Gently tie the vines to the support as needed.
7. Pruning: Prune away any yellowing or dead leaves to keep your plants healthy. You can also pinch back the tips of the vines to encourage bushier growth.
Dealing with Pests and Diseases
Even indoors, your snap peas can be susceptible to pests and diseases. Here’s what to watch out for and how to deal with them.
* Aphids: These tiny insects can suck the sap from your plants, causing them to weaken and yellow. You can control aphids by spraying them with a strong stream of water or using insecticidal soap.
* Spider Mites: These tiny pests create webs on your plants and can cause the leaves to become speckled and dry. Increase humidity and spray the plants with insecticidal soap to control spider mites.
* Powdery Mildew: This fungal disease appears as a white, powdery coating on the leaves. Improve air circulation and spray the plants with a fungicide to control powdery mildew.
* Root Rot: This fungal disease can occur if the soil is too wet. Make sure your pots have good drainage and avoid overwatering.
Harvesting Your Snap Peas
The best part! You can usually start harvesting snap peas about 60-70 days after planting.
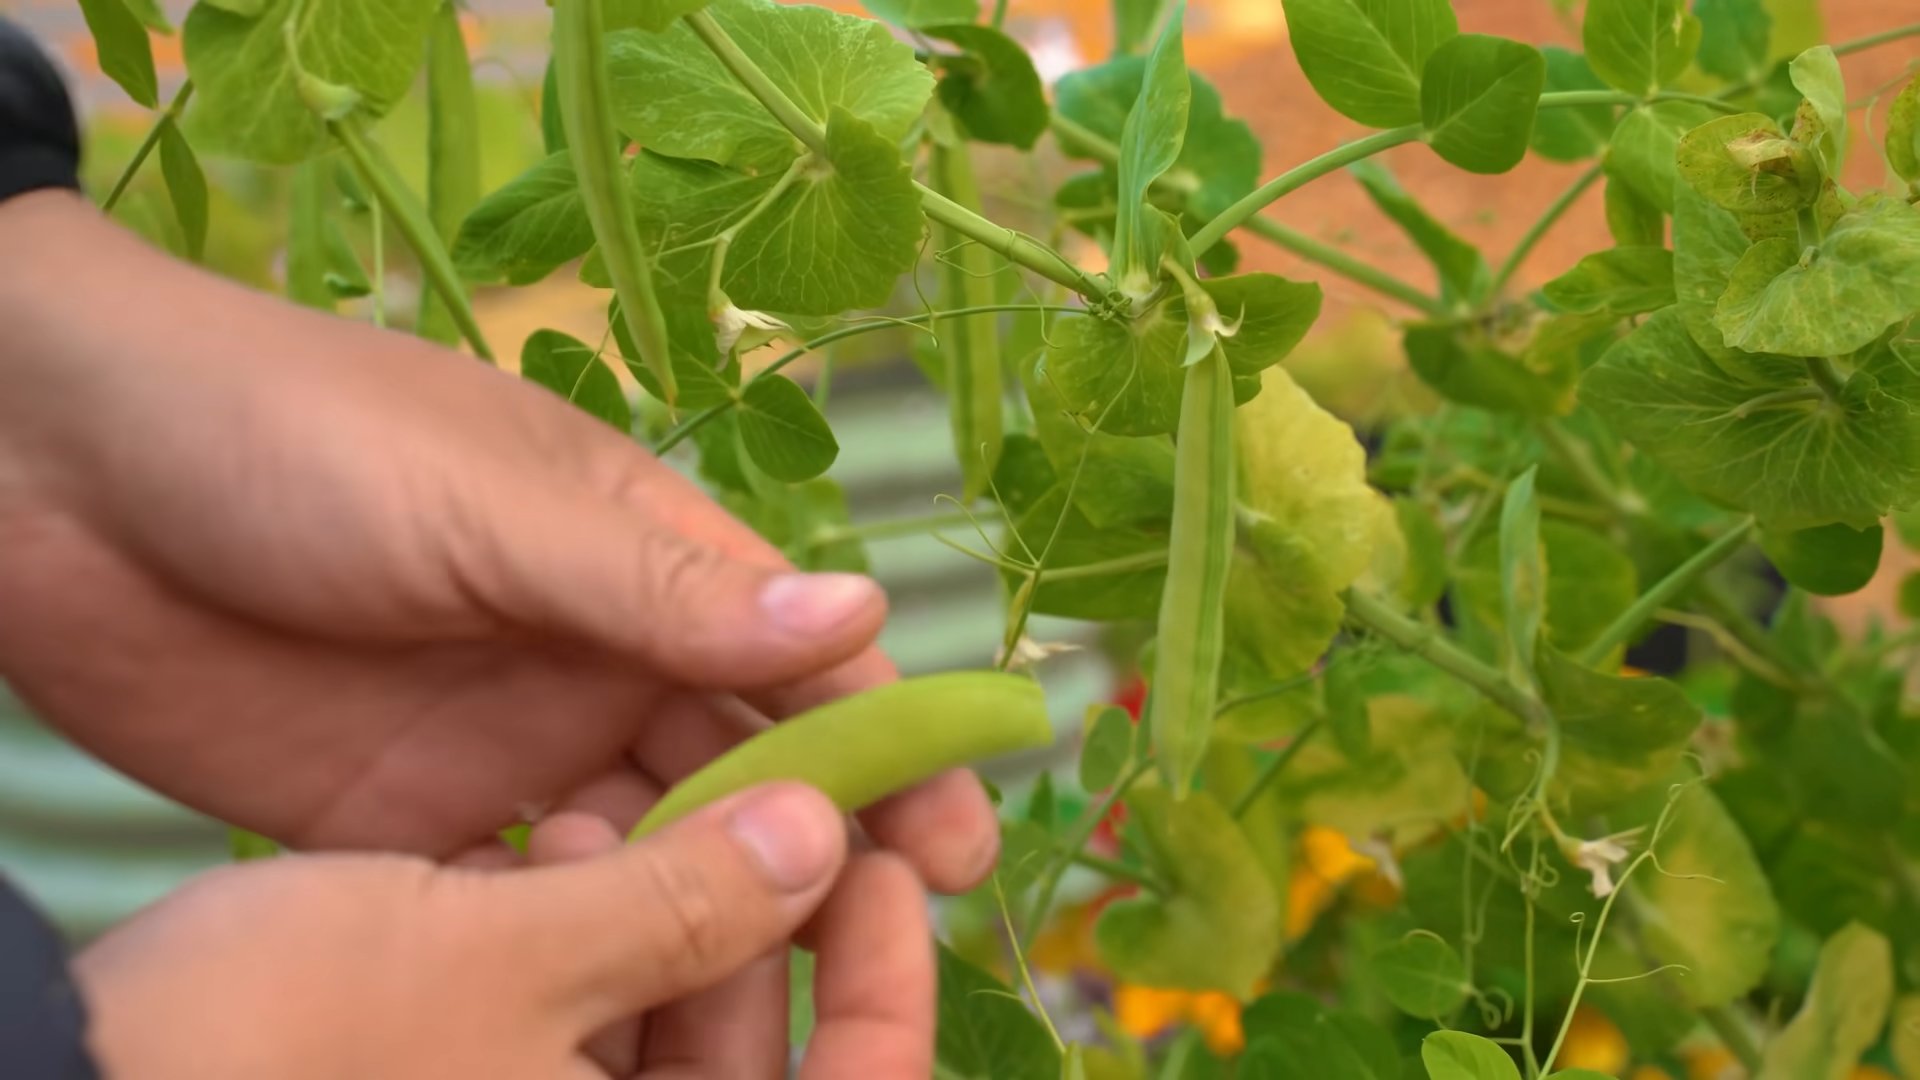
1. Check for Maturity: Snap peas are ready to harvest when the pods are plump and the peas inside are well-developed. The pods should be bright green and crisp.
2. Harvest Regularly: Harvest your snap peas regularly to encourage continued production.
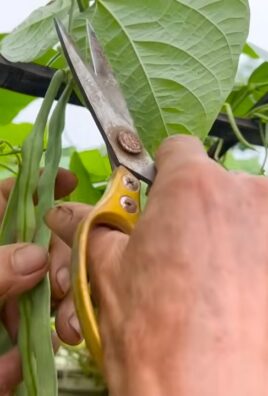
3. Pick Carefully: Gently snap the pods off the vine, being careful not to damage the plant.
Troubleshooting
Sometimes things don’t go exactly as planned. Here are some common problems you might encounter and how to fix them.
* Seeds Not Germinating: Make sure the soil is moist and the temperature is warm enough. You can also try soaking the seeds in water for 24 hours before planting.
* Plants Growing Slowly: Make sure your plants are getting enough light and nutrients. Adjust the height of your grow lights and fertilize regularly.
* Yellowing Leaves: This could be a sign of overwatering, underwatering, or nutrient deficiency. Check the soil moisture and fertilize as needed.
* Leggy Growth: This is usually a sign that your plants aren’t getting enough light. Move them closer to the grow lights or provide more light.
* No Flowers or Pods: This could be due to a lack of pollination. While snap peas are self-pollinating, you can help them along by gently shaking the plants or using a small brush to transfer pollen from one flower to another.
Enjoying Your Harvest
Now that you’ve harvested your snap peas, it’s time to enjoy them! You can eat them fresh, add them to salads, stir-fries, or soups. They’re also delicious steamed or roasted. I love just snacking on them straight from the vine!
Growing snap peas indoors can be a rewarding experience. With a little bit of care and attention, you can enjoy fresh, homegrown snap peas all year round. Happy gardening!
Conclusion
So, there you have it! Growing snap peas indoors is not only achievable, but it’s also a remarkably rewarding experience. Imagine fresh, crisp snap peas right at your fingertips, even when the weather outside is frightful. This DIY project brings a touch of spring into your home, providing a continuous supply of delicious and healthy snacks or additions to your favorite meals.
Why is this a must-try? Because it offers a unique blend of benefits. First, you gain control over the growing environment, shielding your precious snap peas from unpredictable weather, pests, and diseases that can plague outdoor gardens. Second, it’s incredibly space-efficient, making it perfect for apartment dwellers or anyone with limited outdoor space. Third, and perhaps most importantly, it’s incredibly satisfying to nurture a plant from seed to harvest, witnessing the miracle of nature unfold right before your eyes.
But don’t stop there! Feel free to experiment with different varieties of snap peas. Some bush varieties are particularly well-suited for indoor growing due to their compact size. Consider adding companion plants like marigolds or basil to your indoor garden to deter pests naturally and enhance the overall health of your snap peas. You can also explore different trellising methods. While a simple bamboo stake trellis works wonders, you might want to get creative with repurposed materials like old ladders or even decorative branches.
And remember, the key to successful indoor snap pea cultivation lies in providing adequate light. If natural sunlight is scarce, invest in a good quality grow light to ensure your plants receive the energy they need to thrive. Consistent watering and proper ventilation are also crucial for preventing fungal diseases.
We wholeheartedly encourage you to embark on this exciting journey of growing snap peas indoors. It’s a fantastic way to connect with nature, enjoy fresh produce, and add a touch of green to your living space. Don’t be afraid to get your hands dirty and experiment. Every gardener, whether novice or experienced, learns through trial and error.
Once you’ve harvested your first batch of homegrown snap peas, we’d love to hear about your experience! Share your tips, tricks, and photos with us in the comments section below. Let’s create a community of indoor gardeners and inspire others to discover the joy of growing their own food. Happy growing!
Frequently Asked Questions (FAQ)
What are the best varieties of snap peas to grow indoors?
While many snap pea varieties can be grown indoors, bush varieties tend to be more manageable due to their compact size. Consider options like ‘Sugar Ann,’ ‘Sugar Bon,’ or ‘Little Sweetie.’ These varieties don’t require as much vertical space as vining types, making them ideal for indoor containers. However, even bush varieties will benefit from some support, so a small trellis or stake is still recommended. Vining varieties like ‘Sugar Snap’ can also be grown indoors, but they will require a taller trellis and more space. Be sure to check the seed packet for specific information on the plant’s mature size and growth habits.
How much light do snap peas need when grown indoors?
Snap peas require a significant amount of light to thrive. Ideally, they need at least 6-8 hours of direct sunlight per day. If you don’t have a south-facing window that provides sufficient sunlight, you’ll need to supplement with grow lights. Fluorescent grow lights or LED grow lights are both excellent options. Position the grow lights a few inches above the plants and adjust the height as the plants grow. A timer can be used to ensure consistent light exposure. Insufficient light can lead to leggy growth, reduced flowering, and smaller pea pods.
What type of soil is best for growing snap peas indoors?
Snap peas prefer well-draining soil that is rich in organic matter. A good potting mix specifically formulated for vegetables is a great choice. You can also create your own potting mix by combining equal parts of compost, peat moss (or coconut coir), and perlite or vermiculite. Avoid using garden soil, as it can be too heavy and may contain pests or diseases. Ensure the container you use has drainage holes to prevent waterlogging, which can lead to root rot.
How often should I water my indoor snap peas?
Water your snap peas regularly, keeping the soil consistently moist but not waterlogged. Check the soil moisture level by sticking your finger about an inch into the soil. If it feels dry, it’s time to water. Water deeply, allowing the excess water to drain out of the drainage holes. Avoid overhead watering, as this can promote fungal diseases. Instead, water at the base of the plant. The frequency of watering will depend on factors such as the temperature, humidity, and size of the container.
Do snap peas need fertilizer when grown indoors?
Yes, snap peas benefit from regular fertilization, especially when grown in containers. Use a balanced fertilizer specifically formulated for vegetables. Follow the instructions on the fertilizer package for application rates. You can also use organic fertilizers such as compost tea or fish emulsion. Fertilize every 2-3 weeks during the growing season. Avoid over-fertilizing, as this can lead to excessive foliage growth and reduced flowering.
How do I support my snap pea plants as they grow?
Snap peas are climbing plants and require support to grow properly. A trellis, stakes, or netting can be used to provide support. Install the support system when the plants are young, before they start to vine. Gently guide the vines onto the support structure as they grow. You can use plant ties or clips to secure the vines to the support. Ensure the support system is sturdy enough to support the weight of the mature plants and the pea pods.
How long does it take for snap peas to mature and produce pods?
Snap peas typically take 60-70 days to mature and produce pods. The exact time will depend on the variety, growing conditions, and climate. You can start harvesting the pods when they are plump and the peas inside are well-developed. Harvest regularly to encourage continued production. Overripe pods can become tough and stringy.
What are some common pests and diseases that affect snap peas, and how can I prevent them?
Common pests that can affect snap peas include aphids, spider mites, and pea weevils. Regularly inspect your plants for signs of pests. You can control aphids and spider mites with insecticidal soap or neem oil. Pea weevils can be controlled by handpicking or using row covers. Common diseases that can affect snap peas include powdery mildew and root rot. Prevent powdery mildew by providing good air circulation and avoiding overhead watering. Prevent root rot by ensuring the soil is well-draining and avoiding overwatering.
Can I grow snap peas indoors year-round?
Yes, you can grow snap peas indoors year-round, provided you can provide the necessary growing conditions, including adequate light, temperature, and humidity. You may need to adjust your growing practices depending on the season. For example, you may need to provide supplemental heat during the winter months.
How do I harvest snap peas?
Harvest snap peas when the pods are plump and the peas inside are well-developed. Use scissors or pruning shears to cut the pods from the vine. Harvest regularly to encourage continued production. Overripe pods can become tough and stringy. Store harvested snap peas in the refrigerator for up to a week.
Leave a Comment