

Grow Strawberries at Home and unlock a world of fresh, juicy goodness right in your backyard! Imagine plucking sun-ripened strawberries, still warm from the sun, and enjoying their sweet, tangy flavor. Forget those bland, store-bought berries – with a few simple tricks, you can cultivate a thriving strawberry patch that will be the envy of your neighbors.
For centuries, strawberries have been cherished for their delicious taste and health benefits. From ancient Roman gardens to medieval monastery plots, these delightful fruits have graced tables and delighted palates across cultures. In many traditions, strawberries symbolize love, purity, and good fortune. Now, you can bring that same sense of joy and abundance into your own life.
Why should you learn these DIY strawberry-growing hacks? Because let’s face it, buying fresh strawberries can be expensive, and sometimes the quality is disappointing. Plus, there’s something incredibly rewarding about nurturing your own food from seed (or seedling!) to table. I’m here to show you how to grow strawberries at home, even if you have limited space or a brown thumb. We’ll cover everything from choosing the right varieties to creating the perfect growing conditions, ensuring you’ll be enjoying a bountiful harvest in no time. Get ready to transform your garden (or balcony!) into a strawberry paradise!
DIY Guide: Growing Your Own Strawberries at Home
Hey gardening friends! Have you ever imagined picking fresh, juicy strawberries right from your balcony or garden? I’m here to show you how to make this dream a reality. Growing strawberries is easier than you might think, and with a few simple tricks, you’ll soon be enjoying your very own delicious strawberries. Let’s get started!
What You Need: Preparation
Before we begin planting, it’s important to make sure we have everything ready. Here’s a list of what you’ll need:
- Strawberry Plants: Choose healthy strawberry plants. There are various types, such as June-bearing (produce a lot of fruit in the spring) or ever-bearing (produce fruit throughout the season).
- Planting Containers: You can use pots, window boxes, hanging baskets, or even old buckets. Make sure they are large enough (at least 15 cm in diameter per plant) and have drainage holes.
- Soil: Use special strawberry or vegetable soil. It’s nutrient-rich and promotes good growth.
- Fertilizer: Organic strawberry fertilizer is ideal to provide your plants with the nutrients they need.
- Watering Can or Garden Hose: For regular watering.
- Mulching Material: Straw or wood chips to help retain moisture and suppress weeds.
- Garden Scissors: For removing dead leaves and runners.
- Gloves: To keep your hands clean.
Step-by-Step Guide: Planting Strawberries
Now that we’re all set, let’s get started with planting. Here’s a detailed guide to help you every step of the way:
- Preparing the Containers:
- Clean your planting containers thoroughly.
- Add a layer of clay pellets or gravel to the bottom to improve drainage.
- Fill the containers with strawberry or vegetable soil, leaving about 2-3 cm from the rim.
- Preparing the Strawberry Plants:
- Gently remove the strawberry plants from their pots.
- Loosen the roots slightly to help them spread better in the new soil.
- Remove any dead or damaged leaves.
- Planting the Strawberries:
- Make a hole in the soil that is large enough to accommodate the roots of the plant.
- Place the plant so that the crown (the transition between the roots and leaves) is just above the soil surface.
- Fill the hole with soil and gently press it down.
- Make sure the plants are spaced about 20-25 cm apart.
- Watering and Mulching:
- Water the strawberry plants thoroughly after planting.
- Add a layer of mulch (straw or wood chips) around the plants to help retain moisture and suppress weeds.
Care: Keeping Your Strawberries Healthy and Productive
Proper care is crucial for a rich strawberry harvest. Here are some tips to ensure healthy growth:
- Watering: Strawberries need regular watering, especially during flowering and fruit formation. Water in the morning to allow the leaves to dry by the evening. Avoid overwatering, as this can lead to root rot.
- Fertilizing: Feed your strawberry plants regularly with organic fertilizer. Start about 2-3 weeks after planting and repeat every 4-6 weeks.
- Sun Exposure: Strawberries love sunlight! Place your plants in a sunny spot where they get at least 6 hours of sunlight per day.
- Removing Runners: Strawberry plants produce runners (offshoots) that can form new plants. If you want a bountiful harvest, remove the runners regularly as they divert energy from the mother plant. If you want to grow new plants, you can allow a few runners to root.
- Pest and Disease Control: Keep an eye out for pests like slugs, aphids, or gray mold. Inspect your plants regularly and take action when necessary. You can use slug pellets or natural plant protection sprays to control pests.
Special Growing Methods: Strawberries in Pots, Window Boxes, or Hanging Baskets
Strawberries can be grown not only in the garden but also on balconies and terraces. Here are some tips for growing in pots, window boxes, or hanging baskets:
- Strawberries in Pots: Choose a sufficiently large pot (at least 15 cm in diameter per plant) and use special strawberry or vegetable soil. Ensure proper drainage and water regularly.
- Strawberries in Window Boxes: Window boxes are ideal for growing strawberries on the balcony. Ensure the box is deep enough (at least 20 cm) and has drainage holes. Plant the strawberries about 20 cm apart.
- Strawberries in Hanging Baskets: Hanging baskets are a great way to grow strawberries in a space-saving way. Choose a hanging basket with enough volume and use special strawberry or vegetable soil. Make sure the basket is placed in a sunny spot and water regularly.
Harvesting: When and How to Pick Your Strawberries
Finally, it’s time to enjoy the fruits of your labor! Here are some tips on when and how to harvest your strawberries:
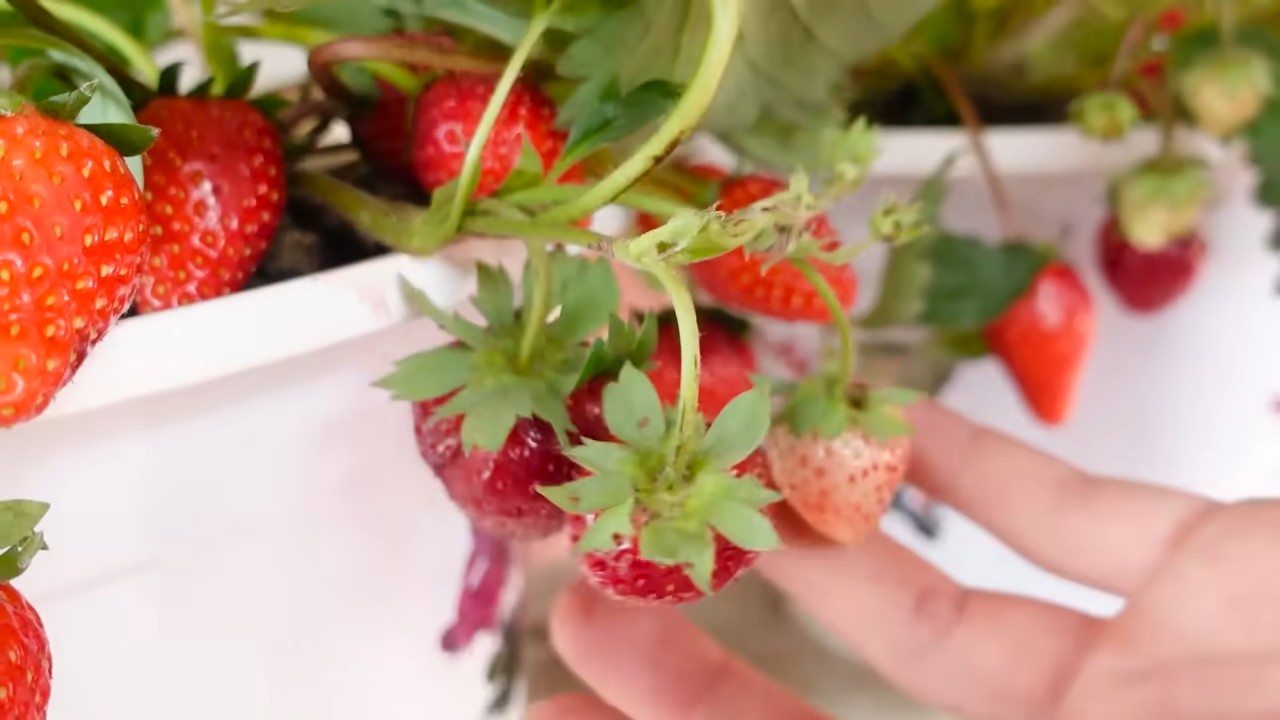
- When to Harvest: Strawberries are ready for harvest when they have a deep red color and come off the stem easily. The harvest season depends on the variety and location, but it usually begins in June and lasts until August.
- How to Harvest: Gently pick the strawberries with the stem still attached. Be careful not to crush the fruit.
- Storage: Strawberries don’t last long. It’s best to eat them right after harvest. If you need to store them, keep them in the fridge and consume them within 1-2 days.
Common Problems and Solutions
Even with the best care, problems can arise. Here are some common issues and how to solve them:
- Slugs: Slugs love strawberries! Protect your plants with slug pellets or set up slug traps.
- Aphids: Aphids suck on the leaves and can damage the plants. Spray the plants with a natural pest control solution.
- Gray Mold: Gray mold is a fungal disease that occurs mostly in wet weather. Remove infected fruit and leaves and ensure good air circulation around the plants.
- Small or Few Fruits: This can be due to nutrient deficiency, water shortage, or too little sunlight. Fertilize regularly, water sufficiently, and ensure the plants are in a sunny spot.
Additional Tips and Tricks:
- Crop Rotation: Avoid planting strawberries in the same spot every year to prevent diseases.
- Companion Planting: Plant strawberries alongside other plants that protect them from pests or promote growth. Good companions include marigolds, sage, or rosemary.
- Soil Testing: If you’re unsure whether your soil has the right nutrients, you can have it tested for pH and nutrient levels.
- Mulching: A layer of mulch (straw or grass clippings) helps keep the soil moist and suppresses weeds.
Conclusion
Growing strawberries at home is a fun and rewarding project. With a little care and patience, you’ll be able to enjoy fresh, homegrown strawberries throughout the season. Whether you have a garden, balcony, or windowsill, there’s always a way to grow these sweet fruits. Happy gardening! 🍓🌱
Conclusion
So, there you have it! Growing your own strawberries at home isn’t just a whimsical dream; it’s an achievable reality, even without a sprawling garden. This simple DIY trick, utilizing readily available materials and a little bit of patience, unlocks a world of fresh, flavorful possibilities right on your windowsill or balcony. Forget those bland, store-bought berries that lack the vibrant sweetness of homegrown produce. With this method, you’re in control of the entire process, from choosing your favorite strawberry variety to ensuring they’re grown organically and free from harmful pesticides.
The beauty of this DIY approach lies in its adaptability. Feel free to experiment with different container sizes and materials. While we’ve highlighted the benefits of using repurposed containers, you could also explore vertical planters or hanging baskets for a more visually appealing display. Consider companion planting to further enhance your strawberry growth. Herbs like basil and thyme can deter pests and improve the overall health of your plants. Marigolds are also excellent companions, adding a splash of color and further discouraging unwanted insects.
Don’t be afraid to get creative with your soil mixture. While the recommended blend of potting soil, compost, and perlite provides excellent drainage and nutrients, you can tailor it to your specific needs. If you live in a particularly dry climate, consider adding a moisture-retentive component like coco coir. If your soil is naturally acidic, you may need to amend it with lime to ensure the optimal pH level for strawberry growth.
The satisfaction of harvesting your own juicy, red strawberries is truly unparalleled. Imagine the delight of adding them to your morning yogurt, baking them into a delicious pie, or simply enjoying them fresh off the vine. This DIY project is not only a rewarding experience but also a sustainable way to reduce your carbon footprint and connect with nature.
We wholeheartedly encourage you to give this DIY trick a try. It’s a fun, educational, and ultimately delicious way to bring the joy of gardening into your home. And remember, the journey of a thousand strawberries begins with a single seed (or in this case, a runner!).
Once you’ve embarked on your strawberry-growing adventure, we’d love to hear about your experiences. Share your photos, tips, and challenges in the comments below. Let’s create a community of home gardeners who are passionate about growing their own food and sharing their knowledge with others. Your insights could inspire someone else to take the plunge and discover the joys of growing strawberries at home. Let’s cultivate a greener, more sustainable future, one strawberry at a time!
Frequently Asked Questions (FAQ)
What type of strawberries are best for growing in containers?
Day-neutral and everbearing strawberry varieties are generally the best choices for container gardening. Day-neutral varieties produce fruit throughout the growing season, while everbearing varieties typically have two main harvests: one in the spring and another in the fall. Some popular options include ‘Albion,’ ‘Seascape,’ ‘Tristan,’ and ‘Ozark Beauty.’ These varieties tend to be more compact and adaptable to the confined space of a container. June-bearing varieties, which produce a large crop all at once in June, can also be grown in containers, but they require larger containers and more space. Consider your local climate and personal preferences when selecting your strawberry variety.
How much sunlight do strawberries need?
Strawberries thrive in full sun, requiring at least 6-8 hours of direct sunlight per day. Insufficient sunlight can lead to reduced fruit production and smaller, less flavorful berries. If you’re growing your strawberries indoors, consider supplementing with grow lights to ensure they receive adequate light. Position your containers in a south-facing window or balcony to maximize sunlight exposure. If you live in a particularly hot climate, providing some afternoon shade can help prevent the plants from overheating.
How often should I water my strawberry plants?
Watering frequency depends on several factors, including the weather, the type of container you’re using, and the soil composition. Generally, you should water your strawberry plants when the top inch of soil feels dry to the touch. Avoid overwatering, as this can lead to root rot. Ensure that your containers have adequate drainage to prevent water from pooling at the bottom. During hot, dry weather, you may need to water your plants daily. In cooler, more humid conditions, you may only need to water them every few days. A good rule of thumb is to water deeply and less frequently, rather than shallowly and more often.
What kind of fertilizer should I use for my strawberry plants?
Strawberries benefit from regular fertilization to promote healthy growth and abundant fruit production. Use a balanced fertilizer with an NPK ratio of 10-10-10 or 12-12-12. You can also use a fertilizer specifically formulated for berries. Apply the fertilizer according to the package instructions, typically every 2-4 weeks during the growing season. Avoid over-fertilizing, as this can burn the roots and damage the plants. Organic options like compost tea or fish emulsion can also be used to provide essential nutrients.
How do I prevent pests and diseases from affecting my strawberry plants?
Prevention is key when it comes to pests and diseases. Inspect your plants regularly for signs of infestation or disease. Common pests that affect strawberries include aphids, spider mites, and slugs. You can control these pests with insecticidal soap, neem oil, or by handpicking them off the plants. Diseases like powdery mildew and gray mold can also affect strawberries. Ensure good air circulation around your plants and avoid overhead watering to prevent these diseases. Remove any infected leaves or fruit promptly to prevent the spread of disease. Companion planting with herbs like basil and thyme can also help deter pests.
How do I overwinter my strawberry plants?
In colder climates, strawberry plants need protection during the winter months. After the first frost, cut back the foliage to about 2 inches above the crown. Mulch the plants heavily with straw or leaves to insulate the roots and protect them from freezing temperatures. You can also move the containers to a sheltered location, such as a garage or shed. Water the plants sparingly during the winter months, only enough to keep the soil from completely drying out. In the spring, remove the mulch and resume regular watering and fertilizing.
How long does it take for strawberries to produce fruit?
The time it takes for strawberries to produce fruit depends on the variety and the growing conditions. Generally, you can expect to harvest your first strawberries within a few months of planting. Day-neutral and everbearing varieties typically produce fruit throughout the growing season, while June-bearing varieties produce a large crop all at once in June. Be patient and provide your plants with the proper care, and you’ll be rewarded with a bountiful harvest of delicious strawberries.
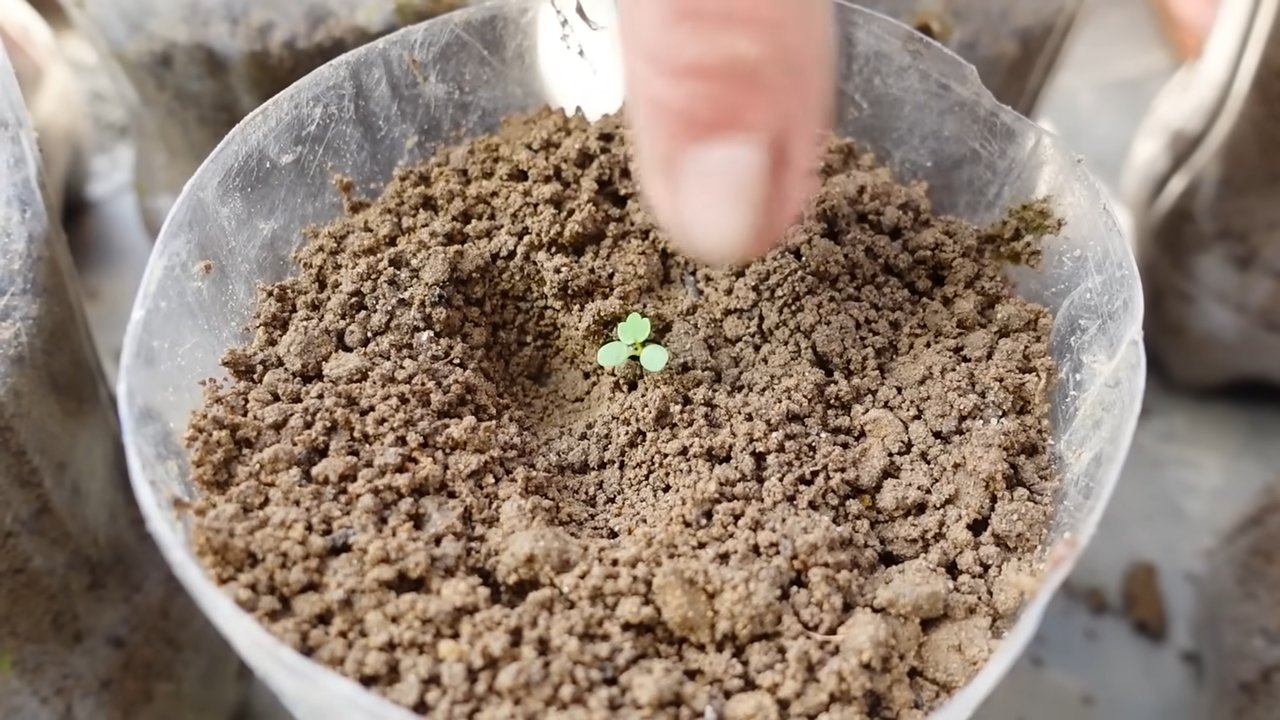
Can I grow strawberries from seed?
While it is possible to grow strawberries from seed, it is a more challenging and time-consuming process than growing them from runners. Strawberry seeds require a period of cold stratification before they will germinate. This involves placing the seeds in the refrigerator for several weeks. Once the seeds have been stratified, they can be sown indoors in a seed-starting mix. Keep the soil moist and warm, and provide plenty of light. Once the seedlings are large enough to handle, they can be transplanted into individual pots. Growing strawberries from runners is a much faster and easier way to propagate new plants.

Leave a Comment