

Grow Watermelon at Home – sounds like a summer dream, right? I know, I know, you might be thinking, “Watermelons? In my backyard? Impossible!” But trust me, it’s more achievable than you think, and I’m here to show you how with some clever DIY tricks and hacks. For centuries, watermelons have been a symbol of summer, abundance, and refreshing sweetness, enjoyed in cultures around the globe. From ancient Egypt, where they were buried with pharaohs, to modern-day picnics, this juicy fruit has always held a special place in our hearts (and stomachs!).
But why should you bother trying to grow watermelon at home? Well, for starters, nothing beats the taste of a homegrown watermelon, bursting with flavor and sunshine. Plus, you’ll know exactly what went into growing it – no mystery chemicals or long-distance transportation. In this article, I’m going to share some simple, effective DIY methods to help you cultivate your own personal watermelon patch, even if you have limited space or experience. We’ll cover everything from seed starting to pest control, ensuring you’ll be enjoying juicy, red slices of summer in no time. So, grab your gardening gloves, and let’s get started!
Growing Watermelons: A Beginner’s Guide to Sweet Success!
Hey there, fellow gardening enthusiasts! Ever dreamt of biting into a juicy, homegrown watermelon on a hot summer day? Well, dream no more! Growing your own watermelons is totally achievable, even if you’re a beginner. It might seem intimidating, but with a little planning and effort, you can be harvesting your own sweet treats in no time. I’m going to walk you through everything you need to know, from choosing the right variety to dealing with pesky pests. Let’s get started!
Choosing the Right Watermelon Variety
First things first, you need to pick the right watermelon variety for your climate and garden size. Not all watermelons are created equal! Some are better suited for shorter growing seasons, while others need a lot of space to sprawl. Here’s a breakdown to help you decide:
* Consider your climate: If you live in a region with a short growing season, opt for early-maturing varieties like ‘Sugar Baby’ or “Bush Sugar Baby”. These varieties ripen quickly, giving you a better chance of harvesting before the first frost. For longer growing seasons, you have more options, including larger varieties like ‘Charleston Gray’ or ‘Crimson Sweet’.
* Think about space: Watermelons are notorious for their sprawling vines. If you have a small garden, consider bush varieties like ‘Bush Sugar Baby’ or ‘Garden Baby’. These varieties are more compact and can even be grown in large containers. If you have plenty of space, go for the larger, vining varieties.
* Flavor preferences: Do you prefer a super sweet watermelon or one with a slightly tangy flavor? Some varieties are known for their exceptional sweetness, while others have a more complex flavor profile. Do some research and read reviews to find a variety that suits your taste.
* Seedless vs. Seeded: Seedless watermelons are popular for their convenience, but they can be a bit more challenging to grow. They require a pollinator variety nearby to produce fruit. Seeded watermelons are generally easier to grow and don’t require a pollinator.
Preparing Your Garden Bed
Watermelons are heavy feeders, meaning they need a lot of nutrients to thrive. Preparing your garden bed properly is crucial for a successful harvest.
* Sunlight is key: Watermelons need at least 6-8 hours of direct sunlight per day. Choose a location in your garden that gets plenty of sun.
* Soil preparation: Watermelons prefer well-drained, sandy loam soil with a pH between 6.0 and 6.8. If your soil is heavy clay, amend it with compost, aged manure, or other organic matter to improve drainage and aeration.
* Adding nutrients: Before planting, incorporate a generous amount of compost or well-rotted manure into the soil. You can also add a balanced fertilizer (e.g., 10-10-10) according to the package directions.
* Creating mounds or rows: Watermelons grow best on slightly raised mounds or rows. This helps with drainage and warms the soil more quickly. Create mounds or rows that are about 12 inches high and 3-4 feet apart.
Planting Your Watermelon Seeds or Seedlings
Now comes the fun part – planting! You can either start your watermelon seeds indoors or direct sow them in your garden.
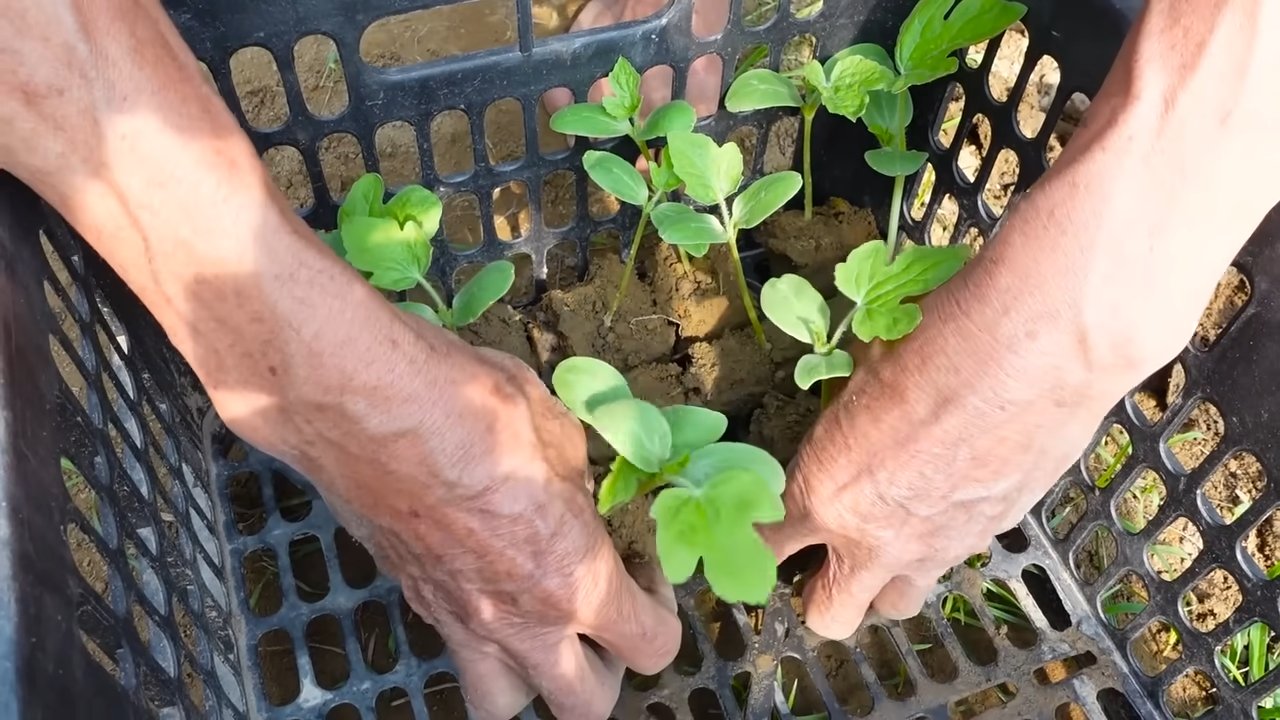
* Starting seeds indoors (optional): Starting seeds indoors gives you a head start, especially if you have a short growing season. Sow the seeds in peat pots or seed trays about 3-4 weeks before the last expected frost. Keep the soil moist and warm (around 80-85°F) until the seeds germinate. Once the seedlings have a few true leaves, you can transplant them into your garden.
* Direct sowing: If you live in a warm climate with a long growing season, you can direct sow the seeds in your garden. Wait until the soil temperature reaches at least 70°F before planting. Sow the seeds about 1 inch deep and 2-3 feet apart on the mounds or rows you prepared earlier.
* Transplanting seedlings: If you started your seeds indoors, harden off the seedlings by gradually exposing them to outdoor conditions for a week before transplanting. Dig a hole slightly larger than the root ball and gently place the seedling in the hole. Backfill with soil and water thoroughly. Space the seedlings 2-3 feet apart.
Watering and Fertilizing
Watermelons need consistent watering, especially during hot, dry weather.
* Watering deeply: Water deeply and regularly, especially when the plants are young and during fruit development. Aim to keep the soil consistently moist but not waterlogged.
* Avoid overhead watering: Avoid overhead watering, as this can promote fungal diseases. Instead, water at the base of the plants using a soaker hose or drip irrigation.
* Fertilizing regularly: Watermelons are heavy feeders and benefit from regular fertilization. Side-dress the plants with a balanced fertilizer every 2-3 weeks, following the package directions. You can also use a liquid fertilizer, such as fish emulsion or seaweed extract.
Pollination and Fruit Development
Watermelons rely on bees and other pollinators to produce fruit.
* Attracting pollinators: Plant flowers near your watermelon patch to attract pollinators. Some good choices include sunflowers, zinnias, and marigolds.
* Hand-pollinating (if needed): If you’re not seeing a lot of bee activity, you can hand-pollinate your watermelon flowers. Identify the female flowers (they have a small fruit behind the flower) and the male flowers (they have a straight stem). Use a small paintbrush to transfer pollen from the male flower to the female flower.
* Thinning fruit: Once the watermelons start to develop, you may need to thin the fruit to allow the remaining melons to grow larger. Remove any misshapen or damaged fruit.
Dealing with Pests and Diseases
Watermelons are susceptible to a variety of pests and diseases.
* Common pests: Common watermelon pests include aphids, squash bugs, and cucumber beetles. Inspect your plants regularly for signs of infestation and take action promptly. You can use insecticidal soap, neem oil, or other organic pest control methods.
* Common diseases: Common watermelon diseases include powdery mildew, downy mildew, and fusarium wilt. Prevent these diseases by providing good air circulation, avoiding overhead watering, and using disease-resistant varieties. If you notice signs of disease, treat the plants with a fungicide.
* Row covers: Using row covers can help protect your watermelon plants from pests and diseases, especially when they are young.
Harvesting Your Watermelons
Knowing when to harvest your watermelons can be tricky, but here are a few indicators to look for:
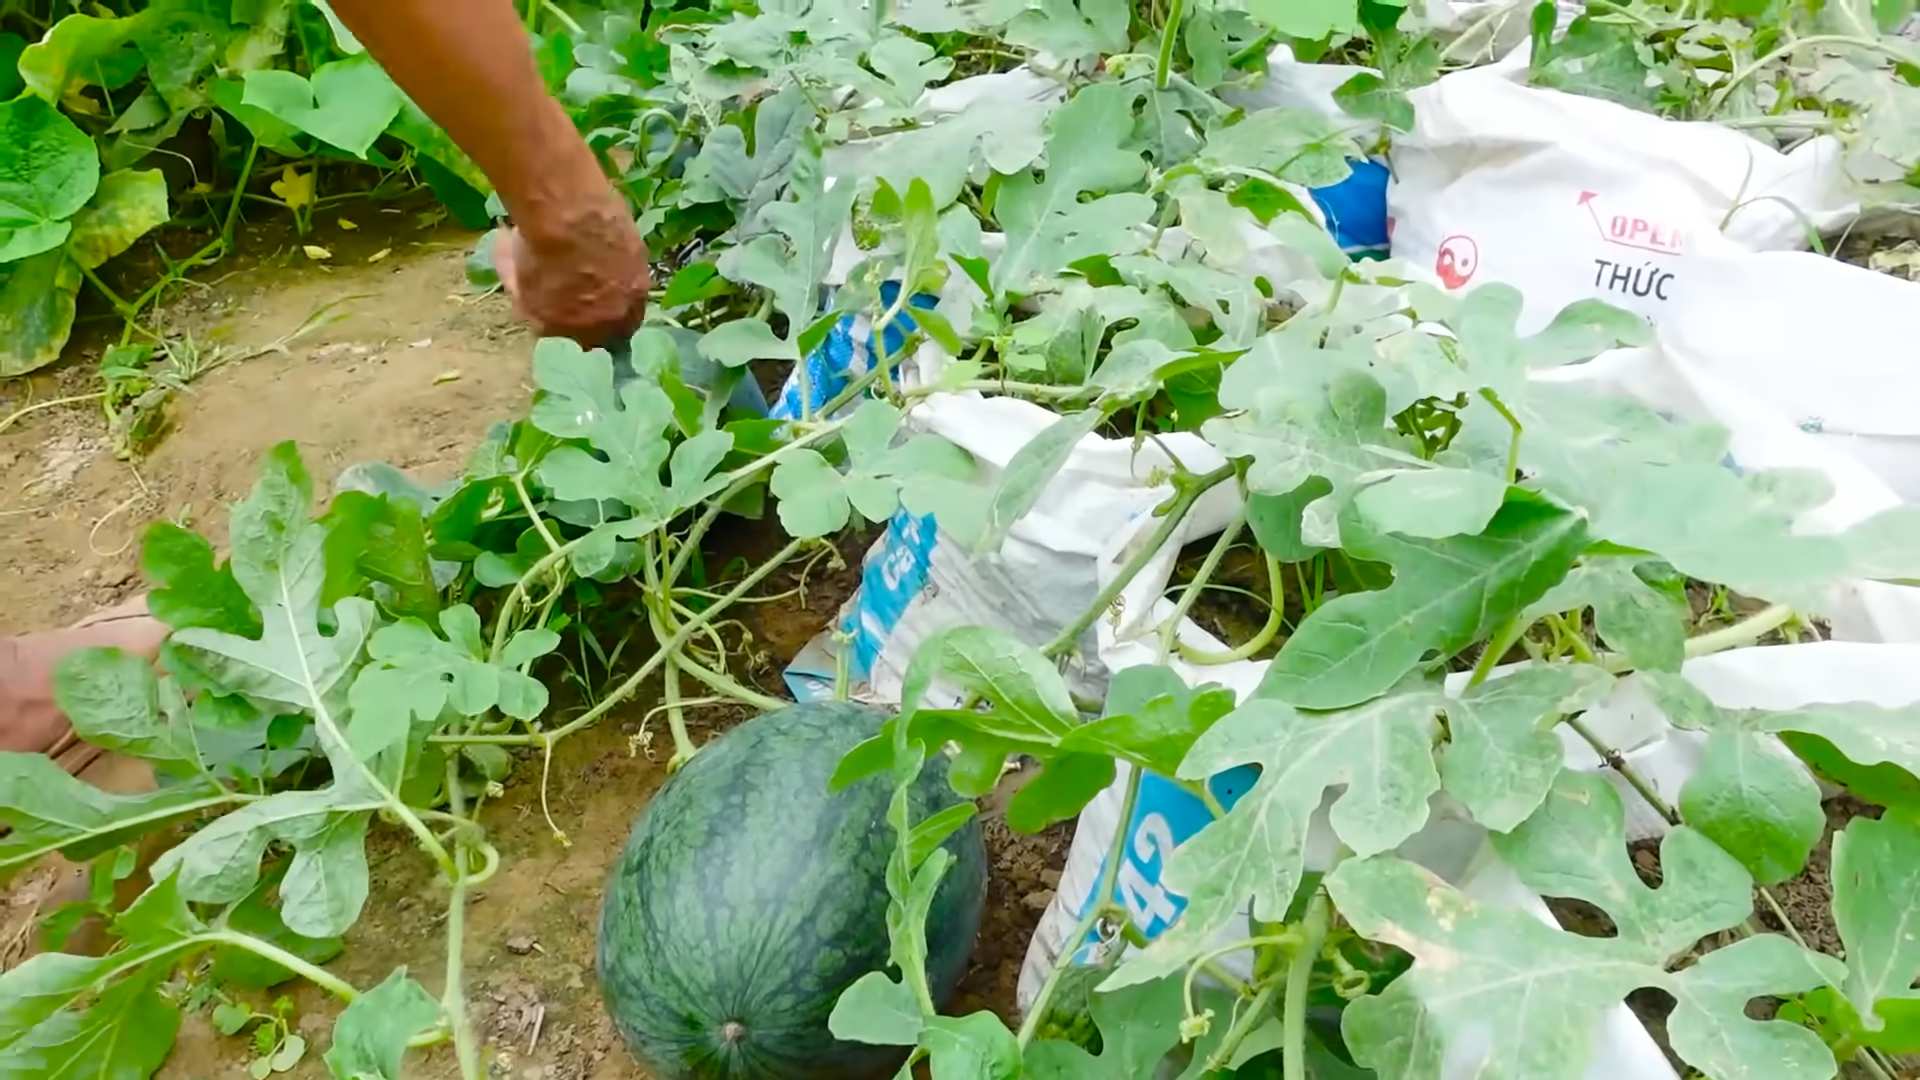
* The tendril closest to the fruit turns brown and dries up. This is a reliable sign that the watermelon is ripe.
* The bottom of the watermelon (where it rests on the ground) turns from white to yellow. This is another good indicator of ripeness.
* The watermelon sounds hollow when you thump it. This takes some practice, but with experience, you’ll be able to tell when a watermelon is ripe by the sound it makes.
* The rind becomes dull and less shiny.
* Check the days to maturity for your specific variety. This will give you a general idea of when to expect your watermelons to be ripe.
Once you’ve determined that your watermelon is ripe, use a sharp knife to cut it from the vine, leaving a few inches of stem attached.
Step-by-Step Instructions: From Seed to Slice
Okay, let’s break down the whole process into easy-to-follow steps:
1. Choose your watermelon variety: Consider your climate, space, and flavor preferences.
2. Prepare your garden bed: Select a sunny location with well-drained soil. Amend the soil with compost or manure and create raised mounds or rows.
3. Plant your seeds or seedlings: Start seeds indoors 3-4 weeks before the last frost or direct sow them in your garden after the soil has warmed up.
4. Water regularly: Water deeply and consistently, especially during hot, dry weather.
5. Fertilize regularly: Side-dress the plants with a balanced fertilizer every 2-3 weeks.
6. Attract pollinators: Plant flowers near your watermelon patch to attract bees and other pollinators.
7. Monitor for pests and diseases: Inspect your plants regularly and take action promptly if you notice any problems.
8. Harvest your watermelons: Look for the signs of ripeness and cut the watermelon from the vine when it’s ready.
9. Enjoy your homegrown watermelon! Slice it up and savor the sweet, juicy flavor.
Troubleshooting Tips
Even with the best planning, things can sometimes go wrong. Here are a few common problems and how to fix them:
* Watermelons not setting fruit: This could be due to poor pollination
Conclusion
So, there you have it! Growing watermelons at home might seem daunting at first, but with a little patience, the right techniques, and our simple DIY tricks, you can be harvesting your own juicy, sweet watermelons before you know it. This isn’t just about saving money; it’s about experiencing the unparalleled satisfaction of nurturing a plant from seed to fruit, knowing exactly what went into its growth, and enjoying a flavor that store-bought watermelons simply can’t match.
The key takeaway here is that successful watermelon cultivation hinges on understanding the plant’s needs and providing the optimal environment. From selecting the right variety for your climate to ensuring proper soil drainage and consistent watering, every step plays a crucial role. And remember, our DIY trick – whether it’s the homemade fertilizer blend or the clever pest control solution – is designed to give your watermelons that extra boost they need to thrive.
Don’t be afraid to experiment! Try different watermelon varieties to find your favorite. Perhaps you’d like to try growing miniature watermelons in containers on your patio. Or maybe you’re feeling adventurous and want to graft your watermelon onto a more disease-resistant rootstock. The possibilities are endless!
Consider these variations to personalize your watermelon growing experience:
* Vertical Growing: If you’re short on space, train your watermelon vines to grow vertically on a trellis. This not only saves space but also improves air circulation, reducing the risk of fungal diseases.
* Companion Planting: Plant basil, marigolds, or nasturtiums near your watermelons to deter pests and attract beneficial insects.
* Seed Saving: Once you’ve grown a watermelon you love, save the seeds for next year’s crop. This is a great way to preserve your favorite varieties and adapt them to your local climate.
* Different DIY Fertilizer: Experiment with different ratios of compost, bone meal, and wood ash in your homemade fertilizer to see what works best for your soil.
We wholeheartedly encourage you to give this DIY trick for growing watermelons at home a try. It’s a rewarding experience that connects you with nature and provides you with delicious, homegrown fruit. And most importantly, don’t forget to share your experiences with us! We’d love to hear about your successes, your challenges, and any variations you’ve tried. Post pictures of your watermelons, share your tips, and let’s create a community of passionate home gardeners. Happy growing!
Frequently Asked Questions (FAQ)
What is the best time to start growing watermelons?
The best time to start growing watermelons depends on your climate. Watermelons are warm-season crops and require a long growing season of at least 70-90 days. In general, you should start seeds indoors about 6-8 weeks before the last expected frost. If you live in a warmer climate with a longer growing season, you can direct sow seeds into the ground after the last frost when the soil temperature reaches at least 70°F (21°C). Make sure to check your local frost dates to determine the best time to start your seeds.
What kind of soil is best for growing watermelons?
Watermelons thrive in well-drained, sandy loam soil that is rich in organic matter. The soil should have a pH between 6.0 and 6.8. Before planting, amend your soil with compost or well-rotted manure to improve drainage and fertility. Avoid heavy clay soils, as they can retain too much water and lead to root rot. If you have clay soil, consider growing your watermelons in raised beds or containers with a well-draining potting mix.
How much sunlight do watermelons need?
Watermelons need at least 6-8 hours of direct sunlight per day to thrive. Choose a planting location that receives full sun throughout the day. Insufficient sunlight can result in smaller fruits and reduced yields. If you live in a particularly hot climate, some afternoon shade may be beneficial to prevent the plants from overheating.
How often should I water my watermelons?
Watermelons need consistent watering, especially during fruit development. Water deeply and regularly, aiming to keep the soil consistently moist but not waterlogged. Water at the base of the plant to avoid wetting the foliage, which can increase the risk of fungal diseases. During hot, dry weather, you may need to water daily. Reduce watering as the fruits ripen to prevent them from cracking. A good rule of thumb is to water when the top inch of soil feels dry to the touch.
What are some common pests and diseases that affect watermelons, and how can I control them?
Common pests that affect watermelons include aphids, squash bugs, cucumber beetles, and vine borers. Diseases include powdery mildew, fusarium wilt, and anthracnose. To control pests, you can use insecticidal soap, neem oil, or row covers. For diseases, ensure good air circulation, avoid overhead watering, and use fungicides if necessary. Our DIY pest control solutions, as mentioned in the article, can also be effective. Regularly inspect your plants for signs of pests or diseases and take action promptly to prevent them from spreading.
How do I know when my watermelon is ripe?
There are several indicators that a watermelon is ripe. The tendril closest to the fruit should be brown and dry. The underside of the watermelon, where it rests on the ground (the “ground spot”), should be yellow or cream-colored. When you thump the watermelon, it should sound hollow and deep. Also, the skin should be dull rather than shiny. These are all good signs that your watermelon is ready to be harvested.
Can I grow watermelons in containers?
Yes, you can grow watermelons in containers, but you’ll need a large container (at least 20 gallons) and a dwarf or bush variety of watermelon. Make sure the container has drainage holes and use a well-draining potting mix. Provide a trellis for the vines to climb and water and fertilize regularly. Container-grown watermelons may require more frequent watering and fertilization than those grown in the ground.
What is the best fertilizer for watermelons?
Watermelons benefit from a balanced fertilizer with a higher phosphorus content to promote fruit development. Use a fertilizer with an N-P-K ratio of 10-10-10 or 6-12-6. Apply fertilizer at planting and then again when the vines start to run and when the fruits begin to set. You can also use our DIY fertilizer blend, as described in the article, which provides essential nutrients for healthy growth and fruit production. Avoid over-fertilizing, as this can lead to excessive foliage growth and reduced fruit production.
How can I prevent my watermelons from cracking?
Watermelon cracking is often caused by inconsistent watering, especially after a period of drought. To prevent cracking, water your watermelons regularly and deeply, especially during hot, dry weather. Avoid letting the soil dry out completely and then suddenly saturating it. Mulching around the plants can help retain moisture and prevent fluctuations in soil moisture levels. Also, reduce watering as the fruits ripen to prevent them from absorbing too much water and cracking.
How do I save watermelon seeds for next year?
To save watermelon seeds, scoop out the seeds from a ripe watermelon and rinse them thoroughly to remove any pulp. Spread the seeds on a paper towel or screen to dry completely for several days. Once the seeds are dry, store them in an airtight container in a cool, dark, and dry place. Properly stored watermelon seeds can remain viable for several years.
Leave a Comment