

Grow Watermelons Easily, even if you think you don’t have a green thumb! Have you ever dreamed of biting into a juicy, homegrown watermelon on a hot summer day? It’s a quintessential summer experience, conjuring images of picnics, family gatherings, and pure, unadulterated joy. Watermelons have a rich history, dating back thousands of years to Africa, where they were prized for their hydrating properties in arid climates. From ancient royalty to modern-day backyard gardeners, the allure of the watermelon has endured.
But let’s be honest, growing watermelons can seem intimidating. They’re big, they need space, and sometimes, they just don’t seem to thrive. That’s where these DIY tricks and hacks come in! I’m going to share some simple, yet effective methods to help you grow watermelons easily, regardless of your experience level or garden size. We’ll tackle common challenges like pollination, pest control, and maximizing fruit production.
Why do you need these tricks? Because store-bought watermelons simply can’t compare to the taste of a vine-ripened, homegrown melon. Plus, gardening is incredibly rewarding, offering a connection to nature and a sense of accomplishment. So, get ready to roll up your sleeves and discover the secrets to a bountiful watermelon harvest. Let’s get growing!
Grow Watermelons Like a Pro: My Foolproof DIY Guide
Hey there, fellow gardening enthusiasts! I’m so excited to share my tried-and-true method for growing juicy, delicious watermelons right in your own backyard. Forget those bland, store-bought melons – with a little effort and this guide, you’ll be enjoying homegrown sweetness all summer long. I’ve broken down the process into easy-to-follow steps, so even if you’re a beginner, you can achieve watermelon success!
Choosing the Right Watermelon Variety
Before we dive into the nitty-gritty, let’s talk about watermelon varieties. Not all watermelons are created equal, and choosing the right one for your climate and space is crucial. Here’s what I consider:
* Climate: Some varieties thrive in warmer climates, while others are more tolerant of cooler temperatures. Check your local growing zone and choose a variety that’s known to do well in your area.
* Space: Watermelons need a lot of space to sprawl. If you have a small garden, consider bush or compact varieties.
* Days to Maturity: This is the number of days it takes for the watermelon to ripen after planting. Choose a variety with a shorter maturity time if you have a shorter growing season.
* Personal Preference: Do you prefer red or yellow flesh? Seeded or seedless? Large or small? There are so many options!
Some of my favorite varieties include:
* Sugar Baby: A classic, small, and sweet watermelon that’s perfect for smaller gardens.
* Crimson Sweet: A popular, large, and juicy watermelon with a vibrant red flesh.
* Black Diamond: A very large, dark green watermelon with a sweet, red flesh.
* Yellow Doll: A unique watermelon with a sweet, yellow flesh.
* Bush Sugar Baby: A compact version of Sugar Baby, ideal for container gardening.
Preparing the Soil: The Foundation for Success
Watermelons are heavy feeders, meaning they need a lot of nutrients to grow. Preparing the soil properly is essential for a bountiful harvest.
* Sunlight: Watermelons need at least 6-8 hours of direct sunlight per day. Choose a location in your garden that gets plenty of sun.
* Soil Type: Watermelons prefer well-drained, sandy loam soil. If your soil is heavy clay, amend it with compost and other organic matter to improve drainage.
* Soil pH: The ideal soil pH for watermelons is between 6.0 and 6.8. You can test your soil pH with a soil testing kit.
* Nutrients: Watermelons need a lot of nitrogen, phosphorus, and potassium. Amend your soil with compost, aged manure, or a balanced fertilizer before planting.
Starting Watermelon Seeds Indoors (Optional)
Starting watermelon seeds indoors gives them a head start, especially in areas with shorter growing seasons. I usually start mine about 4-6 weeks before the last expected frost.
* Seed Starting Mix: Use a high-quality seed starting mix that’s light and well-draining.
* Containers: Use individual pots or seed starting trays with drainage holes. I prefer peat pots or biodegradable pots, as they can be planted directly into the ground, minimizing root disturbance.
* Planting Depth: Plant the seeds about 1 inch deep.
* Watering: Keep the soil consistently moist but not soggy.
* Warmth: Watermelon seeds need warmth to germinate. Use a heat mat to keep the soil temperature between 80-90°F (27-32°C).
* Light: Once the seeds germinate, provide them with plenty of light. Place them under grow lights or in a sunny window.
* Hardening Off: Before transplanting the seedlings outdoors, gradually acclimate them to the outdoor conditions. This process is called hardening off. Start by placing the seedlings outdoors for a few hours each day, gradually increasing the amount of time they spend outside.
Planting Watermelon Seedlings or Seeds Directly
Once the soil has warmed up and the danger of frost has passed, it’s time to plant your watermelon seedlings or seeds directly into the garden.
1. Prepare the Planting Area: Dig a hole that’s twice as wide and as deep as the root ball of the seedling. If you’re planting seeds directly, create small mounds of soil about 2-3 feet apart.
2. Amend the Soil: Mix compost or aged manure into the soil in the planting hole.
3. Plant the Seedling or Seeds: Gently remove the seedling from its container and place it in the planting hole. If you’re planting seeds directly, plant 2-3 seeds per mound.
4. Backfill the Hole: Fill the hole with soil, gently firming it around the seedling or seeds.
5. Water Thoroughly: Water the planting area thoroughly to settle the soil.
6. Mulch: Apply a layer of mulch around the plants to help retain moisture, suppress weeds, and regulate soil temperature. I like to use straw or shredded leaves.
Caring for Your Watermelon Plants
Watermelons need consistent care to thrive. Here’s what I do:
* Watering: Watermelons need plenty of water, especially during hot, dry weather. Water deeply and regularly, aiming for about 1-2 inches of water per week. Avoid overhead watering, as this can lead to fungal diseases. Drip irrigation is ideal.
* Fertilizing: Watermelons are heavy feeders and benefit from regular fertilization. Use a balanced fertilizer or a fertilizer specifically formulated for melons. Follow the instructions on the fertilizer label. I like to side-dress my watermelons with compost tea every few weeks.
* Weeding: Keep the planting area free of weeds, as weeds can compete with watermelons for nutrients and water. Hand-pull weeds or use a hoe to remove them.
* Pruning: Pruning watermelons can improve air circulation and fruit production. Remove any suckers (small shoots that grow from the base of the plant) and any yellowing or diseased leaves.
* Pollination: Watermelons need to be pollinated to produce fruit. Bees are the primary pollinators. If you don’t have enough bees in your garden, you may need to hand-pollinate the flowers. To hand-pollinate, use a small paintbrush to transfer pollen from the male flowers to the female flowers. Female flowers have a small, immature watermelon at the base of the flower.
* Pest and Disease Control: Watermelons can be susceptible to pests and diseases, such as aphids, squash bugs, vine borers, and powdery mildew. Inspect your plants regularly for signs of pests or diseases. Use organic pest control methods, such as insecticidal soap or neem oil, to control pests. Use a fungicide to control fungal diseases.
Protecting Your Watermelons
As your watermelons grow, you may need to protect them from pests and diseases.
* Ground Rot: To prevent ground rot, place a piece of cardboard or straw under each watermelon to keep it from touching the so
Hey there, fellow gardening enthusiasts! I’m so excited to share my tried-and-true method for growing juicy, delicious watermelons right in your own backyard. Forget those bland, store-bought melons – with a little effort and this guide, you’ll be enjoying homegrown sweetness all summer long. I’ve broken down the process into easy-to-follow steps, so even if you’re a beginner, you can achieve watermelon success!
Choosing the Right Watermelon Variety
Before we dive into the nitty-gritty, let’s talk about watermelon varieties. Not all watermelons are created equal, and choosing the right one for your climate and space is crucial. Here’s what I consider:
* Climate: Some varieties thrive in warmer climates, while others are more tolerant of cooler temperatures. Check your local growing zone and choose a variety that’s known to do well in your area.
* Space: Watermelons need a lot of space to sprawl. If you have a small garden, consider bush or compact varieties.
* Days to Maturity: This is the number of days it takes for the watermelon to ripen after planting. Choose a variety with a shorter maturity time if you have a shorter growing season.
* Personal Preference: Do you prefer red or yellow flesh? Seeded or seedless? Large or small? There are so many options!
Some of my favorite varieties include:
* Sugar Baby: A classic, small, and sweet watermelon that’s perfect for smaller gardens.
* Crimson Sweet: A popular, large, and juicy watermelon with a vibrant red flesh.
* Black Diamond: A very large, dark green watermelon with a sweet, red flesh.
* Yellow Doll: A unique watermelon with a sweet, yellow flesh.
* Bush Sugar Baby: A compact version of Sugar Baby, ideal for container gardening.
Preparing the Soil: The Foundation for Success
Watermelons are heavy feeders, meaning they need a lot of nutrients to grow. Preparing the soil properly is essential for a bountiful harvest.
* Sunlight: Watermelons need at least 6-8 hours of direct sunlight per day. Choose a location in your garden that gets plenty of sun.
* Soil Type: Watermelons prefer well-drained, sandy loam soil. If your soil is heavy clay, amend it with compost and other organic matter to improve drainage.
* Soil pH: The ideal soil pH for watermelons is between 6.0 and 6.8. You can test your soil pH with a soil testing kit.
* Nutrients: Watermelons need a lot of nitrogen, phosphorus, and potassium. Amend your soil with compost, aged manure, or a balanced fertilizer before planting.
Starting Watermelon Seeds Indoors (Optional)
Starting watermelon seeds indoors gives them a head start, especially in areas with shorter growing seasons. I usually start mine about 4-6 weeks before the last expected frost.
* Seed Starting Mix: Use a high-quality seed starting mix that’s light and well-draining.
* Containers: Use individual pots or seed starting trays with drainage holes. I prefer peat pots or biodegradable pots, as they can be planted directly into the ground, minimizing root disturbance.
* Planting Depth: Plant the seeds about 1 inch deep.
* Watering: Keep the soil consistently moist but not soggy.
* Warmth: Watermelon seeds need warmth to germinate. Use a heat mat to keep the soil temperature between 80-90°F (27-32°C).
* Light: Once the seeds germinate, provide them with plenty of light. Place them under grow lights or in a sunny window.
* Hardening Off: Before transplanting the seedlings outdoors, gradually acclimate them to the outdoor conditions. This process is called hardening off. Start by placing the seedlings outdoors for a few hours each day, gradually increasing the amount of time they spend outside.
Planting Watermelon Seedlings or Seeds Directly
Once the soil has warmed up and the danger of frost has passed, it’s time to plant your watermelon seedlings or seeds directly into the garden.
1. Prepare the Planting Area: Dig a hole that’s twice as wide and as deep as the root ball of the seedling. If you’re planting seeds directly, create small mounds of soil about 2-3 feet apart.
2. Amend the Soil: Mix compost or aged manure into the soil in the planting hole.
3. Plant the Seedling or Seeds: Gently remove the seedling from its container and place it in the planting hole. If you’re planting seeds directly, plant 2-3 seeds per mound.
4. Backfill the Hole: Fill the hole with soil, gently firming it around the seedling or seeds.
5. Water Thoroughly: Water the planting area thoroughly to settle the soil.
6. Mulch: Apply a layer of mulch around the plants to help retain moisture, suppress weeds, and regulate soil temperature. I like to use straw or shredded leaves.
Caring for Your Watermelon Plants
Watermelons need consistent care to thrive. Here’s what I do:
* Watering: Watermelons need plenty of water, especially during hot, dry weather. Water deeply and regularly, aiming for about 1-2 inches of water per week. Avoid overhead watering, as this can lead to fungal diseases. Drip irrigation is ideal.
* Fertilizing: Watermelons are heavy feeders and benefit from regular fertilization. Use a balanced fertilizer or a fertilizer specifically formulated for melons. Follow the instructions on the fertilizer label. I like to side-dress my watermelons with compost tea every few weeks.
* Weeding: Keep the planting area free of weeds, as weeds can compete with watermelons for nutrients and water. Hand-pull weeds or use a hoe to remove them.
* Pruning: Pruning watermelons can improve air circulation and fruit production. Remove any suckers (small shoots that grow from the base of the plant) and any yellowing or diseased leaves.
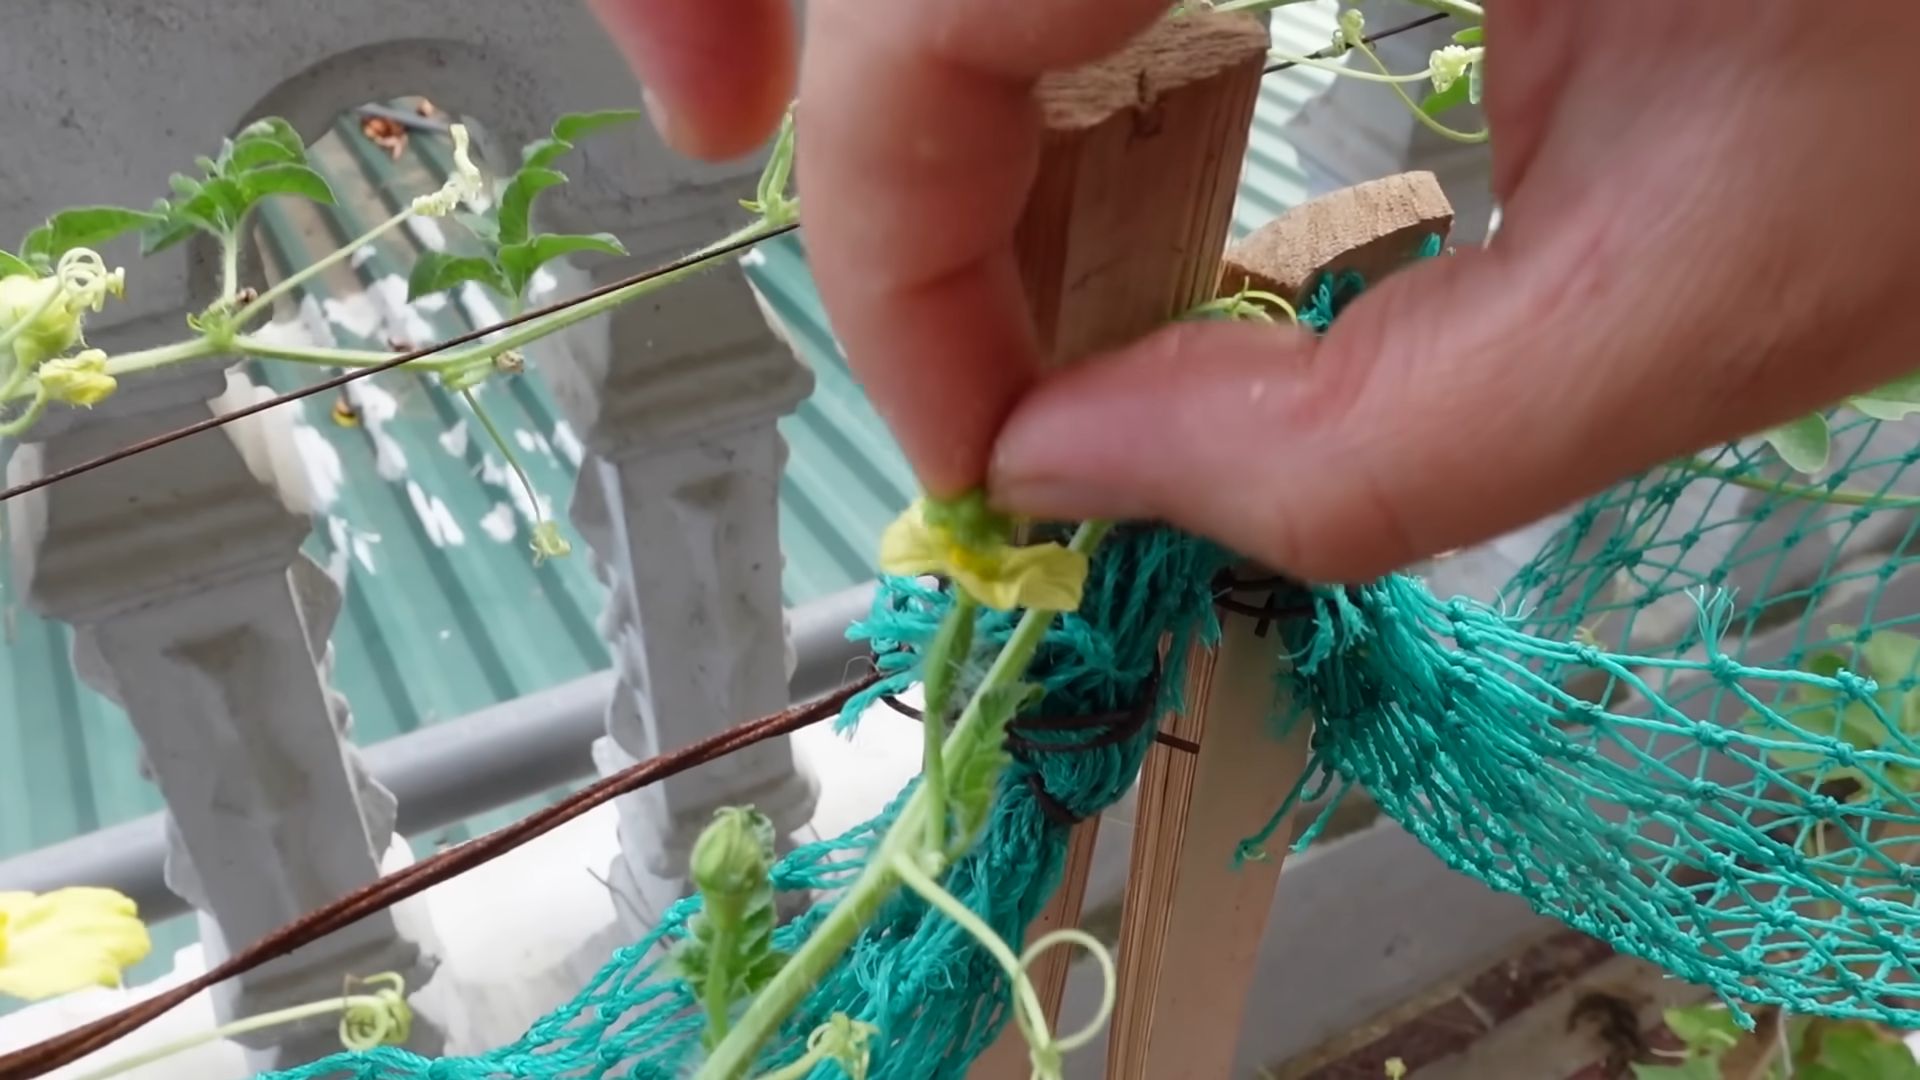
* Pollination: Watermelons need to be pollinated to produce fruit. Bees are the primary pollinators. If you don’t have enough bees in your garden, you may need to hand-pollinate the flowers. To hand-pollinate, use a small paintbrush to transfer pollen from the male flowers to the female flowers. Female flowers have a small, immature watermelon at the base of the flower.
* Pest and Disease Control: Watermelons can be susceptible to pests and diseases, such as aphids, squash bugs, vine borers, and powdery mildew. Inspect your plants regularly for signs of pests or diseases. Use organic pest control methods, such as insecticidal soap or neem oil, to control pests. Use a fungicide to control fungal diseases.
Protecting Your Watermelons
As your watermelons grow, you may need to protect them from pests and diseases.
* Ground Rot: To prevent ground rot, place a piece of cardboard or straw under each watermelon to keep it from touching the soil.
* Pests: Cover your watermelons with netting to protect them from pests, such as birds and rodents.
* Sunburn: If your watermelons are exposed to intense sunlight, cover them with shade cloth to prevent sunburn.
Harvesting Your Watermelons
Knowing when to harvest your watermelons is key to enjoying their full flavor. Here are a few signs that your watermelons are ripe:
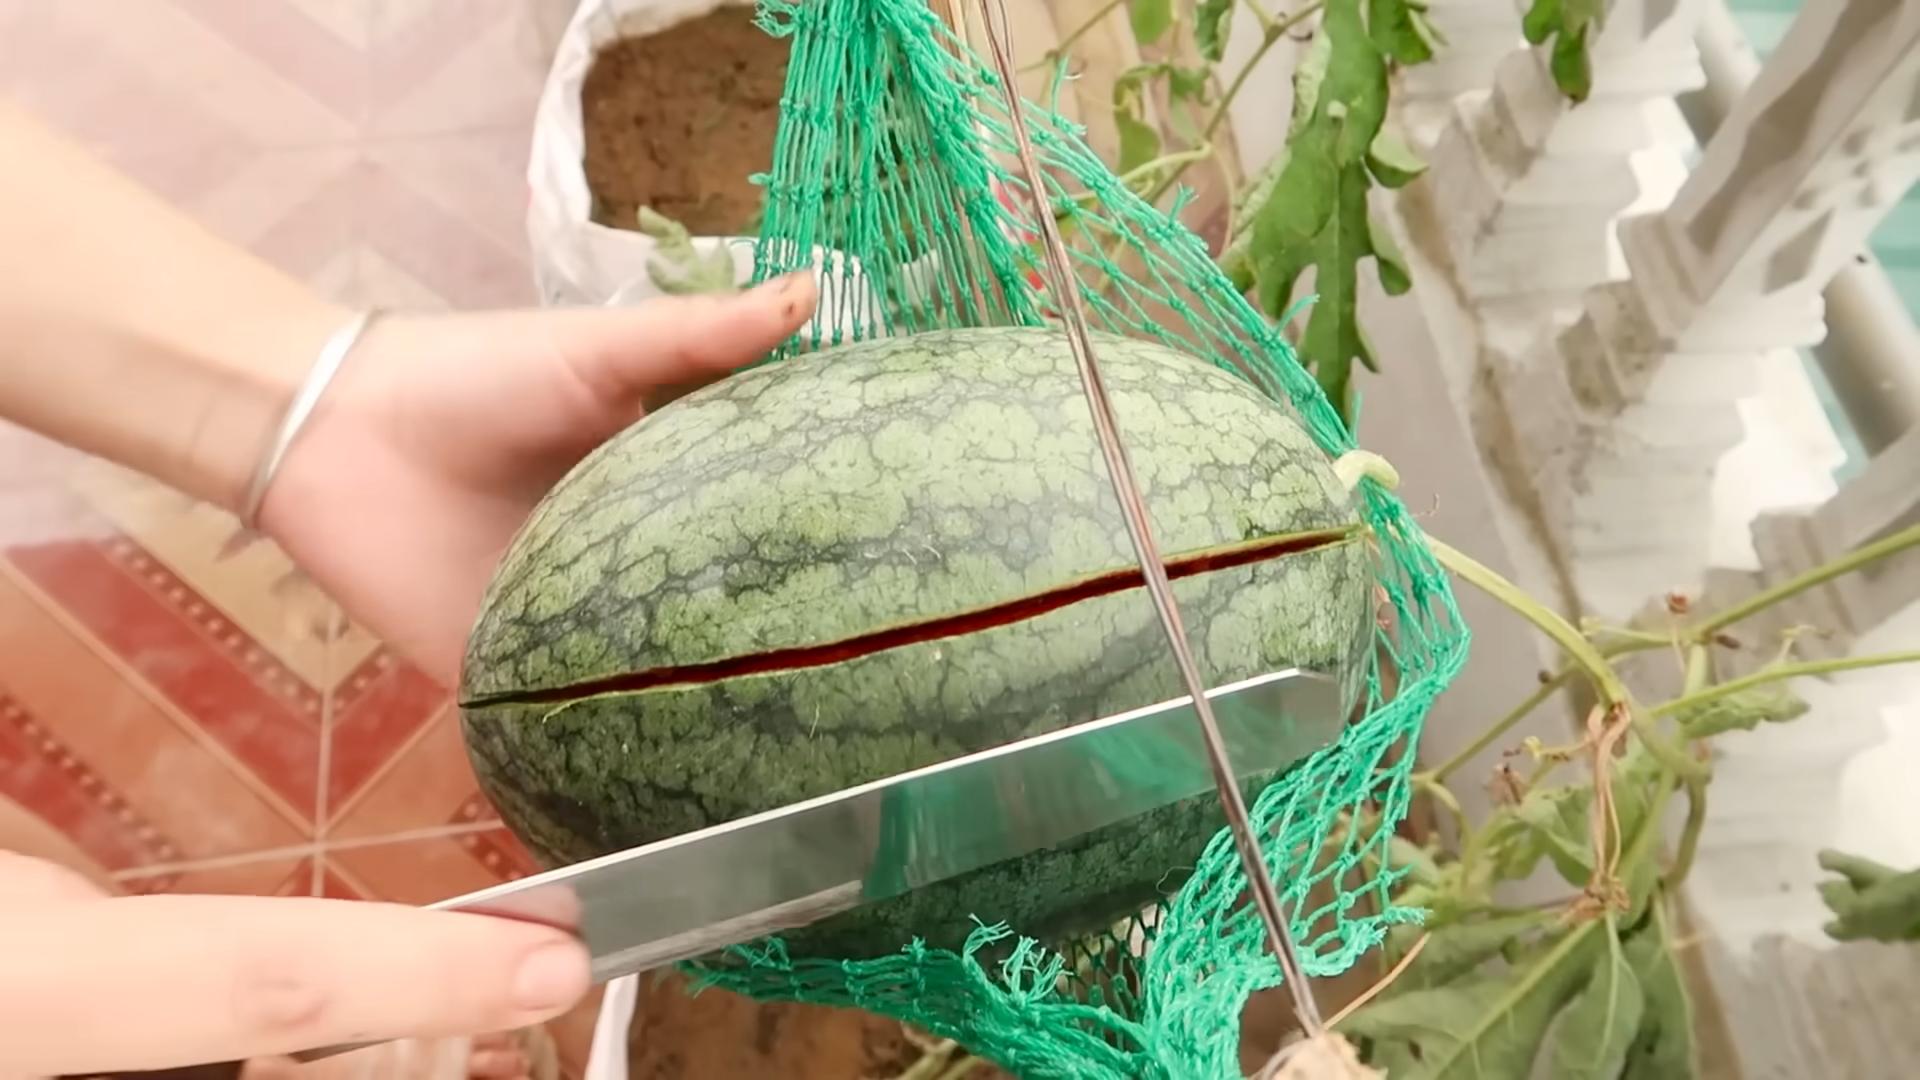
* The tendril closest to the fruit turns brown and dry.
* The bottom of the watermelon (the part that touches the ground) turns from white to yellow.
* The watermelon sounds hollow when you thump it.
* The rind is dull and waxy.
To harvest your watermelons, use a sharp knife to cut the stem close to the fruit. Handle the watermelons carefully to avoid bruising them.
Enjoying Your Homegrown Watermelons
Congratulations! You’ve successfully grown your own watermelons. Now it’s time to enjoy the fruits (or rather, the melons) of your labor. Slice them up and enjoy them fresh, or use them in your favorite recipes. Watermelon juice, watermelon salad, and grilled watermelon are all delicious options.
I hope this guide has been helpful. With a little patience and effort, you can grow your own delicious watermelons right in your backyard. Happy gardening!
Conclusion
So, there you have it! Growing watermelons doesn’t have to be a daunting task reserved for seasoned gardeners. With a few simple tricks and a little bit of patience, you can cultivate your own juicy, refreshing watermelons right in your backyard. This DIY approach, focusing on optimizing soil conditions, providing adequate support, and employing strategic watering techniques, is a game-changer for anyone who’s ever dreamed of biting into a homegrown watermelon.
Why is this DIY trick a must-try? Because it empowers you to take control of the entire growing process, from seed to slice. You’ll know exactly what went into your watermelon, avoiding the potential pesticides and unknown practices of commercially grown fruit. Plus, there’s an unparalleled satisfaction in nurturing a plant from a tiny seed into a sprawling vine laden with delicious fruit. It’s a rewarding experience that connects you to nature and provides a healthy, sustainable food source.
But the benefits don’t stop there. This method is also incredibly adaptable. Feel free to experiment with different watermelon varieties. Perhaps you’re drawn to the classic Crimson Sweet, or maybe you’re intrigued by the smaller, personal-sized Sugar Baby. You could even try growing yellow or orange-fleshed watermelons for a unique twist.
Consider variations in your support system as well. While a simple trellis works wonders, you could also use slings made from old t-shirts or pantyhose to provide extra support for heavier fruits. If you’re growing in containers, ensure they’re large enough to accommodate the watermelon’s extensive root system and consider using a self-watering system to maintain consistent moisture levels.
Another variation to consider is companion planting. Marigolds can help deter pests, while basil can improve the overall health of your watermelon plants. Experiment with different combinations to find what works best in your garden.
Ultimately, the key to success lies in observation and adaptation. Pay close attention to your watermelon plants, noting their growth patterns, leaf color, and overall health. Adjust your watering and fertilization schedule as needed, and don’t be afraid to experiment with different techniques to find what works best in your specific environment.
We are confident that this DIY guide will significantly increase your chances of a successful watermelon harvest. Don’t just take our word for it, though. We wholeheartedly encourage you to try this DIY trick for growing watermelons easily and share your experiences with us. Let us know what varieties you tried, what challenges you faced, and what successes you celebrated. Share your photos and tips in the comments section below. Together, we can create a community of watermelon enthusiasts, sharing knowledge and inspiring each other to grow the best watermelons possible. So, grab your seeds, prepare your soil, and get ready to enjoy the sweet taste of homegrown success!
Frequently Asked Questions (FAQ)
What kind of soil is best for growing watermelons?
Watermelons thrive in well-drained, sandy loam soil that is rich in organic matter. The ideal pH level is between 6.0 and 6.8. Before planting, amend your soil with compost or well-rotted manure to improve its fertility and drainage. Avoid heavy clay soils, as they can retain too much moisture and lead to root rot. If you have clay soil, consider growing your watermelons in raised beds or containers.
How much sunlight do watermelons need?
Watermelons are sun-loving plants and require at least 6-8 hours of direct sunlight per day to produce abundant, sweet fruit. Choose a planting location that receives full sun throughout the day. If you live in a particularly hot climate, some afternoon shade may be beneficial to prevent sunscald on the developing fruits.
How often should I water my watermelon plants?
Watermelons need consistent moisture, especially during fruit development. Water deeply and regularly, aiming for about 1-2 inches of water per week. Avoid overhead watering, as this can promote fungal diseases. Instead, water at the base of the plants, using a soaker hose or drip irrigation system. Reduce watering as the fruits begin to ripen to concentrate the sugars and improve their flavor.
When should I fertilize my watermelon plants?
Fertilize your watermelon plants at planting time with a balanced fertilizer, such as 10-10-10. Side-dress with a nitrogen-rich fertilizer when the vines begin to run and again when the fruits start to set. Avoid over-fertilizing, as this can lead to excessive vine growth at the expense of fruit production. You can also use organic fertilizers, such as compost tea or fish emulsion.
How do I know when my watermelons are ripe?
Determining when a watermelon is ripe can be tricky, but there are several indicators to look for. First, check the tendril closest to the fruit stem. When this tendril turns brown and dries up, it’s a good sign that the watermelon is nearing ripeness. Second, examine the underside of the watermelon where it rests on the ground. This spot, known as the ground spot, should turn from white to a creamy yellow color. Finally, thump the watermelon with your knuckles. A ripe watermelon will sound hollow and deep.
What are some common pests and diseases that affect watermelons?
Common pests that attack watermelons include aphids, squash bugs, and vine borers. Aphids can be controlled with insecticidal soap or neem oil. Squash bugs can be handpicked or trapped under boards placed near the plants. Vine borers can be prevented by wrapping the base of the stems with aluminum foil or netting. Common diseases that affect watermelons include powdery mildew, fusarium wilt, and anthracnose. Powdery mildew can be treated with fungicides or by improving air circulation around the plants. Fusarium wilt and anthracnose are difficult to control, so prevention is key. Choose disease-resistant varieties and practice crop rotation.
Can I grow watermelons in containers?
Yes, you can grow watermelons in containers, but you’ll need a large container (at least 20 gallons) to accommodate the plant’s extensive root system. Choose a dwarf or bush variety of watermelon that is better suited for container growing. Use a well-draining potting mix and provide adequate support for the vines. Water and fertilize regularly, as container-grown plants tend to dry out and deplete nutrients more quickly.
How do I prevent my watermelons from cracking?
Watermelon cracking is often caused by inconsistent watering, especially after a period of drought. To prevent cracking, maintain consistent soil moisture levels throughout the growing season. Avoid overwatering, as this can also contribute to cracking. Mulching around the plants can help retain moisture and prevent soil from drying out too quickly.
How do I pollinate my watermelon flowers?
Watermelons have separate male and female flowers. Pollination is necessary for fruit development. Bees are the primary pollinators of watermelons, so encourage them to visit your garden by planting pollinator-friendly flowers. If you don’t have enough bees, you can hand-pollinate the flowers by transferring pollen from the male flowers to the female flowers using a small brush. The female flowers have a small, immature watermelon at the base of the flower.
What are some good companion plants for watermelons?
Good companion plants for watermelons include marigolds, basil, nasturtiums, and radishes. Marigolds deter pests, while basil improves the overall health of the watermelon plants. Nasturtiums attract beneficial insects, and radishes can help break up the soil and improve drainage. Avoid planting watermelons near potatoes or tomatoes, as they can compete for nutrients.
Leave a Comment