

Grow Winged Beans, and unlock a world of culinary possibilities right in your backyard! Have you ever dreamt of harvesting a vegetable that’s not only delicious but also incredibly versatile? Imagine impressing your friends and family with a unique ingredient they’ve likely never tasted before. This isn’t just about gardening; it’s about embarking on a flavorful adventure!
Winged beans, also known as Goa beans, have a rich history, particularly in Southeast Asia and Papua New Guinea, where they’ve been cultivated for centuries. They’re a staple crop, providing a vital source of protein and nutrients. For generations, these communities have understood the incredible potential of this plant, utilizing every part from the pods to the roots.
But why should you grow winged beans? In today’s world, where we’re increasingly conscious of food security and sustainable living, this plant offers a fantastic solution. It’s relatively easy to grow, even in small spaces, and it’s packed with nutritional benefits. Plus, with rising grocery costs, having a readily available source of fresh, organic produce is more appealing than ever. This DIY guide will equip you with all the knowledge and simple tricks you need to successfully cultivate these amazing beans, ensuring a bountiful harvest and a delightful addition to your meals. I’m excited to share my tips and tricks with you!
Flügelbohnen Anbauen: Dein DIY-Leitfaden für eine Exotische Ernte
Hey Gartenfreunde! Habt ihr schon mal von Flügelbohnen gehört? Diese faszinierenden Pflanzen sind nicht nur wunderschön, sondern auch unglaublich nahrhaft. Alle Teile der Pflanze – von den Blättern über die Schoten bis hin zu den Wurzeln – sind essbar! Ich zeige euch, wie ihr diese exotische Köstlichkeit in eurem eigenen Garten anbauen könnt. Keine Angst, es ist einfacher als ihr denkt!
Was sind Flügelbohnen überhaupt?
Flügelbohnen (Psophocarpus tetragonolobus), auch Goabohnen oder Spargelbohnen genannt, sind tropische Hülsenfrüchte, die für ihre vierflügeligen Schoten bekannt sind. Sie sind reich an Proteinen, Vitaminen und Mineralstoffen und eine tolle Ergänzung für jede Küche. Sie sind nicht nur lecker, sondern auch ein echter Hingucker im Garten.
Warum Flügelbohnen anbauen?
* Nährstoffreich: Wie bereits erwähnt, sind Flügelbohnen vollgepackt mit wichtigen Nährstoffen.
* Vielseitig: Du kannst die Blätter wie Spinat, die Schoten wie grüne Bohnen, die Samen wie Sojabohnen und die Wurzeln wie Kartoffeln zubereiten.
* Attraktiv: Die Pflanzen haben wunderschöne blaue oder violette Blüten und die geflügelten Schoten sind einfach einzigartig.
* Bodenverbesserung: Als Leguminose fixieren Flügelbohnen Stickstoff im Boden und verbessern so die Bodenqualität.
* Gesundheitliche Vorteile: Es wird angenommen, dass Flügelbohnen entzündungshemmende und antioxidative Eigenschaften haben.
Die Vorbereitung: Was du brauchst
Bevor wir loslegen, hier eine Liste der Dinge, die du für den Anbau von Flügelbohnen benötigst:
* Flügelbohnensamen (am besten von einem vertrauenswürdigen Anbieter)
* Anzuchttöpfe oder -schalen
* Anzuchterde
* Gartenerde (gut durchlässig und nährstoffreich)
* Kompost oder organischer Dünger
* Ein sonniger Standort (mindestens 6 Stunden Sonne pro Tag)
* Ein Rankgerüst oder eine andere Stützstruktur (Flügelbohnen sind Kletterpflanzen!)
* Gießkanne oder Gartenschlauch
* Geduld und Liebe zum Gärtnern!
Schritt-für-Schritt-Anleitung: Flügelbohnen selbst anziehen
1. Samen vorbereiten (Optional, aber empfehlenswert)
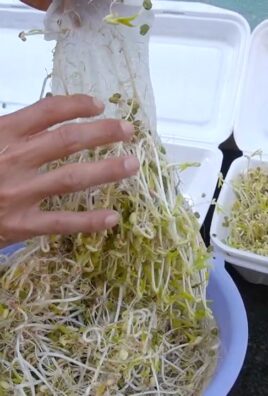
Flügelbohnensamen haben eine harte Schale, daher kann es hilfreich sein, sie vor dem Pflanzen vorzubereiten, um die Keimung zu beschleunigen. Es gibt zwei gängige Methoden:
1. Anritzen: Verwende ein scharfes Messer oder eine Nagelfeile, um die Samenschale leicht anzuritzen. Sei vorsichtig, dass du das Innere des Samens nicht beschädigst.
2. Einweichen: Lege die Samen für 12-24 Stunden in lauwarmes Wasser. Das hilft, die Schale aufzuweichen.
Ich persönlich bevorzuge das Einweichen, da es weniger riskant ist.
2. Aussaat in Anzuchttöpfen
1. Fülle deine Anzuchttöpfe oder -schalen mit Anzuchterde.
2. Drücke die Erde leicht an.
3. Lege in jeden Topf 2-3 Samen, etwa 2-3 cm tief.
4. Bedecke die Samen mit Erde und gieße sie vorsichtig an.
5. Stelle die Töpfe an einen warmen, hellen Ort. Eine Temperatur von 20-25°C ist ideal.
6. Halte die Erde feucht, aber nicht nass.
3. Keimung und Pflege der Sämlinge
1. Die Keimung dauert in der Regel 7-14 Tage.
2. Sobald die Sämlinge aufgegangen sind, dünne sie aus, sodass nur der stärkste Sämling pro Topf übrig bleibt.
3. Gieße die Sämlinge regelmäßig und achte darauf, dass die Erde nicht austrocknet.
4. Sobald die Sämlinge einige Blätter haben, kannst du sie vorsichtig umtopfen, falls nötig.
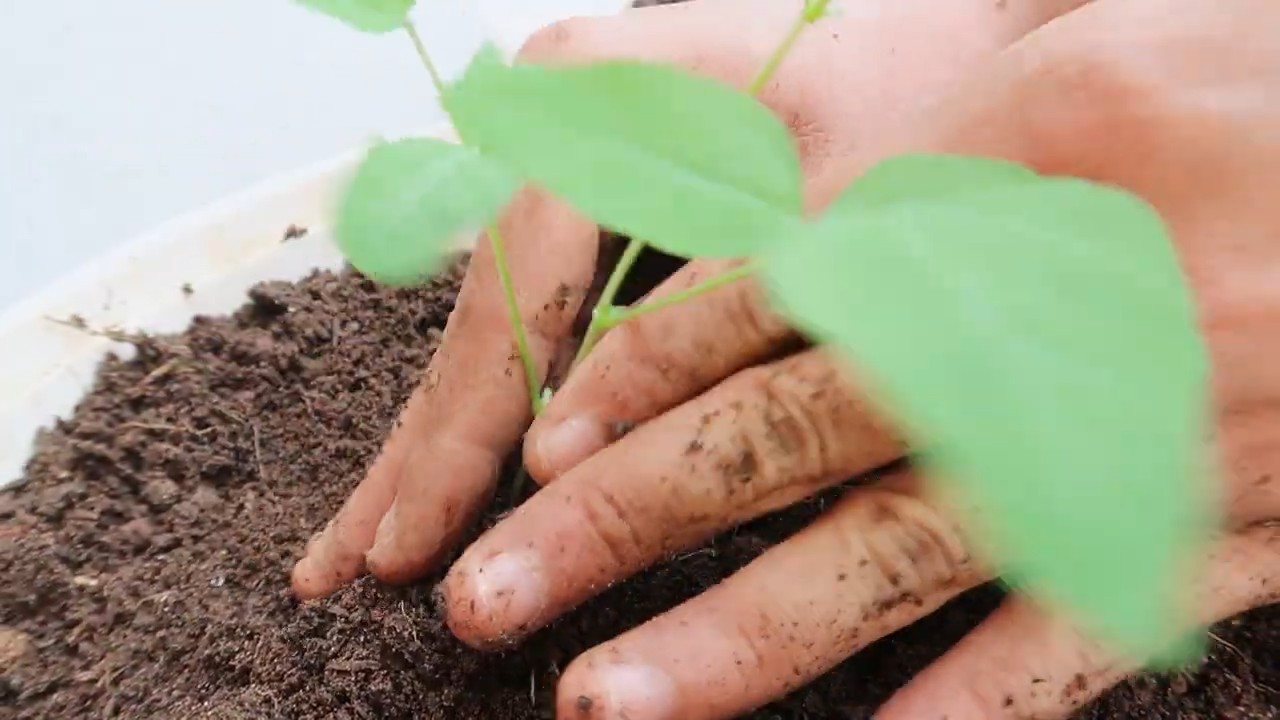
4. Auspflanzen ins Freie
1. Wähle einen sonnigen Standort in deinem Garten mit gut durchlässiger Erde.
2. Bereite den Boden vor, indem du Kompost oder organischen Dünger einarbeitest.
3. Pflanze die Sämlinge aus, sobald keine Frostgefahr mehr besteht und die Bodentemperatur mindestens 15°C beträgt.
4. Achte darauf, dass die Sämlinge ausreichend Platz haben (etwa 30-45 cm Abstand).
5. Gieße die Sämlinge nach dem Auspflanzen gründlich an.
5. Rankgerüst installieren
Flügelbohnen sind Kletterpflanzen und benötigen eine Stützstruktur, um zu wachsen. Du kannst ein Rankgerüst, einen Zaun oder sogar einen Baum als Stütze verwenden.
1. Installiere das Rankgerüst in der Nähe der ausgepflanzten Sämlinge.
2. Leite die jungen Triebe vorsichtig an das Rankgerüst.
3. Die Pflanzen werden sich dann selbstständig daran hochranken.
6. Pflege der Flügelbohnenpflanzen
1. Gießen: Gieße die Pflanzen regelmäßig, besonders während trockener Perioden. Achte darauf, dass die Erde feucht, aber nicht nass ist.
2. Düngen: Dünge die Pflanzen alle paar Wochen mit einem organischen Dünger.
3. Unkrautbekämpfung: Halte den Bereich um die Pflanzen unkrautfrei.
4. Schädlinge und Krankheiten: Flügelbohnen sind relativ resistent gegen Schädlinge und Krankheiten. Achte jedoch auf Blattläuse, Raupen und Pilzkrankheiten. Bei Bedarf kannst du biologische Schädlingsbekämpfungsmittel einsetzen.
5. Beschneiden: Du kannst die Pflanzen beschneiden, um das Wachstum zu fördern und die Ernte zu erleichtern. Entferne einfach abgestorbene oder beschädigte Triebe.
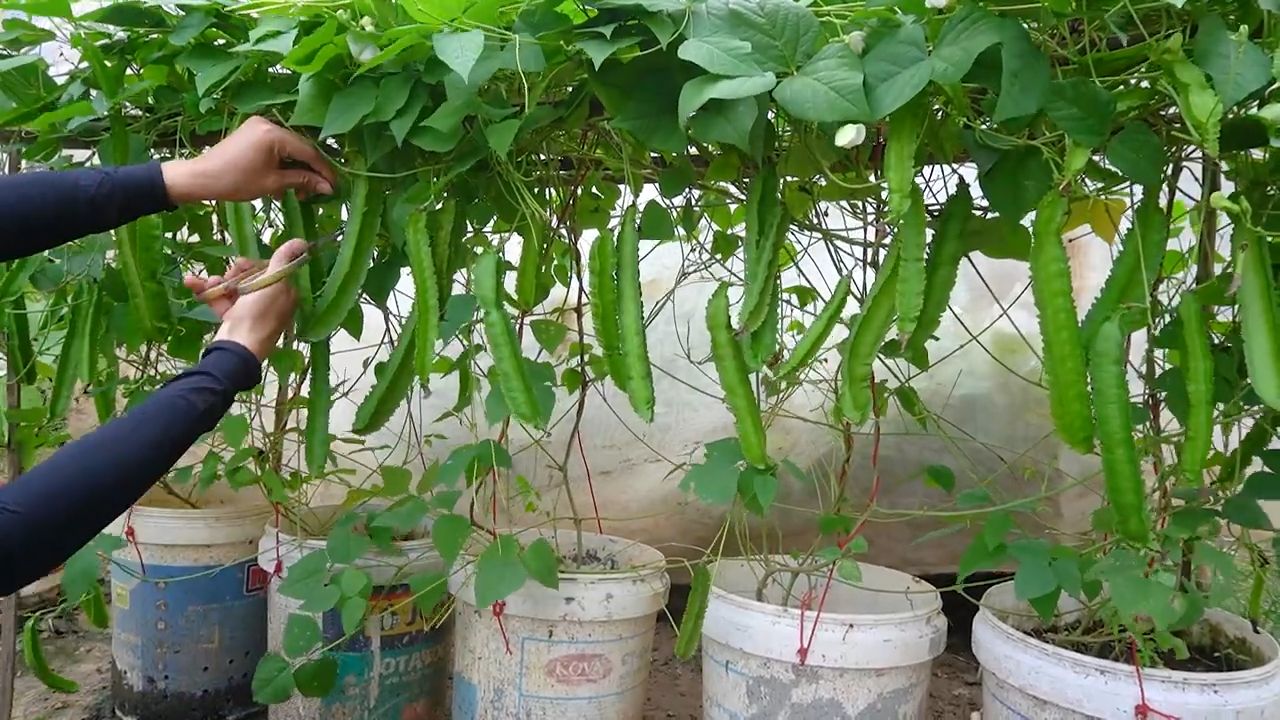
7. Erntezeit!
Die Erntezeit hängt von der Sorte und den klimatischen Bedingungen ab. In der Regel kannst du etwa 2-3 Monate nach dem Auspflanzen mit der Ernte beginnen.
* Blätter: Die Blätter können jederzeit geerntet werden, solange die Pflanze gesund ist.
* Schoten: Die Schoten sollten geerntet werden, wenn sie jung und zart sind (etwa 10-15 cm lang). Je älter die Schoten werden, desto zäher werden sie.
* Samen: Die Samen können geerntet werden, wenn die Schoten reif und trocken sind.
* Wurzeln: Die Wurzeln können geerntet werden, wenn die Pflanze ausgewachsen ist (etwa 4-6 Monate nach dem Auspflanzen).
Kulinarische Verwendung: Was du mit deinen Flügelbohnen anfangen kannst
Die Möglichkeiten sind endlos! Hier ein paar Ideen:
* Blätter: Gedünstet wie Spinat oder in Salaten.
* Schoten: Gekocht, gebraten, gedünstet oder roh in Salaten.
* Samen: Geröstet als Snack oder in Suppen und Eintöpfen.
* Wurzeln: Gekocht, gebacken oder gebraten wie Kartoffeln.
Ich liebe es, die jungen Schoten in einem Wok-Gericht mit Gemüse und Tofu zu verwenden. Sie sind auch eine tolle Ergänzung für Currys.
Häufige Fehler vermeiden
* Zu wenig Sonne: Flügelbohnen brauchen viel Sonne, um gut zu wachsen.
* Schlechte Drainage: Staunässe kann zu Wurzelfäule führen. Achte auf eine gute Drainage.
* Kein Rankgerüst: Ohne Stützstruktur können die Pflanzen nicht richtig wachsen und die Ernte wird erschwert.
* Zu späte Ernte: Wenn die Schoten zu alt werden, werden sie zäh und bitter.
* Falsche Düngung: Überdüngung kann zu Problemen führen. Verwende am besten organischen Dünger.
Extra-Tipps für den Erfolg
* Wähle die richtige Sorte: Es gibt verschiedene Sorten von Flügelbohnen
Conclusion
So, there you have it! Growing winged beans isn’t just about adding another vegetable to your garden; it’s about embarking on a rewarding horticultural adventure. From the vibrant purple flowers to the uniquely shaped pods, every stage of the winged bean’s growth is a visual treat. But beyond the aesthetics, you’re cultivating a powerhouse of nutrition, a plant that’s both delicious and incredibly beneficial for your health.
This DIY approach to growing winged beans, especially if you’re starting from seed, offers a level of control and satisfaction that you simply can’t get from buying them at the store (if you can even find them!). You get to choose the specific variety that suits your taste and climate, ensuring the freshest, most flavorful beans possible. Plus, you’re contributing to a more sustainable food system by reducing your reliance on commercially grown produce.
Why is this DIY trick a must-try? Because it empowers you to grow a truly unique and nutritious crop, even in limited spaces. Winged beans are climbers, so they thrive on trellises or fences, making them ideal for urban gardens or small backyards. They’re also relatively low-maintenance, requiring minimal effort once established. And let’s not forget the sheer novelty of growing something that most people have never even heard of! Imagine the conversations you’ll spark when you serve up a dish featuring your homegrown winged beans.
But the beauty of gardening lies in its adaptability. Feel free to experiment with different growing techniques. Try companion planting with other nitrogen-fixing legumes to further enrich the soil. Explore different trellising methods to maximize your yield. Consider growing winged beans in containers if you have limited space or want to move them indoors during colder months. You can even try different varieties of winged beans, each with its own unique flavor profile and growth habit. Some varieties are better suited for warmer climates, while others are more tolerant of cooler temperatures.
Don’t be afraid to get your hands dirty and embrace the learning process. Gardening is all about trial and error, and every mistake is an opportunity to learn and improve. The most important thing is to start!
We wholeheartedly encourage you to try this DIY trick for growing winged beans. It’s a fun, rewarding, and ultimately delicious experience. And once you’ve harvested your first crop, we’d love to hear about it! Share your experiences, tips, and photos in the comments below. Let’s create a community of winged bean enthusiasts and spread the word about this amazing plant. What challenges did you face? What successes did you celebrate? What unique recipes did you create? Your insights could help other gardeners discover the joy of growing winged beans. So, grab your seeds, prepare your soil, and get ready to embark on a winged bean adventure! Happy gardening!
Frequently Asked Questions (FAQ)
What exactly are winged beans, and why should I grow them?
Winged beans (Psophocarpus tetragonolobus) are a legume native to Southeast Asia. They are unique because almost every part of the plant is edible, including the pods, leaves, flowers, seeds, and tubers. They are incredibly nutritious, packed with protein, vitamins, and minerals. Growing them yourself ensures you have access to fresh, high-quality produce that you might not find in your local grocery store. Plus, they are a beautiful and interesting addition to any garden.
How do I start growing winged beans from seed?
Starting from seed is a great way to cultivate winged beans. First, soak the seeds in warm water for 24 hours to improve germination rates. Then, plant them about an inch deep in well-draining soil. You can start them indoors in seed trays or directly in the ground after the last frost. Ensure the soil is consistently moist but not waterlogged. Winged beans prefer warm temperatures, so wait until the soil has warmed up before planting outdoors.
What kind of support system do winged beans need?
Winged beans are climbing plants, so they require a sturdy support system such as a trellis, fence, or even a strong stake. The support should be at least 6-8 feet tall to accommodate their vigorous growth. You can train the vines to climb the support by gently guiding them in the right direction.
What are the ideal growing conditions for winged beans?
Winged beans thrive in warm, humid climates with plenty of sunshine. They prefer well-draining soil that is rich in organic matter. Aim for at least 6-8 hours of direct sunlight per day. They are relatively drought-tolerant once established, but regular watering is essential during dry periods.
How often should I water and fertilize my winged beans?
Water your winged beans regularly, especially during hot and dry weather. The soil should be consistently moist but not waterlogged. Avoid overhead watering, as this can increase the risk of fungal diseases. Fertilize your winged beans every few weeks with a balanced fertilizer or compost tea. Avoid over-fertilizing, as this can lead to excessive foliage growth at the expense of pod production.
What are some common pests and diseases that affect winged beans?
Winged beans are generally resistant to pests and diseases, but they can be susceptible to aphids, spider mites, and fungal diseases such as powdery mildew. Inspect your plants regularly for signs of infestation or disease. Treat any problems promptly with organic pest control methods or fungicides.
When can I harvest winged beans?
You can harvest the pods when they are young and tender, typically about 6-8 inches long. The pods should be firm and snap easily when bent. You can also harvest the leaves, flowers, and tubers at various stages of growth. The tubers can be harvested after the plant has died back in the fall.
How do I store winged beans?
Freshly harvested winged bean pods can be stored in the refrigerator for up to a week. You can also freeze them for longer storage. To freeze, blanch the pods in boiling water for a few minutes, then plunge them into ice water to stop the cooking process. Drain well and store in freezer bags.
Can I grow winged beans in containers?
Yes, you can grow winged beans in containers, but you will need a large container (at least 15-20 gallons) to accommodate their root system. Use a well-draining potting mix and provide a sturdy trellis for the vines to climb. Container-grown winged beans may require more frequent watering and fertilization than those grown in the ground.
What are some ways to cook with winged beans?
Winged beans are incredibly versatile in the kitchen. The young pods can be eaten raw in salads or stir-fried, steamed, or boiled. The leaves can be used like spinach, and the flowers can be added to salads or used as a garnish. The seeds can be roasted and eaten like nuts, or ground into flour. The tubers can be boiled, baked, or fried like potatoes. Experiment with different recipes and find your favorite way to enjoy this delicious and nutritious vegetable.

Leave a Comment