

Growing Black Tomatoes might seem like a mysterious endeavor reserved for seasoned gardeners, but I’m here to tell you it’s totally achievable, even if you’re just starting out! Forget those bland, store-bought tomatoes – imagine sinking your teeth into a juicy, dark, and intensely flavorful homegrown beauty.
The allure of black tomatoes extends beyond their striking appearance. These varieties, often heirlooms, boast a rich history, with some tracing their origins back to Eastern Europe and Russia. For generations, gardeners have carefully cultivated these unique fruits, preserving their distinct taste and characteristics. Think of it as connecting with a legacy every time you harvest one!
Why should you embark on this growing black tomatoes adventure? Well, beyond the bragging rights (and trust me, you’ll have them!), black tomatoes offer a flavor profile unlike any other. They’re often described as having a smoky, earthy sweetness that elevates salads, sauces, and even just a simple slice with salt and pepper. Plus, with rising food costs and a desire for healthier, more sustainable living, growing your own food is more appealing than ever. I’m going to share some simple DIY tricks and hacks that will help you cultivate a thriving black tomato patch, regardless of your experience level. Get ready to impress your friends and family with the most delicious tomatoes they’ve ever tasted!
Growing Black Tomatoes: A DIY Guide to Deep, Dark Deliciousness
Okay, tomato lovers, let’s talk about something truly special: black tomatoes! These aren’t your average garden variety red or yellow orbs. Black tomatoes offer a unique, smoky-sweet flavor and a stunning visual appeal that will make your garden the envy of the neighborhood. I’m going to walk you through everything you need to know to successfully grow these beauties yourself. Trust me, it’s easier than you think!
Choosing Your Black Tomato Variety
First things first, you need to decide which type of black tomato you want to grow. There are several varieties, each with its own distinct characteristics. Here are a few popular choices:
* Black Krim: This is a classic black tomato, known for its rich, slightly salty flavor and flattened shape. It’s a good choice for slicing and sandwiches.
* Cherokee Purple: Despite the name, this is technically a black tomato with a dusky rose-purple hue. It has a complex, sweet flavor and is a favorite among heirloom tomato enthusiasts.
* Black Prince: A smaller, more compact variety, Black Prince tomatoes are known for their early maturity and intense flavor. They’re great for salads and snacking.
* Paul Robeson: This Russian heirloom is prized for its smooth, almost creamy texture and smoky-sweet taste. It’s a good choice for sauces and soups.
* Japanese Black Trifele: Pear-shaped and beautiful, this variety offers a unique look and a rich, complex flavor.
Consider your taste preferences, growing space, and climate when making your selection. I personally love Black Krim for its classic flavor and Cherokee Purple for its sheer beauty.
Getting Started: Seeds vs. Seedlings
You have two options for starting your black tomato plants: from seed or from seedlings.
* Starting from Seed: This gives you more control over the entire process and allows you to choose from a wider variety of cultivars. However, it requires more time and effort.
* Buying Seedlings: This is a quicker and easier option, especially for beginners. You can find seedlings at most garden centers in the spring.
I usually start my tomatoes from seed indoors about 6-8 weeks before the last expected frost. It gives them a head start and ensures I get the varieties I want.
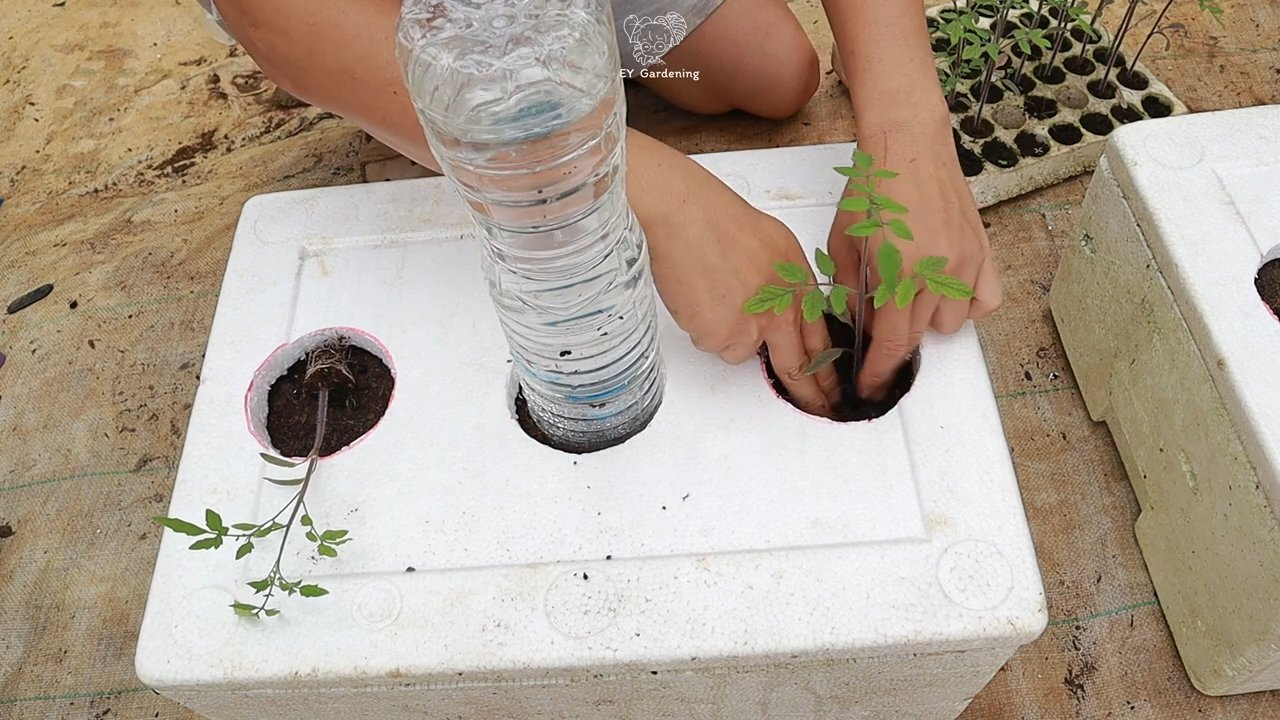
Starting Black Tomato Seeds Indoors (My Preferred Method)
Here’s a step-by-step guide to starting your black tomato seeds indoors:
1. Gather Your Supplies: You’ll need:
* Tomato seeds (of your chosen black tomato variety)
* Seed starting trays or small pots
* Seed starting mix (a sterile, lightweight soil mix)
* A spray bottle filled with water
* A heat mat (optional, but recommended)
* A grow light (optional, but recommended)
* A clear plastic dome or plastic wrap (to create humidity)
2. Sow the Seeds: Fill your seed starting trays or pots with seed starting mix. Moisten the mix with the spray bottle until it’s damp but not soggy. Sow 2-3 seeds per cell or pot, about 1/4 inch deep. Gently cover the seeds with more seed starting mix.
3. Provide Warmth and Humidity: Place the seed starting trays or pots on a heat mat (if using) and cover them with a clear plastic dome or plastic wrap. This will help to create a warm, humid environment that’s ideal for germination.
4. Maintain Moisture: Check the soil moisture daily and mist with the spray bottle as needed to keep it consistently damp. Avoid overwatering, as this can lead to fungal diseases.
5. Provide Light: Once the seeds germinate (usually within 5-10 days), remove the plastic dome or plastic wrap and place the seedlings under a grow light (if using). If you don’t have a grow light, place them in a sunny window that receives at least 6 hours of direct sunlight per day.
6. Thin the Seedlings: Once the seedlings have developed their first true leaves (the leaves that appear after the initial seed leaves), thin them to one seedling per cell or pot. Choose the strongest, healthiest-looking seedling and snip off the others at the soil line.
7. Harden Off the Seedlings: About a week before you plan to transplant the seedlings outdoors, you’ll need to harden them off. This means gradually exposing them to outdoor conditions to help them acclimate. Start by placing them outdoors in a sheltered location for a few hours each day, gradually increasing the amount of time they spend outdoors over the course of a week.
Transplanting Your Black Tomato Seedlings Outdoors
Once your seedlings are hardened off and the danger of frost has passed, it’s time to transplant them into your garden.
1. Choose a Sunny Location: Black tomatoes need at least 6-8 hours of direct sunlight per day to thrive. Choose a location in your garden that receives plenty of sun.
2. Prepare the Soil: Black tomatoes prefer well-drained soil that is rich in organic matter. Amend your soil with compost or well-rotted manure before planting.
3. Dig the Holes: Dig holes that are slightly larger than the root balls of your seedlings. Space the holes about 2-3 feet apart, depending on the variety of tomato you’re growing.
4. Plant the Seedlings: Gently remove the seedlings from their pots or trays and place them in the holes. Make sure the top of the root ball is level with the surrounding soil.
5. Bury the Stem (Optional): For extra strong plants, you can bury the bottom portion of the stem when you transplant. Tomatoes will grow roots from the buried stem, creating a more robust root system. Just pinch off the lower leaves before planting.
6. Water Thoroughly: Water the seedlings thoroughly after planting.
7. Add Support: Black tomato plants can get quite large and heavy, so it’s important to provide them with support. You can use stakes, cages, or trellises. I prefer cages because they provide all-around support and are easy to install.
Caring for Your Black Tomato Plants
Once your black tomato plants are in the ground, it’s important to provide them with proper care to ensure a bountiful harvest.
* Watering: Water your tomato plants deeply and regularly, especially during hot, dry weather. Aim to water at the base of the plant to avoid wetting the foliage, which can lead to fungal diseases.
* Fertilizing: Fertilize your tomato plants every 2-3 weeks with a balanced fertilizer. Look for a fertilizer that is specifically formulated for tomatoes. I like to use a liquid fertilizer that I can apply with a watering can.
* Pruning: Pruning your tomato plants can help to improve air circulation and promote fruit production. Remove suckers (the small shoots that grow between the main stem and the branches) regularly.
* Mulching: Mulching around your tomato plants can help to retain moisture, suppress weeds, and regulate soil temperature. Use organic mulch such as straw, hay, or wood chips.
* Pest and Disease Control: Keep an eye out for pests and diseases, such as aphids, tomato hornworms, and early blight. Treat any problems promptly with appropriate organic or chemical controls. I prefer to use organic methods whenever possible.
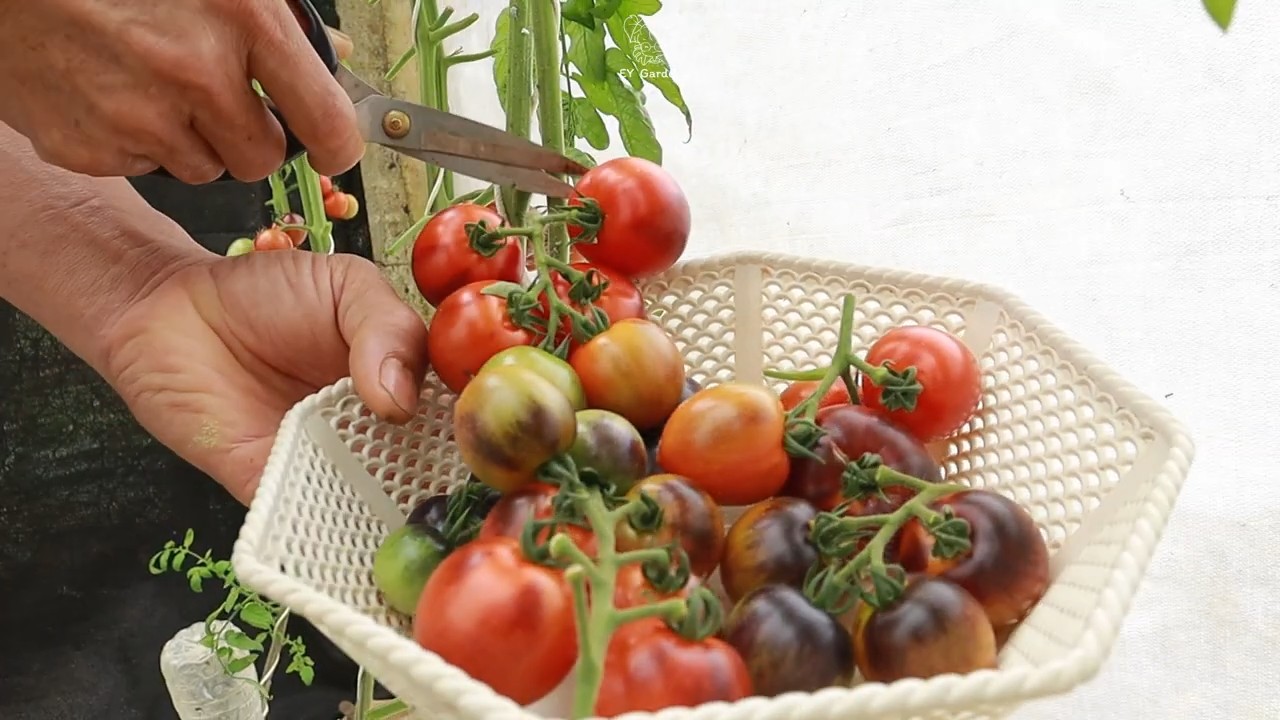
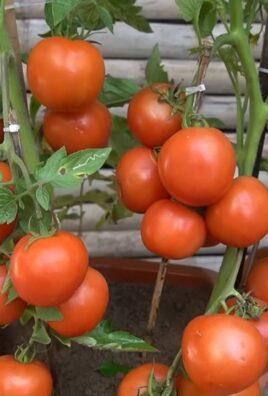
Harvesting Your Black Tomatoes
The moment you’ve been waiting for! Knowing when to harvest your black tomatoes is key to enjoying their full flavor potential.
* Color: Black tomatoes are ripe when they have developed a deep, dark color. The exact shade will vary depending on the variety, but generally, they should be a deep reddish-purple or brownish-black.
* Touch: Ripe black tomatoes will be slightly soft to the touch. They should give a little when you gently squeeze them.
* Smell: Ripe black tomatoes will have a sweet, earthy aroma.
* Ease of Removal: Ripe black tomatoes should easily detach from the vine with a gentle twist.
Harvest your tomatoes regularly as they ripen. This will encourage the plant to produce more fruit.
Troubleshooting Common Problems
Even with the best care, you may encounter some problems when growing black tomatoes. Here are a few common issues and how to address them:
* Blossom End Rot: This is a condition that causes the bottom of the tomato to rot. It’s usually caused by a calcium deficiency. To prevent blossom end rot, make sure your soil is rich in calcium and water your plants consistently. You can also add calcium to the soil by adding crushed eggshells or bone meal.
* Early Blight: This is a fungal disease that causes brown spots on the leaves. To prevent early blight, provide good air circulation around your plants and avoid wetting the foliage when watering. You can also treat early blight with a fungicide.
* Tomato Hornworms: These large green caterpillars can quickly defoliate your tomato plants. Handpick them off the plants and drop them into a bucket of soapy water.
Conclusion
So, there you have it! Growing black tomatoes might seem like a mysterious endeavor reserved for seasoned gardeners, but with these simple DIY tricks, you can unlock the secrets to cultivating these dark, delicious gems right in your own backyard. We’ve demystified the process, providing you with actionable steps to ensure a bountiful harvest of these unique fruits.
Why is this a must-try? Beyond the sheer novelty of growing black tomatoes, you’re investing in a richer, more flavorful experience. These tomatoes boast a complex sweetness with smoky undertones that elevate everything from simple salads to gourmet sauces. Imagine the impressed faces of your friends and family when you present them with a Caprese salad featuring homegrown black tomatoes!
But the benefits extend beyond taste. Black tomatoes are packed with antioxidants, particularly anthocyanins, which contribute to their distinctive color and offer potential health benefits. You’re not just growing tomatoes; you’re growing a powerhouse of nutrition.
Ready to take your tomato game to the next level?
Don’t be afraid to experiment! While we’ve focused on the core principles, there’s plenty of room for personalization. Consider these variations:
* **Companion Planting:** Enhance your tomato patch by planting basil, marigolds, or carrots nearby. These companions can deter pests and improve soil health, leading to even healthier and more productive black tomato plants.
* **Different Varieties:** Explore the diverse world of black tomatoes! From the classic ‘Black Krim’ to the intensely flavored ‘Cherokee Purple’ and the prolific ‘Black Cherry,’ each variety offers a unique taste and texture profile. Experiment to find your favorite!
* **Hydroponics:** For those with limited space or a desire for a controlled environment, consider growing black tomatoes hydroponically. This method can yield impressive results with proper nutrient management.
* **Seed Saving:** Once you’ve successfully grown your black tomatoes, consider saving the seeds for future seasons. This allows you to preserve your favorite varieties and adapt them to your specific growing conditions.
The key to success is consistent care and attention. Monitor your plants regularly for signs of pests or diseases, and adjust your watering and fertilizing schedule as needed. Remember, gardening is a learning process, and every season brings new opportunities to refine your techniques.
We’re confident that with a little effort and these DIY tricks, you’ll be enjoying a delicious harvest of homegrown black tomatoes in no time. So, grab your gardening gloves, prepare your soil, and embark on this exciting adventure!
We’d love to hear about your experiences! Share your photos, tips, and challenges in the comments below. Let’s create a community of black tomato enthusiasts and learn from each other’s successes. Happy gardening!
Frequently Asked Questions (FAQ)
What exactly makes a tomato “black”?
The term “black tomato” is a bit of a misnomer. These tomatoes aren’t truly black, but rather a very deep shade of red, purple, or brown. This dark coloration is due to high concentrations of anthocyanins, the same antioxidants that give blueberries and other dark fruits their vibrant hues. The amount of sunlight the tomato receives also plays a role in the intensity of the color. More sun exposure generally leads to darker tomatoes. The specific variety also dictates the final color, with some varieties leaning more towards a deep mahogany and others exhibiting a purplish-black hue.
Are black tomatoes more difficult to grow than regular tomatoes?
Generally, no. Black tomatoes have similar growing requirements to other tomato varieties. They need plenty of sunlight (at least 6-8 hours per day), well-drained soil, and consistent watering. However, some varieties might be slightly more susceptible to certain diseases, so it’s essential to choose disease-resistant varieties and practice good gardening hygiene, such as proper spacing and pruning. Providing adequate support, like staking or caging, is also crucial, especially as the plants become laden with fruit. Monitoring for pests and addressing any issues promptly will help ensure a successful harvest.
What kind of soil is best for growing black tomatoes?
Black tomatoes thrive in well-drained, fertile soil with a slightly acidic to neutral pH (around 6.0 to 7.0). Amend your soil with compost or other organic matter to improve drainage, aeration, and nutrient content. A soil test can help you determine the pH and nutrient levels of your soil and guide you in making necessary amendments. Avoid heavy clay soils, as they can retain too much water and lead to root rot. If you have clay soil, consider growing your black tomatoes in raised beds or containers with a well-draining potting mix.
How often should I water my black tomato plants?
Water deeply and regularly, especially during hot, dry weather. Aim to keep the soil consistently moist but not waterlogged. Water at the base of the plant to avoid wetting the foliage, which can increase the risk of fungal diseases. Mulching around the plants can help retain moisture and suppress weeds. Check the soil moisture regularly by sticking your finger about an inch into the soil. If it feels dry, it’s time to water. The frequency of watering will depend on the weather, soil type, and the size of your plants.
What kind of fertilizer should I use for black tomatoes?
Use a balanced fertilizer specifically formulated for tomatoes. Look for a fertilizer with an NPK ratio (nitrogen, phosphorus, potassium) that is relatively balanced, such as 5-10-5 or 10-10-10. Avoid fertilizers that are too high in nitrogen, as this can promote excessive foliage growth at the expense of fruit production. Apply fertilizer according to the package directions, typically every few weeks during the growing season. You can also supplement with organic fertilizers like compost tea or fish emulsion.
How do I know when my black tomatoes are ripe?
Determining ripeness can be tricky with black tomatoes, as their color doesn’t change dramatically like red tomatoes. Look for these signs:
* **Slight Softening:** The tomato should feel slightly soft to the touch, but not mushy.
* **Dullness of Skin:** The skin will lose its glossy sheen and become more matte.
* **Aroma:** Ripe tomatoes will have a distinct, sweet tomato aroma.
* **Stem Detachment:** The tomato should detach easily from the vine with a gentle twist.
* **Color Change:** While they won’t turn bright red, you’ll notice a deepening of the dark color and a slight change in hue, depending on the variety.
Don’t be afraid to pick one and taste it! That’s the best way to determine if it’s ripe to your liking.
Are there any common pests or diseases that affect black tomatoes?
Yes, like other tomato varieties, black tomatoes can be susceptible to pests and diseases such as:
* **Aphids:** Small, sap-sucking insects that can weaken plants.
* **Tomato Hornworms:** Large caterpillars that can defoliate plants quickly.
* **Whiteflies:** Tiny, winged insects that feed on plant sap.
* **Blossom End Rot:** A calcium deficiency that causes the bottom of the tomato to rot.
* **Early Blight:** A fungal disease that causes dark spots on leaves.
* **Septoria Leaf Spot:** Another fungal disease that causes small, circular spots on leaves.
To prevent these problems, practice good gardening hygiene, such as removing diseased leaves, providing adequate spacing, and using organic pest control methods. Consider using companion planting to deter pests naturally.
Can I grow black tomatoes in containers?
Absolutely! Black tomatoes can thrive in containers, especially if you choose determinate (bush) varieties. Use a large container (at least 15 gallons) with good drainage and fill it with a high-quality potting mix. Provide adequate support, such as a stake or cage, and water and fertilize regularly. Place the container in a sunny location that receives at least 6-8 hours of sunlight per day. Container gardening is a great option for those with limited space or poor soil conditions.
How can I save seeds from my black tomatoes?
Saving seeds from your black tomatoes is a rewarding way to preserve your favorite varieties. Choose ripe, healthy tomatoes from disease-free plants. Scoop out the seeds and pulp into a jar, add a little water, and let it ferment for a few days. This process helps remove the gelatinous coating around the seeds. Rinse the seeds thoroughly and spread them out on a paper towel to dry completely. Store the dried seeds in an airtight container in a cool, dark, and dry place. Properly stored tomato seeds can remain viable for several years. Remember that if you are growing hybrid varieties, the seeds may not produce plants that are true to type.

Leave a Comment