

Growing celery along a fence might sound like an unusual gardening hack, but trust me, it’s a game-changer! Are you tired of your celery stalks sprawling all over your precious garden space? Do you dream of a tidy, productive garden that maximizes every inch? Well, you’re in the right place! This DIY trick isn’t just about aesthetics; it’s about optimizing your yield and creating a healthier environment for your celery to thrive.
Celery, with its crisp stalks and refreshing flavor, has been cultivated for centuries. From its humble beginnings as a medicinal plant in the Mediterranean to its current status as a culinary staple, celery has a rich history. But let’s be honest, growing it can be a bit of a challenge, especially in smaller gardens. That’s where this clever technique comes in.
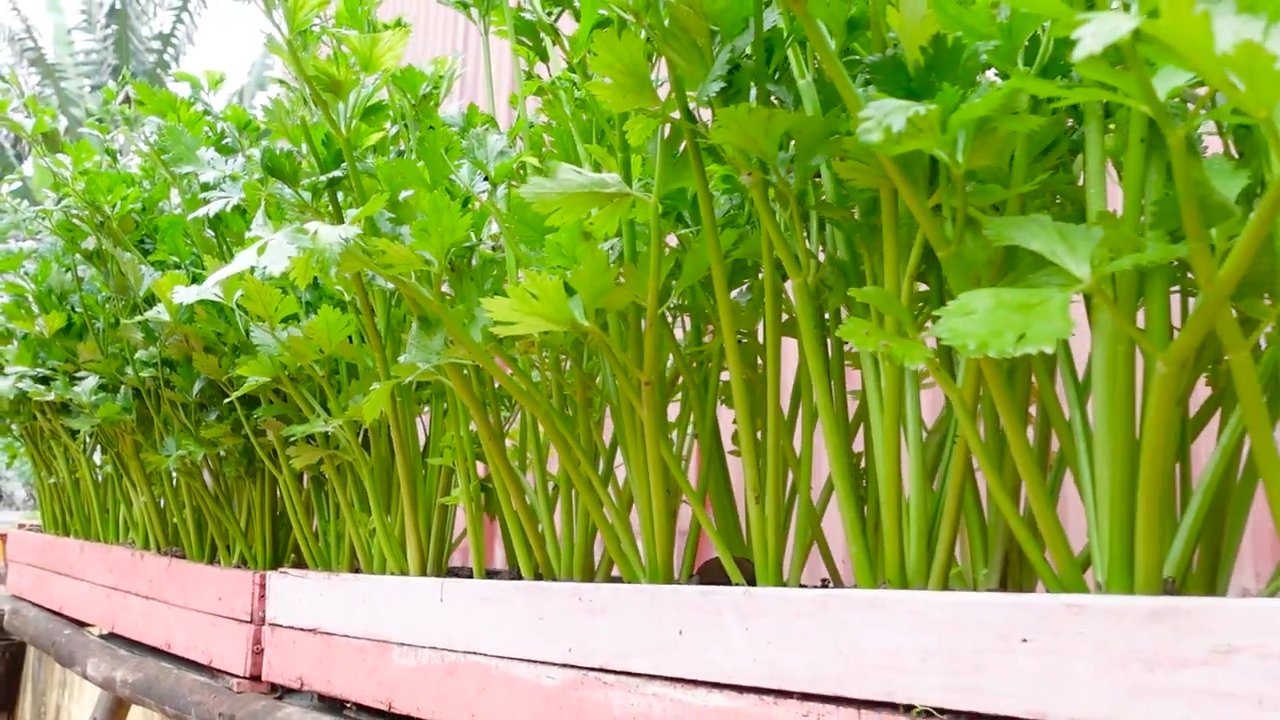
I’ve found that growing celery along a fence provides crucial support, preventing the stalks from bending and breaking. This not only keeps your garden looking neat but also improves air circulation, reducing the risk of fungal diseases. Plus, it makes harvesting a breeze! In this article, I’ll walk you through the simple steps to transform your fence into a celery-growing powerhouse. Get ready to unlock the secrets to a bountiful and beautiful celery harvest!
Growing Celery on a Fence: A DIY Garden Project for More Space and Bigger Harvests 🌱
Hello garden friends! 🌞
Is your garden too small, or your balcony already packed, but you still want to grow fresh veggies? Then I’ve got a clever trick for you: growing celery on a fence! Sounds unusual? It is – but it works. This method saves space, looks super cool, and with a little planning, can even boost your harvest.
Why Grow Celery on a Fence?
- Space-saving: Perfect for small gardens or balconies. A fence lets you use vertical space.
- Better airflow: Plants get more ventilation, reducing the risk of fungal diseases.
- Fewer pests: Slugs and other pests have a harder time reaching your plants.
- Easier harvest: The celery is at a comfortable height, so you won’t strain your back.
- Decorative: A “celery fence” is an eye-catcher and adds greenery to plain walls or fences.
What You’ll Need
- Celery seedlings (store-bought transplants are easiest)
- Plant pots or containers (at least 6 inches / 15 cm in diameter)
- Quality potting mix (vegetable soil mix is ideal)
- Compost or organic fertilizer
- A fence (wood, metal, or chain-link)
- Fasteners (zip ties, hooks, or wire depending on the fence type)
- Watering can or hose
- Pruning shears or a knife
- Optional: gloves, trowel, fertilizer scoop
Step-by-Step Guide: How to Grow Celery on a Fence
1. Prepare the Fence
- Check stability: Make sure your fence can handle the weight of the planted pots.
- Clean it up: Remove dirt, moss, or algae so fasteners hold better.
- Mark positions: Space pots about 8–12 inches (20–30 cm) apart to give each plant room.
2. Prepare the Pots
- Choose containers: Go for pots at least 6 inches wide with drainage holes.
- Add drainage: Place pebbles or clay pellets at the bottom.
- Soil mix: Combine 2 parts potting soil with 1 part compost for a nutrient-rich base.
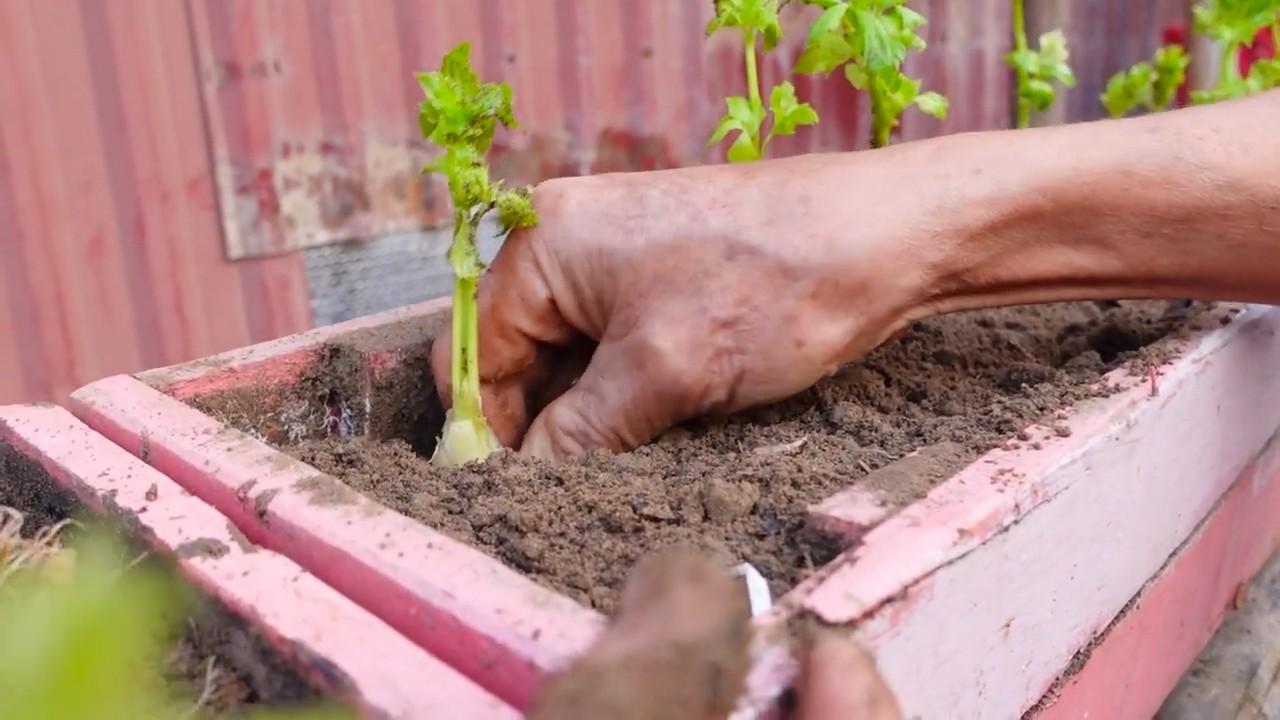
3. Plant the Celery
- Loosen roots: Gently remove seedlings from their starter pots and tease the roots apart.
- Plant: Place in prepared pots so the root crown is just below the surface.
- Water: Give them a good soak to help settle the soil.
4. Attach the Pots to the Fence
- Fasten securely: Use zip ties for chain-link fences, or hooks/wire for wooden fences.
- Check stability: Pots should hang firmly without wobbling or risk of falling.
5. Care for Your Celery Fence
- Watering: Keep the soil consistently moist, but avoid waterlogging.
- Fertilizing: Feed every 2–3 weeks with liquid organic fertilizer.
- Pruning: Remove yellow or wilted leaves to encourage healthy growth.
- Pest control: Watch for aphids or slugs. Use natural remedies if needed.
- Harvesting: Celery is ready in 3–4 months. Cut stalks when firm and crisp.
Extra Tips
- Sunlight: Choose a spot with at least 6 hours of sunlight daily.
- Wind protection: If your fence is in a windy area, add some shielding.
- Variety choice: Pick a celery variety suited for containers.
- Mulch: Add straw or wood chips on top of the soil to lock in moisture.
- Companion planting: Mix in herbs like parsley or chives for variety and pest control.
Common Problems & Fixes
- Yellow leaves: Usually caused by nutrient deficiency or overwatering. Adjust fertilizer or drainage.
- Aphids: Spray off with water or use neem oil.
- Root rot: Avoid waterlogging – ensure proper drainage.
- Slugs: Use copper tape or organic slug pellets if needed.
Final Thoughts
Growing celery on a fence is a fun, space-saving DIY project that doesn’t just give you fresh vegetables – it also transforms your garden or balcony into something unique. With a bit of care and creativity, you’ll soon be harvesting crisp, homegrown celery straight from your very own “green wall.
Conclusion
So, there you have it! Transforming your fence line into a thriving celery patch is not just a gardening novelty; it’s a practical, space-saving, and aesthetically pleasing way to enjoy fresh, homegrown celery. We’ve explored the simple steps, from soil preparation to planting and ongoing care, highlighting how even the most novice gardener can achieve impressive results.
But why is this DIY trick a must-try? Beyond the obvious benefit of having readily available, crisp celery stalks for your salads, soups, and snacks, consider the other advantages. Firstly, growing celery along your fence maximizes your garden space. Fences often go underutilized, becoming mere boundaries rather than productive areas. This method turns that wasted space into a valuable resource, especially beneficial for those with limited garden plots or urban dwellers seeking to green their surroundings.
Secondly, the fence provides natural support for your celery plants, helping them grow upright and preventing them from sprawling. This not only makes harvesting easier but also improves air circulation around the plants, reducing the risk of fungal diseases. Furthermore, the fence can offer some protection from harsh weather conditions, such as strong winds or intense sunlight, creating a more favorable microclimate for your celery.
And let’s not forget the visual appeal! A lush, green celery fence adds a touch of charm and vibrancy to your garden, transforming an otherwise ordinary boundary into a living, breathing work of art. Imagine the envy of your neighbors as they admire your innovative and productive fence line.
Now, for a few suggestions and variations to personalize your celery-growing experience. Consider interplanting your celery with companion plants like marigolds or nasturtiums. These flowers not only add color and beauty to your fence line but also help deter pests that might otherwise target your celery. You could also experiment with different varieties of celery, from the classic Pascal celery to the more colorful and flavorful red celery. Each variety offers a unique taste and texture, allowing you to tailor your harvest to your specific culinary preferences.
Another variation is to incorporate a simple irrigation system along your fence line. A drip irrigation system, for example, can deliver water directly to the roots of your celery plants, ensuring consistent moisture and minimizing water waste. This is particularly beneficial in drier climates or during periods of drought.
Finally, don’t be afraid to get creative with your fence design. You could add trellises or other supports to create a more elaborate and visually appealing structure for your celery to climb. You could even paint your fence a bright color to complement the green foliage of your celery plants.
Ultimately, growing celery along your fence is a rewarding and enjoyable experience that offers a multitude of benefits. It’s a chance to connect with nature, learn new gardening skills, and enjoy the delicious fruits (or rather, vegetables) of your labor. So, grab your gardening gloves, prepare your soil, and get ready to transform your fence line into a thriving celery patch.
We encourage you to try this DIY trick and share your experience with us. Let us know what varieties of celery you planted, what challenges you faced, and what successes you achieved. Your feedback will not only help us improve this guide but also inspire other gardeners to embark on their own celery-growing adventures. Remember, the best gardening advice comes from those who have firsthand experience, so don’t hesitate to share your tips and tricks with the community. Happy gardening! And remember, fresh, homegrown **celery** is just a fence away!
Frequently Asked Questions (FAQ)
What kind of fence is best for growing celery?
The ideal fence for growing celery is one that provides adequate support and allows for good air circulation. A wooden fence, chain-link fence, or even a sturdy wire mesh fence can all work well. The key is to ensure that the fence is strong enough to support the weight of the mature celery plants and that it doesn’t block too much sunlight. If you have a solid fence, consider adding trellises or other supports to allow the celery to climb and receive adequate sunlight. Also, consider the material of the fence. Some materials might leach chemicals into the soil, so opt for untreated wood or coated metal to avoid contamination.
How much sunlight does celery need when grown along a fence?
Celery thrives in full sun to partial shade. Ideally, it needs at least six hours of direct sunlight per day. However, in hotter climates, some afternoon shade can be beneficial to prevent the plants from scorching. When planting along a fence, consider the orientation of the fence and the amount of sunlight it receives throughout the day. If the fence faces south, it will likely receive the most sunlight. If it faces north, it may only receive sunlight during certain times of the day. Adjust your planting location accordingly to ensure that your celery plants receive adequate sunlight.
What type of soil is best for growing celery along a fence?
Celery prefers rich, well-drained soil that is high in organic matter. Before planting, amend the soil along your fence line with compost, aged manure, or other organic materials to improve its fertility and drainage. Celery also prefers a slightly acidic to neutral soil pH, ideally between 6.0 and 7.0. You can test your soil pH using a soil testing kit and adjust it accordingly with lime or sulfur. Ensure the soil is loose and free of rocks or debris to allow for proper root development. Good drainage is crucial, as celery is susceptible to root rot in waterlogged soil.
How often should I water celery grown along a fence?
Celery needs consistent moisture to thrive. Water your celery plants regularly, especially during dry periods. Aim to keep the soil consistently moist but not waterlogged. A good rule of thumb is to water deeply whenever the top inch of soil feels dry to the touch. Consider using a drip irrigation system or soaker hose to deliver water directly to the roots of the plants, minimizing water waste and reducing the risk of fungal diseases. Mulching around the base of the plants can also help retain moisture in the soil.
What are some common pests and diseases that affect celery grown along a fence, and how can I prevent them?
Celery is susceptible to several pests and diseases, including aphids, celery leaf miners, and fungal diseases like early blight and late blight. To prevent these problems, practice good garden hygiene by removing any dead or diseased leaves from the plants. Encourage beneficial insects like ladybugs and lacewings, which prey on aphids and other pests. You can also use insecticidal soap or neem oil to control pests. To prevent fungal diseases, ensure good air circulation around the plants and avoid overhead watering. If fungal diseases do occur, treat them with a fungicide labeled for use on celery. Crop rotation can also help prevent soilborne diseases from building up.
Can I grow celery in containers along a fence if I don’t have garden space?
Yes, you can definitely grow celery in containers along a fence. Choose large containers that are at least 12 inches deep and wide to accommodate the celery’s root system. Use a high-quality potting mix that is well-draining and rich in organic matter. Place the containers along the fence in a location that receives at least six hours of sunlight per day. Water the containers regularly, especially during hot weather, and fertilize them every few weeks with a balanced fertilizer. You may need to provide additional support for the celery plants as they grow, such as stakes or trellises.
How long does it take for celery to mature when grown along a fence?
Celery typically takes 100 to 130 days to mature from seed. However, you can shorten the growing time by starting with transplants instead of seeds. Transplants are usually ready to harvest in 70 to 90 days. The exact time to maturity will depend on the variety of celery you are growing, the growing conditions, and the climate. You can tell when celery is ready to harvest when the stalks are thick, crisp, and about 8 to 10 inches long.
How do I harvest celery grown along a fence?
To harvest celery, simply cut the stalks at the base of the plant with a sharp knife. You can harvest individual stalks as needed or harvest the entire plant at once. If you only harvest a few stalks at a time, the plant will continue to produce new stalks. After harvesting, wash the celery stalks thoroughly and store them in the refrigerator. Celery can be stored in the refrigerator for up to two weeks.


Leave a Comment