

Lazy Potato Growing Method: Sounds too good to be true, right? I thought so too, until I tried it! Forget tilling, digging, and endless weeding. This year, I’m embracing the easiest potato harvest ever, and I’m here to share my secrets with you.
Potatoes have been a staple food for centuries, with their cultivation dating back to the Inca civilization in South America. They’ve nourished populations through famines and fueled countless meals. But let’s be honest, traditional potato farming can be a real pain in the back! That’s where the lazy potato growing method comes in – a revolutionary approach that simplifies the entire process.
Are you tired of spending hours in the garden, only to end up with a meager potato yield? Do you dream of fresh, homegrown potatoes without the back-breaking labor? This DIY guide is for you! I’ll walk you through a simple, step-by-step process that requires minimal effort and yields surprisingly abundant results. Imagine enjoying delicious, homegrown potatoes with just a fraction of the work. Let’s ditch the traditional methods and unlock the secrets to effortless potato growing!
The Ultimate Lazy Potato Growing Guide: From Couch to Sprout!
Hey there, fellow gardening enthusiasts (and aspiring couch potatoes)! Are you dreaming of homegrown potatoes but dread the thought of back-breaking labor? Well, you’ve come to the right place! I’m going to share my super-easy, almost-too-good-to-be-true method for growing potatoes with minimal effort. Get ready to ditch the digging and embrace the lazy potato life!
What You’ll Need: The Bare Essentials
Before we dive in, let’s gather our supplies. The beauty of this method is that you probably already have most of this stuff lying around.
* Seed Potatoes: These are potatoes specifically grown for planting. You can find them at your local garden center or online. Look for varieties that are suited to your climate. I personally love Yukon Gold for their buttery flavor and reliable yields.
* A Large Container: Think big! A 20-gallon container or larger is ideal. A plastic storage tote, a large trash can (with drainage holes!), or even a repurposed barrel will work. The bigger, the better, as it gives the potatoes plenty of room to grow.
* Potting Mix: Don’t skimp on the potting mix! Use a high-quality, well-draining mix. Avoid using garden soil directly, as it can compact and hinder drainage. I like to use a mix of compost, peat moss, and perlite.
* Straw or Mulch: This is crucial for the “lazy” part of the method. Straw helps retain moisture, suppress weeds, and keep the potatoes cool. You can also use shredded leaves or grass clippings.
* Water: Obvious, but essential!
* Optional: Fertilizer: A slow-release fertilizer can give your potatoes a boost, but it’s not strictly necessary.
Step-by-Step: From Seed Potato to Spud-tacular Harvest
Okay, let’s get our hands dirty (well, not too dirty!). Here’s the breakdown of the lazy potato growing process:
1. Prepare Your Seed Potatoes: This is called “chitting” or “sprouting.” About 2-3 weeks before planting, place your seed potatoes in a cool, bright location (but not direct sunlight). You’ll notice small “eyes” or sprouts starting to emerge. This gives them a head start. If your seed potatoes are large, you can cut them into pieces, making sure each piece has at least one or two eyes. Let the cut pieces dry for a day or two to prevent rotting.
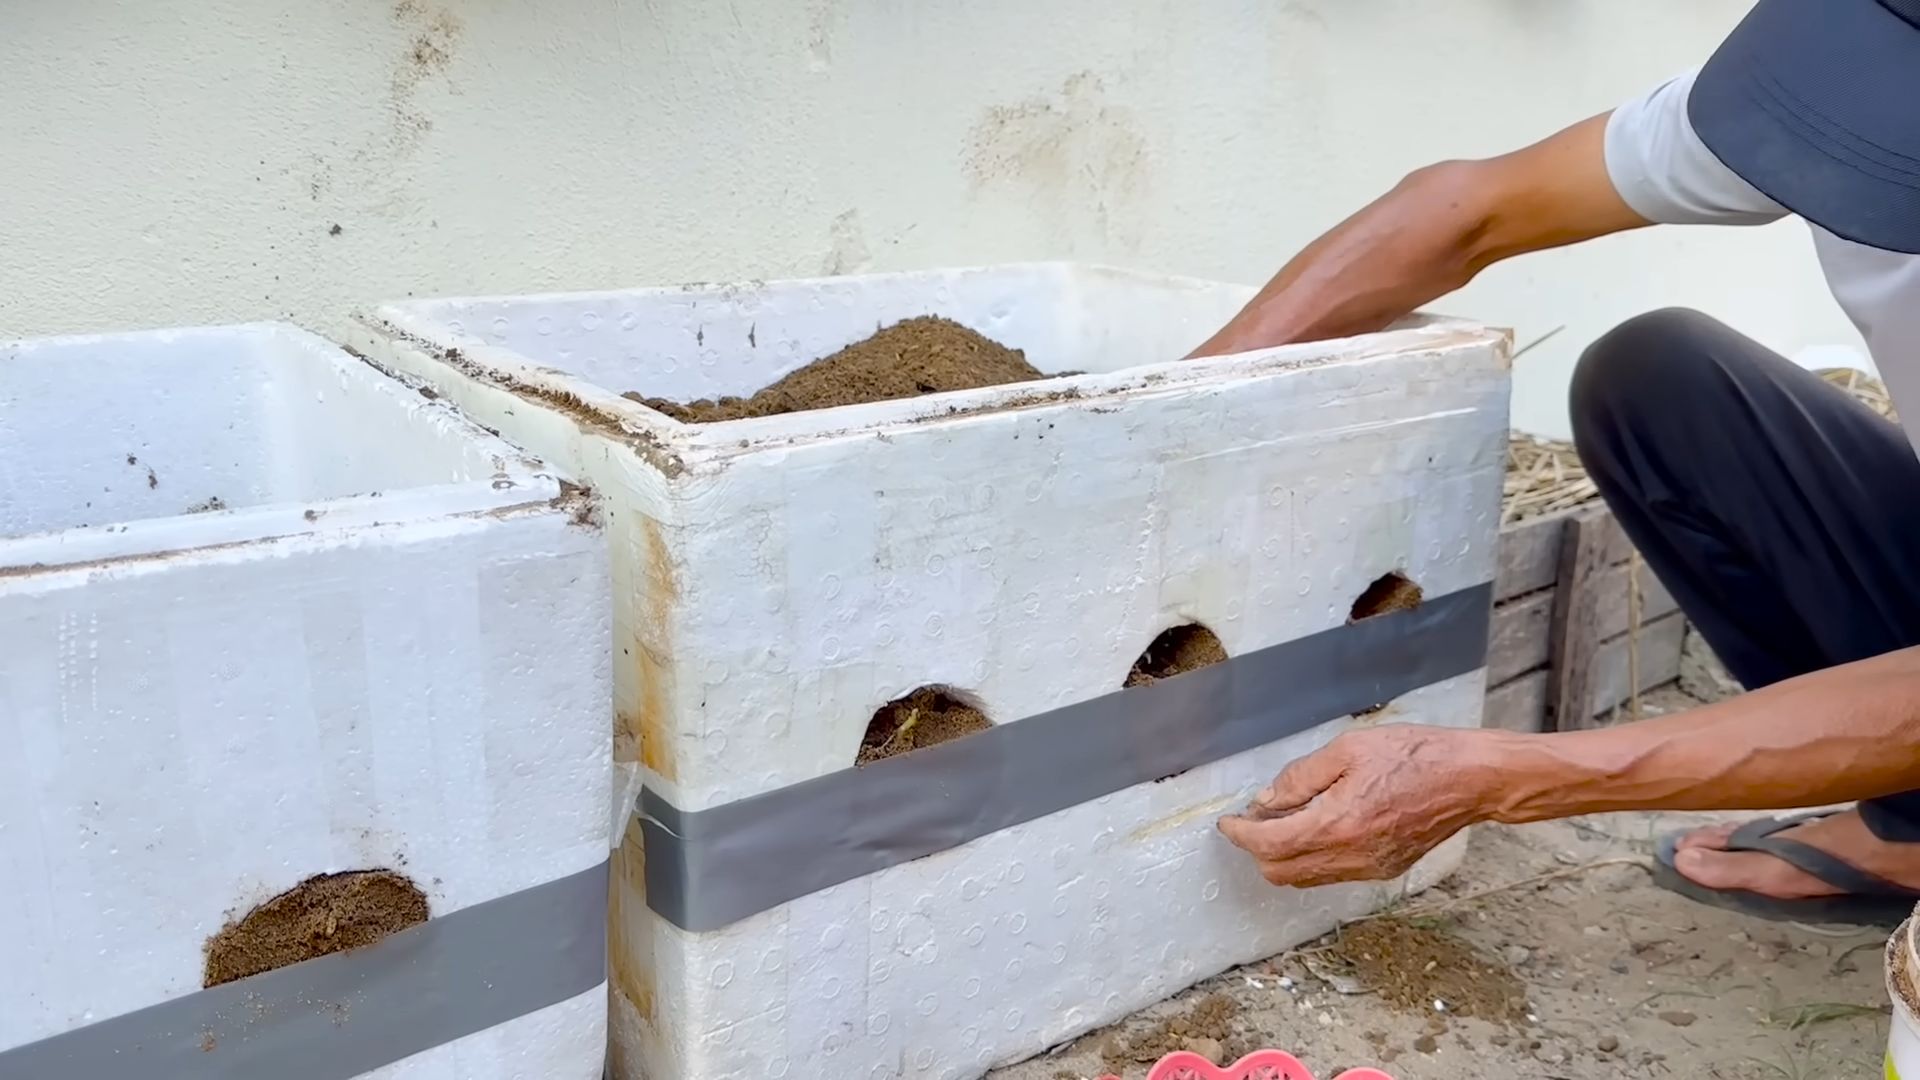
2. Prepare Your Container: Make sure your container has adequate drainage holes. If you’re using a trash can or barrel, drill several holes in the bottom. Then, add about 6-8 inches of potting mix to the bottom of the container.
3. Plant Your Seed Potatoes: Place your sprouted seed potatoes on top of the potting mix, with the sprouts facing upwards. Space them evenly, about 8-10 inches apart. If you’re only planting one or two seed potatoes, place them in the center of the container.
4. Cover with Potting Mix: Cover the seed potatoes with another 3-4 inches of potting mix. Gently water the soil until it’s moist but not soggy.
5. The “Hilling” Process (Simplified): This is where the “lazy” part comes in. As the potato plants grow, you’ll need to “hill” them, which means adding more soil or mulch around the stems. This encourages the plants to produce more potatoes along the buried stems. Instead of constantly adding soil, we’re going to use straw or mulch.
* Initial Mulch Layer: Once the potato plants are about 6 inches tall, add a thick layer of straw or mulch around the base of the plants, covering about half of the stems.
* Subsequent Mulch Layers: As the plants continue to grow, keep adding more straw or mulch, gradually covering more and more of the stems. Aim to keep about 1/3 of the plant exposed. This will encourage the plants to produce potatoes all along the buried stems.
6. Watering: Potatoes need consistent moisture, especially during flowering and tuber formation. Water deeply whenever the top inch of soil feels dry to the touch. Avoid overwatering, as this can lead to rot.
7. Fertilizing (Optional): If you want to give your potatoes a boost, you can apply a slow-release fertilizer at planting time or side-dress with a balanced fertilizer every few weeks. Follow the instructions on the fertilizer package.
8. Pest Control: Keep an eye out for pests like potato beetles and aphids. Hand-picking them off the plants is often the easiest solution. You can also use insecticidal soap or neem oil if necessary.
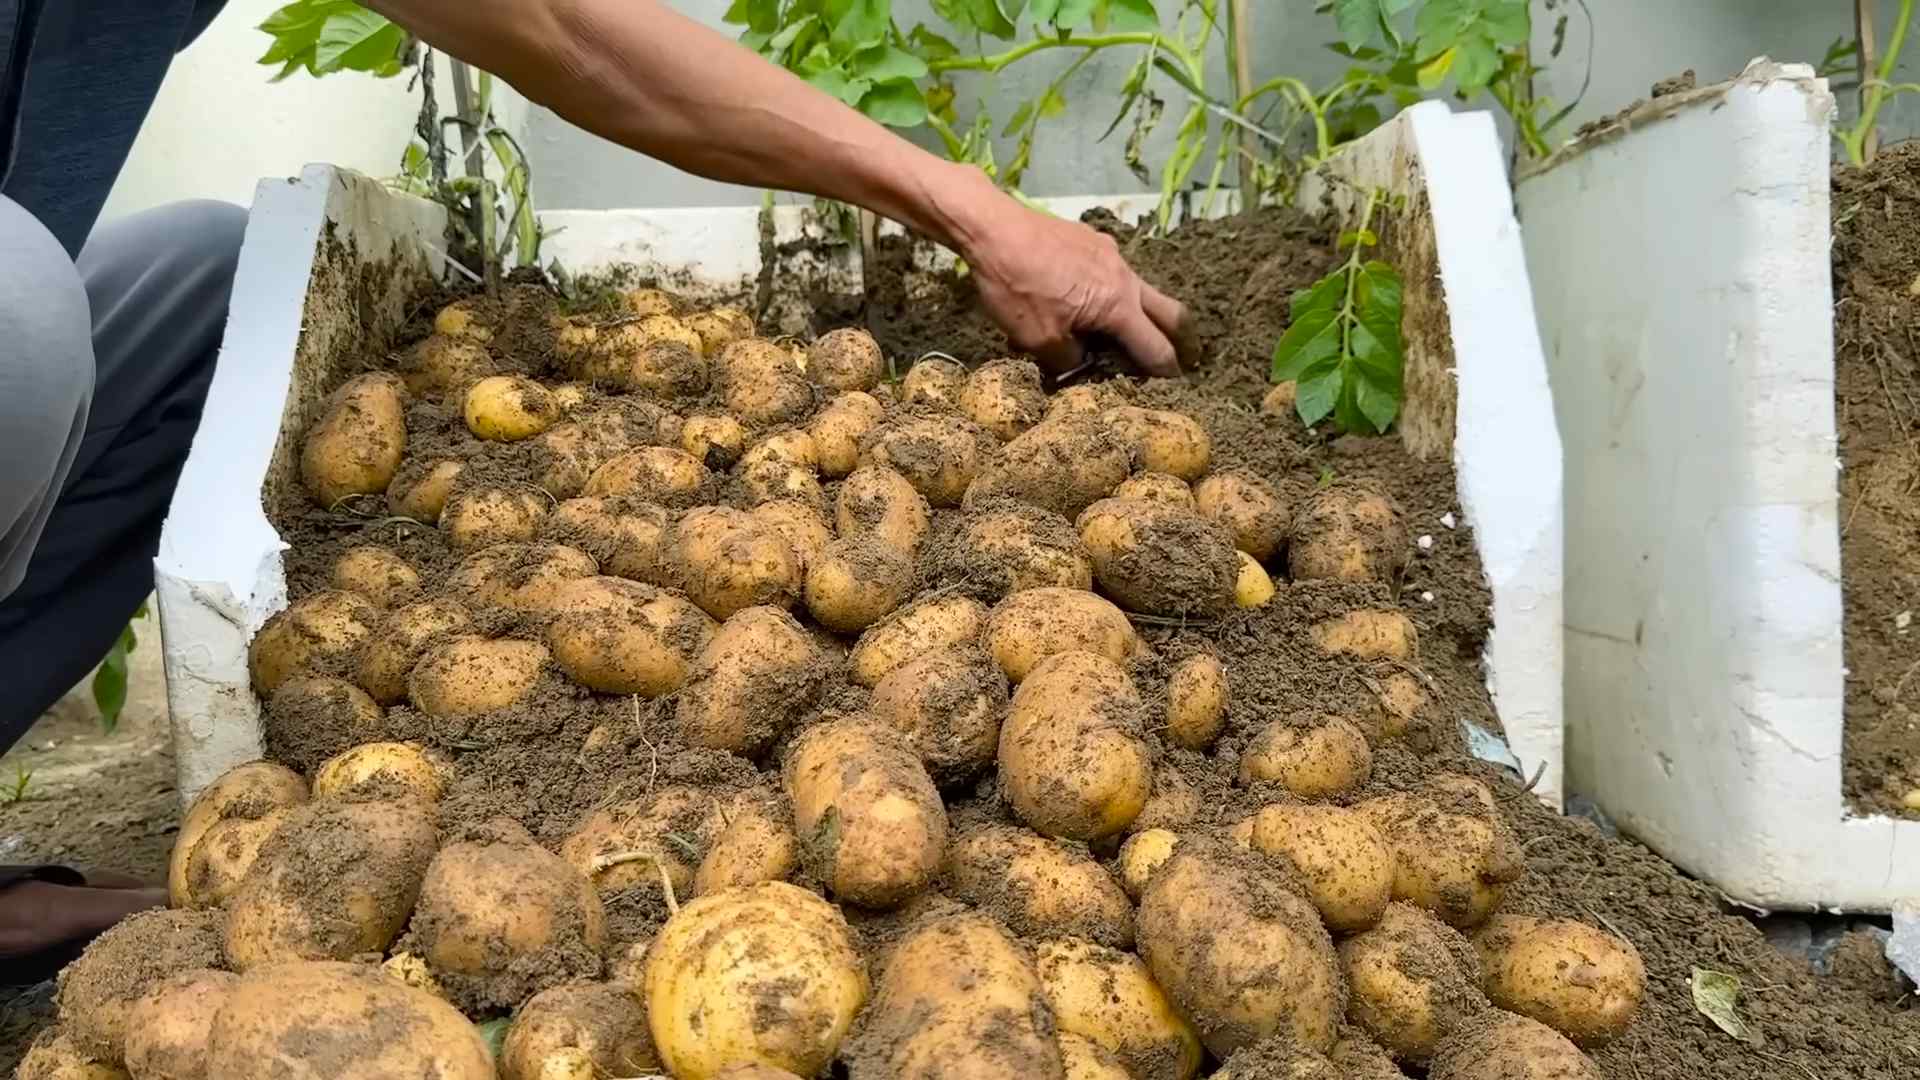
9. Harvest Time! This is the most exciting part! Potatoes are typically ready to harvest about 80-100 days after planting, depending on the variety. You’ll know they’re ready when the plants start to flower and the foliage begins to yellow and die back.
* The Lazy Harvest: Instead of digging, simply reach into the container and gently pull out the potatoes. The straw or mulch makes it easy to access them. You can harvest potatoes as needed, leaving the rest in the container to continue growing.
Troubleshooting: Common Potato Problems and Solutions
Even with the lazy method, you might encounter a few challenges. Here’s how to handle them:
* Potato Blight: This fungal disease can cause brown spots on the leaves and stems. To prevent blight, choose disease-resistant varieties and ensure good air circulation around the plants. If blight does occur, remove affected foliage immediately and treat with a fungicide.
* Potato Beetles: These pesky beetles can quickly defoliate your potato plants. Hand-picking them off the plants is the most effective solution. You can also use insecticidal soap or neem oil.
* Scab: This disease causes rough, scabby patches on the potato skins. To prevent scab, avoid planting potatoes in alkaline soil and ensure good drainage.
* Rot: Overwatering can lead to rot. Make sure your container has adequate drainage and avoid watering too frequently.
Maximizing Your Potato Harvest: Pro Tips and Tricks
Want to take your lazy potato growing to the next level? Here are a few extra tips:
* Choose the Right Variety: Different potato varieties have different growing requirements and yields. Research which varieties are best suited to your climate and growing conditions.
* Succession Planting: Plant potatoes every few weeks to extend your harvest season.
* Sunlight is Key: Potatoes need at least 6-8 hours of sunlight per day. Choose a sunny location for your container.
* Don’t Overcrowd: Give your potato plants plenty of space to grow. Overcrowding can lead to smaller potatoes and increased disease risk.
* Compost Tea: Give your potato plants a boost with a weekly dose of compost tea. This will provide them with essential nutrients and help them grow strong and healthy.
* Observe Your Plants: Pay attention to your potato plants and watch for any signs of stress or disease. The sooner you catch a problem, the easier it will be to fix.
* Reusing Soil: While you can reuse potting soil, it’s best to amend it with fresh compost and fertilizer before planting potatoes again. This will replenish the nutrients that were used by the previous crop.
* Storing Potatoes: Store your harvested potatoes in a cool, dark, and dry place. They should last for several months.
Why This Method Works: The Science Behind the Laziness
You might be wondering, “How can I get a decent potato harvest with so little effort?” Here’s the secret:
* Hilling Encourages Tuber Formation: Potatoes form along the stems that are buried in soil or mulch. By gradually adding straw or mulch, we’re creating more opportunities for potatoes to grow.
* Straw Retains Moisture: Straw acts as a natural mulch, helping to retain moisture in the soil and reduce the need for frequent watering.
* Container Gardening Provides Control: Growing potatoes in containers allows us to control the soil quality, drainage, and sunlight exposure. This makes it easier to create the ideal growing conditions for potatoes.
* Less Digging, Less Damage: By harvesting potatoes from the top of the container, we avoid damaging the tubers and disturbing the root system.
Beyond Potatoes: Other Lazy Gardening Ideas
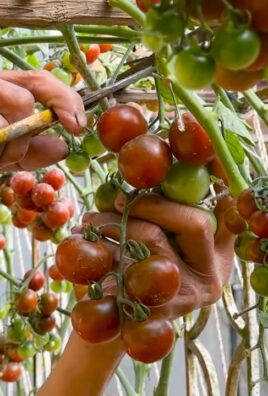
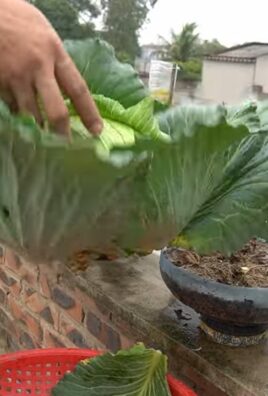
Once you’ve mastered the lazy potato growing method, you can apply the same principles to other vegetables. Try growing tomatoes, peppers, or zucchini in containers with minimal effort. The key is to choose the right varieties, provide adequate sunlight and water, and use mulch to retain moisture and suppress weeds.
So there you have it! My ultimate guide to lazy potato growing. I hope this inspires you to give it a try. Happy gardening (or should I say, happy relaxing?)!
Conclusion
So, there you have it! The lazy potato growing method – a game-changer for anyone who wants fresh, homegrown potatoes without the back-breaking labor. This isn’t just about convenience; it’s about maximizing your yield with minimal effort, making it accessible to gardeners of all skill levels, even those with limited space or time.
Why is this a must-try? Because it simplifies the entire potato-growing process. Forget about digging deep trenches, constantly hilling, and battling weeds. This method focuses on creating a nurturing environment where your potatoes can thrive with minimal intervention. You’re essentially creating a self-contained ecosystem that promotes healthy growth and abundant harvests.
But the beauty of this lazy potato growing method lies in its adaptability. Feel free to experiment with different containers. While a large bag works wonders, you can also use old tires stacked on top of each other, large plastic bins, or even repurposed laundry baskets lined with burlap. The key is to ensure good drainage and ample space for the potatoes to grow.
Consider experimenting with different potato varieties as well. Russets are a classic choice, but Yukon Golds, Red Pontiacs, or even fingerling potatoes can all be successfully grown using this method. Each variety offers a unique flavor and texture, allowing you to tailor your harvest to your culinary preferences.
For an extra boost, try adding a layer of compost tea to your watering routine. This will provide your potatoes with essential nutrients and promote healthy growth. You can also incorporate companion plants like marigolds or basil around the base of your container to deter pests and attract beneficial insects.
The lazy potato growing method is more than just a gardening technique; it’s an invitation to connect with nature, enjoy the satisfaction of growing your own food, and experience the deliciousness of freshly harvested potatoes. It’s a sustainable and rewarding way to bring the farm-to-table experience right to your backyard, balcony, or patio.
We wholeheartedly encourage you to give this method a try. It’s simple, effective, and incredibly rewarding. And most importantly, don’t forget to share your experiences with us! We’d love to hear about your successes, challenges, and any variations you’ve tried. Share your photos, tips, and stories in the comments below. Let’s build a community of lazy potato growers and inspire others to embrace this easy and fulfilling gardening technique. Happy growing!
Frequently Asked Questions (FAQ)
What kind of potatoes are best for the lazy potato growing method?
While you can grow almost any type of potato using this method, some varieties tend to perform better than others. Early-maturing varieties like Yukon Gold and Red Pontiac are excellent choices because they have a shorter growing season and are less susceptible to pests and diseases. Russet potatoes, known for their versatility, also thrive in this environment. Fingerling potatoes are another great option, offering a unique shape and flavor. Ultimately, the best potato variety for you will depend on your personal preferences and local climate. Experiment with different varieties to see which ones perform best in your area.
How often should I water my potatoes grown in a bag?
Watering frequency is crucial for successful potato growth. The goal is to keep the soil consistently moist but not waterlogged. Check the soil moisture level regularly by sticking your finger about an inch or two into the soil. If it feels dry, it’s time to water. In general, you’ll likely need to water your potatoes every 1-3 days, depending on the weather conditions. During hot, dry spells, you may need to water more frequently. Ensure that the container has adequate drainage to prevent water from pooling at the bottom, which can lead to root rot.
What kind of soil should I use for growing potatoes in a bag?
The ideal soil for growing potatoes in a bag is a well-draining, nutrient-rich mix. A good starting point is a combination of equal parts potting soil, compost, and peat moss (or coco coir as a sustainable alternative). The potting soil provides a good base for drainage and aeration, while the compost adds essential nutrients and improves soil structure. Peat moss or coco coir helps retain moisture and prevent the soil from drying out too quickly. Avoid using garden soil, as it can be too heavy and compacted, hindering root growth.
How do I know when my potatoes are ready to harvest?
The timing of your potato harvest depends on the variety you’re growing and your desired size. Generally, early-maturing varieties are ready to harvest about 70-80 days after planting, while late-maturing varieties may take up to 100 days or more. A good indicator is when the foliage starts to turn yellow and die back. You can also gently reach into the bag and feel around for potatoes. If they are the size you want, you can start harvesting. For “new potatoes,” you can harvest them earlier when they are smaller and more tender.
Can I reuse the soil from my potato bag for other plants?
Yes, you can reuse the soil from your potato bag, but it’s essential to replenish the nutrients that the potatoes have used. After harvesting your potatoes, remove any remaining plant debris and mix in fresh compost or other organic matter to revitalize the soil. You can also add a slow-release fertilizer to provide a boost of nutrients. Avoid planting potatoes in the same soil for consecutive years, as this can increase the risk of soilborne diseases. Consider rotating crops to maintain soil health.
What are some common pests and diseases that affect potatoes, and how can I prevent them?
Potatoes can be susceptible to various pests and diseases, including potato beetles, aphids, blight, and scab. To prevent these problems, start with disease-free seed potatoes and practice good sanitation. Remove any infected foliage promptly and avoid overhead watering, which can promote fungal diseases. Companion planting with marigolds or basil can help deter pests. If you encounter severe infestations, consider using organic pest control methods like insecticidal soap or neem oil. Crop rotation is also crucial for preventing soilborne diseases.
Can I grow potatoes in a bag indoors?
While it’s possible to grow potatoes in a bag indoors, it requires providing them with adequate light and ventilation. Potatoes need at least 6-8 hours of direct sunlight per day, so you’ll likely need to supplement with grow lights. Ensure that the container has good drainage and that the room is well-ventilated to prevent fungal diseases. Indoor potato growing can be more challenging than outdoor growing, but it’s a viable option for those with limited outdoor space.
How much space do I need to grow potatoes in a bag?
The amount of space you need depends on the size of the bag or container you’re using. A good rule of thumb is to use a bag that is at least 2 feet in diameter and 2 feet deep. This will provide enough space for the potatoes to grow and develop. You’ll also need enough space to move around the bag and water it easily. If you’re growing multiple bags of potatoes, space them a few feet apart to allow for good air circulation.
What if my potato plants are growing too tall and leggy?
If your potato plants are growing too tall and leggy, it could be a sign that they’re not getting enough light. Try moving them to a sunnier location or supplementing with grow lights. You can also prune the plants to encourage bushier growth. Simply trim off the top few inches of the stems to promote branching. Be careful not to over-prune, as this can reduce your yield.
Is the lazy potato growing method suitable for beginners?
Absolutely! The lazy potato growing method is specifically designed to be easy and accessible for gardeners of all skill levels, including beginners. It eliminates many of the complexities associated with traditional potato growing, such as digging trenches and hilling. The simple steps and minimal maintenance make it a perfect starting point for anyone who wants to experience the joy of growing their own potatoes.

Leave a Comment