

Growing Gourds in Bags: Unlock a world of creative possibilities right in your backyard! Have you ever dreamt of crafting your own unique birdhouses, decorative bowls, or even musical instruments? Gourds, with their fascinating shapes and textures, offer endless DIY potential. But what if you lack a sprawling garden? Don’t worry, I’m here to tell you that you can still cultivate these amazing plants, even in limited spaces, by growing gourds in bags!
The history of gourds is deeply intertwined with human civilization. For centuries, across various cultures, they’ve served as essential tools, containers, and artistic mediums. From ancient Egyptians using them as water vessels to Native American tribes crafting rattles and ceremonial objects, gourds have played a vital role in our past. Today, we can continue this tradition by embracing the joy of growing and crafting with these versatile plants.
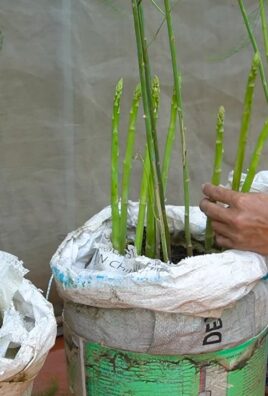
Many people shy away from growing gourds, believing they require vast amounts of space and expert gardening skills. But that’s simply not true! Growing gourds in bags is a game-changer, offering a practical and accessible solution for urban gardeners, apartment dwellers, and anyone with limited ground space. This method allows you to control the soil quality, manage watering more efficiently, and even move your plants to optimize sunlight exposure. Plus, it’s a fantastic way to add a touch of rustic charm and personal flair to your outdoor living space. So, let’s dive in and discover the secrets to successfully cultivating these amazing plants in bags, transforming your small space into a gourd-growing haven!
Growing Gourds in Bags: A Comprehensive DIY Guide
Hey there, fellow gardening enthusiasts! I’m so excited to share my experience with growing gourds in bags. It’s a fantastic way to cultivate these fascinating plants, especially if you’re short on space or have challenging soil conditions. Trust me, it’s easier than you think, and the results are incredibly rewarding!
Why Grow Gourds in Bags?
Before we dive into the how-to, let’s quickly touch on why growing gourds in bags is such a great idea:
* Space Saving: Perfect for balconies, patios, or small gardens. You don’t need a huge plot of land to enjoy these beauties.
* Soil Control: You have complete control over the soil composition, ensuring your gourds get the nutrients they need.
* Portability: Need to move your gourds to a sunnier spot? No problem! Bags make it easy.
* Reduced Weeding: Bags minimize weed growth, saving you time and effort.
* Better Drainage: Proper drainage is crucial for gourds, and bags can help prevent waterlogging.
Materials You’ll Need
Okay, let’s gather our supplies. Here’s what you’ll need to get started:
* Gourd Seeds: Choose your favorite variety! Bottle gourds, birdhouse gourds, and dipper gourds are all excellent choices.
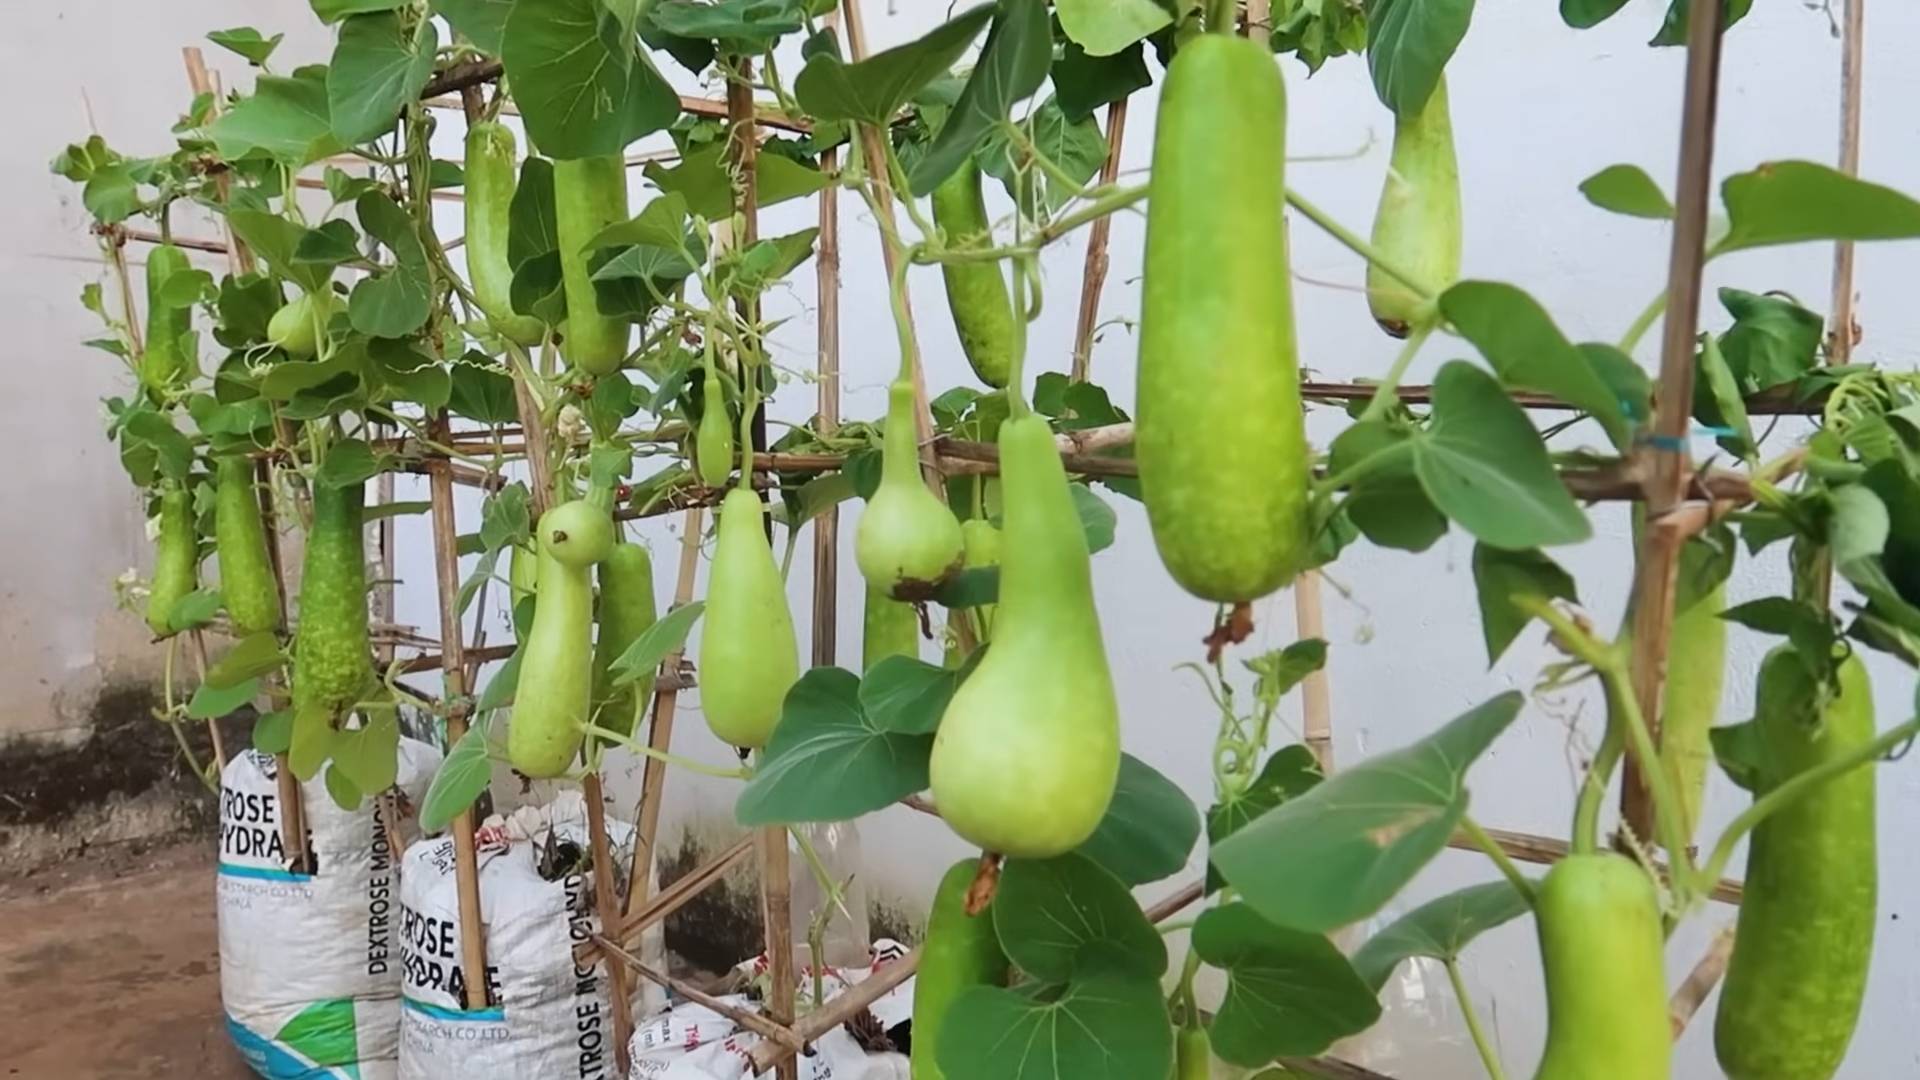
* Grow Bags: I recommend using fabric grow bags that are at least 15-20 gallons in size. The bigger, the better, as gourds have extensive root systems.
* Potting Mix: A high-quality potting mix is essential. Look for one that’s well-draining and rich in organic matter.
* Compost: Compost adds nutrients and improves soil structure.
* Slow-Release Fertilizer: This will provide your gourds with a steady supply of nutrients throughout the growing season.
* Trellis or Support Structure: Gourds are vines and need something to climb on. A sturdy trellis, fence, or even a DIY structure will work.
* Watering Can or Hose: For regular watering.
* Gloves: To protect your hands.
* Hand Trowel or Shovel: For planting.
* Pruning Shears: For trimming vines as needed.
Step-by-Step Guide to Growing Gourds in Bags
Alright, let’s get our hands dirty! Here’s a detailed guide to growing gourds in bags:
1. Preparing the Grow Bags
* Choose Your Location: Select a sunny spot that receives at least 6-8 hours of direct sunlight per day. Gourds thrive in full sun.
* Set Up the Bags: Place your empty grow bags in the chosen location. Once filled, they’ll be heavy, so it’s best to position them beforehand.
* Prepare the Soil Mix: In a large container or wheelbarrow, mix together the potting mix, compost, and slow-release fertilizer. I usually go for a ratio of 2 parts potting mix, 1 part compost, and follow the fertilizer instructions on the package.
* Fill the Bags: Fill the grow bags with the prepared soil mix, leaving a few inches of space at the top.
2. Sowing the Seeds
* Timing is Key: Gourds need a long growing season, so start your seeds indoors about 4-6 weeks before the last expected frost. Alternatively, you can sow seeds directly into the bags after the danger of frost has passed.
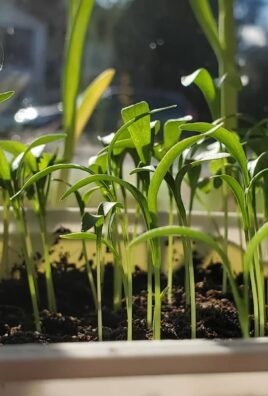
* Starting Seeds Indoors (Optional): Fill small pots or seed trays with potting mix. Sow 2-3 seeds per pot, about 1 inch deep. Water gently and keep the soil moist. Place the pots in a warm, sunny location or under grow lights.
* Direct Sowing: If sowing directly into the bags, plant 2-3 seeds per bag, about 1 inch deep. Water gently and keep the soil moist.
* Thinning Seedlings: Once the seedlings emerge (either indoors or outdoors), thin them to one strong seedling per bag or pot. Snip off the weaker seedlings at the soil line to avoid disturbing the roots of the remaining seedling.
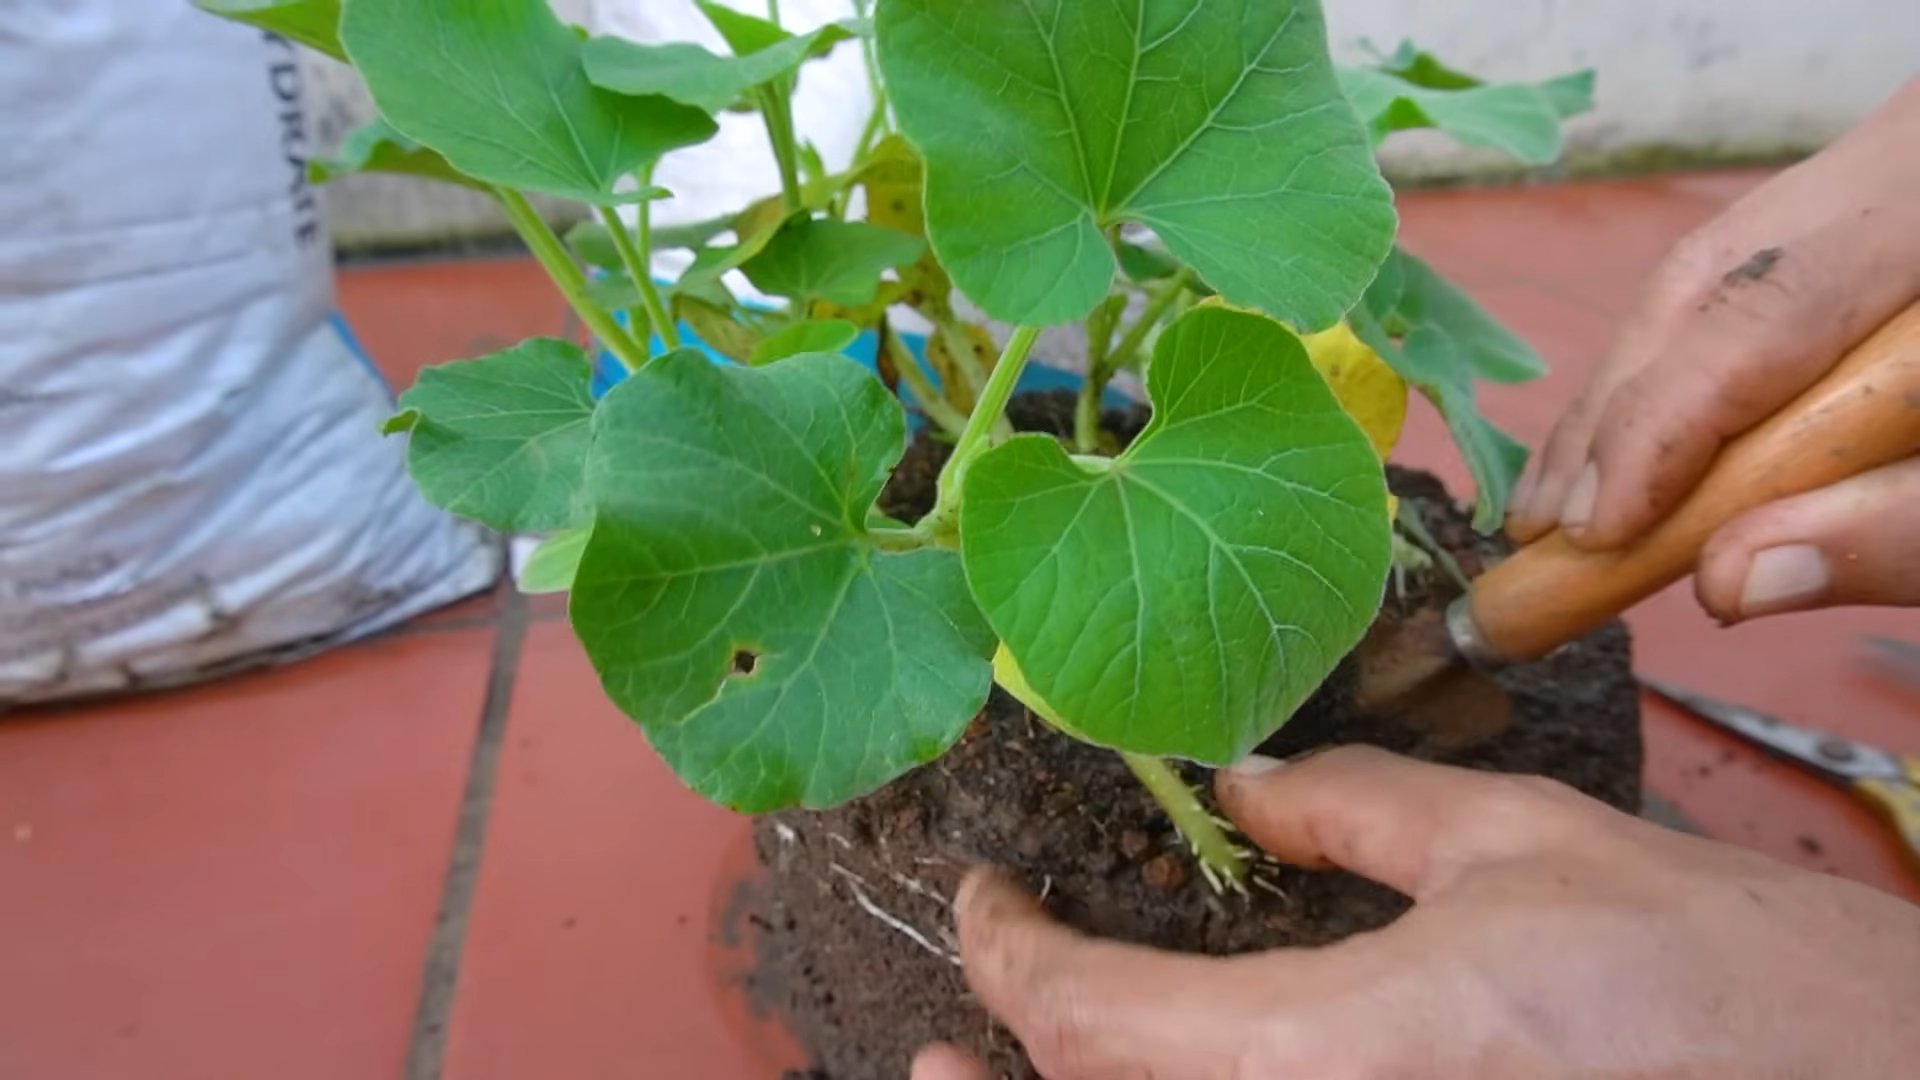
3. Transplanting Seedlings (If Started Indoors)
* Harden Off Seedlings: Before transplanting, gradually acclimate the seedlings to outdoor conditions. This process, called “hardening off,” involves exposing the seedlings to increasing amounts of sunlight and wind over a period of 7-10 days. Start by placing them outdoors for an hour or two each day, gradually increasing the time.
* Transplant Carefully: Once the seedlings are hardened off, gently remove them from their pots, being careful not to damage the roots. Dig a small hole in the soil in the grow bag and transplant the seedling. Water thoroughly.
4. Providing Support
* Install Trellis or Support: Gourds are vigorous vines and need a strong support structure to climb on. Install a trellis, fence, or DIY support structure near the grow bag. Make sure it’s sturdy enough to handle the weight of the mature vines and gourds.
* Guide the Vines: As the vines grow, gently guide them onto the trellis or support structure. You may need to tie them loosely with twine or plant ties.
5. Watering and Fertilizing
* Water Regularly: Gourds need consistent moisture, especially during hot weather. Water deeply whenever the top inch of soil feels dry to the touch. Avoid overwatering, as this can lead to root rot.
* Fertilize Regularly: In addition to the slow-release fertilizer you added at planting time, you may need to supplement with liquid fertilizer every few weeks. Use a balanced fertilizer or one that’s specifically formulated for vegetables. Follow the instructions on the fertilizer package.
6. Pruning and Training
* Prune as Needed: Pruning can help improve air circulation and encourage fruit production. Remove any dead or yellowing leaves. You can also prune the tips of the vines to encourage branching.
* Train the Vines: Continue to guide the vines onto the trellis or support structure as they grow. You may need to prune some of the side shoots to keep the vines from becoming too dense.
7. Pollination
* Hand Pollination (If Necessary): Gourds have separate male and female flowers. If you’re not seeing many gourds developing, you may need to hand-pollinate the flowers. To do this, use a small paintbrush to transfer pollen from the male flowers to the female flowers. The female flowers have a small gourd-like structure at the base of the flower.
8. Pest and Disease Control
* Monitor for Pests and Diseases: Keep an eye out for common gourd pests, such as squash bugs, squash vine borers, and aphids. Check the leaves regularly for signs of damage.
* Take Action Promptly: If you find pests or diseases, take action promptly. You can use organic pest control methods, such as insecticidal soap or neem oil. For diseases, make sure the plants have good air circulation and avoid overwatering.
9. Harvesting
* Harvest When Mature: The timing of the harvest depends on the type of gourd you’re growing. Generally, gourds are ready to harvest when the stems are dry and brown and the gourds are hard and lightweight.
* Cut Carefully: Use pruning shears to cut the gourds from the vine, leaving a few inches of stem attached.
* Curing: Curing is essential for preserving gourds. Place the harvested gourds in a dry, well-ventilated area for several weeks. This allows the gourds to dry out and harden.
Troubleshooting Tips
* Yellowing Leaves: Could be a sign of overwatering, nutrient deficiency, or pest infestation. Check the soil moisture, fertilize if needed, and inspect for pests.
* Lack of Fruit: Could be due to poor pollination, insufficient sunlight, or nutrient deficiency. Try hand-pollinating the flowers, ensure the plants are getting enough sunlight, and fertilize regularly.
* Pest Infestation: Use organic pest control methods, such as insecticidal soap or neem oil.
* Disease: Ensure good air circulation and avoid overwatering. You can also use a fungicide if necessary.
Extra Tips for Success
* Choose the Right Variety: Select a gourd variety that’s well-suited to your climate and growing conditions.
* Amend the Soil: Add plenty of compost to the soil to improve drainage and fertility.
* Water Deeply: Water deeply and less frequently, rather than shallowly and often.
* Mulch Around the Plants: Mulch helps retain moisture, suppress weeds, and regulate soil temperature.
* Be Patient: Gourds take time to mature, so be patient and don’t give up!
Growing gourds in bags is a rewarding experience that allows you to enjoy
Conclusion
So, there you have it! Growing gourds in bags isn’t just a quirky gardening experiment; it’s a game-changer for anyone looking to maximize their yield, control their growing environment, and add a touch of vertical artistry to their space. We’ve explored the ins and outs of this method, from choosing the right bag size and soil mix to providing the necessary support and nutrients. The benefits are undeniable: improved drainage, reduced soilborne diseases, easier pest control, and the sheer joy of watching your gourds cascade down from their elevated perches.
This DIY trick is a must-try because it democratizes gourd growing. You don’t need acres of land or perfectly amended soil to cultivate these fascinating fruits. Whether you have a small balcony, a patio, or a limited garden space, growing gourds in bags opens up a world of possibilities. It allows you to tailor the growing conditions to the specific needs of your chosen gourd variety, giving you a significant advantage over traditional in-ground planting.
But don’t stop there! Experimentation is key to unlocking the full potential of this method. Consider trying different types of bags – burlap sacks for a rustic look, heavy-duty plastic bags for durability, or even repurposed grow bags for an eco-friendly approach. Play around with different soil amendments, such as adding compost tea or worm castings, to boost nutrient availability. And don’t be afraid to get creative with your support structures. Trellises, arches, and even repurposed ladders can provide the perfect framework for your gourds to climb and thrive.
For those seeking a unique twist, try growing miniature gourds in smaller bags. These charming little fruits are perfect for crafting, decorating, and adding a whimsical touch to your home. Or, if you’re feeling adventurous, explore the world of edible gourds, such as zucchini or squash, and enjoy the satisfaction of harvesting fresh, homegrown produce right from your bag garden.
The beauty of growing gourds in bags lies in its adaptability and versatility. It’s a method that can be tailored to suit your individual needs, preferences, and growing conditions. So, embrace the challenge, get your hands dirty, and embark on this exciting gourd-growing adventure.
We are confident that you’ll be amazed by the results. But more importantly, we want to hear about your experience! Share your tips, tricks, and triumphs in the comments below. Let us know what worked for you, what challenges you faced, and what you learned along the way. Together, we can create a community of gourd-growing enthusiasts and unlock the secrets to cultivating these fascinating fruits in bags. So, grab your bags, gather your seeds, and get ready to grow some gourds! Your journey to a bountiful harvest starts now. Remember, successful **gourd growing** is within your reach, even in the most limited of spaces.
Frequently Asked Questions (FAQ)
What size bag is best for growing gourds?
The ideal bag size depends on the type of gourd you’re growing. For smaller gourds, like ornamental varieties or miniature gourds, a 5-10 gallon bag should suffice. Larger gourds, such as bottle gourds or dipper gourds, will require a larger bag, typically 15-20 gallons or even larger. The key is to provide enough space for the roots to develop and support the plant’s growth. Consider the mature size of the gourd variety when selecting your bag size. A larger bag will also retain moisture better, which is crucial during hot weather.
What type of soil should I use in the bags?
A well-draining, nutrient-rich soil mix is essential for growing gourds in bags. A good starting point is a mix of equal parts potting soil, compost, and perlite or vermiculite. The potting soil provides a base for the mix, the compost adds essential nutrients, and the perlite or vermiculite improves drainage and aeration. You can also add slow-release fertilizer to the mix to provide a steady supply of nutrients throughout the growing season. Avoid using garden soil directly in the bags, as it can become compacted and poorly drained.
How often should I water gourds grown in bags?
Watering frequency will depend on the weather conditions, the size of the bag, and the type of gourd you’re growing. Generally, you should water the bags when the top inch of soil feels dry to the touch. During hot, dry weather, you may need to water daily or even twice a day. Be sure to water deeply, allowing the water to drain out of the bottom of the bag. Avoid overwatering, as this can lead to root rot. Using a moisture meter can help you determine the moisture level of the soil and avoid over or under watering.
How much sunlight do gourds need when grown in bags?
Gourds are sun-loving plants and require at least 6-8 hours of direct sunlight per day. Choose a location for your bags that receives plenty of sunlight throughout the day. If you live in a particularly hot climate, you may need to provide some afternoon shade to prevent the gourds from scorching. You can also rotate the bags periodically to ensure that all sides of the plant receive adequate sunlight.
What kind of support do gourds need when grown in bags?
Gourds are vining plants and require support to climb and grow properly. A sturdy trellis, fence, or arbor can provide the necessary support. You can also use ropes or netting to guide the vines. Be sure to provide adequate support early in the growing season, as the vines can become heavy as the gourds develop. Consider the mature size and weight of the gourd variety when selecting your support structure.
How do I prevent pests and diseases when growing gourds in bags?
Growing gourds in bags can actually help reduce the risk of soilborne diseases and pests. However, it’s still important to take preventative measures. Use a clean, sterile soil mix to avoid introducing pathogens. Monitor your plants regularly for signs of pests or diseases. If you spot any problems, take action immediately. Insecticidal soap or neem oil can be effective for controlling many common pests. Proper watering and ventilation can also help prevent fungal diseases.
Can I grow different types of gourds in the same bag?
While it’s technically possible to grow different types of gourds in the same bag, it’s generally not recommended. Different gourd varieties may have different growing requirements, such as sunlight, water, and nutrient needs. Growing them together can lead to competition for resources and reduced yields. It’s best to grow each gourd variety in its own separate bag to ensure optimal growth and development.
How do I harvest gourds grown in bags?
The harvesting time for gourds depends on the variety and your intended use. Ornamental gourds are typically harvested when they are fully mature and the stems have dried out. Edible gourds, such as zucchini or squash, are harvested when they are young and tender. Use a sharp knife or pruners to cut the gourd from the vine, leaving a short stem attached. Handle the gourds carefully to avoid bruising or damaging them.
Can I reuse the bags for growing gourds next year?
Yes, you can reuse the bags for growing gourds next year, but it’s important to clean and sterilize them first. Remove any remaining soil and plant debris. Wash the bags thoroughly with soap and water. You can also soak them in a diluted bleach solution to kill any pathogens. Allow the bags to dry completely before storing them. If the bags are damaged or worn, it’s best to replace them with new ones.
What are some creative ways to use gourds grown in bags?
The possibilities are endless! Ornamental gourds can be used for crafting, decorating, and creating unique home decor items. You can paint them, carve them, or use them to make birdhouses, bowls, or musical instruments. Edible gourds can be used in a variety of culinary dishes, from soups and stews to stir-fries and salads. Get creative and explore the many ways to use your homegrown gourds!
Leave a Comment