

Growing Grape Tomatoes at Home can be incredibly rewarding, offering a burst of fresh, sweet flavor right from your backyard! Imagine popping sun-ripened grape tomatoes straight into your salad or snacking on them while you tend to your garden. Sounds idyllic, right? But maybe you’ve tried before and ended up with spindly plants or a disappointing harvest. Don’t worry, I’m here to help!
For centuries, home gardening has been a source of sustenance and joy. From ancient Roman kitchen gardens to the victory gardens of World War II, growing your own food connects us to a rich history of self-sufficiency and resourcefulness. While the humble grape tomato might not have the same historical weight as, say, heirloom varieties, its popularity has exploded in recent decades, making it a staple in modern gardens and kitchens.
Why should you bother with this DIY project? Well, store-bought grape tomatoes often lack the vibrant flavor of homegrown ones. Plus, you have complete control over what goes into your plants, ensuring they’re free from harmful chemicals. More importantly, growing grape tomatoes at home is easier than you might think! This article will provide you with simple, effective tricks and DIY hacks to maximize your yield and enjoy a bountiful harvest. I’ll guide you through everything from choosing the right variety to dealing with common pests, so you can confidently cultivate your own delicious grape tomatoes.
DIY: Growing Juicy Cherry Tomatoes – Here’s How!
I absolutely love the taste of freshly picked, sun-ripened cherry tomatoes! And the best part? You don’t have to buy them at the supermarket – you can easily grow them yourself at home. I’m going to show you how to harvest your own delicious cherry tomatoes with just a few simple steps and some patience.
What You Need:
Before we get started, here’s a list of what you’ll need:
- Cherry Tomato Seeds: You can either order them online, buy them from a garden center, or even save seeds from a ripe cherry tomato (more on that later!). Make sure to choose a variety that you like and that is suitable for growing in pots or in the garden.
- Seed-Starting Soil: This soil is light, nutrient-poor, and ideal for delicate seedlings.
- Small Pots or Trays: Small pots with drainage holes are perfect for starting seeds.
- Pikking Stick or Spoon: For carefully thinning out the seedlings.
- Larger Pots or a Garden Bed: For transplanting the tomato plants later.
- Tomato Soil: Nutrient-rich soil specially made for tomatoes.
- Plant Sticks or Trellises: Cherry tomato plants can get pretty tall and need support.
- Watering Can or Spray Bottle: For watering your plants.
- Liquid Fertilizer for Tomatoes: For optimal nutrient supply during the growth phase.
- A Sunny Spot: Tomatoes love sunlight!
- Patience and Love: The most important ingredients!
Phase 1: Starting the Seeds (about 6-8 weeks before the last frost)
Starting the seeds is the first and most important step. This is where you lay the foundation for a successful harvest.
- Prepare the Seeds (optional): To speed up germination, you can soak the seeds in lukewarm water for 12-24 hours. This softens the hard seed coat and helps them sprout faster, but it’s not required.
- Sowing the Seeds:
- Fill your seed-starting pots or trays with seed-starting soil.
- Lightly press the soil down but don’t compact it too much.
- Place 2-3 seeds per pot or tray about 1-2 cm deep.
- Cover the seeds with a thin layer of soil (about 0.5 cm).
- Gently spray the soil with water, keeping it moist but not soggy.
- Provide Heat:
- Place the pots or trays in a warm, sunny location. The ideal temperature for germination is between 20 and 25 degrees Celsius.
- You can cover the pots or trays with clear plastic or a lid to increase humidity, but make sure to ventilate regularly to prevent mold.
- Patience:
- Germination usually takes 7-14 days. Keep the soil moist during this time, but not too wet.
- First Leaves:
- Once the seedlings develop their first true leaves (the leaves after the seed leaves), it’s time to thin them out.
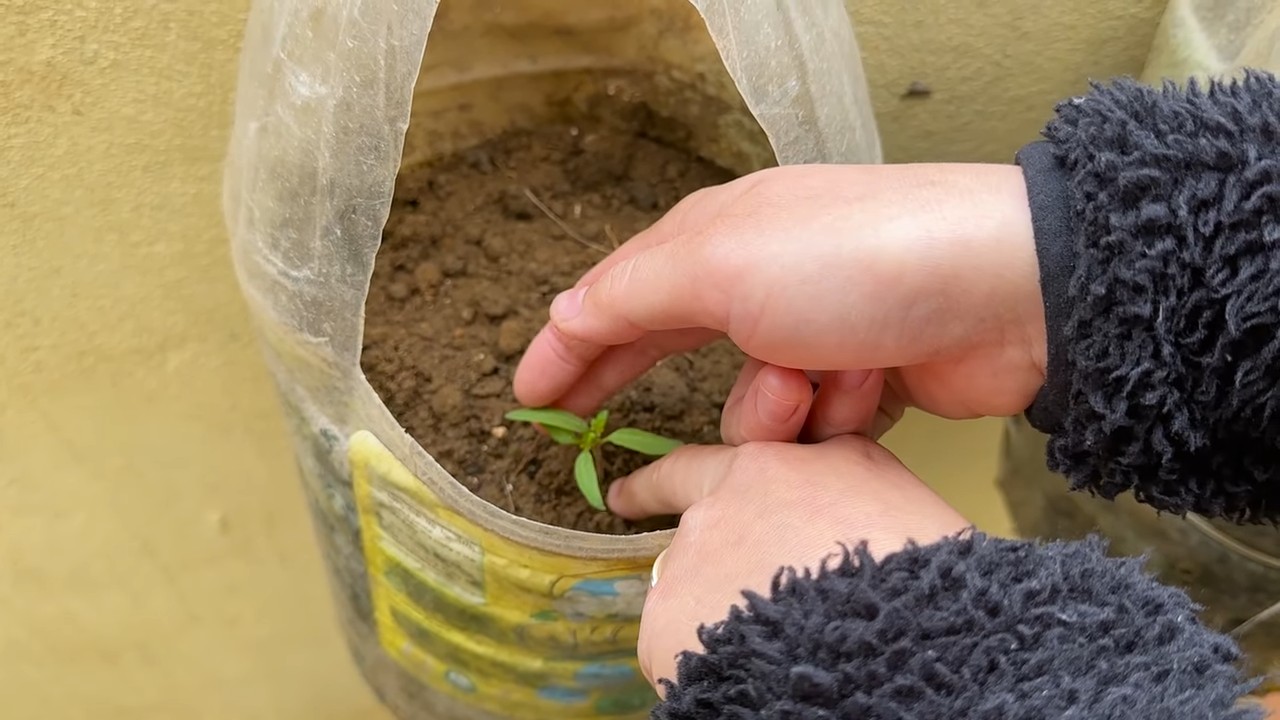
Phase 2: Thinning (Separating the Seedlings)
Thinning is essential to ensure the plants have enough space to grow.
- Preparation:
- Fill small pots (around 8-10 cm in diameter) with tomato soil.
- Lightly moisten the soil.
- Thinning:
- Carefully loosen the soil in the seed-starting pots or trays.
- Gently lift the seedlings using a picking stick or spoon, trying to avoid damaging the roots.
- Place each seedling into one of the prepared pots.
- Make sure the roots are well covered with soil.
- Press the soil down gently.
- Watering:
- Gently water the transplanted seedlings.
- Further Care:
- Place the seedlings in a bright location, but avoid direct sunlight at this stage.
- Keep the soil moist but not soggy.
Phase 3: Transplanting (After the Last Frost)
Once the plants are strong enough and there is no longer any danger of frost, it’s time to move them outside.
- Preparation:
- Choose a sunny spot for your tomato plants.
- Loosen the soil in the garden bed or pots well.
- Enrich the soil with compost or organic fertilizer.
- Transplanting:
- Dig a hole that is slightly larger than the root ball of the tomato plant.
- Gently remove the tomato plant from its pot.
- Place the plant in the hole.
- Fill the hole with soil and lightly press it down.
- Water the plant thoroughly after planting.
- Spacing:
- Be sure to space the plants at least 50-60 cm apart. Cherry tomato plants generally need this space to grow properly.
- Support:
- Place a plant stake or install a trellis next to the tomato plant as soon as you transplant it. Cherry tomatoes can grow quite tall and need support.
Phase 4: Care During the Growing Phase
Proper care during the growing phase is key to getting a good harvest.
- Watering:
- Water your tomato plants regularly, especially on hot days. Make sure the soil remains moist, but not too wet. Avoid watering the leaves as this can promote fungal diseases.
- Fertilizing:
- Fertilize your tomato plants regularly with a liquid fertilizer designed for tomatoes. Start fertilizing about 2-3 weeks after transplanting. Follow the instructions on the fertilizer packaging.
- Pruning:
- Regularly remove side shoots (suckers) that grow between the main stem and branches. This helps promote better airflow and supports better fruit production.
- Pest and Disease Protection:
- Regularly check your tomato plants for signs of pests or diseases. Use organic plant protection methods if necessary.
- Sun Protection:
- On particularly hot days, you may want to protect your plants from direct sunlight to prevent sunburn.
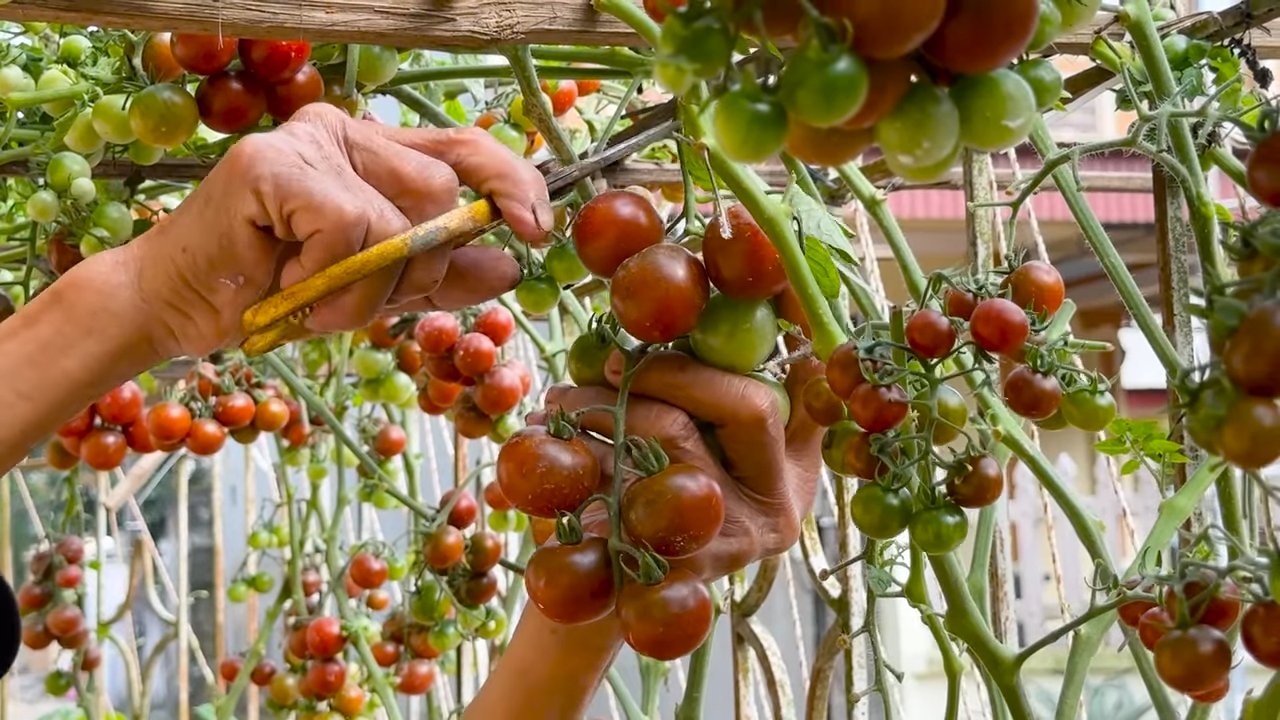
Phase 5: Harvesting (When the Tomatoes are Ripe)
Finally, the time has come to harvest your home-grown tomatoes!
- Signs of Ripeness:
- Cherry tomatoes are ripe when they have a rich color (red, yellow, orange, depending on the variety) and can be easily detached from the stem.
- Harvesting:
- Pick the ripe tomatoes regularly to encourage more fruits to develop.
- Enjoying:
- Enjoy your fresh, home-grown cherry tomatoes right off the vine, in salads, as a snack, or in your favorite dishes!
Tips and Tricks for a Successful Harvest:
- Saving Seeds from Your Own Tomatoes: If you want to save seeds from your own tomatoes, carefully remove the seeds from ripe tomatoes, let them dry, and store them in an airtight container for next year.
- Try Different Varieties: Experiment with different cherry tomato varieties to find the ones that suit your taste and climate the best.
- Support Your Plants: If you have limited space, you can grow cherry tomatoes on a trellis. This saves space and provides better airflow.
- Mulch: A layer of mulch around the plants helps retain moisture, suppresses weeds, and keeps the soil warm.
- Regular Monitoring: Regularly check your tomato plants for pests and diseases, and address any issues promptly.
Common Mistakes to Avoid:
- Overwatering: Be careful not to overwater. The soil should be moist but not soggy.
- Too Little Sun: Cherry tomatoes need at least 6 hours of sun per day.
- Insufficient Support: Don’t forget to stake your plants early on; they’ll need support as they grow.
- Not Enough Space: Give your tomato plants enough room to grow properly. Overcrowding can stunt their growth.
More Ideas:
- Using Fresh Tomatoes: Fresh cherry tomatoes are a delight in salads, sauces, or as a healthy snack.
- Ripening Green Tomatoes: If you have too many tomatoes at once and some aren’t fully ripe, leave them to ripen at room temperature.
- Seed Storage: For next year’s harvest, save and dry the seeds from your tomatoes.
Conclusion:
Growing cherry tomatoes is a rewarding project that’s great for both beginners and experienced gardeners. With a little patience, the right care, and the right materials, you’ll soon enjoy your very own, home-grown cherry tomatoes. Happy gardening, and let me know how it goes!
Conclusion
So, there you have it! Growing grape tomatoes at home is not only achievable, but it’s also incredibly rewarding. From the vibrant burst of flavor in every tiny tomato to the sheer satisfaction of nurturing your own food, this DIY project is a must-try for any gardening enthusiast, regardless of experience level. Forget those bland, store-bought grape tomatoes; imagine popping sun-ripened, juicy gems straight from your own backyard into your salads, pasta dishes, or simply enjoying them as a healthy snack.
The beauty of growing your own grape tomatoes lies in the control you have over the entire process. You can choose organic methods, ensuring that your tomatoes are free from harmful pesticides and chemicals. You can select the specific variety of grape tomato that best suits your taste preferences, whether you prefer the classic sweetness of ‘Sungold’ or the slightly tangy flavor of ‘Juliet’. And you can tailor the growing conditions to maximize yield and flavor.
But the benefits extend beyond just taste and health. Gardening is a fantastic way to relieve stress, connect with nature, and get some much-needed sunshine and fresh air. It’s also a wonderful activity to share with family and friends, teaching children about the importance of healthy eating and sustainable living.
Don’t be afraid to experiment with different variations to find what works best for you. Try growing your grape tomatoes in containers on a balcony or patio if you have limited space. Consider using different types of soil or fertilizer to see how they affect the growth and flavor of your tomatoes. Explore companion planting, pairing your grape tomatoes with herbs like basil or marigolds to deter pests and enhance flavor. You could even try growing them indoors under grow lights during the colder months to enjoy fresh grape tomatoes year-round.
Ready to embark on your grape tomato growing adventure? We encourage you to give this DIY trick a try. It’s easier than you might think, and the rewards are well worth the effort. Remember to start with good quality seeds or seedlings, provide plenty of sunlight and water, and be patient. With a little care and attention, you’ll be harvesting your own delicious grape tomatoes in no time.
And most importantly, don’t forget to share your experience with us! We’d love to hear about your successes, challenges, and any tips or tricks you discover along the way. Post pictures of your grape tomato plants on social media using [Your Hashtag Here], or leave a comment below to share your story. Let’s create a community of grape tomato growers and inspire others to experience the joy of growing their own food. Happy gardening!
Frequently Asked Questions (FAQ)
What are the best varieties of grape tomatoes to grow at home?
Choosing the right variety is crucial for success. Some popular and reliable choices include ‘Sungold’ (known for its exceptional sweetness), ‘Juliet’ (a prolific producer with a slightly tangy flavor), ‘Santa’ (a classic grape tomato with good disease resistance), and ‘Red Robin’ (a compact variety perfect for containers). Consider your taste preferences and growing conditions when making your selection. Researching disease resistance is also important, especially if you live in an area prone to tomato diseases.
How much sunlight do grape tomatoes need?
Grape tomatoes thrive in full sun, requiring at least 6-8 hours of direct sunlight per day. Insufficient sunlight can lead to leggy plants, reduced fruit production, and less flavorful tomatoes. If you’re growing your tomatoes indoors, you’ll need to supplement with grow lights to provide adequate light. Position your plants in the sunniest spot in your garden or on your balcony.
What kind of soil is best for growing grape tomatoes?
Grape tomatoes prefer well-draining soil that is rich in organic matter. A slightly acidic soil pH (around 6.0-6.8) is ideal. Amend your soil with compost, aged manure, or other organic materials to improve drainage, fertility, and water retention. If you’re growing in containers, use a high-quality potting mix specifically formulated for vegetables. Avoid using garden soil in containers, as it can become compacted and restrict root growth.
How often should I water my grape tomato plants?
Water your grape tomato plants deeply and regularly, especially during hot, dry weather. Aim to keep the soil consistently moist but not waterlogged. Water at the base of the plant to avoid wetting the foliage, which can increase the risk of fungal diseases. Check the soil moisture regularly by sticking your finger into the soil about an inch deep. If the soil feels dry, it’s time to water. Mulching around the plants can help retain moisture and suppress weeds.
Do grape tomatoes need fertilizer?
Yes, grape tomatoes benefit from regular fertilization. Use a balanced fertilizer specifically formulated for tomatoes, following the instructions on the package. Fertilize at planting time and then every few weeks throughout the growing season. Avoid over-fertilizing, as this can lead to excessive foliage growth and reduced fruit production. Consider using organic fertilizers like compost tea or fish emulsion for a more sustainable approach.
How do I prevent common tomato diseases?
Preventing tomato diseases is essential for a successful harvest. Choose disease-resistant varieties, provide good air circulation, avoid overhead watering, and remove any diseased leaves promptly. Mulching around the plants can help prevent soil-borne diseases from splashing onto the foliage. Consider using organic fungicides like copper spray or neem oil to control fungal diseases. Crop rotation can also help prevent the buildup of soil-borne pathogens.
When should I harvest my grape tomatoes?
Grape tomatoes are ready to harvest when they are fully colored and slightly soft to the touch. Gently twist or snip the tomatoes from the vine. Harvest regularly to encourage continued fruit production. The color will depend on the variety you’re growing. Taste one to make sure it’s at the sweetness level you prefer.
How do I deal with pests on my grape tomato plants?
Monitor your plants regularly for pests like aphids, whiteflies, and tomato hornworms. Handpick any pests you find or use insecticidal soap or neem oil to control infestations. Encourage beneficial insects like ladybugs and lacewings to help control pests naturally. Covering your plants with row covers can also help prevent pests from reaching your tomatoes.
Can I grow grape tomatoes in containers?
Absolutely! Grape tomatoes are well-suited for container gardening. Choose a large container (at least 12 inches in diameter) with good drainage. Use a high-quality potting mix and provide regular watering and fertilization. Dwarf or compact varieties are particularly well-suited for containers. Make sure the container receives at least 6-8 hours of sunlight per day.
How do I prune grape tomato plants?
Pruning can help improve air circulation, reduce disease risk, and encourage fruit production. Remove suckers (the small shoots that grow between the main stem and the branches) to direct the plant’s energy towards fruit production. You can also remove any yellowing or diseased leaves. Pruning is especially important for indeterminate varieties, which can grow very tall and bushy.


Leave a Comment