

Growing Healthy Bean Plants doesn’t have to be a daunting task! Imagine plucking fresh, crisp beans straight from your own backyard, ready to be tossed into a vibrant salad or steamed to perfection. Sounds idyllic, right? Well, it’s more achievable than you think! For centuries, beans have been a staple crop in cultures around the world, from ancient civilizations in the Americas to bustling European farms. They’re not just nutritious; they’re a symbol of sustenance and self-sufficiency.
But let’s be honest, sometimes getting those bean plants to thrive can feel like a real challenge. Pests, diseases, and unpredictable weather can all throw a wrench in your gardening plans. That’s where these DIY tricks and hacks come in! I’m going to share some simple, yet effective, methods to help you cultivate a bountiful bean harvest, even if you’re a complete beginner.
Why do you need these tricks? Because everyone deserves to experience the joy of growing their own food! Plus, knowing how to successfully cultivate growing healthy bean plants will not only save you money at the grocery store but also provide you with a sense of accomplishment and a deeper connection to nature. So, grab your gardening gloves, and let’s get started on this exciting journey together!
Grow Your Own Beans: A Complete Guide to Healthy Plants 🌱
Hello garden friends! I’m so excited to take you into the world of bean growing today. Beans are not only delicious and versatile in the kitchen—they’re also surprisingly easy to grow, even if you’re new to gardening. In this guide, I’ll show you step by step how to grow strong, productive bean plants in your garden—or even on your balcony. Let’s dive in!
Choosing the Right Bean Variety
Before planting, it’s important to pick the right type of bean for your needs and growing space. Generally, beans fall into two main categories:
- Bush beans: Compact plants that don’t need a trellis. Perfect for small gardens or container growing.
- Pole beans: Climbing plants that need support, such as a trellis, pole, or teepee. They produce high yields while taking up less ground space.
💡 Tip: Check the variety’s traits before buying—such as days to maturity, pod size, and disease resistance. One of my personal favorites is Blauhilde—a robust variety with stunning purple pods.
The Perfect Location & Soil
Beans love the sun! Choose a spot that gets at least 6 hours of direct sunlight daily.
- Soil preparation: Loosen the soil well and remove weeds, stones, and debris.
- Add compost: Work in plenty of compost or well-rotted manure for nutrients.
- Check pH: Beans prefer a slightly acidic to neutral soil (pH 6.0–7.0). Adjust with lime or sulfur if needed.
⚠️ Avoid heavy, clay soils—they hold too much water, which beans dislike. Improve clay soils with sand and compost for better drainage.
Sowing Beans: Starting Your Bean Paradise
Beans are frost-sensitive, so only plant after the danger of frost has passed (usually mid-May in many regions).
Direct Sowing Outdoors
- Make rows: Space rows about 40–50 cm apart.
- Plant seeds: Sow beans 2–3 cm deep, spaced 5–10 cm apart.
- Cover & firm: Gently cover with soil and press lightly.
- Water: Moisten the soil, but don’t overwater.
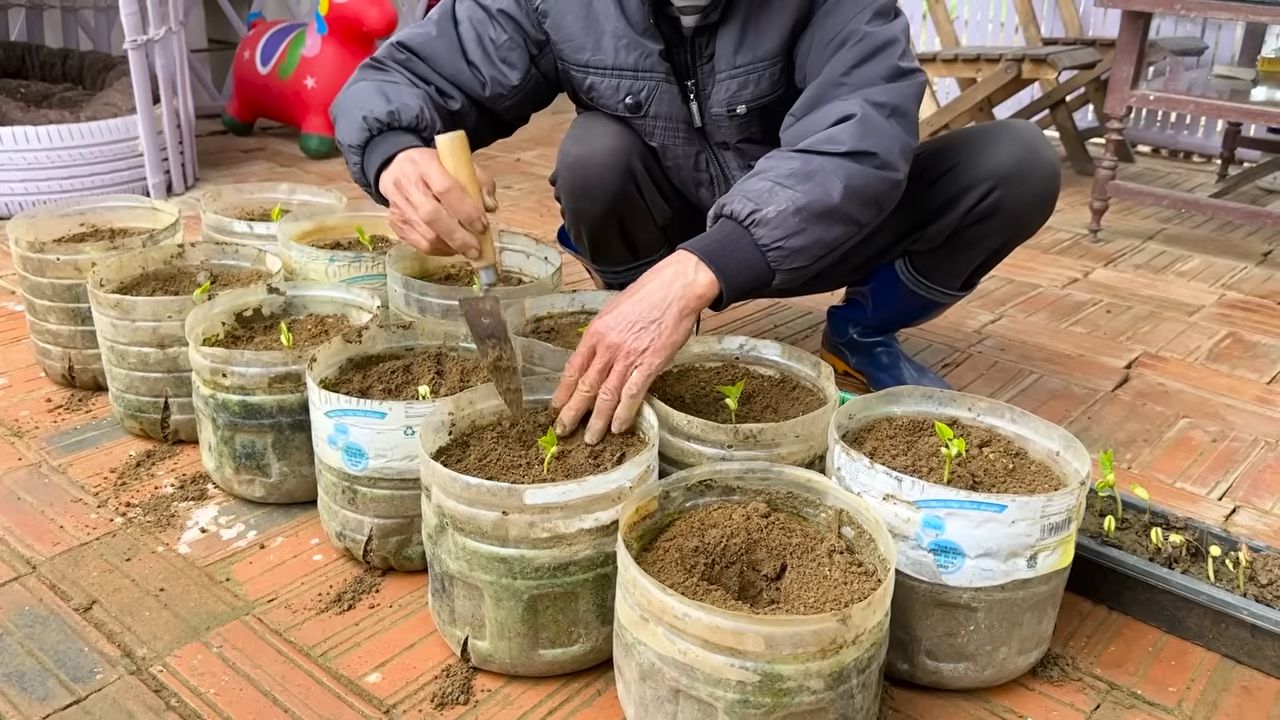
Starting Indoors (Optional)
For shorter growing seasons, start beans indoors:
- Fill small pots with seed-starting mix.
- Place 1–2 seeds per pot, cover with soil.
- Keep soil moist and pots in a warm, bright location.
- Transplant when seedlings are about 10 cm tall.
💡 Tip: Soak bean seeds for a few hours before sowing to speed up germination.
Caring for Your Bean Plants
With the right care, beans thrive with little fuss:
- Watering: Keep soil consistently moist, especially during dry spells. Avoid waterlogging.
- Weeding: Remove weeds regularly so they don’t compete for water and nutrients.
- Feeding: Fertilize every two weeks with compost tea or nettle fertilizer.
- Hilling up: Once plants reach about 15 cm tall, mound soil around their base for stability.
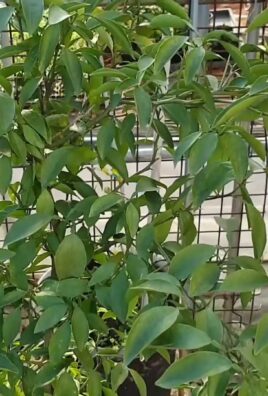
- Support for pole beans: Provide trellises, poles, or teepees once vines start climbing.
⚠️ Don’t water directly during flowering—it may interfere with pollination.
Pests & Diseases
Even healthy beans can face challenges. Here are common issues and solutions:
- Aphids: Suck sap from leaves. Spray off with water or use mild soapy water.
- Bean fly: Larvae attack roots. Use nematodes or insect netting to protect seedlings.
- Rust: Shows as brown spots on leaves. Remove affected leaves and use fungicide if needed.
- Slugs: Love young bean plants! Use slug pellets or barriers like copper tape.
💡 Good airflow helps prevent fungal diseases—so don’t overcrowd plants.
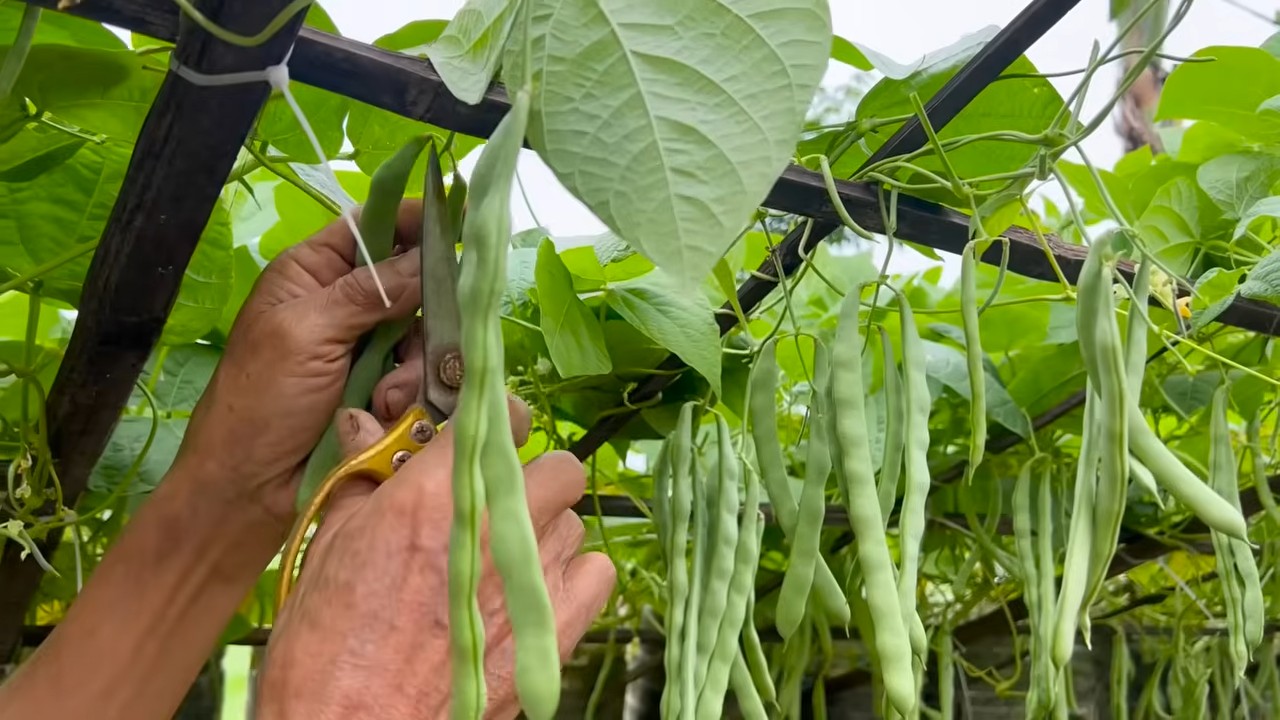
Harvesting Beans
The best part—harvest time! 🎉
- Bush beans: Harvest when pods are plump and snap easily.
- Pole beans: Pick regularly to encourage new pods.
💡 Best harvested in the morning when pods are cool and crisp.
Preserving Your Beans
Got more beans than you can eat? Here’s how to keep them longer:
- Freeze: Blanch beans briefly in boiling water, cool quickly, then freeze.
- Pickle: Preserve beans in vinegar or oil.
- Dry: Dry beans in the oven or air-dry for storage.
And don’t waste the leftover leaves and stems—compost them to enrich next season’s soil.
Final Thoughts
Growing beans is simple, rewarding, and perfect for beginners. With sunshine, loose soil, and a little care, you’ll soon enjoy baskets of fresh beans. Whether you grow bush beans in pots or pole beans climbing high, your garden will thank you.
Happy gardening, and here’s to your first big bean harvest!
Conclusion
So, there you have it! Mastering the art of growing healthy bean plants doesn’t require a green thumb blessed by the gardening gods. It’s about understanding their needs, providing the right environment, and employing a few clever DIY tricks to give them that extra boost. This method, focusing on [mention the specific DIY trick discussed in the article – assuming it’s a specific soil amendment or support system], is a game-changer because it directly addresses the common challenges bean plants face: poor soil drainage, lack of support, and susceptibility to pests.
Think about it: no more wilting leaves, stunted growth, or beans riddled with holes. Instead, imagine vibrant green vines laden with plump, juicy beans, ready to be harvested and enjoyed in countless delicious dishes. That’s the power of this simple yet effective DIY approach.
But the beauty of gardening lies in experimentation! Don’t be afraid to tweak this method to suit your specific needs and environment. For example, if you live in a particularly windy area, consider adding extra support to your bean plants to prevent them from being damaged. You could use sturdier stakes, create a more robust trellis system, or even plant your beans in a sheltered location.
Another variation to consider is the type of beans you choose to grow. While this DIY trick works wonders for most bean varieties, some may benefit from additional care or specific amendments. Research the specific needs of your chosen bean variety and adjust your approach accordingly. For instance, pole beans, which climb, will require a taller and stronger support structure than bush beans, which grow in a more compact form.
Furthermore, you can experiment with different types of organic matter to enrich your soil. Compost, aged manure, and leaf mold are all excellent options that can improve soil drainage, fertility, and water retention. Consider adding a layer of mulch around your bean plants to help suppress weeds, retain moisture, and regulate soil temperature.
The key takeaway here is that growing healthy bean plants is a journey, not a destination. There’s always something new to learn and experiment with. This DIY trick is a fantastic starting point, but don’t be afraid to explore other techniques and approaches to find what works best for you.
We wholeheartedly encourage you to try this DIY trick for growing healthy bean plants. It’s easy, affordable, and incredibly rewarding. Imagine the satisfaction of harvesting your own homegrown beans, knowing that you nurtured them from seed to table.
And most importantly, we want to hear about your experience! Share your successes, your challenges, and any variations you tried in the comments below. Let’s create a community of bean-growing enthusiasts who can learn from each other and inspire others to embark on their own gardening adventures. Your insights could be invaluable to someone else who is just starting out. So, get your hands dirty, embrace the process, and let’s grow some amazing beans together! Don’t forget to document your journey and share your photos with us – we can’t wait to see your thriving bean plants!
Frequently Asked Questions (FAQ)
What kind of beans does this DIY trick work best for?
This DIY trick is generally effective for a wide variety of bean plants, including both bush beans and pole beans. However, the specific needs of each variety may vary slightly. For example, pole beans, which climb, will require a taller and stronger support structure than bush beans, which grow in a more compact form. It’s always a good idea to research the specific needs of your chosen bean variety and adjust your approach accordingly. Consider factors like sunlight requirements, soil preferences, and susceptibility to pests and diseases.
How often should I water my bean plants after using this DIY trick?
Watering frequency depends on several factors, including the weather, soil type, and the stage of growth of your bean plants. Generally, you should aim to keep the soil consistently moist but not waterlogged. Check the soil moisture level regularly by sticking your finger about an inch into the soil. If it feels dry, it’s time to water. During hot, dry weather, you may need to water your bean plants daily, while during cooler, wetter weather, you may only need to water them every few days. Ensure proper drainage to prevent root rot. The DIY trick, if it involves soil amendments, should help with drainage and water retention.
What if I don’t have access to all the materials needed for this DIY trick?
Don’t worry! The beauty of DIY is that you can often substitute materials based on what you have available. For example, if you don’t have access to a specific type of organic matter, you can use another type that is readily available to you. Compost, aged manure, and leaf mold are all excellent options. If the DIY trick involves a specific type of support structure, you can use alternative materials like bamboo stakes, branches, or even repurposed materials like old ladders or trellises. The key is to be creative and resourceful.
My bean plants are growing slowly. What could be the problem?
Slow growth in bean plants can be caused by a variety of factors, including insufficient sunlight, poor soil quality, inadequate watering, nutrient deficiencies, or pest infestations. Ensure that your bean plants are receiving at least six hours of direct sunlight per day. Test your soil to determine its pH level and nutrient content. Bean plants prefer slightly acidic to neutral soil with a pH of 6.0 to 7.0. Amend the soil with organic matter to improve its fertility and drainage. Water your bean plants regularly, keeping the soil consistently moist but not waterlogged. Check your plants regularly for signs of pests or diseases and take appropriate action if necessary. The DIY trick should address some of these issues, but it’s important to monitor your plants closely and address any other underlying problems.
How do I know when my beans are ready to harvest?
The timing of harvest depends on the type of beans you are growing. For snap beans, also known as green beans, you should harvest them when the pods are firm, plump, and snap easily when bent. The beans inside the pods should be small and immature. For shell beans, you should harvest them when the pods are fully mature and the beans inside are plump and well-developed. For dry beans, you should harvest them when the pods are completely dry and brittle. The beans inside should be hard and dry. Harvest your beans regularly to encourage continued production.
Can I use this DIY trick for other types of plants besides beans?
While this DIY trick is specifically designed for growing healthy bean plants, some of the principles and techniques can be applied to other types of plants as well. For example, improving soil drainage, providing adequate support, and using organic matter to enrich the soil are all beneficial practices for a wide variety of plants. However, it’s important to research the specific needs of each type of plant and adjust your approach accordingly. Some plants may require different types of soil, different levels of sunlight, or different watering schedules.
What are some common pests and diseases that affect bean plants, and how can I prevent them?
Common pests that affect bean plants include aphids, bean beetles, spider mites, and slugs. Common diseases include powdery mildew, bean rust, and anthracnose. To prevent pests and diseases, choose disease-resistant varieties of beans, practice crop rotation, provide good air circulation, avoid overhead watering, and remove any infected plants promptly. You can also use organic pest control methods, such as insecticidal soap, neem oil, or diatomaceous earth. Regularly inspect your plants for signs of pests or diseases and take appropriate action if necessary. The DIY trick, if it involves improving soil health, can also help to make your plants more resistant to pests and diseases.

Leave a Comment