

Growing Hibiscus at Home can transform your garden into a tropical paradise, bursting with vibrant colors and exotic charm! Have you ever dreamed of sipping iced tea surrounded by the lush beauty of hibiscus blooms? Well, dream no more! This DIY guide is your passport to creating that very scene, right in your own backyard.
Hibiscus flowers have captivated hearts for centuries. From ancient Egypt, where they were offered to deities, to their prominent role in Hawaiian culture, symbolizing respect and hospitality, these blooms carry a rich history. In many cultures, hibiscus tea is enjoyed for its refreshing taste and potential health benefits, making it more than just a pretty flower.
But why should you embark on this growing hibiscus at home adventure? Because it’s easier than you think! Many people are intimidated by the thought of cultivating these beauties, believing they require specialized care. However, with a few simple tricks and DIY hacks, you can unlock the secrets to thriving hibiscus plants. Imagine the satisfaction of nurturing these stunning flowers from bud to bloom, adding a touch of the exotic to your everyday life. Plus, you’ll have a constant supply of gorgeous blooms for teas, decorations, or simply to admire. Let’s dive in and discover how to make your hibiscus dreams a reality!
Hibiskus zu Hause ziehen: Ein umfassender DIY-Leitfaden
Hallo Pflanzenfreunde! Ich freue mich riesig, euch heute in die wunderbare Welt des Hibiskusanbaus zu Hause einzuführen. Diese tropischen Schönheiten mit ihren leuchtenden Blüten können jedem Garten oder sogar einem sonnigen Fensterbrett einen Hauch von Exotik verleihen. Keine Angst, es ist einfacher als ihr denkt! Lasst uns gemeinsam eintauchen und sehen, wie ihr eure eigenen Hibiskusblüten zum Erblühen bringen könnt.
Die Grundlagen: Was Hibiskus zum Gedeihen braucht
Bevor wir loslegen, ist es wichtig zu verstehen, was Hibiskus wirklich glücklich macht. Hier sind die wichtigsten Faktoren:
* Sonne, Sonne, Sonne: Hibiskus liebt die Sonne! Mindestens 6 Stunden direkte Sonneneinstrahlung pro Tag sind ideal. Je mehr Sonne, desto mehr Blüten!
* Gut durchlässiger Boden: Staunässe ist der Feind des Hibiskus. Ein gut durchlässiger Boden, der reich an organischen Stoffen ist, ist entscheidend.
* Regelmäßige Bewässerung: Hibiskus mag es feucht, aber nicht durchnässt. Gießt regelmäßig, besonders während der heißen Sommermonate.
* Düngung: Hibiskus sind hungrige Pflanzen. Eine regelmäßige Düngung mit einem speziellen Hibiskusdünger fördert üppiges Wachstum und reiche Blütenbildung.
* Schutz vor Frost: Die meisten Hibiskusarten sind nicht winterhart. Wenn ihr in einer Region mit kalten Wintern lebt, müsst ihr eure Pflanzen entweder ins Haus holen oder winterharte Sorten wählen.
Schritt-für-Schritt-Anleitung: Hibiskus pflanzen
Egal, ob ihr euren Hibiskus im Garten oder in einem Topf pflanzt, die folgenden Schritte helfen euch dabei, einen guten Start zu gewährleisten:
1. Den richtigen Standort wählen: Sucht einen sonnigen Platz in eurem Garten oder auf eurem Balkon, der mindestens 6 Stunden direkte Sonneneinstrahlung pro Tag erhält. Achtet darauf, dass der Boden gut durchlässig ist.
2. Den Boden vorbereiten: Wenn ihr im Garten pflanzt, lockert den Boden gut auf und mischt Kompost oder andere organische Stoffe ein, um die Drainage und die Nährstoffversorgung zu verbessern. Für Topfpflanzen verwendet eine hochwertige Blumenerde, die speziell für Hibiskus geeignet ist.
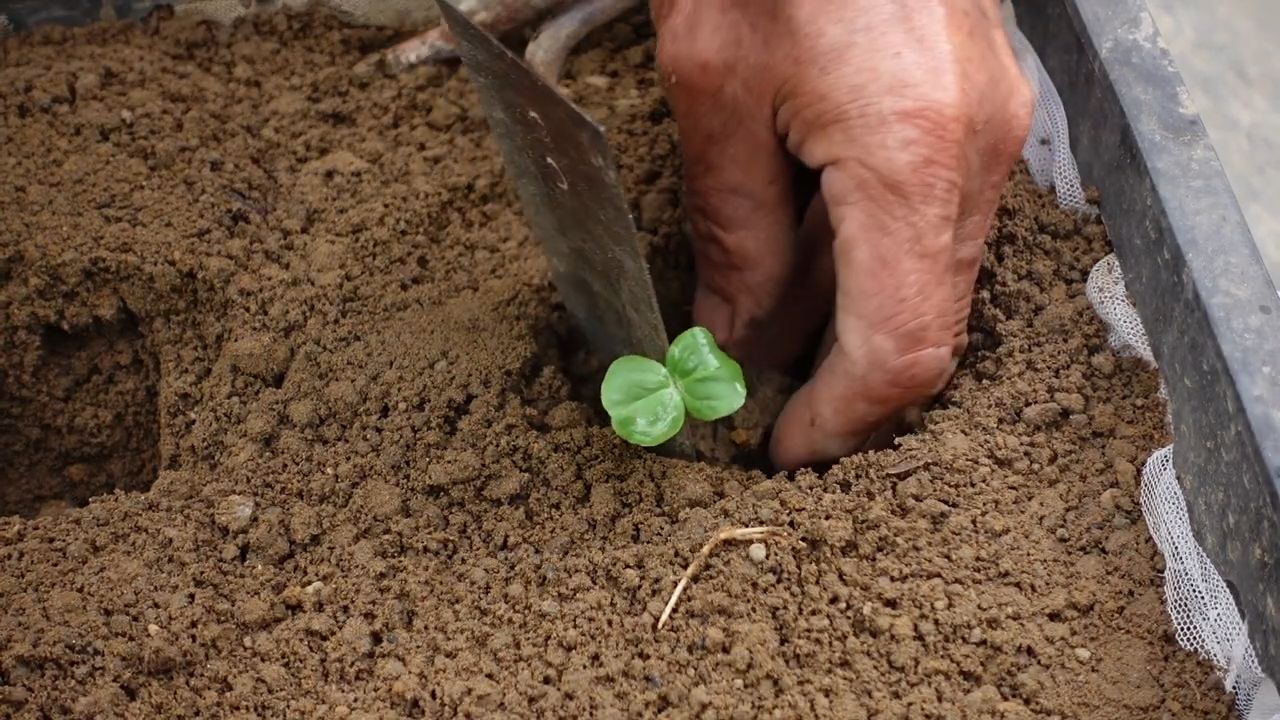
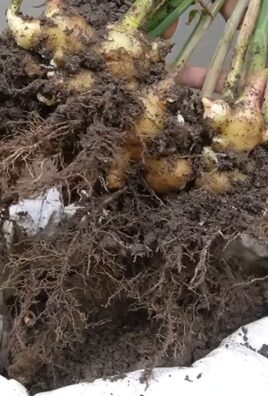
3. Die Pflanze vorbereiten: Nehmt den Hibiskus vorsichtig aus dem Topf. Lockert die Wurzeln leicht auf, falls sie stark verwurzelt sind.
4. Pflanzen: Grabt ein Loch, das doppelt so breit ist wie der Wurzelballen und genauso tief. Setzt den Hibiskus in das Loch und füllt es mit Erde auf. Achtet darauf, dass der obere Rand des Wurzelballens mit der Bodenoberfläche abschließt.
5. Gießen: Gießt den Hibiskus nach dem Pflanzen gründlich, um die Erde zu setzen und die Wurzeln zu befeuchten.
6. Mulchen: Tragt eine Schicht Mulch um die Pflanze auf, um die Feuchtigkeit zu speichern, Unkraut zu unterdrücken und den Boden kühl zu halten.
Hibiskus im Topf ziehen: So geht’s
Hibiskus im Topf zu ziehen ist eine großartige Option, wenn ihr keinen Garten habt oder in einer Region mit kalten Wintern lebt. Hier sind die Besonderheiten:
1. Den richtigen Topf wählen: Wählt einen Topf, der groß genug ist, um den Wurzelballen aufzunehmen, und der über Drainagelöcher verfügt. Ein Topf mit einem Durchmesser von mindestens 30 cm ist ein guter Anfang.
2. Die richtige Blumenerde verwenden: Verwendet eine hochwertige Blumenerde, die speziell für Hibiskus geeignet ist. Diese Erde ist in der Regel gut durchlässig und enthält die notwendigen Nährstoffe.
3. Regelmäßig gießen: Gießt den Hibiskus regelmäßig, besonders während der heißen Sommermonate. Achtet darauf, dass die Erde feucht, aber nicht durchnässt ist.
4. Regelmäßig düngen: Düngt den Hibiskus regelmäßig mit einem speziellen Hibiskusdünger. Befolgt die Anweisungen auf der Verpackung.
5. Den Hibiskus umtopfen: Topft den Hibiskus alle ein bis zwei Jahre in einen größeren Topf um, um ihm mehr Platz zum Wachsen zu geben.
Düngung: Der Schlüssel zu üppigen Blüten
Hibiskus sind hungrige Pflanzen und benötigen regelmäßige Düngung, um üppig zu wachsen und reichlich zu blühen.
1. Den richtigen Dünger wählen: Verwendet einen speziellen Hibiskusdünger, der reich an Kalium ist. Kalium fördert die Blütenbildung.
2. Regelmäßig düngen: Düngt den Hibiskus während der Wachstumsperiode (Frühling und Sommer) alle zwei bis vier Wochen. Befolgt die Anweisungen auf der Verpackung.
3. Weniger düngen im Winter: Reduziert die Düngung im Winter, wenn das Wachstum der Pflanze verlangsamt ist.
Bewässerung: Das richtige Maß finden
Die richtige Bewässerung ist entscheidend für die Gesundheit und das Wachstum des Hibiskus.
1. Regelmäßig gießen: Gießt den Hibiskus regelmäßig, besonders während der heißen Sommermonate. Achtet darauf, dass die Erde feucht, aber nicht durchnässt ist.
2. Die Erde überprüfen: Überprüft die Erde regelmäßig, um festzustellen, ob sie trocken ist. Steckt euren Finger etwa 2-3 cm tief in die Erde. Wenn sie sich trocken anfühlt, ist es Zeit zu gießen.
3. Nicht überbewässern: Überbewässerung kann zu Wurzelfäule führen. Achtet darauf, dass das Wasser gut abfließen kann.
4. Weniger gießen im Winter: Reduziert die Bewässerung im Winter, wenn das Wachstum der Pflanze verlangsamt ist.
Schneiden: Für eine buschige Pflanze und mehr Blüten
Das Schneiden des Hibiskus ist wichtig, um eine buschige Pflanze zu fördern und die Blütenbildung anzuregen.
1. Den richtigen Zeitpunkt wählen: Schneidet den Hibiskus im Frühjahr, bevor das neue Wachstum beginnt.
2. Abgestorbene oder beschädigte Äste entfernen: Entfernt zuerst alle abgestorbenen oder beschädigten Äste.
3. Die Pflanze formen: Schneidet die Äste zurück, um die Pflanze zu formen und das Wachstum neuer Triebe zu fördern.
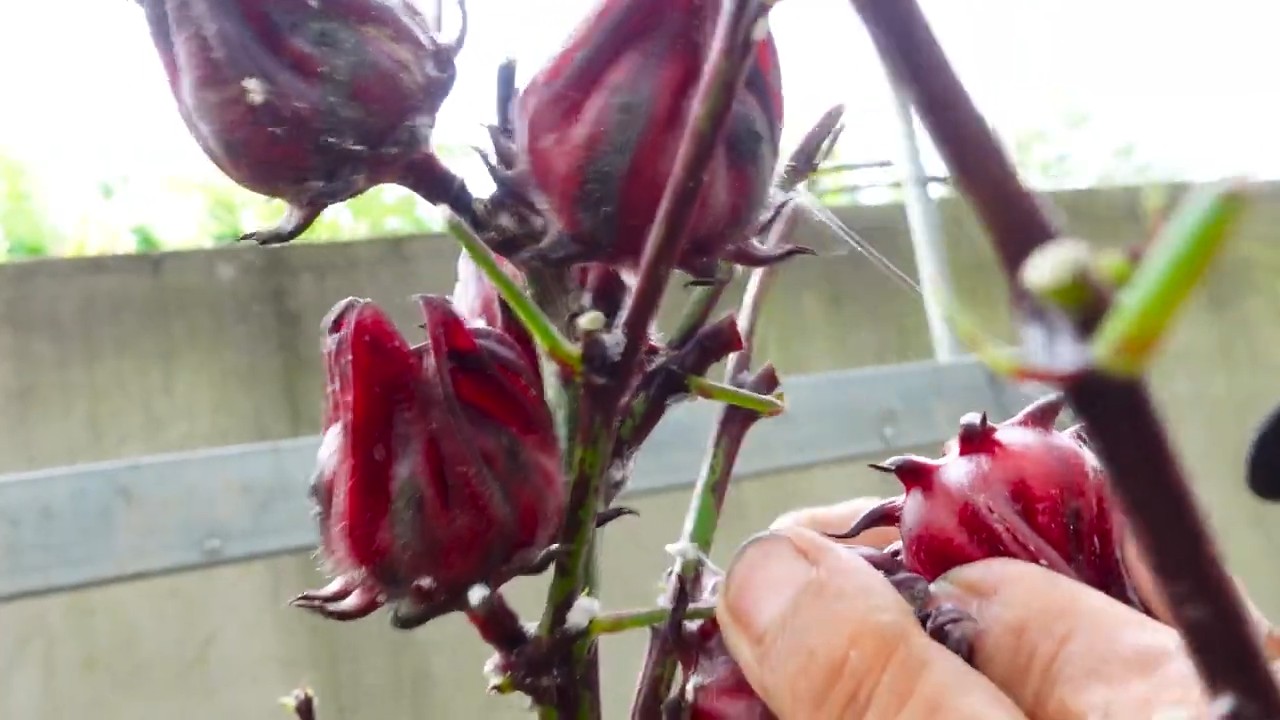
4. Verblühte Blüten entfernen: Entfernt regelmäßig verblühte Blüten, um die Bildung neuer Blüten anzuregen.
Überwinterung: Hibiskus vor Frost schützen
Die meisten Hibiskusarten sind nicht winterhart und müssen vor Frost geschützt werden.
1. Den Hibiskus ins Haus holen: Wenn ihr in einer Region mit kalten Wintern lebt, holt den Hibiskus ins Haus, bevor der erste Frost kommt.
2. Einen kühlen, hellen Standort wählen: Stellt den Hibiskus an einen kühlen, hellen Standort, z. B. in ein ungeheiztes Zimmer oder einen Wintergarten.
3. Weniger gießen und düngen: Reduziert die Bewässerung und Düngung im Winter, wenn das Wachstum der Pflanze verlangsamt ist.
4. Den Hibiskus im Frühjahr wieder nach draußen stellen: Wenn die Frostgefahr vorüber ist, könnt ihr den Hibiskus wieder nach draußen stellen. Gewöhnt die Pflanze langsam an die Sonne, um Sonnenbrand zu vermeiden.
Häufige Probleme und Lösungen
Auch beim Hibiskusanbau können Probleme auftreten. Hier sind einige der häufigsten Probleme und wie ihr sie lösen könnt:
* Gelbe Blätter: Gelbe Blätter können verschiedene Ursachen haben, z. B. Überbewässerung, Unterbewässerung, Nährstoffmangel oder Schädlingsbefall. Überprüft die Erde, um festzustellen, ob sie zu feucht oder zu trocken ist. Düngt die Pflanze bei Bedarf. Untersucht die Blätter auf Schädlinge.
* Blüten fallen ab: Das Abfallen von Blüten kann durch Stress verursacht werden, z. B. durch plötzliche Temperaturänderungen, Wassermangel oder Nährstoffmangel. Achtet auf eine gleichmäßige Bewässerung und Düngung. Schützt die Pflanze vor extremen Temperaturen.
* Schäd
Conclusion
So, there you have it! Growing hibiscus at home, while it might seem daunting at first, is entirely achievable and incredibly rewarding. We’ve walked through the essential steps, from selecting the right variety to providing the perfect environment and tackling potential problems. But why should you embark on this floral adventure?
The answer is simple: fresh, vibrant hibiscus blooms right at your fingertips. Imagine the joy of snipping a gorgeous flower to adorn your home, using the petals to brew a refreshing tea, or even incorporating them into your culinary creations. Store-bought hibiscus simply can’t compare to the satisfaction and quality of homegrown blooms. Plus, you’ll be contributing to a healthier environment by reducing your reliance on commercially grown flowers that often involve pesticides and long-distance transportation.
This DIY trick is a must-try because it empowers you to connect with nature, cultivate beauty, and enjoy the numerous benefits of this stunning flower. It’s a project that offers both aesthetic pleasure and practical applications.
Don’t be afraid to experiment with different hibiscus varieties to find your favorites. Consider trying the ‘Cranberry Crush’ for its intense color, or the ‘President’ for its classic appeal. You can also explore different growing methods, such as container gardening for smaller spaces or planting directly in the ground if you have the room.
Another variation to consider is the use of different fertilizers. While we recommended a balanced fertilizer, you can tailor the nutrient mix to your hibiscus’s specific needs. For example, a fertilizer higher in phosphorus can promote more abundant blooms. Remember to always follow the instructions on the fertilizer label and avoid over-fertilizing, which can damage your plant.
Furthermore, think about companion planting. Certain herbs and flowers can deter pests and attract beneficial insects, creating a healthier environment for your hibiscus. Marigolds, for instance, are known to repel nematodes, while lavender can attract pollinators.
We encourage you to take the plunge and start growing hibiscus at home today. It’s a journey filled with learning, growth, and the ultimate reward of beautiful, homegrown flowers. And once you’ve experienced the magic of cultivating your own hibiscus, we’d love to hear about it! Share your experiences, tips, and photos with us in the comments below. Let’s create a community of hibiscus enthusiasts and inspire others to discover the joy of this rewarding DIY project. Your success stories can help others overcome challenges and unlock the full potential of growing hibiscus at home. Let’s spread the hibiscus love!
Frequently Asked Questions (FAQ)
1. What is the best time of year to start growing hibiscus?
The best time to start growing hibiscus depends on your climate. In warmer climates (zones 9-11), you can plant hibiscus year-round. However, in cooler climates, it’s best to start in the spring after the last frost. This gives the plant ample time to establish itself before the colder months arrive. If you’re starting from seeds, begin indoors 6-8 weeks before the last expected frost. This will give your seedlings a head start. For potted hibiscus, you can typically transplant them outdoors in the spring or early summer.
2. How much sunlight does hibiscus need?
Hibiscus thrives in full sun, requiring at least 6-8 hours of direct sunlight per day. Insufficient sunlight can lead to fewer blooms and leggy growth. If you’re growing hibiscus indoors, place it near a sunny window or supplement with grow lights. Rotate the plant regularly to ensure even exposure to sunlight. If you live in a particularly hot climate, some afternoon shade can be beneficial to prevent leaf scorch.
3. What kind of soil is best for hibiscus?
Hibiscus prefers well-draining, slightly acidic soil with a pH between 6.0 and 6.5. A good potting mix for hibiscus should contain a blend of peat moss, perlite, and vermiculite. This combination provides good drainage and aeration, which are essential for healthy root growth. Avoid heavy clay soils, as they can retain too much water and lead to root rot. You can amend clay soils with organic matter, such as compost or well-rotted manure, to improve drainage.
4. How often should I water my hibiscus?
Water hibiscus regularly, especially during hot and dry weather. The soil should be kept consistently moist but not waterlogged. Check the soil moisture by sticking your finger about an inch deep. If the soil feels dry, it’s time to water. Water deeply, allowing the water to drain out of the bottom of the pot. Reduce watering during the winter months when the plant is dormant. Overwatering can lead to root rot, so it’s important to strike a balance.
5. What kind of fertilizer should I use for hibiscus?
Use a balanced fertilizer with a slightly higher phosphorus content to promote blooming. A fertilizer with an NPK ratio of 10-30-20 is a good choice. Fertilize hibiscus every 2-4 weeks during the growing season (spring and summer). Reduce or stop fertilizing during the winter months. Always follow the instructions on the fertilizer label and avoid over-fertilizing, which can burn the roots. You can also use a slow-release fertilizer at the beginning of the growing season for a continuous supply of nutrients.
6. How do I prune my hibiscus?
Prune hibiscus in late winter or early spring before new growth begins. Remove any dead, damaged, or crossing branches. You can also prune to shape the plant and encourage bushier growth. Cut back stems by about one-third to promote more blooms. Pinching off the tips of new growth can also encourage branching. Avoid pruning too heavily, as this can reduce flowering.
7. What are some common pests and diseases that affect hibiscus?
Common pests that affect hibiscus include aphids, spider mites, whiteflies, and mealybugs. These pests can be controlled with insecticidal soap or neem oil. Diseases that can affect hibiscus include root rot, leaf spot, and powdery mildew. Root rot is caused by overwatering and can be prevented by ensuring good drainage. Leaf spot and powdery mildew can be treated with fungicides. Regularly inspect your hibiscus for signs of pests or diseases and take action promptly to prevent them from spreading.
8. Can I grow hibiscus indoors?
Yes, you can grow hibiscus indoors, but it requires specific conditions. Provide plenty of bright, indirect sunlight, maintain consistent moisture, and ensure good air circulation. Use a well-draining potting mix and fertilize regularly during the growing season. Indoor hibiscus may also require higher humidity levels, which can be achieved by using a humidifier or placing the pot on a tray filled with pebbles and water.
9. How do I overwinter my hibiscus in cold climates?
In cold climates, you’ll need to bring your hibiscus indoors before the first frost. Prune the plant back by about one-third and reduce watering. Place the hibiscus in a cool, bright location, such as a sunroom or near a sunny window. Water sparingly, allowing the soil to dry out slightly between waterings. You can also store the hibiscus in a dormant state in a dark, cool location, such as a garage or basement, but this requires even less watering. In the spring, gradually acclimate the hibiscus to outdoor conditions before placing it back in its usual spot.
10. My hibiscus is not blooming. What could be the problem?
There are several reasons why your hibiscus might not be blooming. The most common causes include insufficient sunlight, improper watering, lack of fertilizer, and incorrect pruning. Ensure that your hibiscus is receiving at least 6-8 hours of direct sunlight per day, water it regularly but not excessively, fertilize it every 2-4 weeks during the growing season, and prune it correctly. Also, check for pests or diseases that could be affecting the plant’s health. By addressing these potential issues, you can encourage your hibiscus to bloom more abundantly.
Leave a Comment