

Growing Hibiscus Sabdariffa Indoors might seem like a tropical dream reserved for sun-drenched gardens, but guess what? You can absolutely cultivate this vibrant plant right in the comfort of your own home! Forget those winter blues; imagine harvesting your own ruby-red roselle calyces for delicious teas and jams, all thanks to a little indoor gardening magic.
Hibiscus Sabdariffa, also known as Roselle, boasts a rich history, particularly in regions like West Africa and Southeast Asia, where it’s been used for centuries in traditional medicine and culinary delights. From refreshing beverages to flavorful sauces, this plant is a cultural staple. But you don’t need to travel the globe to experience its wonders!
Why should you try growing Hibiscus Sabdariffa indoors? Well, for starters, it’s a fantastic way to add a splash of color and a touch of the exotic to your living space. More importantly, it allows you to enjoy the health benefits and unique flavors of Roselle even if you don’t have a sprawling outdoor garden. Plus, let’s be honest, who wouldn’t want to impress their friends with homegrown hibiscus tea? In this article, I’ll share my favorite DIY tricks and hacks to ensure your indoor Hibiscus Sabdariffa thrives, bringing a taste of the tropics right to your windowsill. Get ready to unleash your inner gardener!
Hibiscus Sabdariffa (Roselle) Indoor Cultivation: Your DIY Guide
Hey plant friends! Have you ever thought about growing Hibiscus Sabdariffa, also known as Roselle, indoors? This beautiful plant, known for its bright red calyxes from which delicious hibiscus tea can be made, is not as difficult to cultivate as you might think. I’ll show you how you can easily do it yourself!
What You Need: The Material List
Before we get started, here’s a list of the things you’ll need for your indoor hibiscus project:
- Hibiscus Sabdariffa Seeds: Preferably from a trusted source to ensure a good germination rate.
- Seed Starting Mix: A light, well-draining mixture is ideal.
- Pots: Small seed starting pots to begin with and later larger pots for transplanting.
- Potting Soil: High-quality potting soil that retains nutrients and drains well.
- Water: Ideally room-temperature, standing water.
- Spray Bottle: For watering seedlings.
- Grow Light (optional): If you don’t have enough sunlight.
- Fertilizer: A balanced liquid fertilizer for flowering plants.
- Pruning Shears: For pruning.
- Gloves: To keep your hands clean.
Phase 1: Sowing – The Start of Hibiscus Happiness
- Prepare Seeds: To speed up germination, you can soak the seeds in lukewarm water for 24 hours. This helps to soften the hard seed coat.
- Prepare Sowing Containers: Fill your seed starting pots with seed starting mix. Gently press down the soil.
- Sow Seeds: Place 2-3 seeds per pot about 1 cm deep into the soil.
- Water: Carefully moisten the soil with a spray bottle. The soil should be damp but not wet.
- Cover: Cover the pots with cling film or a transparent lid to create high humidity.
- Location: Place the pots in a warm, bright spot. A temperature of 20-25°C is ideal.
- Be Patient: Germination can take 1-3 weeks. Keep the soil moist and air out the pots briefly daily to prevent mold.
Phase 2: The Seedlings – From Sprout to Small Plant
- Remove the Cover: Once the seedlings emerge from the soil, remove the cover.
- Bright Light: Place the seedlings in a very bright location, ideally a south-facing window. If natural light is not sufficient, use a grow light.
- Watering: Water the seedlings when the top layer of soil is dry. Avoid waterlogging.
- Thinning: If several seedlings have grown in one pot, thin them out once they have a few leaves. Choose the strongest seedling and carefully cut off the others.
- Fertilize: Start fertilizing about 2-3 weeks after emergence. Use a diluted liquid fertilizer for young plants.
Phase 3: Transplanting – A New Home for Your Hibiscus
- Choose the Right Pot: Once the seedlings are large enough (about 10-15 cm tall), it’s time to transplant them into larger pots. Choose a pot with a diameter of at least 20 cm.
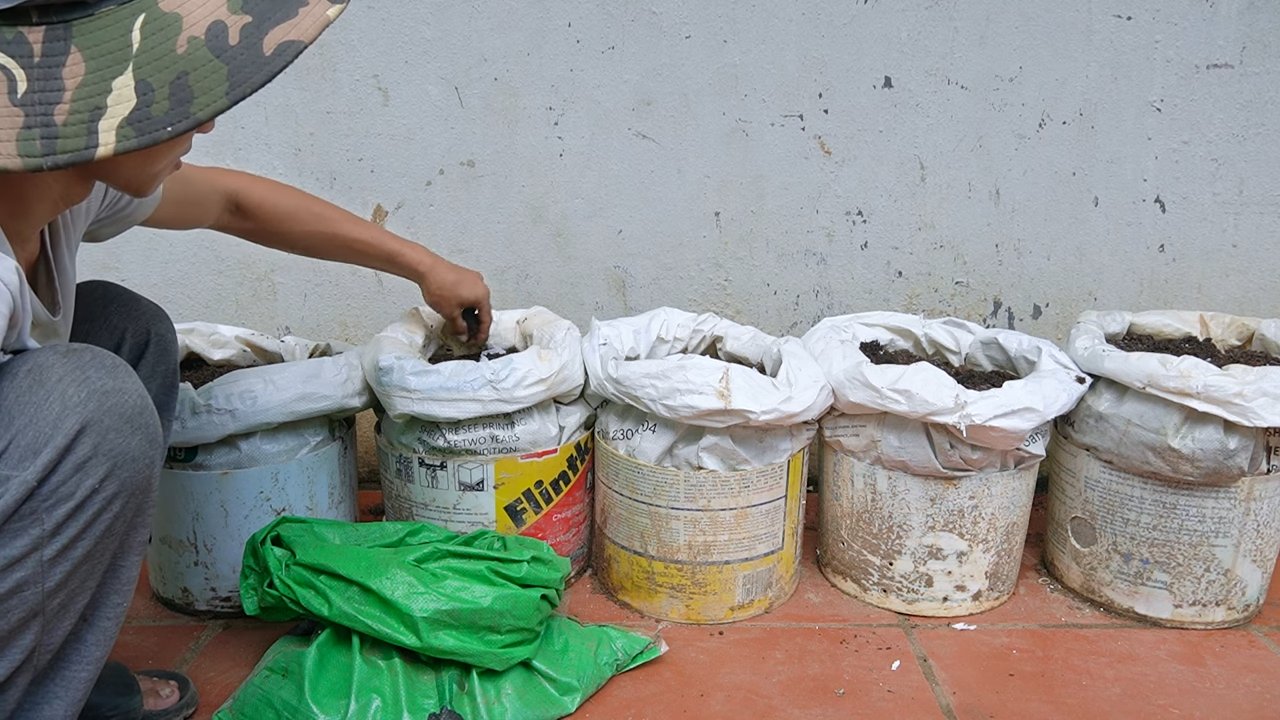
- Prepare the Pot: Fill the pot with high-quality potting soil.
- Transplant: Dig a hole in the soil large enough for the seedling’s root ball. Carefully remove the seedling from the seed starting pot and place it in the hole. Fill the pot with soil and gently press it down.
- Water: Water the plant thoroughly after transplanting.
- Location: Place the pot in a bright, sunny spot.
Phase 4: Care – So Your Hibiscus Thrives Beautifully
- Light: Hibiscus Sabdariffa needs a lot of light, at least 6-8 hours of direct sunlight per day. If you don’t have enough sunlight, use a grow light.
- Watering: Water the plant regularly, especially during flowering. The soil should always be slightly moist but not wet. Avoid waterlogging, as this can lead to root rot.
- Humidity: Hibiscus Sabdariffa likes high humidity. You can increase humidity by regularly misting the plant with water or placing the pot on a tray of moist pebbles.
- Fertilizing: During the growing and flowering season, fertilize the plant every 2-4 weeks with a balanced liquid fertilizer for flowering plants. Follow the instructions on the packaging.
- Pruning: Prune the plant regularly to make it bushier and encourage flowering. Remove dead or damaged branches. You can also prune the plant after flowering to maintain its shape.
- Temperature: Hibiscus Sabdariffa prefers warm temperatures between 20-30°C. Avoid sudden temperature fluctuations.
- Pests and Diseases: Watch out for pests like aphids, spider mites, and whiteflies. Combat them if necessary with natural remedies like neem oil or insecticidal soap. Also, look for signs of diseases like root rot or fungal infections.
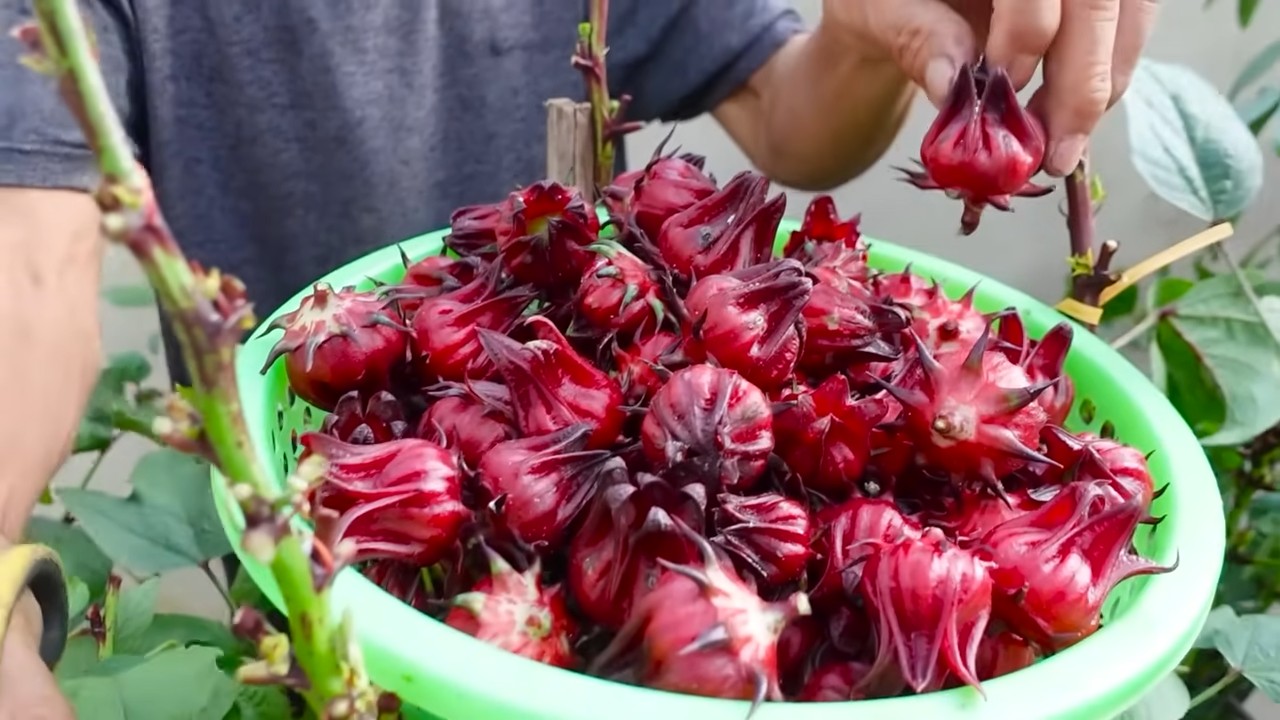
Phase 5: Harvesting – Time for Hibiscus Tea!
- Harvest Time: The calyxes are ready for harvest when they are plump and bright red. This is usually about 2-3 weeks after flowering.
- Harvesting: Cut the calyxes with pruning shears.
- Drying: Dry the calyxes in a warm, dry place or in a food dehydrator. They are dry when they crumble easily.
- Storage: Store the dried calyxes in an airtight container in a cool, dark place.
Preparing Hibiscus Tea:
- Ingredients: Dried hibiscus calyxes, water, optional: honey or other sweeteners.
- Preparation: Pour boiling water over the dried hibiscus calyxes. Let the tea steep for 5-10 minutes.
- Serving: Strain the tea and sweeten to taste. You can enjoy the tea hot or cold.
Additional Tips for Indoor Cultivation:
Ensure Air Circulation: Good air circulation helps prevent fungal infections.
Rotate the Pot Regularly: To ensure all sides of the plant receive even light, rotate the pot regularly.
Conclusion
So, there you have it! Growing Hibiscus Sabdariffa indoors is not only achievable, but it’s a rewarding experience that brings a touch of the tropics right into your home. Forget relying solely on commercially available hibiscus tea; imagine the satisfaction of brewing a vibrant, tangy beverage made from your own homegrown roselle. This DIY project is a must-try for several compelling reasons.
First and foremost, you gain complete control over the growing process. You know exactly what goes into nurturing your plants, ensuring they are free from harmful pesticides and chemicals often found in commercially grown produce. This is especially important if you’re health-conscious and prefer organic options. Secondly, growing your own Hibiscus Sabdariffa offers a unique opportunity to connect with nature, even within the confines of your living space. The daily observation of growth, the gentle care you provide, and the eventual harvest all contribute to a sense of accomplishment and well-being.
Beyond the pure joy of gardening, consider the economic benefits. While the initial investment in seeds, pots, and soil is required, the long-term yield of roselle calyces will undoubtedly outweigh the cost of constantly purchasing hibiscus tea or dried hibiscus flowers. Plus, you’ll have an abundance to share with friends and family, spreading the joy of homegrown goodness.
But the benefits extend beyond the practical. The vibrant colors and unique shape of the Hibiscus Sabdariffa plant add a touch of exotic beauty to any indoor space. It’s a conversation starter, a visual delight, and a constant reminder of the power and beauty of nature.
Don’t be afraid to experiment with variations! Try different potting mixes to see which one your plants thrive in. Consider using grow lights to supplement natural sunlight, especially during the shorter winter months. And once you’ve harvested your roselle calyces, explore the myriad of ways to use them. Beyond tea, you can make jams, jellies, syrups, and even use them as a natural food coloring.
Ready to embark on your Hibiscus Sabdariffa growing adventure? We encourage you to give this DIY trick a try. It’s easier than you might think, and the rewards are well worth the effort. Remember to start with high-quality seeds, provide ample sunlight and water, and be patient. Growing takes time, but the journey is just as enjoyable as the destination.
Once you’ve experienced the joy of growing your own Hibiscus Sabdariffa indoors, we’d love to hear about it! Share your experiences, tips, and photos in the comments below. Let’s create a community of indoor roselle growers and inspire others to embrace the beauty and benefits of this amazing plant. What are you waiting for? Get planting!
Frequently Asked Questions (FAQ)
What are the best conditions for growing Hibiscus Sabdariffa indoors?
Hibiscus Sabdariffa, like most hibiscus varieties, thrives in warm, sunny conditions. When growing indoors, aim to provide at least 6-8 hours of direct sunlight per day. A south-facing window is ideal. If you don’t have enough natural light, consider using grow lights to supplement. The ideal temperature range is between 65-80°F (18-27°C). Avoid placing your plants near drafts or cold windows. Humidity is also important; aim for a humidity level of around 50-60%. You can increase humidity by using a humidifier, placing the pot on a tray filled with pebbles and water (making sure the pot isn’t sitting directly in the water), or grouping plants together.
What type of soil should I use for growing Hibiscus Sabdariffa indoors?
Hibiscus Sabdariffa prefers well-draining, slightly acidic soil. A good potting mix for hibiscus is a blend of peat moss, perlite, and vermiculite. You can also add some compost to provide extra nutrients. Avoid using heavy clay soils, as they can retain too much water and lead to root rot. Ensure your pot has drainage holes to prevent waterlogging. A pH level between 6.0 and 6.5 is ideal. You can test the pH of your soil using a soil testing kit.
How often should I water my indoor Hibiscus Sabdariffa plant?
Water your Hibiscus Sabdariffa regularly, but avoid overwatering. The soil should be kept consistently moist, but not soggy. Water when the top inch of soil feels dry to the touch. During the growing season (spring and summer), you may need to water more frequently than during the dormant season (fall and winter). When watering, water thoroughly until water drains out of the drainage holes. Empty the saucer beneath the pot to prevent the plant from sitting in water.
What kind of fertilizer should I use for my Hibiscus Sabdariffa plant?
Hibiscus Sabdariffa benefits from regular fertilization, especially during the growing season. Use a balanced fertilizer with a slightly higher phosphorus content (e.g., 10-30-10). Fertilize every 2-4 weeks during the spring and summer. Reduce or stop fertilizing during the fall and winter. Follow the instructions on the fertilizer label carefully to avoid over-fertilizing, which can damage your plant. You can also use organic fertilizers, such as compost tea or fish emulsion.
How do I harvest the roselle calyces from my Hibiscus Sabdariffa plant?
The roselle calyces are ready to harvest when they are plump, bright red, and easily detach from the stem. This typically occurs about 6 months after planting. Use sharp scissors or pruning shears to cut the calyces from the plant. Be careful not to damage the plant when harvesting. After harvesting, remove the seed pod from the center of the calyx. The calyces can be used fresh or dried for later use. To dry the calyces, spread them out on a tray in a well-ventilated area or use a dehydrator.
Are there any common pests or diseases that affect Hibiscus Sabdariffa?
Yes, Hibiscus Sabdariffa can be susceptible to certain pests and diseases. Common pests include aphids, spider mites, and whiteflies. These pests can be controlled with insecticidal soap or neem oil. Diseases that can affect Hibiscus Sabdariffa include root rot, leaf spot, and powdery mildew. Root rot is caused by overwatering, so ensure your plant has good drainage. Leaf spot and powdery mildew can be treated with fungicides. Regularly inspect your plants for signs of pests or diseases and take action promptly to prevent them from spreading.
Can I propagate Hibiscus Sabdariffa from cuttings?
Yes, Hibiscus Sabdariffa can be propagated from cuttings. Take cuttings from healthy, non-flowering stems in the spring or summer. The cuttings should be about 4-6 inches long. Remove the lower leaves and dip the cut end in rooting hormone. Plant the cuttings in a well-draining potting mix and keep them moist. Place the cuttings in a warm, humid location. Roots should develop within a few weeks. Once the cuttings have rooted, they can be transplanted into individual pots.
How big will my indoor Hibiscus Sabdariffa plant get?
The size of your indoor Hibiscus Sabdariffa plant will depend on the size of the pot and the growing conditions. In general, indoor hibiscus plants can grow to be 3-6 feet tall. You can prune your plant to control its size and shape. Pruning also encourages bushier growth and more flowers. Prune your plant in the late winter or early spring before new growth begins.
Can I grow Hibiscus Sabdariffa from seed indoors year-round?
While you can technically start Hibiscus Sabdariffa seeds indoors year-round, it’s best to start them in the late winter or early spring. This gives the plants a head start before the growing season begins. Starting seeds indoors allows you to control the temperature and humidity, which can improve germination rates. However, with proper grow lights and temperature control, you can certainly attempt to grow them at any time of the year.
What are some creative ways to use my homegrown roselle calyces?
Beyond the traditional hibiscus tea, there are many creative ways to use your homegrown roselle calyces. You can make jams, jellies, and syrups. Roselle syrup can be used to flavor cocktails, mocktails, and desserts. You can also use the calyces as a natural food coloring for cakes, cookies, and other baked goods. Roselle can also be used to make a refreshing sorbet or granita. Experiment with different recipes and find your favorite ways to enjoy the unique flavor and vibrant color of homegrown roselle.

Leave a Comment