

Growing Malabar Spinach Fast can feel like a race against the clock, especially when you’re craving those delicious, nutrient-packed leaves! Have you ever dreamt of harvesting a vibrant, leafy green just weeks after planting? Well, you’re not alone! For centuries, Malabar Spinach, also known as Basella alba, has been a culinary staple in Asian and African cultures, prized for its heat tolerance and unique flavor. It’s a climbing vine that not only provides a tasty addition to your meals but also adds a touch of vertical beauty to your garden.
But let’s be honest, sometimes patience isn’t our strongest virtue, especially when it comes to fresh, homegrown veggies. That’s why I’m so excited to share these tried-and-true DIY tricks and hacks to help you accelerate the growth of your Malabar Spinach. We’ll dive into everything from seed preparation to soil optimization, ensuring you’re harvesting those luscious leaves in record time.
Why is this so important? Because everyone deserves access to fresh, healthy food, and growing Malabar Spinach fast means more delicious meals, less reliance on store-bought produce, and a deeper connection to the natural world. Plus, who doesn’t love bragging rights for having the most thriving garden on the block? Let’s get started and unlock the secrets to rapid Malabar Spinach growth!
Growing Malabar Spinach Like a Pro: A DIY Guide to Speedy Success
Hey there, fellow gardening enthusiasts! I’m so excited to share my secrets for growing Malabar spinach, also known as Ceylon spinach or vine spinach, at lightning speed. This leafy green is a fantastic addition to any garden, offering a delicious and nutritious alternative to traditional spinach, especially in warmer climates. It thrives in the heat, is super easy to propagate, and can climb, making it a beautiful and productive addition to your space. Let’s dive in!
What You’ll Need
Before we get our hands dirty, let’s gather the essentials. Here’s a list of what you’ll need to grow Malabar spinach quickly and successfully:
* **Malabar Spinach Seeds or Cuttings:** You can purchase seeds online or at your local garden center. Alternatively, if you know someone who already grows Malabar spinach, ask for a few cuttings – they root incredibly easily!
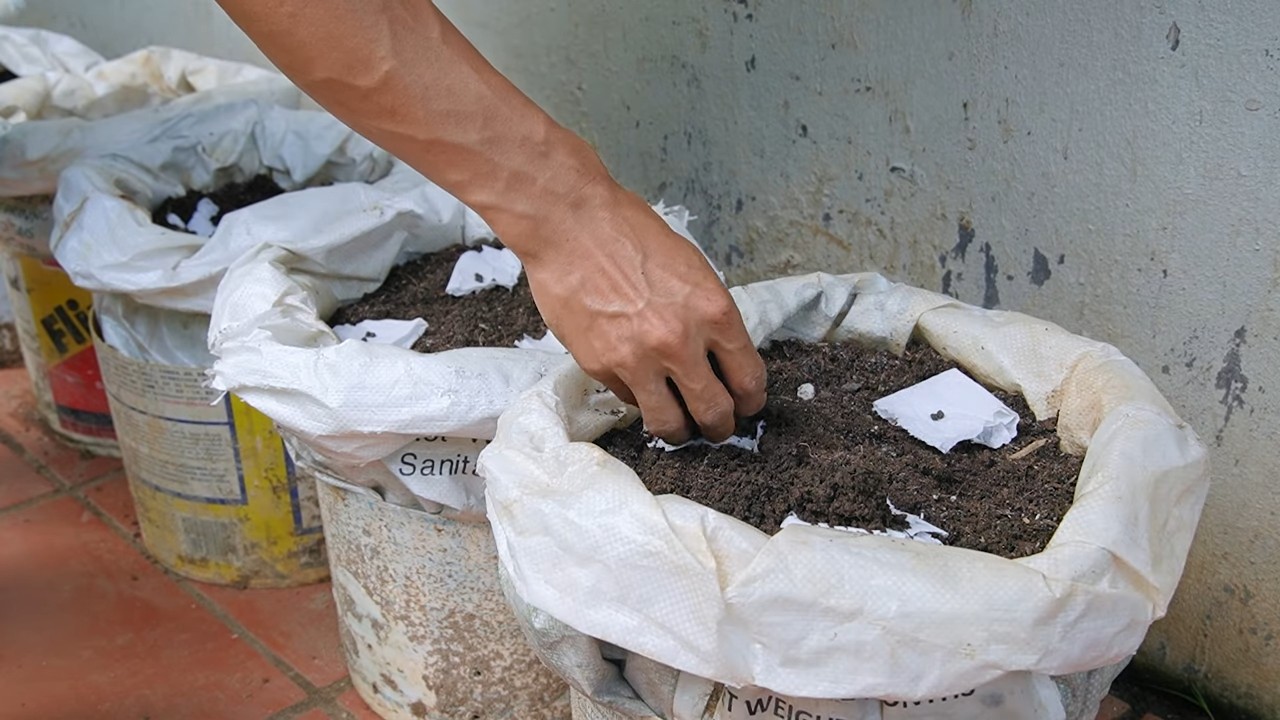
* **Potting Mix:** A well-draining potting mix is crucial, especially if you’re starting your plants in containers. I like to use a mix of compost, perlite, and coco coir.
* **Gardening Gloves:** Protect those precious hands!
* **Small Pots or Seed Trays:** For starting seeds or rooting cuttings.
* **Larger Pots or Garden Bed:** Where your Malabar spinach will eventually grow.
* **Trellis or Support Structure:** Malabar spinach is a vine, so it needs something to climb on. A trellis, fence, or even a sturdy tomato cage will work wonders.
* **Watering Can or Hose:** For keeping your plants hydrated.
* **Liquid Fertilizer:** A balanced liquid fertilizer will give your plants a boost.
* **Pruning Shears or Scissors:** For harvesting and shaping your plants.
Starting from Seeds: The Patient Gardener’s Route
If you’re starting from seeds, here’s how to get them germinating quickly:
1. **Scarification (Optional but Recommended):** Malabar spinach seeds have a tough outer shell, which can slow down germination. To speed things up, you can scarify the seeds by gently rubbing them with sandpaper or nicking them with a knife. Be careful not to damage the inner seed!
2. **Soaking the Seeds:** Soak the scarified seeds in warm water for 24-48 hours. This helps to soften the seed coat and encourages germination. I usually change the water every 12 hours.
3. **Sowing the Seeds:** Fill your small pots or seed trays with potting mix. Make a small hole (about ½ inch deep) in each pot and place one or two seeds in each hole. Cover the seeds with potting mix and gently water them.
4. **Creating a Warm and Humid Environment:** Malabar spinach seeds germinate best in warm, humid conditions. You can create a mini-greenhouse effect by covering the pots with plastic wrap or placing them in a propagator.
5. **Maintaining Moisture:** Keep the potting mix consistently moist, but not soggy. Check the moisture level daily and water as needed.
6. **Providing Light:** Once the seedlings emerge (usually within 7-14 days), remove the plastic wrap and place them in a sunny location. They need at least 6 hours of sunlight per day.
7. **Thinning Seedlings (If Necessary):** If you planted two seeds in each pot and both germinated, thin them out by removing the weaker seedling. This will give the remaining seedling more room to grow.
Propagating from Cuttings: The Speedy Shortcut
If you have access to Malabar spinach cuttings, you can bypass the seed-starting process altogether. This is my preferred method because it’s faster and easier!
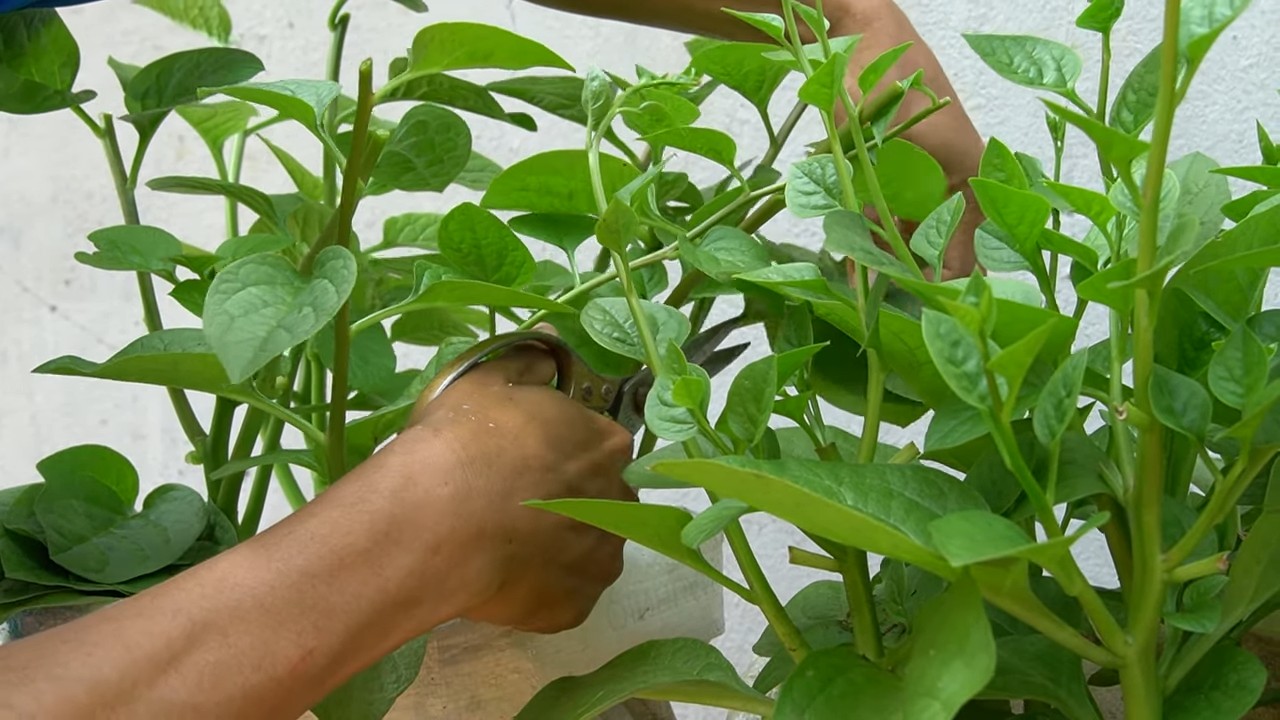
1. **Selecting Cuttings:** Choose healthy, vigorous stems that are about 4-6 inches long. Make sure the cuttings have at least a few leaves.
2. **Preparing the Cuttings:** Remove the leaves from the bottom 2 inches of the cutting. This will encourage root growth.
3. **Rooting in Water (My Favorite Method):** Place the cuttings in a glass or jar of water, making sure that the bottom 2 inches are submerged. Change the water every 1-2 days to prevent bacterial growth.
4. **Rooting in Potting Mix (Alternative Method):** Dip the cut end of the cutting in rooting hormone (optional) and insert it into a small pot filled with moist potting mix.
5. **Creating a Humid Environment:** Cover the cuttings with a plastic bag or place them in a propagator to create a humid environment.
6. **Providing Light:** Place the cuttings in a bright, indirect light location. Avoid direct sunlight, which can scorch the leaves.
7. **Waiting for Roots:** Roots should start to form within 1-2 weeks. You’ll know the cuttings are ready to be transplanted when the roots are about 1-2 inches long.
Transplanting Your Seedlings or Cuttings: Setting the Stage for Growth
Once your seedlings or cuttings have developed a strong root system, it’s time to transplant them into their permanent home.
1. **Choosing the Right Location:** Malabar spinach thrives in full sun (at least 6 hours of sunlight per day) and well-drained soil. If you’re growing it in containers, choose a large pot (at least 12 inches in diameter) with drainage holes.
2. **Preparing the Soil:** Amend the soil with compost or other organic matter to improve drainage and fertility.
3. **Digging the Hole:** Dig a hole that is slightly larger than the root ball of your seedling or cutting.
4. **Carefully Removing the Plant:** Gently remove the seedling or cutting from its pot, being careful not to damage the roots.
5. **Placing the Plant in the Hole:** Place the plant in the hole and backfill with soil. Gently firm the soil around the base of the plant.
6. **Watering Thoroughly:** Water the plant thoroughly after transplanting.
7. **Adding a Trellis or Support Structure:** Install a trellis or other support structure near the plant. Malabar spinach is a vine and needs something to climb on.
Caring for Your Malabar Spinach: Keeping it Happy and Healthy
Now that your Malabar spinach is planted, here’s how to keep it thriving:
1. **Watering:** Water regularly, especially during hot, dry weather. Malabar spinach prefers consistently moist soil, but avoid overwatering, which can lead to root rot. I usually water deeply every 2-3 days, depending on the weather.
2. **Fertilizing:** Feed your Malabar spinach with a balanced liquid fertilizer every 2-3 weeks. This will provide the nutrients it needs to grow quickly and produce lots of leaves.
3. **Pruning:** Prune your Malabar spinach regularly to encourage bushier growth and prevent it from becoming too leggy. You can also prune it to shape it to your desired form.
4. **Pest and Disease Control:** Malabar spinach is relatively pest and disease-resistant. However, it can occasionally be affected by aphids or spider mites. If you notice any pests, treat them with insecticidal soap or neem oil.
5. **Sunlight:** Ensure your plant receives at least 6 hours of direct sunlight daily. This is crucial for vigorous growth.
6. **Soil pH:** Malabar spinach prefers a slightly acidic to neutral soil pH (6.0-7.0). You can test your soil pH with a soil testing kit and amend it as needed.
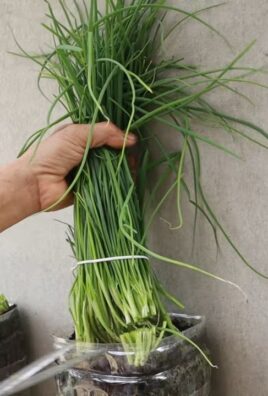
Harvesting Your Malabar Spinach: Enjoying the Fruits (or Leaves!) of Your Labor
You can start harvesting your Malabar spinach leaves as soon as the plant is large enough.
1. **Harvesting Leaves:** Simply snip off the leaves with pruning shears or scissors. You can harvest individual leaves or entire stems.
2. **Harvesting Regularly:** Harvesting regularly will encourage the plant to produce more leaves.
3. **Using Fresh:** Malabar spinach is best used fresh. You can add it to salads, stir-fries, soups, or stews.
4. **Storing:** You can store Malabar spinach leaves in the refrigerator for up to a week. Wrap them in a damp paper towel and place them in a plastic bag.
Troubleshooting: Addressing Common Issues
Even with the best care, you might encounter a few challenges along the way. Here are some common problems and how to fix them:
* **Yellowing Leaves:** This could be a sign of overwatering, underwatering, or nutrient deficiency. Check the soil moisture and adjust your watering schedule accordingly. Fertilize with a balanced liquid fertilizer.
* **Slow Growth:** This could be due to insufficient sunlight, poor soil, or lack of nutrients. Make sure your plant is getting enough sunlight and amend the soil with compost or other organic matter. Fertilize regularly.
* **Pests:** Inspect your plants regularly for pests. Treat any infestations with insecticidal soap or neem oil.
* **Root Rot:** This is caused by overwatering. Make sure your soil is well-draining and avoid overwatering.
Extra Tips for Super Speedy Growth
Here are
Conclusion
So, there you have it! Growing Malabar spinach fast is not just a pipe dream; it’s an achievable reality with a little know-how and the right techniques. We’ve explored the key elements that contribute to rapid growth, from selecting the optimal growing location and preparing nutrient-rich soil to providing consistent watering and support structures. By implementing these strategies, you can significantly accelerate the growth of your Malabar spinach and enjoy a bountiful harvest much sooner than you might expect.
This DIY trick is a must-try for several compelling reasons. First and foremost, it empowers you to take control of your food source. Knowing exactly where your vegetables come from and how they were grown provides peace of mind and ensures you’re consuming fresh, healthy produce free from harmful chemicals. Secondly, it’s incredibly rewarding to witness the transformation from tiny seeds to lush, vibrant vines laden with edible leaves. The satisfaction of harvesting your own homegrown Malabar spinach is unparalleled. Finally, growing your own vegetables can be a cost-effective way to supplement your grocery budget, especially if you consume Malabar spinach regularly.
But the beauty of this DIY approach lies in its adaptability. Feel free to experiment with different variations to suit your specific needs and preferences. For instance, if you live in a particularly hot climate, consider providing shade during the hottest part of the day to prevent leaf scorch. Alternatively, if you’re short on space, you can grow Malabar spinach in containers, ensuring they have adequate drainage and support. You can also try different types of fertilizers, such as compost tea or fish emulsion, to boost growth and nutrient content.
Don’t be afraid to get creative and personalize your growing experience. Perhaps you want to train your Malabar spinach to climb a decorative trellis or create a living wall. The possibilities are endless!
We wholeheartedly encourage you to try this DIY trick for growing Malabar spinach fast. It’s a fun, rewarding, and ultimately delicious endeavor. Once you’ve experienced the joy of harvesting your own homegrown spinach, you’ll never look back.
And most importantly, we want to hear about your experiences! Share your tips, tricks, and successes in the comments below. Let us know what worked for you, what challenges you encountered, and any variations you tried. Your feedback will not only help other readers but also contribute to our collective knowledge of growing this wonderful vegetable. Let’s create a community of Malabar spinach enthusiasts and learn from each other’s journeys. Happy growing!
Frequently Asked Questions (FAQ)
What is the best time of year to plant Malabar spinach?
Malabar spinach thrives in warm weather, so the best time to plant it is in late spring or early summer, after the last frost has passed. The soil temperature should be at least 65°F (18°C) for optimal germination. If you live in a region with a long growing season, you can even plant a second crop in mid-summer for a fall harvest. In cooler climates, starting seeds indoors 4-6 weeks before the last frost can give you a head start.
How much sunlight does Malabar spinach need?
Malabar spinach requires at least 6 hours of direct sunlight per day to grow vigorously. A sunny location will ensure that the plants produce plenty of leaves and develop a strong, healthy vine. If you live in a particularly hot climate, providing some afternoon shade can help prevent leaf scorch. However, avoid planting in a completely shaded area, as this will result in stunted growth and reduced yields.
What type of soil is best for growing Malabar spinach?
Malabar spinach prefers well-draining soil that is rich in organic matter. Amend your soil with compost, aged manure, or other organic materials before planting to improve its fertility and drainage. A slightly acidic to neutral soil pH (6.0-7.5) is ideal. You can test your soil pH using a soil testing kit and adjust it accordingly with lime or sulfur.
How often should I water Malabar spinach?
Malabar spinach needs consistent watering, especially during hot, dry weather. Water deeply and regularly, ensuring that the soil remains moist but not waterlogged. Avoid overhead watering, as this can promote fungal diseases. Instead, water at the base of the plant using a soaker hose or drip irrigation system. Mulching around the plants can help retain moisture and suppress weeds.
What kind of support structure does Malabar spinach need?
Malabar spinach is a vining plant and requires a support structure to climb on. A trellis, fence, or even a sturdy stake will work well. Provide the support structure at the time of planting to encourage the vines to climb upwards. As the plants grow, you may need to gently guide the vines onto the support structure.
How do I fertilize Malabar spinach?
Malabar spinach benefits from regular fertilization to promote vigorous growth and abundant leaf production. Use a balanced fertilizer (e.g., 10-10-10) or an organic fertilizer such as compost tea or fish emulsion. Apply the fertilizer according to the package instructions, being careful not to over-fertilize, as this can burn the plants. Side-dressing with compost every few weeks can also provide a steady supply of nutrients.
When can I start harvesting Malabar spinach?
You can start harvesting Malabar spinach leaves as soon as the plants are established and have reached a reasonable size (typically 6-8 inches tall). Harvest the young, tender leaves regularly to encourage continued growth. Avoid harvesting more than one-third of the plant at a time, as this can stress the plant and reduce yields.
How do I deal with pests and diseases?
Malabar spinach is generally resistant to pests and diseases, but it can occasionally be affected by aphids, spider mites, or fungal diseases. Inspect your plants regularly for signs of infestation or disease. If you notice any problems, treat them promptly with an appropriate insecticide or fungicide. Organic options include insecticidal soap, neem oil, and copper fungicide. Good air circulation and proper watering practices can also help prevent diseases.
Can I grow Malabar spinach in containers?
Yes, Malabar spinach can be successfully grown in containers, making it a great option for gardeners with limited space. Choose a large container (at least 12 inches in diameter) with good drainage holes. Use a high-quality potting mix and provide a support structure for the vines to climb on. Water and fertilize regularly, as container-grown plants tend to dry out and deplete nutrients more quickly than those grown in the ground.
Is Malabar spinach heat tolerant?
Yes, Malabar spinach is known for its excellent heat tolerance, making it a great choice for gardeners in hot climates. It can withstand high temperatures and still produce abundant leaves. However, providing some afternoon shade during the hottest part of the day can help prevent leaf scorch and keep the plants healthy.
How do I save seeds from Malabar spinach?
Saving seeds from Malabar spinach is relatively easy. Allow some of the flowers to develop into small, dark berries. Once the berries are fully ripe and have turned black, harvest them and allow them to dry completely. Then, crush the berries to release the seeds. Store the seeds in a cool, dry place until you’re ready to plant them.
What are some ways to use Malabar spinach in cooking?
Malabar spinach can be used in a variety of culinary applications. The leaves can be eaten raw in salads or cooked like spinach in stir-fries, soups, and stews. They have a slightly mucilaginous texture, which can help thicken sauces and soups. The young shoots can also be eaten raw or cooked. Malabar spinach is a versatile and nutritious vegetable that can add a unique flavor and texture to your meals.
Leave a Comment