

Growing Malabar Spinach Quickly can feel like a race against the clock, especially when you’re craving those delicious, nutrient-packed leaves! Have you ever dreamt of harvesting a bountiful supply of this leafy green, but felt like it was taking forever to mature? Well, you’re not alone! Many home gardeners face the same challenge. But what if I told you there are simple, effective DIY tricks to significantly speed up the process?
Malabar Spinach, also known as Basella alba, isn’t actually spinach at all! It’s a vining plant with origins in tropical Asia and Africa, where it’s been a culinary staple for centuries. Its popularity has spread worldwide, prized for its heat tolerance and mild, spinach-like flavor. However, its relatively slow growth can be frustrating for impatient gardeners like myself.
That’s where these DIY hacks come in! In this article, I’m going to share some tried-and-true methods to help you achieve rapid growing Malabar Spinach Quickly. These tips are designed to give your plants the boost they need, from seed to harvest, ensuring you’re enjoying fresh, homegrown greens in no time. Whether you’re a seasoned gardener or just starting out, these easy-to-implement techniques will transform your Malabar Spinach growing experience. Get ready to unlock the secrets to a faster, more abundant harvest!
Malabar Spinach Quick Grow: Your DIY Guide for a Lush Harvest
Hello garden friends! I love harvesting fresh vegetables straight from my garden, and Malabar spinach is no exception. It’s not only super healthy but also incredibly easy to grow, especially if you know a few tricks. In this article, I’ll show you how to speed up your Malabar spinach cultivation and achieve a rich harvest. Let’s go!
What you need for quick Malabar spinach cultivation
Before we start, here’s a list of things you’ll need:
- Malabar spinach seeds (or cuttings if you already have a plant)
- Seed starting pots or trays
- Seed starting mix
- Garden soil (well-drained and nutrient-rich)
- Compost or organic fertilizer
- Planters (if you don’t want to plant the spinach directly in the bed)
- Trellis (e.g., a trellis, fence, or bamboo stakes)
- Watering can or garden hose
- Pruning shears
- Gloves (optional, but recommended)
Step-by-step guide for quick cultivation
Here’s a detailed guide on how to grow Malabar spinach quickly and successfully:
- Prepare seeds (Optional, but recommended)
Malabar spinach seeds have a relatively hard shell, which can slow down germination. To speed up the process, I recommend pre-treating the seeds:
- Soaking: Place the seeds in lukewarm water for 24 hours. This helps to soften the shell and promote germination.
- Scarification: You can also gently nick the seeds with a nail file or sandpaper. Be careful not to damage the seeds, but only to lightly roughen the outer layer.
- Sowing in seed starting pots
Pre-growing in seed starting pots gives your plants a head start and protects them from unfavorable weather conditions.
- Prepare pots: Fill the seed starting pots or trays with seed starting mix. Press the soil down lightly.
- Sow seeds: Place 2-3 seeds in each pot, about 1 cm deep.
- Cover: Cover the seeds with a thin layer of soil and moisten them carefully with a spray bottle.
- Location: Place the pots in a warm and bright location. A temperature of 20-25°C is ideal for germination.
- Moisture: Keep the soil moist, but not wet. Avoid waterlogging, as this can lead to mold growth.
- Patience: Germination can take 1-3 weeks. Once the seedlings have a few leaves, you can prick them out (thin them).
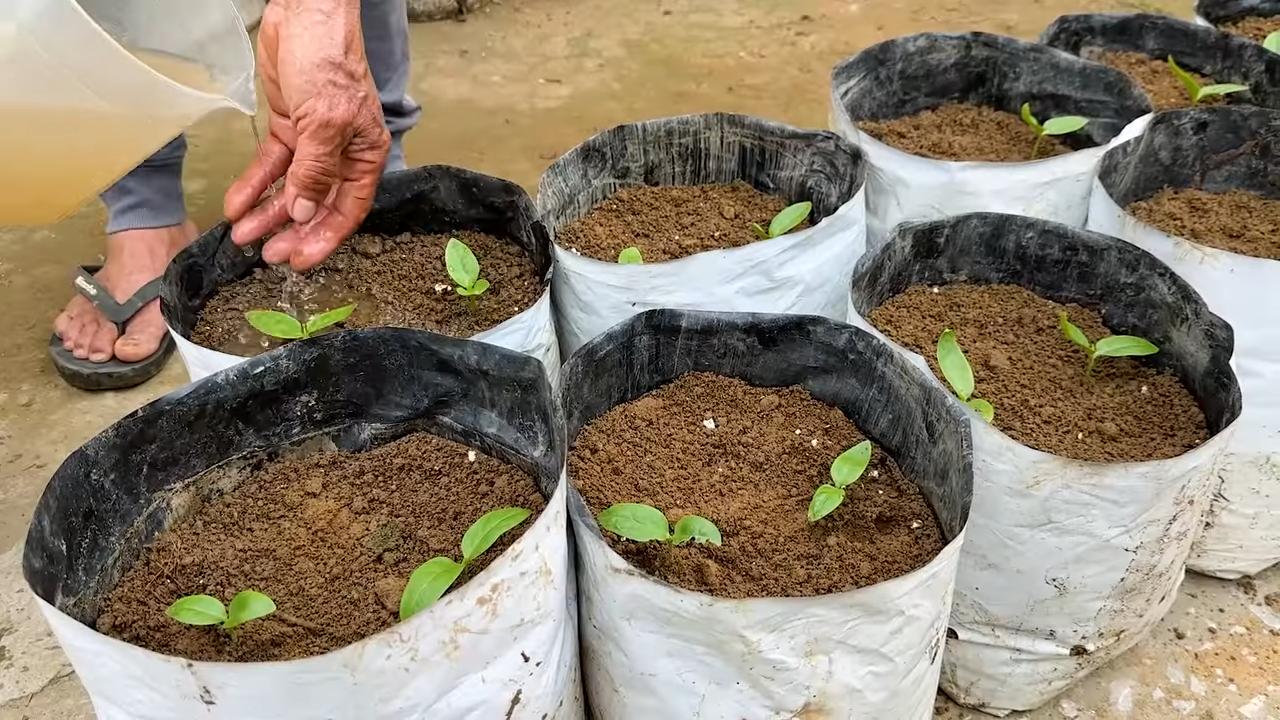
- Pricking out (thinning) the seedlings
When the seedlings are large enough to handle (about 5-7 cm tall), it’s time to prick them out.
- Preparation: Fill larger pots (approx. 8-10 cm in diameter) with garden soil enriched with compost or organic fertilizer.
- Carefully lift seedlings: Gently lift the seedlings from the seed starting pots by sliding a small spoon or pricking stick under the roots. Try to damage the roots as little as possible.
- Plant: Place each seedling in a separate pot and fill with soil. Press the soil down lightly.
- Water: Water the seedlings carefully.
- Location: Place the pots in a bright, but not directly sunny, location.
- Planting outdoors or in larger planters
Once the danger of frost has passed (usually mid-May), you can plant the Malabar spinach plants outdoors.
- Choose a location: Choose a sunny to partially shaded location with well-drained soil. Malabar spinach prefers a warm and sheltered spot.
- Prepare the soil: Loosen the soil thoroughly and mix in compost or organic fertilizer.
- Planting distance: Plant the Malabar spinach plants about 30-40 cm apart.
- Planting: Dig a hole large enough to accommodate the root ball. Place the plant in it and fill the hole with soil. Press the soil down lightly.
- Water: Water the plants thoroughly.
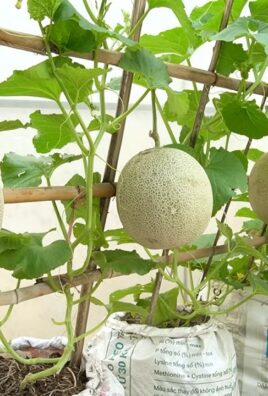
- Install climbing aid: Malabar spinach is a climbing plant and needs a climbing aid to hold onto. Install a trellis, fence, or bamboo stakes near the plants.
- Caring for Malabar spinach
Proper care is crucial for a lush harvest.
- Watering: Water the Malabar spinach regularly, especially during dry periods. Make sure the soil is always slightly moist, but avoid waterlogging.
- Fertilizing: Fertilize the Malabar spinach every 2-3 weeks with an organic fertilizer or compost tea. This promotes growth and leaf formation.
- Mulching: A layer of mulch made of straw or grass clippings helps retain moisture in the soil and suppress weeds.
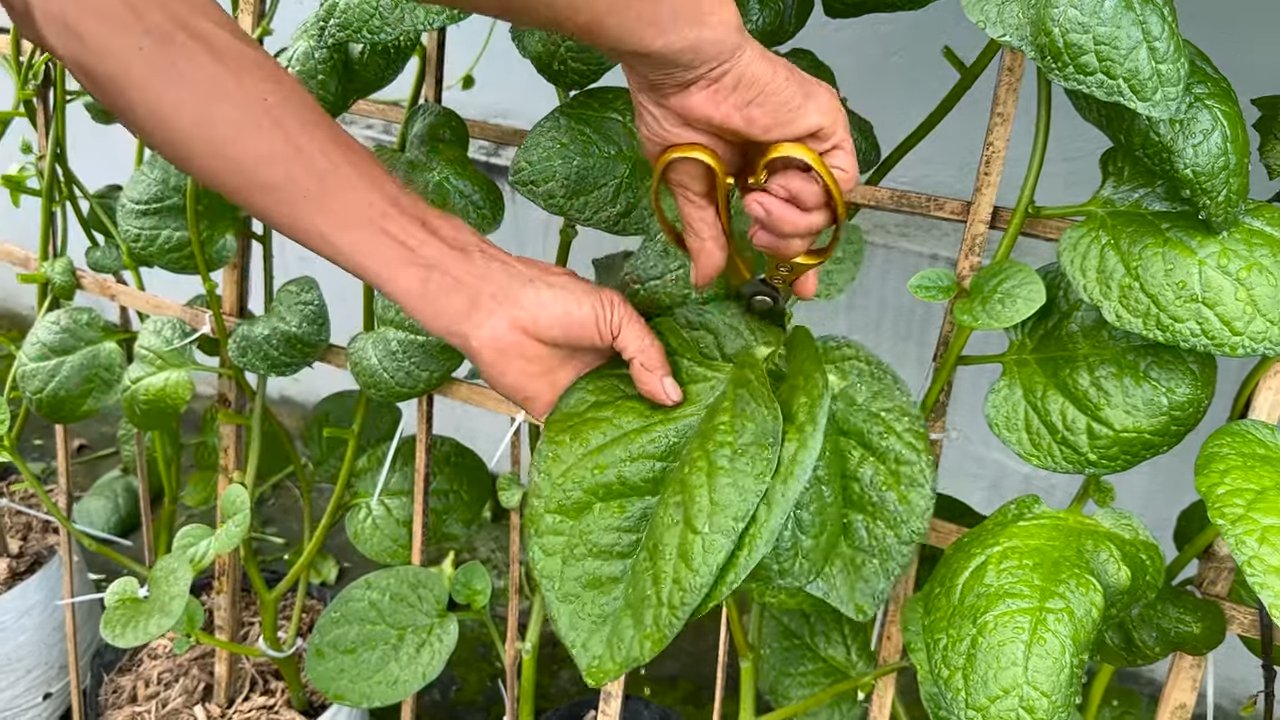
- Pruning: Regularly cut off the shoot tips to encourage growth and make the plant bushier.
- Pests and diseases: Malabar spinach is relatively resistant to pests and diseases. However, watch out for aphids or slugs. If necessary, you can use organic pest control methods.
Accelerating growth: Additional tips
Here are a few additional tips to speed up the growth of your Malabar spinach:
- Warm location: Malabar spinach loves warmth. Choose a location that gets a lot of sun and is protected from wind.
- Early sowing: Start sowing in seed starting pots as early as possible in spring (February/March) to give the plants a head start.
- Fleece cover: Cover the plants with fleece after planting to protect them from cold and pests. The fleece retains warmth and promotes growth.
- Regular harvesting: Harvest the leaves regularly to stimulate the growth of new leaves. The more you harvest, the more the plant grows.
- Soil improvement: Improve the soil with compost or organic fertilizer before planting. Nutrient-rich soil is crucial for fast growth.
- Vertical growing method: Since Malabar spinach is a climbing plant, you can also grow it vertically. This saves space and ensures better air circulation for the plants.
Harvesting and using Malabar spinach
You can harvest the leaves of Malabar spinach as soon as they are large enough (about 10-15 cm long). Pick the leaves individually or cut off entire shoots. Malabar spinach can be eaten raw in salads or cooked like spinach. It is rich in vitamins and minerals and has a slightly sour taste.
Tip: Young leaves are more tender and have a milder taste than older leaves.
Conclusion
So, there you have it! Growing Malabar spinach quickly isn’t some unattainable gardening dream. It’s a tangible reality within your reach, achievable with a few simple tweaks and a little bit of dedication. We’ve explored the key elements – from selecting the right variety and preparing the soil meticulously to optimizing sunlight exposure and providing consistent moisture. Remember, Malabar spinach thrives in warm conditions, so mimicking a tropical environment as much as possible will significantly boost its growth rate.
But why should you even bother with this DIY trick? Because the rewards are immense. Imagine fresh, vibrant, nutrient-packed greens readily available right outside your door. No more last-minute grocery store runs or settling for wilted, pre-packaged spinach. You’ll have a constant supply of this delicious and versatile leafy green, perfect for adding to salads, stir-fries, soups, and so much more. Plus, the satisfaction of nurturing a plant from seed to harvest is incredibly fulfilling.
Beyond the basic techniques, feel free to experiment and personalize your approach. For instance, if you live in a cooler climate, consider starting your Malabar spinach indoors several weeks before the last expected frost. This will give your seedlings a head start and ensure they’re strong enough to withstand the outdoor elements. You could also try different trellising methods to maximize space and encourage vertical growth. Bamboo stakes, netting, or even repurposed materials can all work wonders.
Another variation to consider is companion planting. Certain plants, like basil and marigolds, can help deter pests and attract beneficial insects, creating a healthier and more productive environment for your Malabar spinach. Researching companion planting options specific to your region can yield surprising results.
Don’t be afraid to get your hands dirty and embrace the learning process. Gardening is all about experimentation and adapting to your unique environment. Even if you encounter challenges along the way, view them as opportunities to learn and refine your techniques. The journey of growing your own food is just as rewarding as the harvest itself.
We wholeheartedly encourage you to try this DIY trick for growing Malabar spinach quickly. It’s a game-changer for any gardener, regardless of experience level. And most importantly, we want to hear about your experiences! Share your successes, your challenges, and any tips or tricks you discover along the way. Let’s create a community of Malabar spinach enthusiasts, sharing knowledge and inspiring each other to grow the best possible crop. Post pictures of your thriving vines, share your favorite Malabar spinach recipes, and let us know what worked best for you. Your insights could be invaluable to other gardeners embarking on this journey. Happy growing!
Frequently Asked Questions (FAQ)
What is the best time of year to start growing Malabar spinach?
Malabar spinach thrives in warm weather, so the best time to start growing it is in late spring or early summer, after the last frost has passed. The soil temperature should be at least 65°F (18°C) for optimal germination. If you live in a cooler climate, you can start the seeds indoors 4-6 weeks before the last expected frost and transplant them outdoors once the weather warms up. Starting indoors gives the plants a head start and allows them to establish themselves before the hottest part of the summer arrives.
How much sunlight does Malabar spinach need?
Malabar spinach needs at least 6 hours of direct sunlight per day to thrive. A sunny location will promote vigorous growth and abundant leaf production. If you’re growing it indoors, place it near a south-facing window or use grow lights to supplement natural sunlight. Insufficient sunlight can lead to leggy growth and reduced yields. Monitor your plants closely and adjust their position as needed to ensure they receive adequate sunlight.
What kind of soil is best for growing Malabar spinach?
Malabar spinach prefers well-draining soil that is rich in organic matter. Amend your soil with compost, aged manure, or other organic materials to improve its fertility and drainage. A slightly acidic to neutral pH (6.0-7.0) is ideal. Avoid heavy clay soils, as they can become waterlogged and hinder root growth. If you have clay soil, consider growing Malabar spinach in raised beds or containers with a well-draining potting mix.
How often should I water Malabar spinach?
Malabar spinach needs consistent moisture to thrive, especially during hot weather. Water deeply and regularly, ensuring that the soil remains consistently moist but not waterlogged. Check the soil moisture regularly by sticking your finger into the soil about an inch deep. If the soil feels dry, it’s time to water. Avoid overhead watering, as it can promote fungal diseases. Instead, water at the base of the plant. Mulching around the plants can help retain moisture and suppress weeds.
Does Malabar spinach need fertilizer?
Yes, Malabar spinach benefits from regular fertilization, especially during the growing season. Use a balanced fertilizer or one that is higher in nitrogen to promote leafy growth. Apply fertilizer according to the package instructions. You can also use organic fertilizers, such as compost tea or fish emulsion. Avoid over-fertilizing, as it can lead to excessive vegetative growth at the expense of leaf production.
How do I harvest Malabar spinach?
You can start harvesting Malabar spinach leaves as soon as they are large enough to use, typically when they are about 4-6 inches long. Harvest the leaves by snipping them off with scissors or pruning shears. Regular harvesting encourages the plant to produce more leaves. You can also harvest the tender stems, which are also edible. Avoid harvesting more than one-third of the plant at a time to allow it to continue growing.
Are there any pests or diseases that affect Malabar spinach?
Malabar spinach is generally resistant to pests and diseases, but it can be susceptible to aphids, spider mites, and fungal diseases, especially in humid conditions. Inspect your plants regularly for signs of pests or diseases. If you find any, treat them promptly with insecticidal soap or neem oil for pests, and fungicide for fungal diseases. Good air circulation and proper watering practices can help prevent fungal diseases.
Can I grow Malabar spinach in a container?
Yes, Malabar spinach grows well in containers, making it a great option for gardeners with limited space. Choose a large container that is at least 12 inches in diameter and depth. Use a well-draining potting mix and provide a trellis or support for the vines to climb. Water regularly and fertilize as needed. Place the container in a sunny location that receives at least 6 hours of direct sunlight per day.
How do I save seeds from Malabar spinach?
To save seeds from Malabar spinach, allow some of the flowers to mature and form berries. Once the berries turn dark purple or black, they are ready to harvest. Gently squeeze the berries to extract the seeds. Rinse the seeds with water and spread them out on a paper towel to dry completely. Store the dried seeds in an airtight container in a cool, dry place.
Is Malabar spinach the same as regular spinach?
No, Malabar spinach (Basella alba) is not the same as regular spinach (Spinacia oleracea). While both are leafy green vegetables, they belong to different plant families and have different characteristics. Malabar spinach is a heat-loving vine that thrives in warm weather, while regular spinach is a cool-season crop. Malabar spinach has a slightly thicker, more succulent texture and a milder flavor than regular spinach.
Leave a Comment