

Growing mint indoors can seem daunting, but trust me, it’s easier than you think! Imagine stepping into your kitchen and snipping fresh, fragrant mint leaves for your tea, mojito, or even a gourmet salad – all year round. No more sad, wilted herbs from the grocery store!
Mint has a rich history, dating back to ancient Egypt, where it was used for medicinal purposes and even in embalming. The Romans spread its cultivation throughout Europe, valuing it for its refreshing aroma and digestive benefits. Today, mint remains a beloved herb worldwide, and bringing it indoors allows us to enjoy its goodness regardless of the season.
Why should you learn this DIY trick? Well, for starters, growing mint indoors saves you money! Those little herb packets at the supermarket add up quickly. Plus, you’ll have access to fresher, more flavorful mint than anything you can buy. But more importantly, it’s incredibly rewarding to nurture a plant and watch it thrive. It’s a little bit of nature right in your home, offering a calming and therapeutic experience. In this article, I’ll share my tried-and-true tips and tricks for successfully growing mint indoors, even if you don’t have a green thumb. Get ready to unleash your inner gardener!
Growing Mint Indoors: Your Green Thumb Guide for Fresh Mint All Year Round
Hello dear plant enthusiasts! Are you tired of buying expensive mint at the supermarket in the winter that wilts after just two days? Me too! That’s why today, I’ll show you how to easily grow your own mint indoors. This way, you’ll always have fresh mint for tea, cocktails, or cooking. And the best part: it’s super easy and a lot of fun!
What You Need: Ingredients for Your Mint Garden
Before we begin, here’s a list of everything you’ll need for your indoor mint garden:
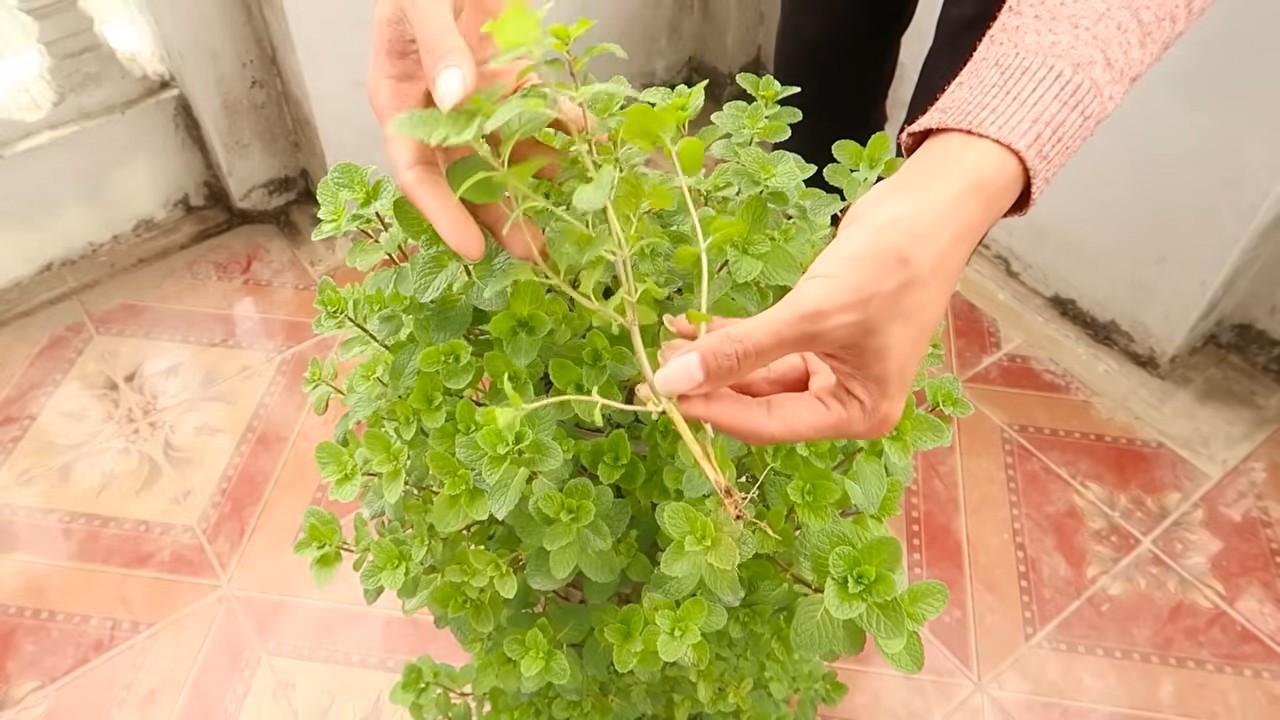
- Mint seedlings or seeds: You can either buy ready-made mint seedlings from the garden center or grow mint from seeds. I personally find seedlings easier, but both work. Make sure to choose a mint variety you like! There are so many different types, from peppermint to chocolate mint.
- A pot with drainage holes: Mint doesn’t like waterlogging, so it’s important to have a pot with holes in the bottom. The size of the pot depends on how much mint you want to grow. A pot with a diameter of 15-20 cm is a good starting point.
- High-quality potting soil: It’s best to use special herb soil or a good potting soil mixed with some sand. This ensures good drainage.
- A spray bottle: For moistening the leaves.
- A sunny windowsill or a grow light: Mint needs a lot of light to grow well.
- Optional: Liquid fertilizer for herbs.
Step-by-Step Guide: How to Properly Plant Your Mint
Now let’s get into the fun part! Follow these steps to successfully grow your mint indoors:
- Prepare the Pot: Fill the pot with potting soil, leaving about 2-3 cm of space from the top.
- Plant the Mint:
- For Seedlings: Gently remove the seedling from its nursery pot and loosen the roots a bit. Then, place it in the prepared pot and fill the remaining space with soil. Gently press the soil down.
- For Seeds: Evenly sprinkle the seeds over the soil and lightly cover them with a thin layer of soil. Gently moisten the soil with the spray bottle.
- Watering: Water the mint thoroughly after planting, until water flows out of the drainage holes.
- Choose the Right Location: Place the pot on a sunny windowsill, ideally facing south or east. If you don’t have a sunny windowsill, you can also use a grow light. Mint should get at least 6 hours of light per day.
- Regular Watering: The soil should always be slightly moist but not soaking wet. Water the mint when the top layer of soil feels dry. Avoid waterlogging!
- Fertilizing (optional): If you want, you can fertilize the mint every few weeks with liquid fertilizer for herbs. Follow the instructions on the packaging.
Care: How to Keep Your Mint Happy and Healthy
Mint is actually quite easy to care for, but there are a few things you should pay attention to, so it grows and thrives:
- Regular Harvesting: Harvesting mint encourages growth. Cut the tips of the stems regularly to make the plant bushier. Don’t worry, you can be generous with cutting!
- Remove Flowers: When mint starts flowering, it loses its aroma. Remove the flowers as soon as they appear.
- Repotting: If the pot becomes too small, you should repot the mint into a larger pot. This usually happens after about a year.
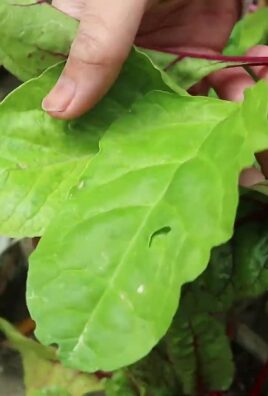
- Pests and Diseases: Mint is relatively resistant to pests and diseases. Occasionally, aphids may appear. You can easily rinse them off with a stream of water or treat them with an organic pest control product.
Challenges and Solutions: What to Do When Things Aren’t Going Right?
Sometimes things don’t go as planned. Here are a few common problems and how you can solve them:
- Yellow Leaves: Yellow leaves can be a sign of too much or too little water. Check the soil moisture and adjust watering accordingly.
- Wilting Leaves: Wilting leaves are usually a sign of water shortage. Water the mint thoroughly.
- Little Growth: If the mint isn’t growing properly, it may be due to insufficient light or nutrients. Place the plant in a brighter spot and fertilize it regularly.
- Pests: As mentioned, aphids may appear. Combat them with a stream of water or an organic pest control product.
Propagating Mint: How to Get Even More Mint
If your mint is growing well, you can easily propagate it. There are different ways to do this:
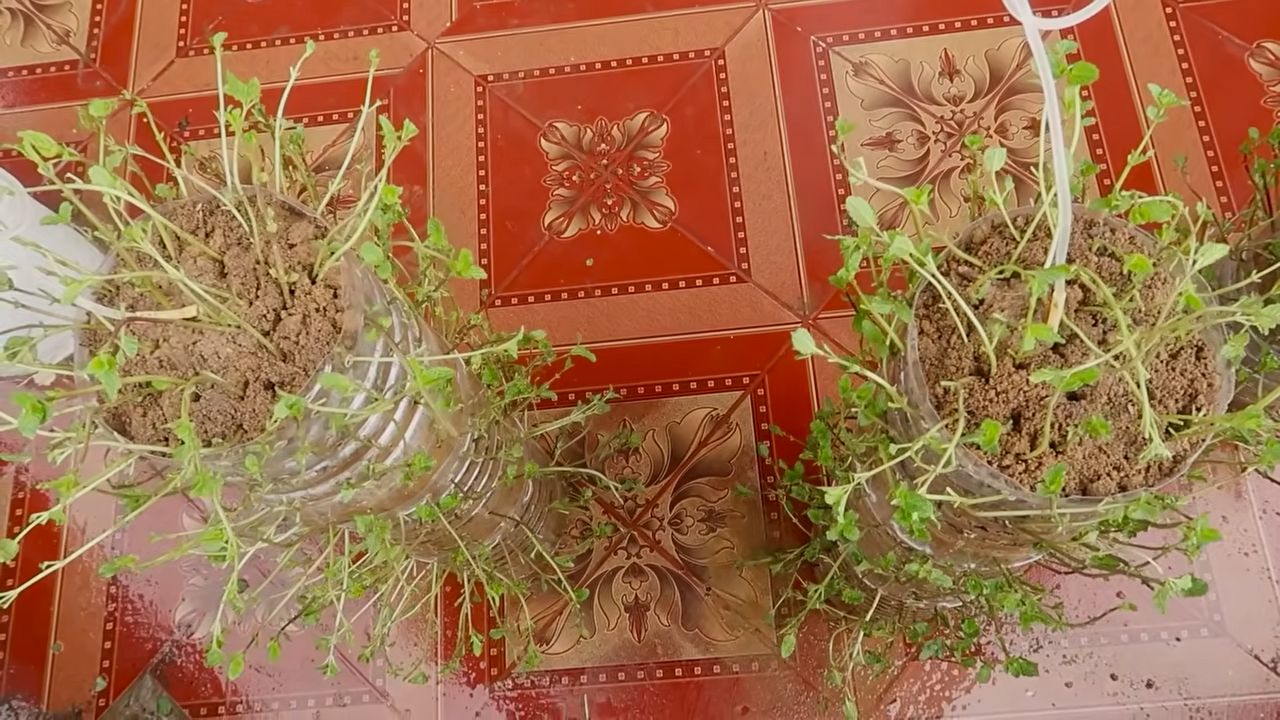
- Cuttings: Cut a stem from the plant and place it in a glass of water. After a few days, roots will start to form. Once the roots are about 2-3 cm long, you can plant the cutting in a pot with soil.
- Division: When repotting, you can simply divide the mint. Gently separate the roots and plant the individual parts in separate pots.
- Layering: Bend a stem of mint to the ground and cover it with some soil. After a few weeks, roots will form. Then, separate the stem from the mother plant and plant it in a separate pot.
Mint in the Kitchen: Versatile Uses
Mint is not only a beautiful plant but also a versatile herb in the kitchen. Here are a few ideas for using your fresh mint:
- Tea: Fresh mint tea is not only delicious but also healthy. It has a soothing effect and can help with digestion.
- Cocktails: Mint is an essential ingredient in many cocktails, such as mojitos or mint juleps.
- Salads: Mint adds a fresh touch to salads.
- Desserts: Mint pairs wonderfully with chocolate, ice cream, or fruit salad.
- Sauces: Mint sauce is a classic accompaniment to lamb dishes.
- Decoration: Mint also makes a great decoration for dishes and drinks.
Extra Tips for the Mint Pro
- Keep Mint in Pots: Mint tends to spread rapidly. If you’re growing it in your garden, you should keep it in a pot to prevent it from spreading uncontrollably.
- Grow Different Mint Varieties: There are so many different mint varieties, each with its own flavor. Try out different varieties and find your favorite.
- Drying Mint: If you have too much mint, you can dry it and store it for later. Tie the mint into small bundles and hang them in a dry, dark place.
I hope this guide helps you grow your own mint indoors. It’s really easier than you think, and it’s definitely worth it! Have fun gardening!
Conclusion
So, there you have it! Mastering the art of growing mint indoors is not only achievable but also incredibly rewarding. Imagine stepping into your kitchen and having fresh, vibrant mint leaves readily available to elevate your culinary creations, infuse your beverages with refreshing flavor, or simply add a touch of aromatic greenery to your living space. This simple DIY trick transforms your home into a miniature herb garden, offering a sustainable and cost-effective alternative to constantly purchasing mint from the grocery store.
But why is this a must-try? Beyond the convenience and cost savings, growing your own mint indoors allows you to control the quality and freshness of your herbs. You know exactly where your mint is coming from and what (or rather, what isn’t) going into it. No pesticides, no questionable handling – just pure, unadulterated minty goodness. Plus, let’s be honest, there’s a certain satisfaction that comes from nurturing a plant from a tiny sprig to a thriving herb.
The possibilities are endless once you’ve mastered the basics. Experiment with different varieties of mint, such as peppermint, spearmint, chocolate mint, or even apple mint, each offering a unique flavor profile to explore. Get creative with your containers – repurpose old teacups, mason jars, or even create a vertical garden for a stunning visual display. Consider companion planting, placing your mint near other herbs or vegetables that benefit from its presence (and vice versa). You can even try propagating your mint to expand your indoor garden or share with friends and family.
Growing mint indoors is more than just a gardening project; it’s an invitation to connect with nature, enhance your culinary experiences, and add a touch of green to your everyday life. It’s a simple yet profound way to bring the outdoors in and enjoy the many benefits of fresh, homegrown herbs.
Don’t be intimidated if you’re a beginner. This guide provides all the essential steps to get you started. Remember to be patient, observant, and willing to adjust your approach as needed. Every plant is unique, and learning its specific needs is part of the fun.
We wholeheartedly encourage you to give this DIY trick a try. Start small, experiment, and most importantly, enjoy the process. Once you’ve experienced the joy of harvesting your own fresh mint, you’ll wonder why you didn’t start sooner.
We’d love to hear about your experiences! Share your photos, tips, and challenges in the comments below. Let’s create a community of indoor mint growers and inspire each other to cultivate our own little green oases. What variety of mint are you most excited to grow? What creative ways are you planning to use your homegrown mint? Let us know! Your insights could be invaluable to other aspiring indoor gardeners.
Frequently Asked Questions (FAQ)
What kind of container is best for growing mint indoors?
The best container for growing mint indoors is one that is at least 6 inches deep and has drainage holes. Mint spreads quickly, so choose a container that is wide enough to accommodate its growth. Terracotta pots are a good option because they allow the soil to breathe, but plastic pots are also suitable. Just make sure the container is clean and free of any harmful chemicals. You can also use repurposed containers like mason jars or teacups, but ensure they have adequate drainage or add a layer of gravel at the bottom to prevent waterlogging.
How much sunlight does indoor mint need?
Mint thrives in bright, indirect sunlight. Aim for at least 4-6 hours of sunlight per day. If you don’t have a sunny windowsill, you can supplement with a grow light. Place the grow light about 6-12 inches above the plant. Rotate the plant regularly to ensure all sides receive adequate light. Signs of insufficient light include leggy growth and pale leaves.
What type of soil is best for growing mint indoors?
Mint prefers well-draining soil that is rich in organic matter. A good potting mix for mint is a combination of peat moss, perlite, and vermiculite. You can also add compost to the soil to provide extra nutrients. Avoid using garden soil, as it can be too heavy and may contain pests or diseases. The ideal pH level for mint is between 6.0 and 7.0.
How often should I water my indoor mint plant?
Water your mint plant when the top inch of soil feels dry to the touch. Water thoroughly until water drains out of the drainage holes. Avoid overwatering, as this can lead to root rot. Mint prefers consistently moist soil, but it doesn’t like to sit in standing water. During the winter months, you may need to water less frequently.
How do I fertilize my indoor mint plant?
Fertilize your mint plant every 2-4 weeks during the growing season (spring and summer) with a balanced liquid fertilizer diluted to half strength. Avoid over-fertilizing, as this can burn the roots. You can also use a slow-release fertilizer at the beginning of the growing season. Organic fertilizers, such as compost tea or fish emulsion, are also good options.
How do I harvest mint leaves?
Harvest mint leaves by pinching or cutting off stems just above a leaf node. This will encourage the plant to branch out and produce more leaves. You can harvest up to one-third of the plant at a time without harming it. Harvest regularly to keep the plant compact and prevent it from flowering. Flowering can reduce the flavor of the leaves.
How do I prevent pests and diseases on my indoor mint plant?
Inspect your mint plant regularly for pests and diseases. Common pests include aphids, spider mites, and whiteflies. You can control these pests by spraying the plant with insecticidal soap or neem oil. To prevent diseases, ensure good air circulation and avoid overwatering. If you notice any signs of disease, such as yellowing leaves or spots, remove the affected leaves immediately.
Can I grow different varieties of mint together in the same container?
It’s generally not recommended to grow different varieties of mint together in the same container. Mint is a vigorous grower and can quickly take over, potentially crowding out other varieties. Additionally, different varieties may have different growing requirements. If you want to grow multiple varieties of mint, it’s best to keep them in separate containers.
How do I propagate mint from cuttings?
Propagating mint from cuttings is a simple and effective way to expand your indoor mint garden. Take a 4-6 inch cutting from a healthy stem, removing the lower leaves. Place the cutting in a glass of water, ensuring that the nodes (where the leaves were removed) are submerged. Roots should begin to form within a week or two. Once the roots are about an inch long, you can transplant the cutting into a pot filled with well-draining soil.
My mint plant is leggy and not producing many leaves. What should I do?
Leggy growth and sparse leaves are often signs of insufficient light. Move your mint plant to a sunnier location or supplement with a grow light. You can also prune the plant back to encourage bushier growth. Pinch off the tips of the stems to promote branching. Make sure you are fertilizing regularly and providing adequate water.
Leave a Comment