

Growing onions in plastic bottles might sound a little unconventional, but trust me, it’s a game-changer for any home gardener, especially if you’re tight on space! For centuries, humans have cultivated onions, from the fertile crescent where they were first domesticated to kitchen gardens around the world. Their pungent flavor and incredible versatility have made them a staple in countless cuisines.
But what if you don’t have a sprawling backyard to dedicate to your allium dreams? That’s where this ingenious DIY trick comes in. Imagine harvesting fresh, flavorful onions right from your balcony or windowsill. No more trips to the grocery store for that one missing ingredient! This method is not only space-saving but also incredibly sustainable, giving those plastic bottles a new lease on life.
I’m going to show you how to transform discarded plastic bottles into mini onion farms, making growing onions in plastic bottles a fun, rewarding, and eco-friendly project. Get ready to impress your friends and family with your green thumb and enjoy the satisfaction of growing your own delicious onions, no matter how small your living space may be!
Growing Onions in Plastic Bottles: A DIY Garden Project for Everyone!
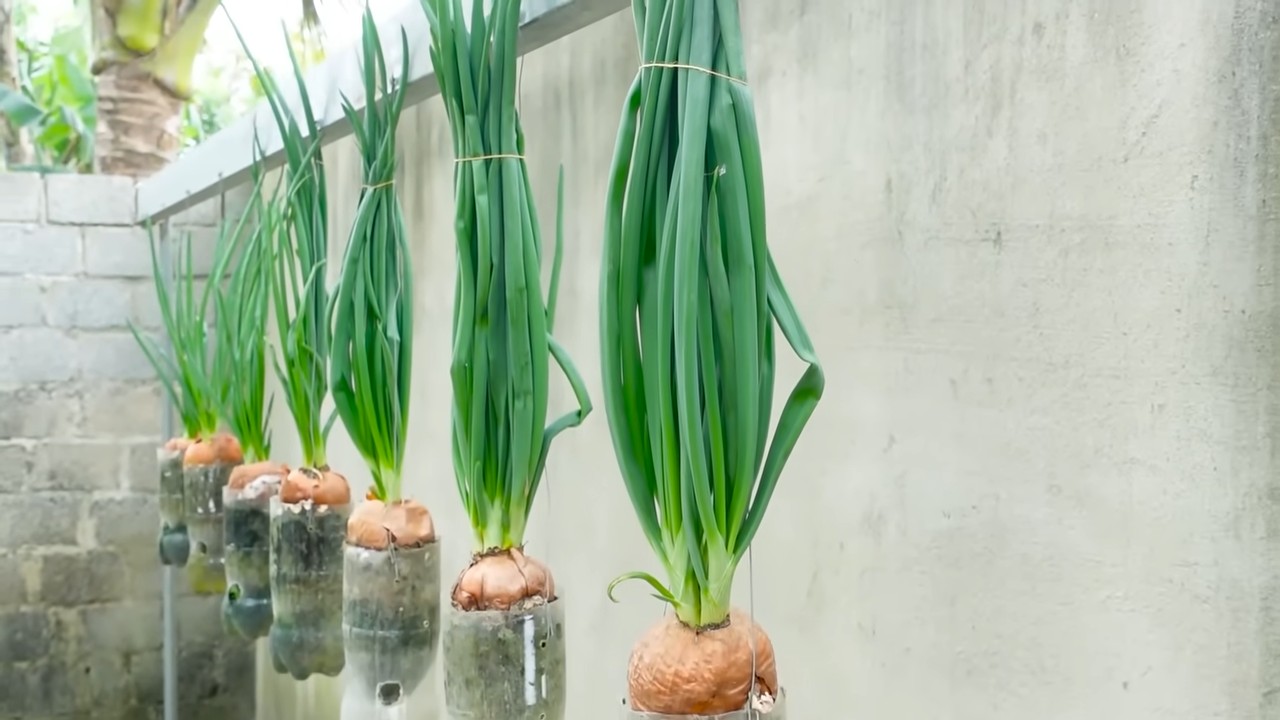
Hello, garden friends! Have you ever felt like there’s just not enough space in your garden? Or maybe you don’t even have a garden, just a balcony or terrace? Don’t worry, I have the perfect solution for you: Growing onions in plastic bottles! This is not only space-saving but also a great way to recycle plastic waste while harvesting fresh, delicious onions. Let me show you how it’s done!
What You Need:
- Plastic Bottles: Large PET bottles (like from water or juice) work best. The bigger the bottle, the more space the onions have to grow.
- Soil: Normal potting soil or garden soil is perfect. You can also mix soil with compost and sand.
- Onions: Either small sets of onions or onions that have already sprouted. The latter is a great way to make use of onions forgotten in the fridge that have started to sprout.
- Knife or Scissors: For cutting the plastic bottles.
- Drill or Nail: To make drainage holes.
- Watering Can: For watering the onions.
- Optional: Gravel or expanded clay for drainage.
Preparation:
Before we begin, we need to prepare the plastic bottles. But don’t worry, it’s quite simple!
- Clean the Bottles: Rinse the plastic bottles thoroughly with water and dish soap to remove any residues. Let them dry completely afterward.
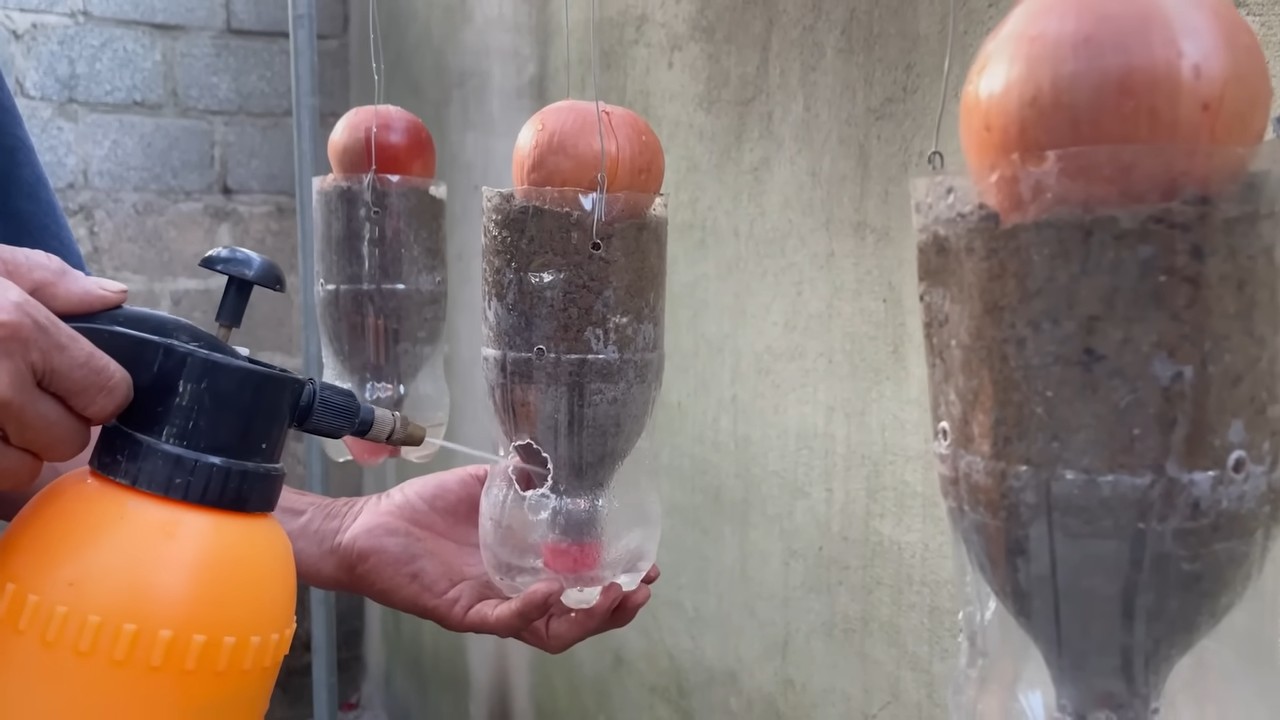
- Make Holes: Drill several holes in the bottom of the bottle with a drill or nail. These holes are for drainage and will prevent waterlogging. Make sure the holes aren’t too large, so the soil doesn’t fall through.
- Cut the Bottles: There are a couple of ways you can cut the bottles. Here are two options:
- Option 1: Horizontal Cutting: Cut the bottle horizontally in half. This gives you two halves that can both be planted. You can place the top half upside down inside the bottom half to create a mini greenhouse effect.
- Option 2: Vertical Cutting: Cut the bottle vertically but not all the way through. Leave a few centimeters at the bottom to keep the bottle intact. Spread the two halves apart to give more space for the onions.
Planting:
Now, the fun part begins: planting the bottles with onions!
- Create Drainage (Optional): Add a layer of gravel or expanded clay at the bottom of the bottle. This improves drainage and prevents waterlogging.
- Fill with Soil: Fill the bottle with soil, leaving a few centimeters of space at the top, so you can water without overflowing.
- Plant the Onions: Gently press the onions into the soil. Make sure the tips of the onions stick out above the soil. Leave about 5-10 cm between each onion so they have enough room to grow.
- Watering: Gently water the onions. Make sure the soil is evenly moist but not soggy.
Care:
To ensure your onions grow well, they’ll need the right care.
- Location: Place the planted bottles in a sunny spot. Onions love the sun!
- Watering: Water the onions regularly, but not too much. The soil should always be slightly moist. Avoid waterlogging, as this can cause rotting.
- Fertilizing (Optional): If you like, you can fertilize the onions during the growing phase with an organic fertilizer. This promotes growth and helps with the harvest.
- Pest Control: Keep an eye out for pests like aphids or onion flies. If necessary, treat the onions with a natural pest control solution.
Harvest:
Depending on the onion variety and location, you can harvest your onions after about 3-4 months.
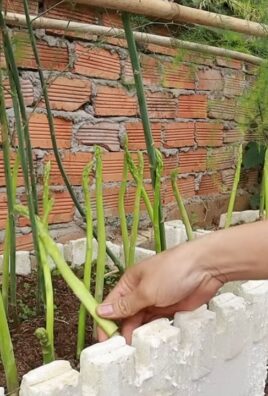
- Harvest Timing: Onions are ready when the leaves turn yellow and fall over.
- Harvesting: Gently pull the onions from the soil.
- Drying: Let the onions dry in a dry, airy spot. This will extend their shelf life.
Additional Tips and Tricks:
- Different Onion Varieties: Try experimenting with different onion varieties to find the ones that taste the best and grow best in plastic bottles.
- Planting Herbs: You can also plant herbs like chives or parsley along with the onions in the bottles. This saves space and looks great.
- Labeling: Label the bottles with the onion variety and planting date to keep track.
- Upcycling: Use old plastic bottles to make your contribution to environmental protection.
- Get Creative: Be creative and experiment with different growing methods and materials.
Common Problems and Solutions:
- Waterlogging: If the soil is too wet, the onions can rot. Ensure good drainage and avoid over-watering.
- Pests: Aphids and onion flies can infest the onions. Treat the onions with a natural pest control solution.
- Growth Issues: If the onions are not growing well, it could be due to a nutrient deficiency. Fertilize the onions with organic fertilizer.
A Few Ideas for Decoration:
- Painting: Paint the plastic bottles with bright colors or patterns to make your little garden even more cheerful.
- Labels: Attach labels with the onion variety names to the bottles.
- Hanging: Hang the bottles on a railing or wall. This saves space and looks fantastic.
- Combining: Combine onions with other plants like herbs or lettuce.
Why Grow Onions in Plastic Bottles?
- Space-Saving: Ideal for small gardens, balconies, or terraces.
- Recycling: A great way to recycle plastic waste.
- Simple: Perfect for beginners.
- Fresh Onions: Always have fresh onions on hand.
- Decorative: A charming addition to any garden or balcony.
I hope this guide has inspired you to grow your own onions in plastic bottles. It’s a fantastic project that’s fun and helps the environment at the same time. So, what are you waiting for? Grab those bottles and get started! Wishing you success and a bountiful harvest!
Conclusion
So, there you have it! Growing onions in plastic bottles isn’t just a quirky gardening experiment; it’s a genuinely effective and space-saving method for cultivating fresh, flavorful onions right at home. We’ve walked through the process, highlighting the benefits and addressing potential challenges. Now, it’s time to ditch the store-bought onions (at least some of the time!) and embrace the satisfaction of harvesting your own.
Why is this DIY trick a must-try? Because it empowers you to take control of your food source, even with limited space. Imagine the pride of adding homegrown onions to your favorite dishes, knowing you nurtured them from seedling to bulb. Beyond the practical advantages, it’s a rewarding experience that connects you with nature and promotes sustainable living. Plus, let’s be honest, it’s a fantastic conversation starter!
But don’t stop there! Experiment with different onion varieties to discover your favorites. Try red onions for a vibrant addition to salads, or shallots for a milder, more delicate flavor. You can also explore companion planting by adding herbs like thyme or rosemary to the bottle, creating a miniature ecosystem that benefits your onions. Consider using different types of plastic bottles too – larger bottles can accommodate more onions, while smaller bottles are perfect for starting seedlings.
Remember, gardening is all about learning and adapting. Don’t be discouraged if your first attempt isn’t perfect. Observe your onions, adjust your watering schedule, and fine-tune your technique. The more you experiment, the better you’ll become at this innovative gardening method.
We are confident that this method of growing onions in plastic bottles will not only save you money but also provide you with a constant supply of fresh onions.
Now, we want to hear from you! Have you tried growing onions in plastic bottles? What were your results? What challenges did you face, and how did you overcome them? Share your experiences, tips, and photos in the comments below. Let’s create a community of bottle-gardening enthusiasts and inspire others to give this fantastic DIY trick a try. Your insights could be invaluable to someone just starting out. Let’s cultivate a greener, more sustainable future, one plastic bottle at a time!
Frequently Asked Questions (FAQ)
1. What type of plastic bottle is best for growing onions?
Ideally, you should use food-grade plastic bottles, such as those that previously contained water, juice, or soda. Avoid bottles that held harsh chemicals or cleaning products, as these could contaminate the soil and affect the onions. The size of the bottle depends on how many onions you want to grow in each container. A 2-liter bottle can comfortably accommodate 3-4 onion sets or seedlings. Ensure the bottle is clean and has drainage holes before planting.
2. What kind of soil should I use for growing onions in plastic bottles?
A well-draining potting mix is crucial for successful onion growth. Onions prefer soil that is rich in organic matter and retains moisture without becoming waterlogged. You can use a commercially available potting mix or create your own by combining equal parts of garden soil, compost, and perlite or vermiculite. The compost provides essential nutrients, while the perlite or vermiculite improves drainage and aeration. Avoid using heavy clay soil, as it can compact and hinder root development.
3. How often should I water my onions grown in plastic bottles?
Watering frequency depends on several factors, including the climate, the type of soil, and the size of the bottle. Generally, you should water your onions when the top inch of soil feels dry to the touch. Avoid overwatering, as this can lead to root rot. Water thoroughly until excess water drains out of the drainage holes. During hot, dry weather, you may need to water more frequently. Check the soil moisture regularly and adjust your watering schedule accordingly.
4. How much sunlight do onions need when grown in plastic bottles?
Onions require at least 6-8 hours of direct sunlight per day to thrive. Place your plastic bottle containers in a sunny location, such as a south-facing balcony or windowsill. If you don’t have access to enough natural sunlight, you can supplement with artificial grow lights. Rotate the bottles regularly to ensure that all sides of the onions receive adequate sunlight. Insufficient sunlight can result in weak, leggy growth and smaller bulbs.
5. How do I fertilize onions grown in plastic bottles?
Onions are heavy feeders and benefit from regular fertilization. Start by incorporating compost into the potting mix before planting. During the growing season, fertilize your onions every 2-3 weeks with a balanced liquid fertilizer, such as a 10-10-10 or 20-20-20 formula. Dilute the fertilizer according to the package instructions and apply it to the soil around the base of the onions. Avoid getting fertilizer on the leaves, as this can cause burning. You can also use organic fertilizers, such as fish emulsion or seaweed extract.
6. How do I prevent pests and diseases from affecting my onions?
Growing onions in plastic bottles can help minimize pest and disease problems, but it’s still important to take preventative measures. Inspect your onions regularly for signs of pests, such as aphids, thrips, or onion maggots. If you spot any pests, treat them with insecticidal soap or neem oil. To prevent fungal diseases, ensure good air circulation around the plants and avoid overwatering. You can also apply a fungicide if necessary. Remove any diseased or damaged leaves promptly to prevent the spread of infection.
7. How long does it take to grow onions in plastic bottles?
The time it takes to grow onions in plastic bottles depends on the variety of onion and the growing conditions. Generally, it takes about 90-120 days to grow onions from sets (small, immature bulbs) and 120-150 days to grow onions from seeds. You can harvest green onions (scallions) at any time, as needed. The bulbs are ready to harvest when the tops start to turn yellow and fall over.
8. Can I grow different types of onions in plastic bottles?
Yes, you can grow various types of onions in plastic bottles, including bulb onions, green onions (scallions), and shallots. Bulb onions require more space and time to mature, so choose smaller varieties or plant fewer onions per bottle. Green onions are quick and easy to grow and can be harvested continuously. Shallots are similar to onions but have a milder flavor and can be grown in the same way. Experiment with different varieties to find your favorites.
9. What are some variations I can try when growing onions in plastic bottles?
There are many variations you can try to customize your onion-growing experience. You can experiment with different types of plastic bottles, such as hanging bottles or self-watering bottles. You can also try companion planting by adding herbs or flowers to the bottle, which can attract beneficial insects and deter pests. Another variation is to use different growing mediums, such as hydroponics or aquaponics. Get creative and see what works best for you.
10. What do I do with the plastic bottles after harvesting the onions?
After harvesting your onions, you can reuse the plastic bottles for other gardening projects or recycle them. Clean the bottles thoroughly and remove any remaining soil or debris. You can use them to start new seedlings, grow herbs, or create a vertical garden. If you choose to recycle them, check with your local recycling center for specific guidelines. By reusing or recycling the plastic bottles, you can reduce waste and promote sustainable gardening practices.

Leave a Comment