

Growing Peppers at Home can seem daunting, but trust me, with a few clever tricks and DIY hacks, you’ll be harvesting a vibrant bounty in no time! Forget those bland, store-bought peppers – imagine the satisfaction of plucking a fiery habanero or a sweet bell pepper straight from your own garden.
The history of pepper cultivation is rich and fascinating, dating back thousands of years in South America. These vibrant fruits weren’t just a food source; they held cultural significance, used in rituals and traditional medicine. Today, while we might not be using them for ancient ceremonies, the joy of nurturing these plants and adding their unique flavors to our meals remains a powerful connection to the past.
So, why do you need these DIY tricks for growing peppers at home? Well, let’s face it, gardening can be tricky! Pests, diseases, and unpredictable weather can all throw a wrench in your pepper-growing plans. But fear not! I’m here to share some simple, effective, and budget-friendly solutions that will help you overcome these challenges and ensure a thriving pepper patch. From clever container gardening ideas to natural pest control methods, I’ve got you covered. Get ready to unlock the secrets to a pepper-packed harvest!

Growing Peppers at Home: A DIY Guide for Spicy Success!
Hey there, fellow gardening enthusiasts! I’m so excited to share my tried-and-true method for growing peppers at home. Whether you’re dreaming of fiery habaneros or sweet bell peppers, this guide will walk you through every step, from seed to salsa! I’ve learned a lot over the years, and I’m confident you can have a thriving pepper patch, even if you’re a beginner.
Choosing Your Pepper Varieties
Before we dive into the nitty-gritty, let’s talk about pepper varieties. The world of peppers is vast and exciting! Consider these factors when making your selection:
* Heat Level: This is measured using the Scoville scale. Sweet peppers have a Scoville Heat Unit (SHU) of 0, while the hottest peppers can reach millions! Think about what you enjoy eating.
* Size and Shape: Peppers come in all shapes and sizes, from tiny bird’s eye chilis to large bell peppers. Choose varieties that suit your culinary needs.
* Color: Red, yellow, orange, green, purple – the possibilities are endless! Color can also indicate ripeness in some varieties.
* Growing Conditions: Some peppers thrive in hot, humid climates, while others prefer cooler temperatures. Check the seed packet or plant description for specific requirements.
* Days to Maturity: This tells you how long it will take for the peppers to ripen after transplanting. Consider your growing season length.
Some popular and easy-to-grow pepper varieties include:
* Bell Peppers (various colors)
* Jalapeños
* Serranos
* Cayenne Peppers
* Anaheim Peppers
* Poblano Peppers
Starting Your Pepper Seeds Indoors
Peppers need a long growing season, so starting them indoors is crucial, especially if you live in a cooler climate. I usually start my seeds about 8-10 weeks before the last expected frost.
Materials You’ll Need:
* Pepper seeds
* Seed starting trays or small pots
* Seed starting mix (a light, well-draining mix is best)
* Heat mat (optional, but highly recommended)
* Grow lights (essential for strong seedlings)
* Spray bottle
* Waterproof tray to hold the seed starting trays
Step-by-Step Instructions:
1. Prepare Your Seed Starting Trays: Fill your seed starting trays or pots with seed starting mix. Gently tap the trays to settle the mix.
2. Sow the Seeds: Make a small indentation (about ¼ inch deep) in the center of each cell or pot. Place 2-3 seeds in each indentation. This increases the chances of at least one seed germinating.
3. Cover the Seeds: Gently cover the seeds with seed starting mix.
4. Water Thoroughly: Use a spray bottle to thoroughly moisten the soil. Avoid overwatering, which can lead to damping off (a fungal disease that kills seedlings).
5. Provide Warmth: Place the seed starting trays on a heat mat. Peppers need warm soil (around 80-85°F) to germinate.
6. Provide Light: Place the trays under grow lights. Position the lights a few inches above the trays and keep them on for 14-16 hours per day.
7. Maintain Moisture: Check the soil moisture daily. Keep the soil consistently moist, but not soggy. Use a spray bottle to water as needed.
8. Monitor Germination: Pepper seeds can take anywhere from 7 to 21 days to germinate, depending on the variety and temperature. Be patient!
9. Thin the Seedlings: Once the seedlings have their first true leaves (the second set of leaves that appear after the cotyledons), thin them to one seedling per cell or pot. Choose the strongest, healthiest-looking seedling and snip off the others at the soil line with small scissors. Don’t pull them out, as this can disturb the roots of the remaining seedling.
10. Fertilize Gently: Once the seedlings have several sets of true leaves, start fertilizing them with a diluted liquid fertilizer (half strength) every 1-2 weeks.
Hardening Off Your Pepper Seedlings
Before transplanting your pepper seedlings outdoors, you need to “harden them off.” This process gradually acclimates them to the outdoor environment, preventing shock and ensuring they thrive.
Step-by-Step Instructions:
1. Day 1-3: Place the seedlings outdoors in a sheltered location (e.g., a shady porch or patio) for 1-2 hours per day.
2. Day 4-6: Gradually increase the amount of time the seedlings spend outdoors, exposing them to more sunlight each day.
3. Day 7-10: Leave the seedlings outdoors for the entire day, but bring them back inside at night if temperatures are expected to drop below 50°F.
4. Day 11-14: If the weather is favorable, leave the seedlings outdoors overnight.
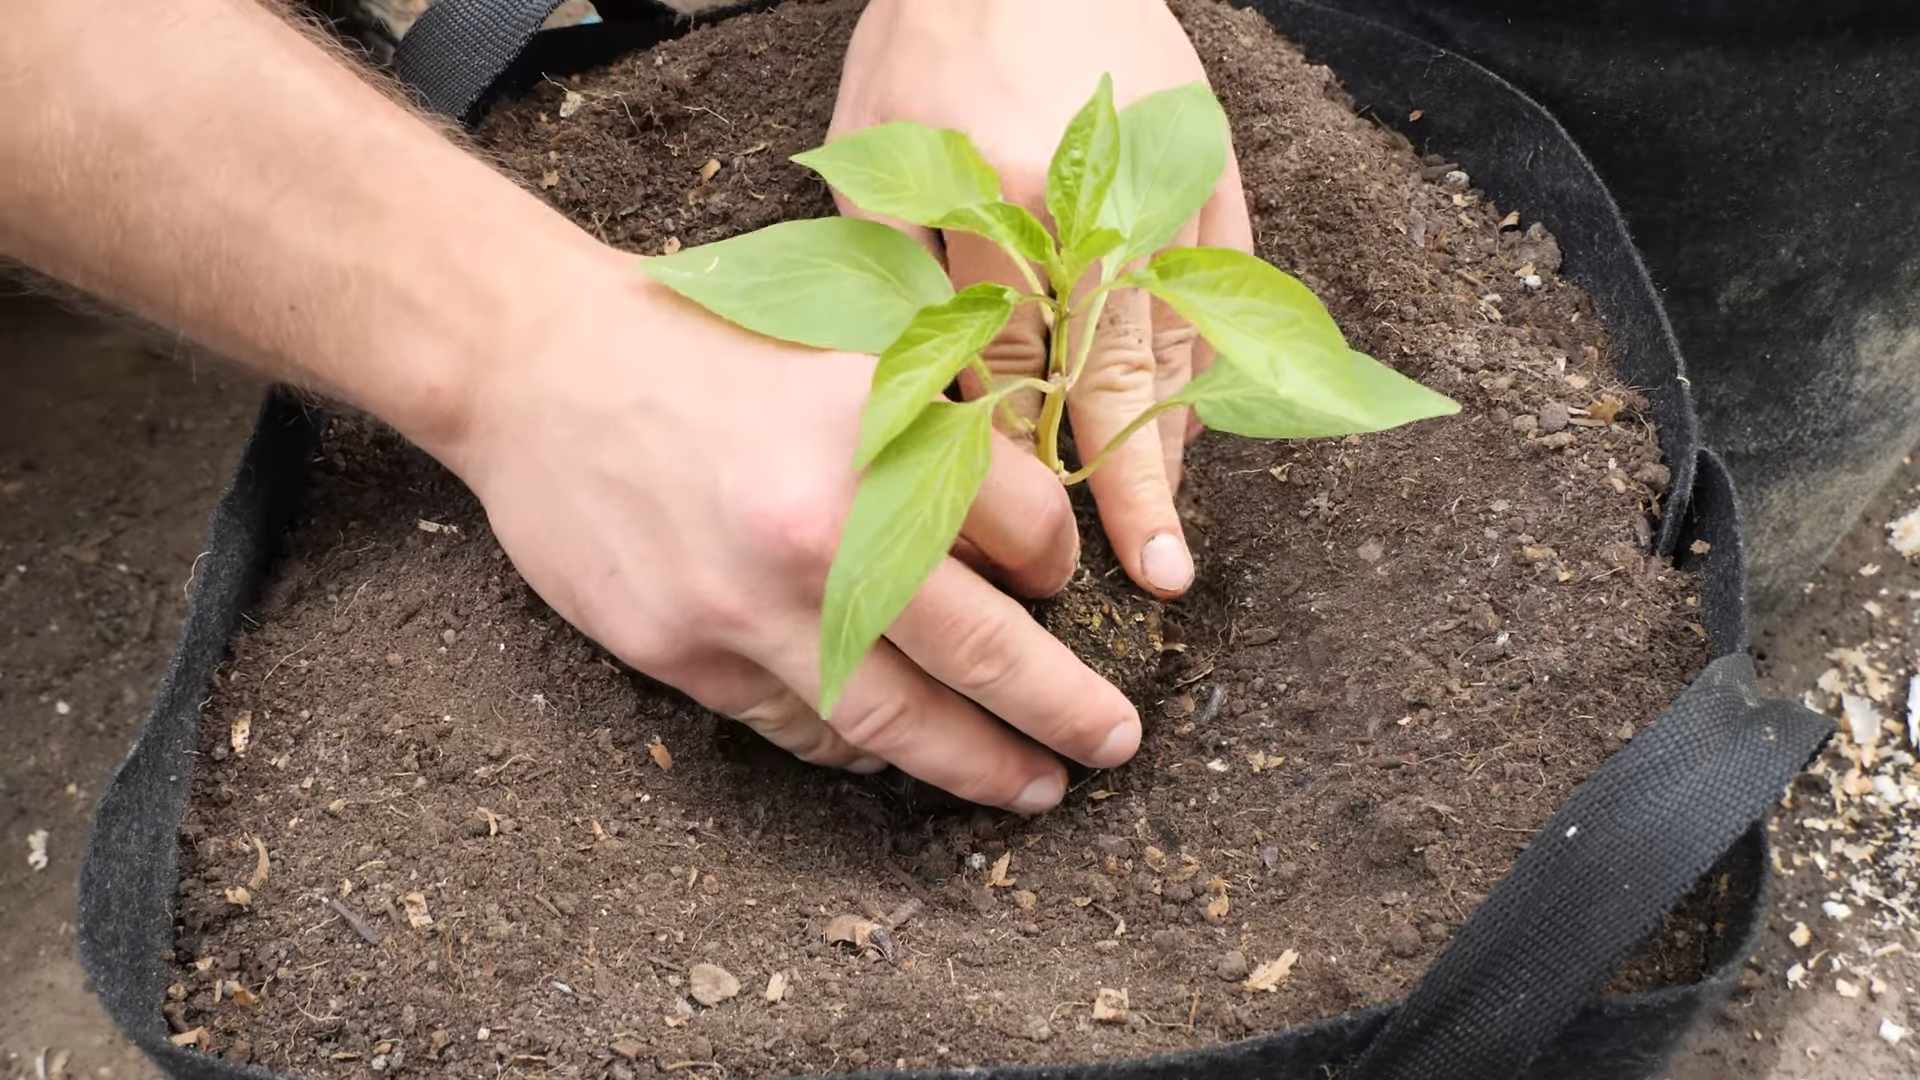
Transplanting Your Pepper Seedlings Outdoors
Once your pepper seedlings are hardened off and the danger of frost has passed, it’s time to transplant them into your garden or containers.
Choosing the Right Location:
* Sunlight: Peppers need at least 6-8 hours of direct sunlight per day.
* Soil: Peppers prefer well-drained soil that is rich in organic matter.
* Protection from Wind: Choose a location that is sheltered from strong winds.
Preparing the Soil:
1. Amend the Soil: Dig in plenty of compost or other organic matter to improve soil drainage and fertility.
2. Test the Soil pH: Peppers prefer a soil pH of 6.0-6.8. Amend the soil with lime to raise the pH or sulfur to lower it, if necessary.
3. Add Fertilizer: Incorporate a slow-release fertilizer into the soil according to the package directions.
Step-by-Step Instructions:
1. Dig Holes: Dig holes that are slightly larger than the root balls of your pepper seedlings. Space the holes 18-24 inches apart, depending on the variety.
2. Remove Seedlings from Trays: Gently remove the seedlings from their seed starting trays or pots. Be careful not to damage the roots.
3. Plant the Seedlings: Place the seedlings in the holes and backfill with soil. Make sure the top of the root ball is level with the surrounding soil.
4. Water Thoroughly: Water the seedlings thoroughly after planting.
5. Mulch: Apply a layer of mulch around the plants to help retain moisture, suppress weeds, and regulate soil temperature. I like to use straw or wood chips.
6. Stake or Cage: For taller pepper varieties, provide support with stakes or cages to prevent them from falling over.
Caring for Your Pepper Plants
Once your pepper plants are established, it’s important to provide them with proper care to ensure a bountiful harvest.
Watering:
* Water deeply and regularly, especially during hot, dry weather.
* Avoid overwatering, which can lead to root rot.
* Water at the base of the plants to avoid wetting the foliage, which can promote fungal diseases.
Fertilizing:
* Fertilize every 2-3 weeks with a balanced liquid fertilizer.
* Avoid over-fertilizing, which can lead to excessive foliage growth and fewer peppers.
Pruning:
* Pruning is generally not necessary for pepper plants, but you can remove any yellowing or diseased leaves.
* You can also pinch off the growing tips of young plants to encourage bushier growth.
Pest and Disease Control:
* Monitor your pepper plants regularly for pests and diseases.
* Common pepper pests include aphids, flea beetles, and spider mites.
* Common pepper diseases include blossom end rot, fungal leaf spot, and viral diseases.
* Use organic pest control methods whenever possible, such as insecticidal soap or neem oil.
* Remove any diseased plants or plant parts immediately to prevent the spread of disease.
Blossom End Rot Prevention:
Blossom end rot is a common problem in peppers (and tomatoes) caused by a calcium deficiency. It appears as a dark, sunken spot on the bottom of the fruit. Here’s how to prevent it:
* Maintain Consistent Watering: Fluctuations in soil moisture can interfere with calcium uptake.
* Add Calcium to the Soil: Incorporate bone meal or crushed eggshells into the soil before planting.
* Use a Calcium Spray: If you suspect a calcium deficiency, you can spray the plants with a calcium chloride solution (follow the instructions on the product label).
Harvesting Your Peppers
The time to harvest your peppers depends on the variety and your personal preference.
*
Conclusion
So, there you have it! Growing peppers at home, especially with these simple DIY tricks, is not only achievable but incredibly rewarding. We’ve walked through the process, highlighting the ease and cost-effectiveness of nurturing your own pepper plants from seed to harvest. The satisfaction of plucking a vibrant, sun-ripened pepper from your own garden, knowing you cultivated it with your own hands, is truly unparalleled.
But why is this DIY approach a must-try? Beyond the cost savings, it’s about control. You dictate the growing conditions, ensuring your peppers are free from harmful pesticides and herbicides. You choose the varieties that excite you most, from the mildest bell peppers to the fiery habaneros, creating a personalized pepper paradise right in your backyard or even on your balcony. Plus, it’s a fantastic way to connect with nature, learn about the growing cycle, and appreciate the journey from seed to table.
Don’t be afraid to experiment! Consider these variations to personalize your pepper-growing experience:
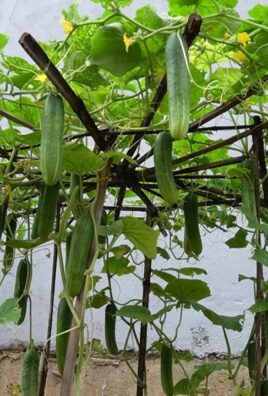
* Vertical Gardening: If space is limited, explore vertical gardening techniques. Trellises, hanging baskets, and stacked planters can maximize your yield in a small area.
* Companion Planting: Plant basil, carrots, or onions alongside your peppers. These companion plants can deter pests and improve the overall health of your pepper plants.
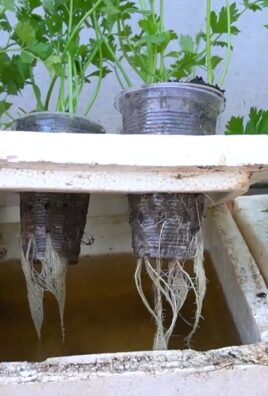
* Hydroponics: For a more advanced approach, try growing your peppers hydroponically. This soilless method can lead to faster growth and higher yields.
* Pepper Powders and Sauces: Once you have a bountiful harvest, consider drying your peppers to make your own homemade pepper powders or fermenting them into delicious hot sauces. The possibilities are endless!
* Different Soil Types: Experiment with different soil types to see what works best for your pepper plants. Some peppers prefer well-draining soil, while others prefer soil that retains more moisture.
Growing peppers at home is more than just a gardening project; it’s an investment in fresh, flavorful ingredients and a connection to the natural world. It’s a chance to learn, experiment, and enjoy the fruits (or rather, vegetables) of your labor.
We wholeheartedly encourage you to give these DIY tricks a try. Start small, be patient, and don’t be afraid to make mistakes. Every gardener learns through trial and error. And most importantly, share your experience with us! We’d love to hear about your successes, your challenges, and any unique tips you discover along the way. Post photos of your pepper plants, share your favorite recipes using your homegrown peppers, and let’s create a community of passionate pepper growers. Happy gardening!
Frequently Asked Questions (FAQ)
What are the best pepper varieties to grow for beginners?
For beginners, bell peppers are an excellent choice due to their mild flavor and relatively easy cultivation. Jalapeños are also a good option, offering a bit of heat without being overly challenging to grow. Other beginner-friendly varieties include banana peppers, poblano peppers, and Anaheim peppers. These peppers are generally more forgiving and require less specialized care than some of the hotter varieties. Remember to choose varieties that are well-suited to your local climate and growing conditions.
How often should I water my pepper plants?
Watering frequency depends on several factors, including the weather, soil type, and the size of your pepper plants. Generally, you should water your pepper plants deeply whenever the top inch of soil feels dry to the touch. Avoid overwatering, as this can lead to root rot. During hot, dry weather, you may need to water your plants daily. In cooler, wetter weather, you may only need to water them every few days. A good rule of thumb is to water thoroughly until water drains from the bottom of the pot or garden bed.
What kind of fertilizer should I use for my pepper plants?
Pepper plants benefit from a balanced fertilizer, especially during the early stages of growth. Look for a fertilizer with an NPK ratio (nitrogen, phosphorus, potassium) that is relatively even, such as 10-10-10 or 14-14-14. As your pepper plants begin to flower and produce fruit, you can switch to a fertilizer that is higher in phosphorus and potassium, which will promote fruit development. Avoid using fertilizers that are too high in nitrogen, as this can lead to excessive foliage growth at the expense of fruit production. Organic options like compost tea and bone meal are also excellent choices.
How do I protect my pepper plants from pests and diseases?
Preventing pests and diseases is crucial for a successful pepper harvest. Regularly inspect your plants for signs of infestation or disease, such as aphids, whiteflies, or leaf spot. Use organic pest control methods, such as insecticidal soap or neem oil, to control pests. Ensure good air circulation around your plants to prevent fungal diseases. Remove any diseased leaves or plants promptly to prevent the spread of infection. Companion planting with herbs like basil and marigolds can also help deter pests.
How long does it take for pepper plants to produce fruit?
The time it takes for pepper plants to produce fruit varies depending on the variety, growing conditions, and climate. Generally, it takes about 60 to 90 days from transplanting seedlings to harvesting mature peppers. Hotter varieties tend to take longer to mature than milder varieties. Ensure your pepper plants receive adequate sunlight, water, and nutrients to promote faster fruit production.
What is the best way to harvest peppers?
Harvest peppers when they have reached their mature color and size. Use a sharp knife or pruning shears to cut the peppers from the plant, leaving a small stem attached. Avoid pulling the peppers off the plant, as this can damage the branches. Harvest peppers regularly to encourage continued fruit production.
Can I grow peppers indoors?
Yes, you can grow peppers indoors, but it requires providing them with adequate light and warmth. Place your pepper plants near a sunny window that receives at least 6 to 8 hours of direct sunlight per day. If you don’t have enough natural light, you can supplement with grow lights. Use a well-draining potting mix and water your plants regularly. Indoor pepper plants may require hand-pollination to ensure fruit production.
How do I overwinter my pepper plants?
In colder climates, you can overwinter your pepper plants indoors to save them for the following growing season. Before the first frost, prune your pepper plants back to about 6 to 8 inches tall. Dig up the plants and pot them in containers with fresh potting mix. Place the plants in a cool, bright location indoors and water them sparingly. In the spring, gradually acclimate the plants to outdoor conditions before transplanting them back into the garden.
What are some common problems when growing peppers and how do I fix them?
Some common problems include blossom end rot (caused by calcium deficiency), aphids, and fungal diseases. Blossom end rot can be prevented by ensuring consistent watering and adding calcium to the soil. Aphids can be controlled with insecticidal soap or neem oil. Fungal diseases can be prevented by ensuring good air circulation and avoiding overwatering.
How do I save seeds from my pepper plants?
To save seeds, allow the peppers to fully ripen on the plant. Once they are fully ripe, cut them open and remove the seeds. Spread the seeds out on a paper towel to dry completely. Once the seeds are dry, store them in an airtight container in a cool, dark place. Be aware that hybrid pepper varieties may not produce true-to-type seeds.
Leave a Comment