

Growing sponge gourds indoors might sound like a tropical dream reserved for seasoned gardeners, but trust me, it’s more achievable than you think! Have you ever imagined harvesting your own natural sponges right from your living room? It’s not just a quirky conversation starter; it’s a rewarding project that connects you with nature in a unique way.
The sponge gourd, also known as loofah, has a rich history, particularly in Asian cultures, where it’s been used for centuries not only as a bath sponge but also in culinary dishes and traditional medicine. Imagine, our ancestors knew the secrets of this plant long before we discovered fancy exfoliating scrubs!
But why bother growing sponge gourds indoors? Well, for many of us, space is a premium. Maybe you don’t have a sprawling garden, or perhaps your climate isn’t ideal for these sun-loving vines. That’s where the magic of indoor gardening comes in. Plus, think of the satisfaction of nurturing a plant from seed to sponge, knowing exactly where it came from and how it was grown. This DIY project is not only fun but also a step towards sustainable living. I’m excited to share some simple yet effective tricks and hacks that will help you successfully growing sponge gourds indoors, even if you’re a complete beginner. Let’s get our hands dirty (metaphorically, for now!) and embark on this green adventure together!
Growing Sponge Gourds Indoors: A Comprehensive DIY Guide
Okay, so you want to grow sponge gourds indoors? Awesome! It’s totally doable, and I’m here to walk you through the whole process. It might seem a little daunting at first, but trust me, with a little patience and the right setup, you’ll be harvesting your own natural sponges in no time. Let’s get started!
What You’ll Need
Before we dive into the nitty-gritty, let’s gather all the supplies. Having everything ready beforehand will make the whole process much smoother.
* Sponge Gourd Seeds: Obviously! Make sure you get good quality seeds from a reputable source. Look for varieties that are known to produce well.
* Seed Starting Trays or Small Pots: These are for starting your seeds indoors. I prefer trays with individual cells, but small pots work just as well.
* Seed Starting Mix: This is a light, airy soil mix specifically designed for starting seeds. Don’t use regular garden soil; it’s too heavy.
* Larger Pots (at least 10-15 gallons): Sponge gourds need plenty of room to grow, so you’ll need large pots for transplanting.
* Potting Soil: Once your seedlings are ready to move to larger pots, you’ll need a good quality potting soil.
* Grow Lights: Since we’re growing indoors, grow lights are essential. LED grow lights are energy-efficient and work great.
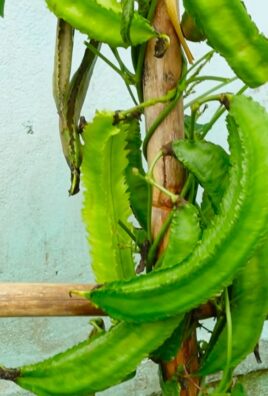
* Trellis or Support System: Sponge gourds are vines, so they need something to climb on. A sturdy trellis is a must.
* Watering Can or Spray Bottle: For watering your seedlings and plants.
* Fertilizer: A balanced fertilizer to feed your plants. Look for one that’s high in phosphorus to encourage flowering.
* Scissors or Pruning Shears: For pruning and harvesting.
* Gloves: To protect your hands.
* Optional: Heat Mat: To speed up germination.
* Optional: Humidity Dome: To help retain moisture during germination.
Phase 1: Starting Your Seeds
This is where the magic begins! Getting your seeds started right is crucial for a successful harvest.
1. Soaking the Seeds (Optional but Recommended): To help speed up germination, I like to soak my sponge gourd seeds in warm water for 24-48 hours before planting. This softens the seed coat and makes it easier for the seedling to emerge. Just put the seeds in a small bowl of warm water and let them sit.
2. Preparing the Seed Starting Trays: Fill your seed starting trays or small pots with seed starting mix. Gently press the soil down to remove any air pockets.
3. Planting the Seeds: Make a small hole (about 1/2 inch deep) in the center of each cell or pot. Place one seed in each hole and cover it with soil. Gently pat the soil down.
4. Watering: Water the soil gently with a watering can or spray bottle until it’s moist but not soggy. Be careful not to overwater, as this can lead to rot.
5. Creating a Humid Environment (Optional): If you have a humidity dome, place it over the seed starting tray. This will help retain moisture and create a warm, humid environment that’s ideal for germination. If you don’t have a humidity dome, you can cover the tray with plastic wrap.
6. Providing Warmth (Optional): Place the seed starting tray on a heat mat. This will help speed up germination, especially if your home is cool.
7. Waiting for Germination: Place the seed starting tray in a warm, well-lit location. Keep the soil moist but not soggy. Germination typically takes 7-14 days. Be patient!
Phase 2: Caring for Your Seedlings
Once your seedlings emerge, it’s time to provide them with the care they need to grow strong and healthy.
1. Providing Light: Once the seedlings emerge, remove the humidity dome or plastic wrap and place them under grow lights. Position the grow lights a few inches above the seedlings and keep them on for 14-16 hours per day.
2. Watering: Water the seedlings regularly, keeping the soil moist but not soggy. Water when the top inch of soil feels dry to the touch.
3. Fertilizing: Once the seedlings have their first true leaves (the leaves that appear after the initial seed leaves), start fertilizing them with a diluted balanced fertilizer. Follow the instructions on the fertilizer package.
4. Thinning (If Necessary): If you planted more than one seed per cell or pot, thin out the seedlings, leaving only the strongest one.
5. Hardening Off: Before transplanting your seedlings to larger pots, you’ll need to harden them off. This means gradually exposing them to outdoor conditions to help them adjust to the change in environment. Start by placing the seedlings outdoors for a few hours each day, gradually increasing the amount of time they spend outside over the course of a week.
Phase 3: Transplanting and Setting Up Your Growing Space
Now it’s time to move your seedlings to their permanent homes and set up your indoor growing space.
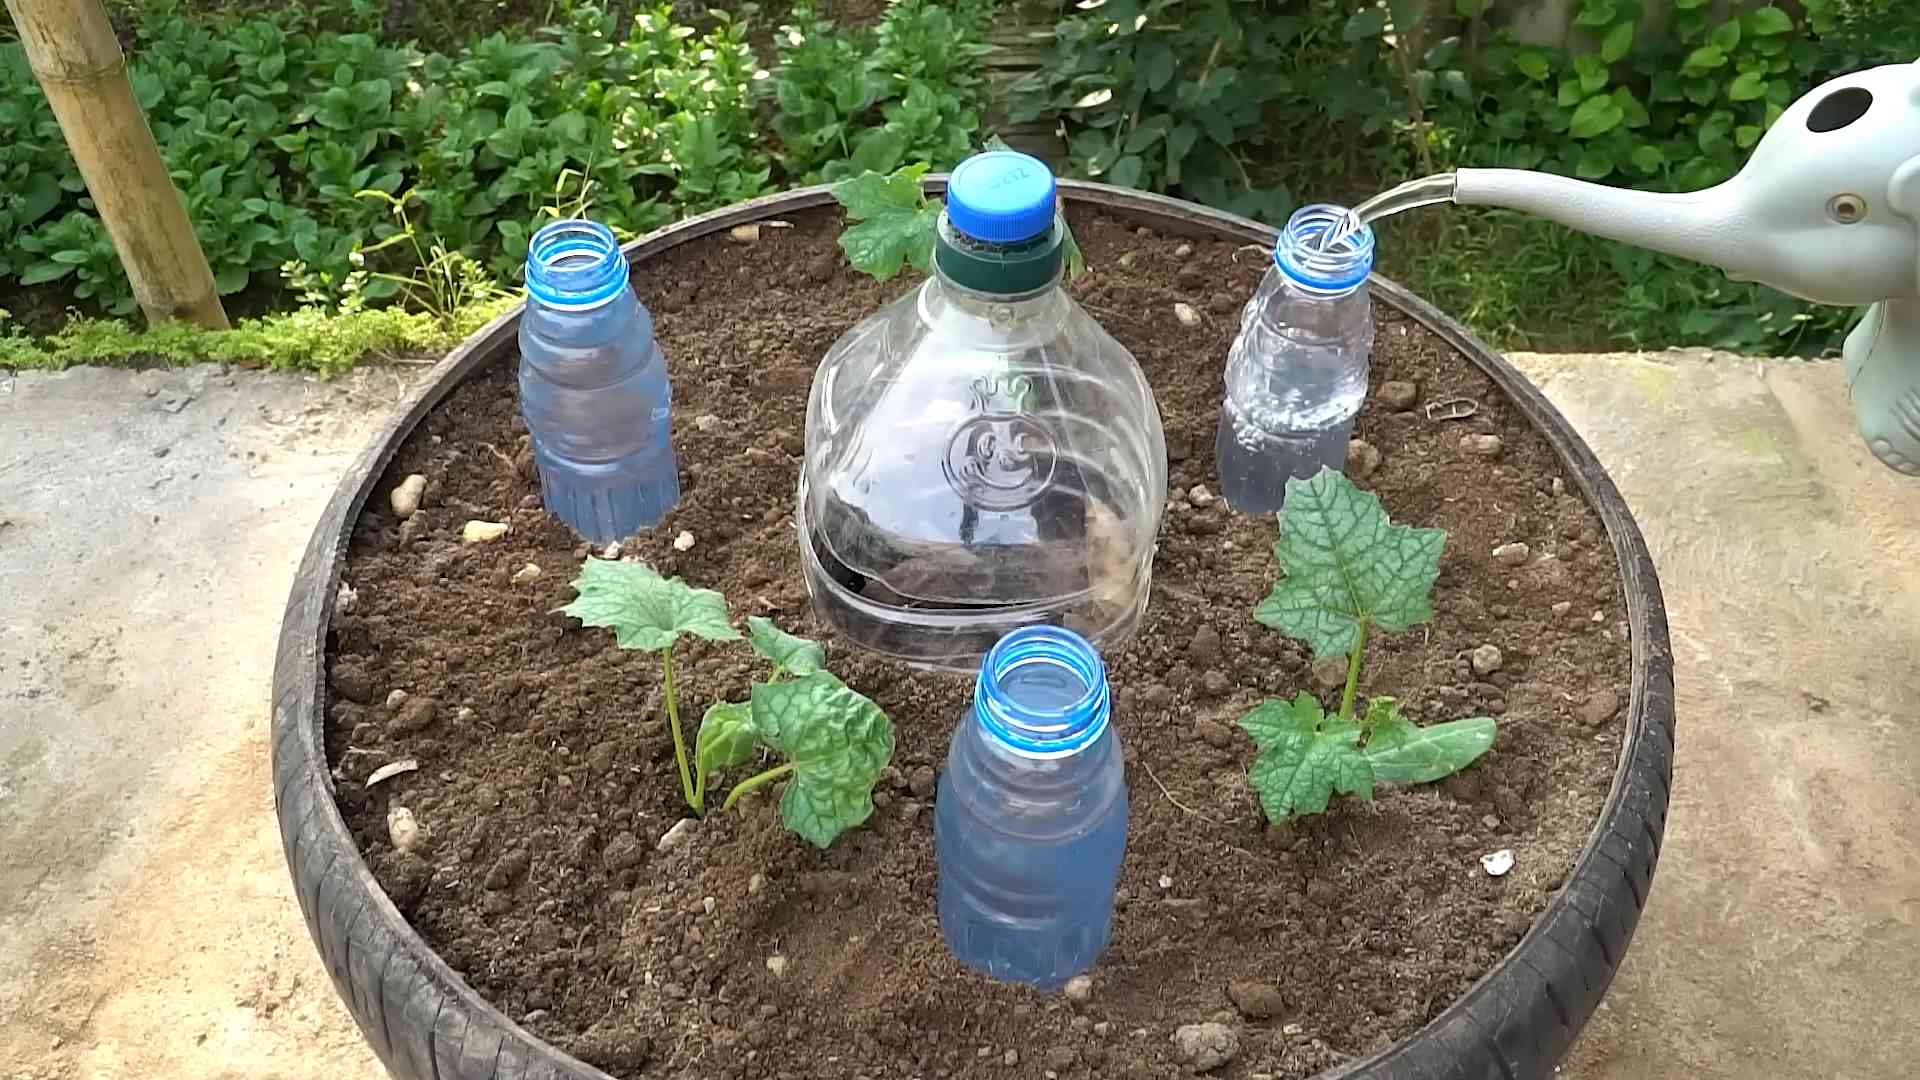
1. Preparing the Larger Pots: Fill your large pots (at least 10-15 gallons) with potting soil. Make sure the pots have drainage holes to prevent waterlogging.
2. Transplanting the Seedlings: Gently remove the seedlings from their seed starting trays or small pots. Be careful not to damage the roots. Dig a hole in the center of each pot and place the seedling in the hole. Cover the roots with soil and gently pat the soil down.
3. Watering: Water the newly transplanted seedlings thoroughly.
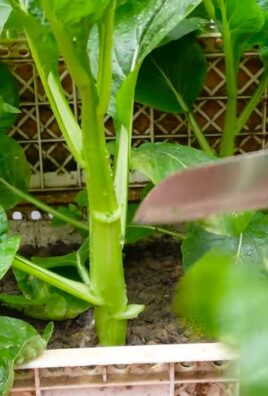
4. Setting Up the Trellis: Install a sturdy trellis or support system for your sponge gourd vines to climb on. Make sure the trellis is tall enough to accommodate the mature size of the vines. I’ve found that a trellis that’s at least 6-8 feet tall works well. You can use a variety of materials for your trellis, such as wood, bamboo, or metal.
5. Positioning the Pots: Place the pots near the trellis so that the vines can easily climb on it. Make sure the plants are getting plenty of light from the grow lights.
Phase 4: Ongoing Care and Maintenance
Once your sponge gourd plants are established, it’s important to provide them with ongoing care and maintenance to ensure a healthy and productive harvest.
1. Watering: Water your plants regularly, keeping the soil moist but not soggy. Water when the top inch of soil feels dry to the touch. Sponge gourds need a lot of water, especially during hot weather.
2. Fertilizing: Fertilize your plants every 2-3 weeks with a balanced fertilizer. Follow the instructions on the fertilizer package. You can also supplement with a liquid seaweed fertilizer to provide additional nutrients.
3. Pruning: Prune your plants regularly to encourage branching and fruit production. Remove any dead or yellowing leaves. You can also prune the vines to control their size and shape.
4. Pollination: Sponge gourds are monoecious, meaning they have separate male and female flowers on the same plant. The female flowers need to be pollinated in order to produce fruit. Indoors, you’ll need to hand-pollinate the flowers. To do this, use a small paintbrush to transfer pollen from the male flowers to the female flowers. The female flowers have a small, immature gourd at the base of the flower.
5. Pest and Disease Control: Keep an eye out for pests and diseases. Common pests that can affect sponge gourds include aphids, spider mites, and whiteflies. Common diseases include powdery mildew and fungal infections. Treat any infestations or infections promptly with appropriate organic pest control methods or fungicides.
6. Providing Air Circulation: Good air circulation is important for preventing fungal diseases. Make sure your plants have plenty of space around them and that the air is circulating well. You can use a fan to improve air circulation.
Phase 5: Harvesting and Processing Your Sponge Gourds
The moment you’ve been waiting for! Harvesting your own homegrown sponges is incredibly rewarding.
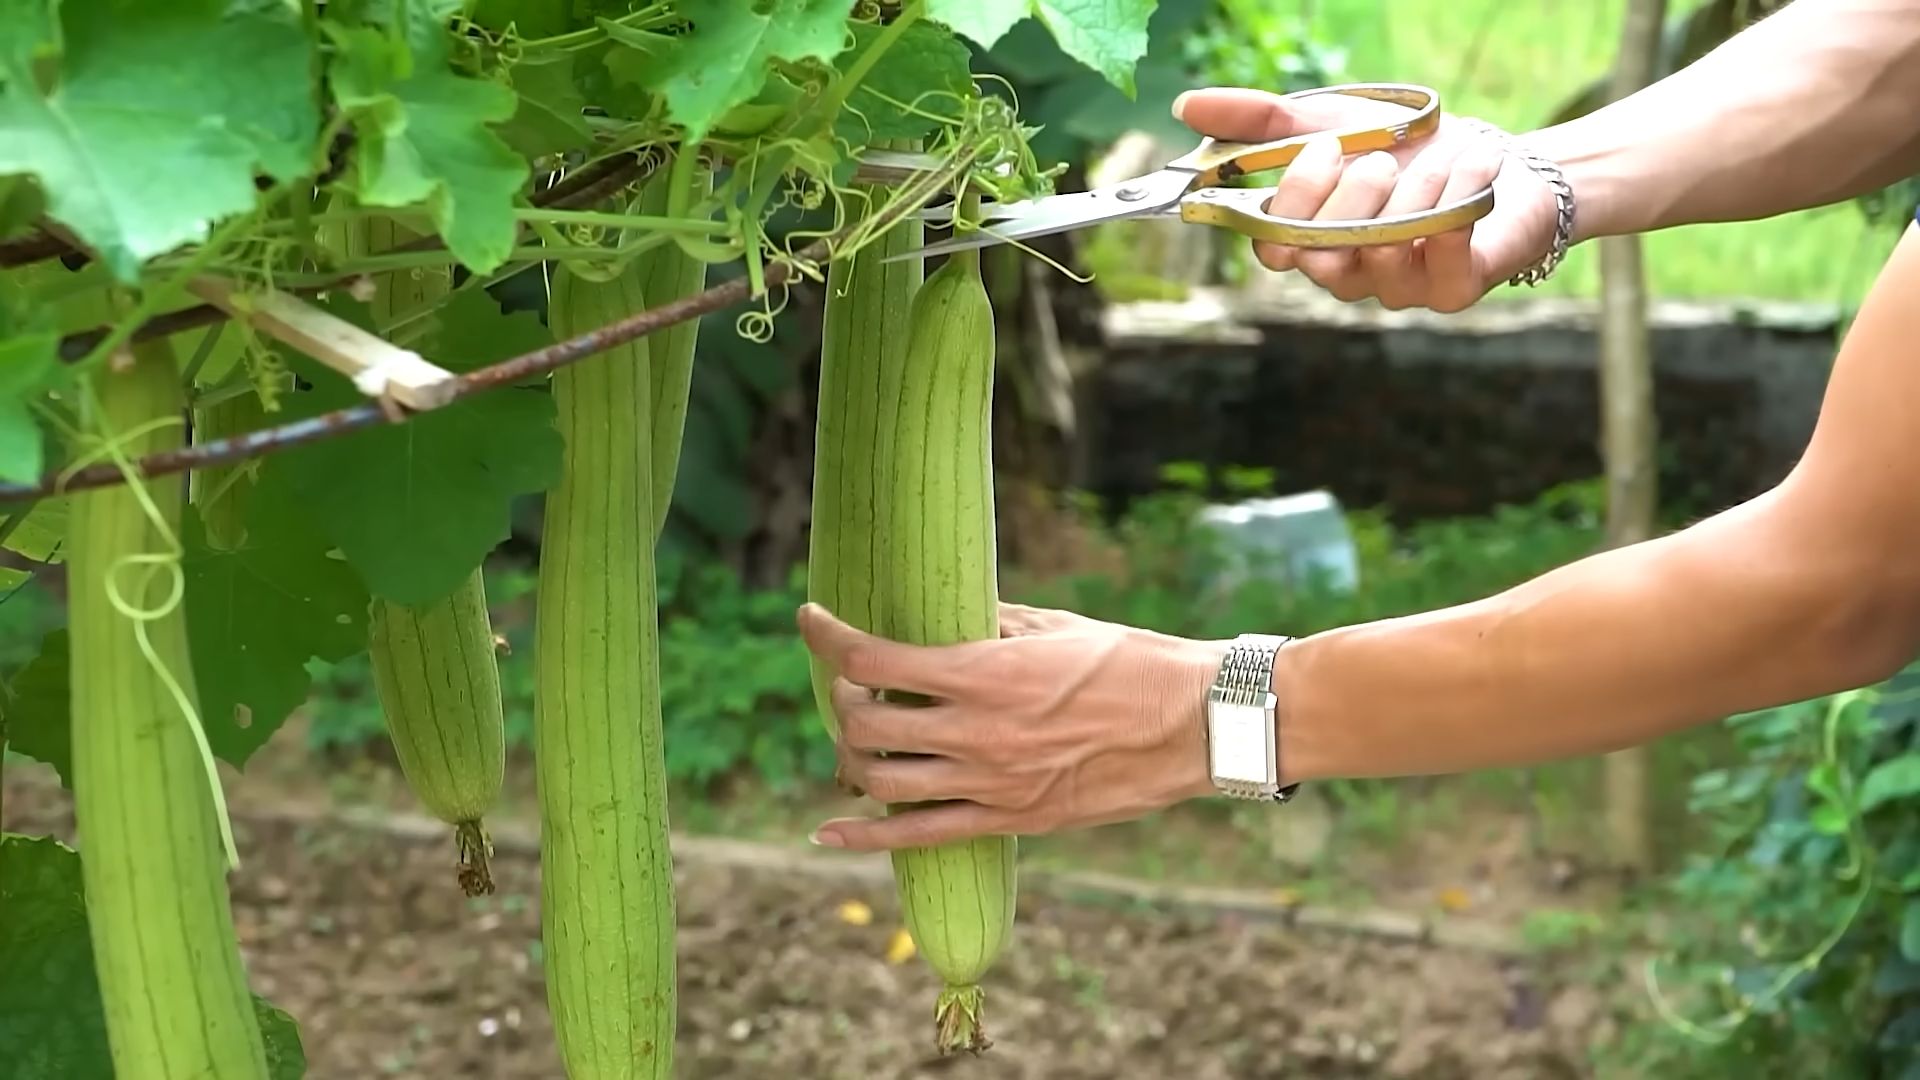
1. Harvesting: Sponge gourds are typically ready to harvest about 90-120 days after planting. The gourds should be mature but still green and slightly soft to the touch. If you wait too long, the gourds will become too fibrous and tough.
2. Cutting the Gourds: Use scissors or pruning shears to cut the gourds from the vine. Leave a few inches of stem attached to the gourd.
3. Soaking the Gourds: Soak the gourds in water for several days to soften the skin. This will make it easier to remove the skin and seeds.
4. Removing the Skin and Seeds: Once the skin is soft,
Conclusion
So, there you have it! Growing sponge gourds indoors might seem like a challenge, but with a little planning and the right approach, you can absolutely cultivate these fascinating and useful vegetables right in your own home. This DIY trick isn’t just about saving money; it’s about connecting with nature, understanding the growth cycle of a plant, and enjoying the satisfaction of harvesting something you nurtured from seed.
Why is this a must-try? Because it opens up a world of possibilities, especially for those with limited outdoor space or those who live in climates where sponge gourds wouldn’t typically thrive. Imagine having a constant supply of natural sponges, ready for everything from exfoliating your skin to scrubbing your dishes. Plus, the vibrant green vines and delicate yellow flowers add a touch of beauty to any indoor space.
Don’t be afraid to experiment with variations! Try different potting mixes to see what works best for your growing conditions. Some gardeners swear by a mix of coco coir, perlite, and compost, while others prefer a more traditional soil-based blend. You can also explore different trellising methods. While a simple bamboo stake works well, you might want to get creative with a decorative trellis or even train the vines along a window frame. Consider adding companion plants to your indoor garden. Basil, for example, is said to deter pests and improve the flavor of the gourds.
Most importantly, remember to be patient. Growing sponge gourds from seed takes time and dedication. Don’t get discouraged if you don’t see results immediately. Keep an eye on your plants, adjust your watering and fertilizing schedule as needed, and celebrate every milestone along the way.
We wholeheartedly encourage you to give this DIY trick a try. It’s a rewarding experience that will not only provide you with a sustainable source of natural sponges but also deepen your appreciation for the wonders of the plant kingdom. Once you’ve harvested your first sponge gourd, be sure to share your experience with us! We’d love to hear about your successes, your challenges, and any tips you’ve learned along the way. Post photos of your indoor garden, share your favorite recipes using sponge gourds, and let’s create a community of indoor sponge gourd enthusiasts! Let us know how your indoor **growing sponge gourds** journey goes.
Frequently Asked Questions (FAQ)
Q: What are the best varieties of sponge gourd to grow indoors?
A: While most sponge gourd varieties can be grown indoors, some are better suited than others due to their size and growth habits. Look for more compact varieties, often labeled as “bush” or “dwarf.” These varieties tend to produce shorter vines and smaller gourds, making them easier to manage in a limited indoor space. Some popular choices include ‘Hybrid Sponge Gourd’ (if available in a compact form) or any variety specifically bred for container gardening. Always check the seed packet or plant description for information on size and growth habit before making your selection.
Q: How much light do sponge gourds need when grown indoors?
A: Sponge gourds are sun-loving plants and require at least 6-8 hours of direct sunlight per day to thrive. If you don’t have a south-facing window that provides sufficient sunlight, you’ll need to supplement with artificial lighting. Grow lights, particularly LED grow lights, are an excellent option. Position the grow lights about 6-12 inches above the plants and keep them on for 12-16 hours per day. Monitor your plants closely and adjust the lighting as needed. Signs of insufficient light include leggy growth, pale leaves, and a lack of flowering.
Q: What type of potting mix should I use for growing sponge gourds indoors?
A: Sponge gourds need a well-draining and nutrient-rich potting mix. A good option is a mix of equal parts potting soil, compost, and perlite. The potting soil provides a base for the plants to grow, the compost adds essential nutrients, and the perlite improves drainage and aeration. Avoid using garden soil, as it can be too heavy and may contain pests or diseases. You can also add a slow-release fertilizer to the potting mix to provide a steady supply of nutrients throughout the growing season.
Q: How often should I water my indoor sponge gourd plants?
A: Water your sponge gourd plants regularly, keeping the soil consistently moist but not waterlogged. Check the soil moisture level daily by sticking your finger about an inch into the soil. If the soil feels dry, it’s time to water. Water deeply, allowing the excess water to drain out of the bottom of the pot. Avoid overhead watering, as this can promote fungal diseases. During hot weather, you may need to water your plants more frequently.
Q: How do I pollinate sponge gourd flowers indoors?
A: Sponge gourds have separate male and female flowers. In an outdoor setting, pollination is typically done by insects. However, indoors, you’ll need to hand-pollinate the flowers. The easiest way to do this is to use a small paintbrush to transfer pollen from the male flower to the female flower. Identify the male flowers by their long, slender stems and the female flowers by the small gourd-like structure at the base of the flower. Gently brush the pollen from the male flower onto the stigma of the female flower. Repeat this process every day until the female flower begins to develop into a gourd.
Q: What are some common pests and diseases that affect sponge gourds grown indoors?
A: Common pests that can affect sponge gourds grown indoors include aphids, spider mites, and whiteflies. These pests can be controlled with insecticidal soap or neem oil. Fungal diseases, such as powdery mildew, can also be a problem, especially in humid environments. To prevent fungal diseases, ensure good air circulation around your plants and avoid overhead watering. If you notice signs of disease, treat your plants with a fungicide.
Q: How long does it take to harvest sponge gourds?
A: The time it takes to harvest sponge gourds depends on the variety and growing conditions. Generally, it takes about 90-120 days from planting to harvest. You’ll know the gourds are ready to harvest when they turn yellow or brown and the skin becomes dry and hard. To harvest, simply cut the gourd from the vine with a sharp knife or pruning shears.
Q: How do I process sponge gourds to make sponges?
A: Once you’ve harvested your sponge gourds, you’ll need to process them to remove the outer skin and seeds. Soak the gourds in water for several days to soften the skin. Then, use a knife or vegetable peeler to remove the skin. Cut the gourd into smaller pieces and remove the seeds. Rinse the sponge thoroughly and allow it to dry completely. Once dry, you can use your homemade sponge for a variety of purposes.
Q: Can I eat sponge gourds?
A: Yes, young sponge gourds are edible and can be used in a variety of dishes. They have a mild, slightly sweet flavor and a tender texture. You can use them in stir-fries, soups, stews, and curries. However, as the gourds mature, they become more fibrous and less palatable. Only harvest young gourds for eating.
Q: What are the benefits of using natural sponge gourds?
A: Natural sponge gourds are a sustainable and eco-friendly alternative to synthetic sponges. They are biodegradable, compostable, and gentle on the environment. They are also naturally absorbent and exfoliating, making them ideal for use in the kitchen, bathroom, and garden. Plus, they are a renewable resource that you can grow yourself!
Leave a Comment