

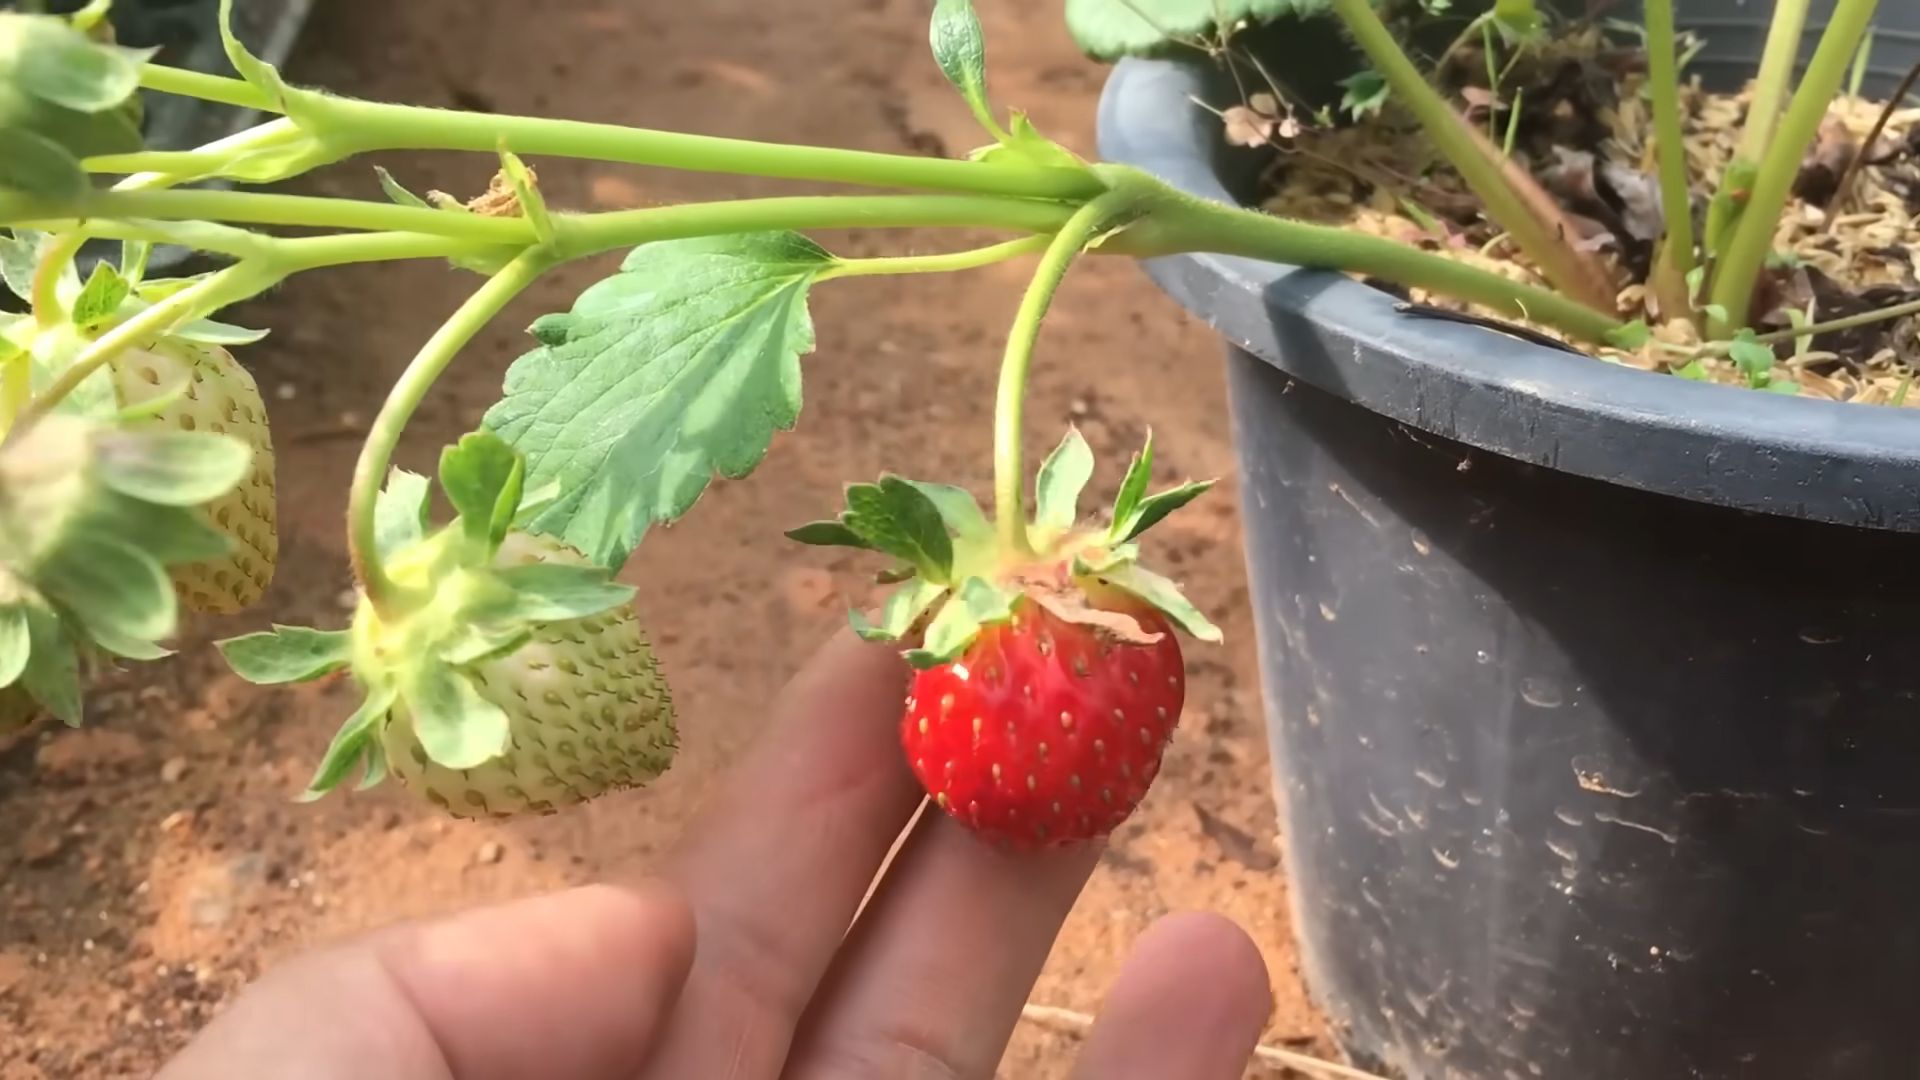
Growing Strawberries from Seed might seem like a daunting task, but trust me, the reward of plucking your own sun-ripened, juicy berries straight from your garden is absolutely worth the effort! Forget those bland, store-bought strawberries – imagine the burst of flavor from a strawberry you nurtured from a tiny seed.
For centuries, strawberries have been cherished, not just for their delicious taste, but also for their vibrant color and perceived health benefits. From ancient Roman gardens to the strawberry fields of California, these little red gems have captured our hearts (and taste buds!). But did you know that traditionally, strawberries were often propagated through runners, rather than seeds? While runners are still a popular method, learning how to grow strawberries from seed opens up a whole new world of varieties and possibilities for your home garden.
Why should you bother with this DIY project? Well, for starters, it’s incredibly satisfying to witness the entire life cycle of a plant. Plus, growing strawberries from seed allows you to cultivate unique and heirloom varieties that you might not find available as starter plants. More importantly, in a world where we’re increasingly conscious of where our food comes from, this is a fantastic way to take control of your food source and enjoy fresh, organic strawberries right in your backyard. So, let’s dive in and unlock the secrets to successfully growing these delightful berries from seed!
Growing Strawberries From Seed: A Comprehensive Guide
Okay, so you want to grow strawberries from seed? Awesome! It might seem a little daunting at first, but trust me, it’s totally doable and super rewarding. Growing your own strawberries from seed gives you access to varieties you might not find as starter plants, and there’s just something special about nurturing a tiny seed into a delicious, juicy berry. Let’s dive in!
Why Grow Strawberries From Seed?
Before we get started, let’s quickly touch on why you might choose to grow strawberries from seed instead of buying established plants.
* Variety: You’ll have access to a wider range of strawberry varieties, including heirloom and alpine types.
* Cost-Effective: Seeds are generally cheaper than starter plants, especially if you’re planning on growing a lot of strawberries.
* Satisfaction: There’s a unique sense of accomplishment that comes with growing something from seed.
* Disease-Free Start: Starting from seed can help ensure your plants are free from common strawberry diseases.
What You’ll Need
Here’s a list of everything you’ll need to get started:
* Strawberry Seeds: Choose a variety that suits your climate and taste preferences. Alpine strawberries are a great option for beginners.
* Seed Starting Trays or Pots: Small containers with drainage holes are essential.
* Seed Starting Mix: This is a fine, sterile soil mix specifically designed for starting seeds.
* Spray Bottle: For gently watering the seeds.
* Clear Plastic Wrap or a Humidity Dome: To create a humid environment for germination.
* Grow Lights (Optional but Recommended): To provide consistent light, especially if you’re starting seeds indoors during the winter.
* Heat Mat (Optional): To provide bottom heat, which can speed up germination.
* Small Pots (3-4 inch): For transplanting seedlings.
* Potting Soil: For transplanting seedlings into larger pots.
* Fertilizer: A balanced liquid fertilizer for feeding your seedlings.
Phase 1: Stratification (Cooling the Seeds)
Strawberry seeds often need a period of cold stratification to break dormancy and improve germination rates. This mimics the natural winter conditions they would experience in the wild. Don’t skip this step!
1. Prepare a Damp Paper Towel: Lightly dampen a paper towel with distilled or filtered water. You don’t want it soaking wet, just moist.
2. Place Seeds on the Paper Towel: Sprinkle your strawberry seeds evenly across the damp paper towel.
3. Fold and Seal: Fold the paper towel over the seeds and place it inside a resealable plastic bag.
4. Refrigerate: Place the bag in your refrigerator for 4-6 weeks. The ideal temperature is around 35-40°F (2-4°C).
5. Check Periodically: Check the paper towel every week or so to make sure it’s still damp. If it’s drying out, lightly mist it with water.
Phase 2: Sowing the Seeds
After stratification, it’s time to sow your strawberry seeds.
1. Prepare Seed Starting Trays: Fill your seed starting trays or pots with seed starting mix. Gently press down on the soil to create a firm, even surface.
2. Sow the Seeds: Strawberry seeds are tiny, so handle them carefully. You can use tweezers or a toothpick to pick them up. Sprinkle a few seeds (2-3) on the surface of each cell or pot.
3. Don’t Bury the Seeds: Strawberry seeds need light to germinate, so don’t bury them. Gently press them into the surface of the soil, but leave them exposed.
4. Water Gently: Use a spray bottle to mist the soil surface thoroughly. Be careful not to dislodge the seeds.
5. Cover with Plastic Wrap or Humidity Dome: Cover the seed starting trays or pots with clear plastic wrap or a humidity dome to create a humid environment. This will help keep the soil moist and promote germination.
6. Provide Light and Warmth: Place the trays or pots in a warm location with bright, indirect light. If you’re using grow lights, position them a few inches above the trays. A heat mat can also be used to provide bottom heat, which can speed up germination. The ideal temperature for germination is around 70-75°F (21-24°C).
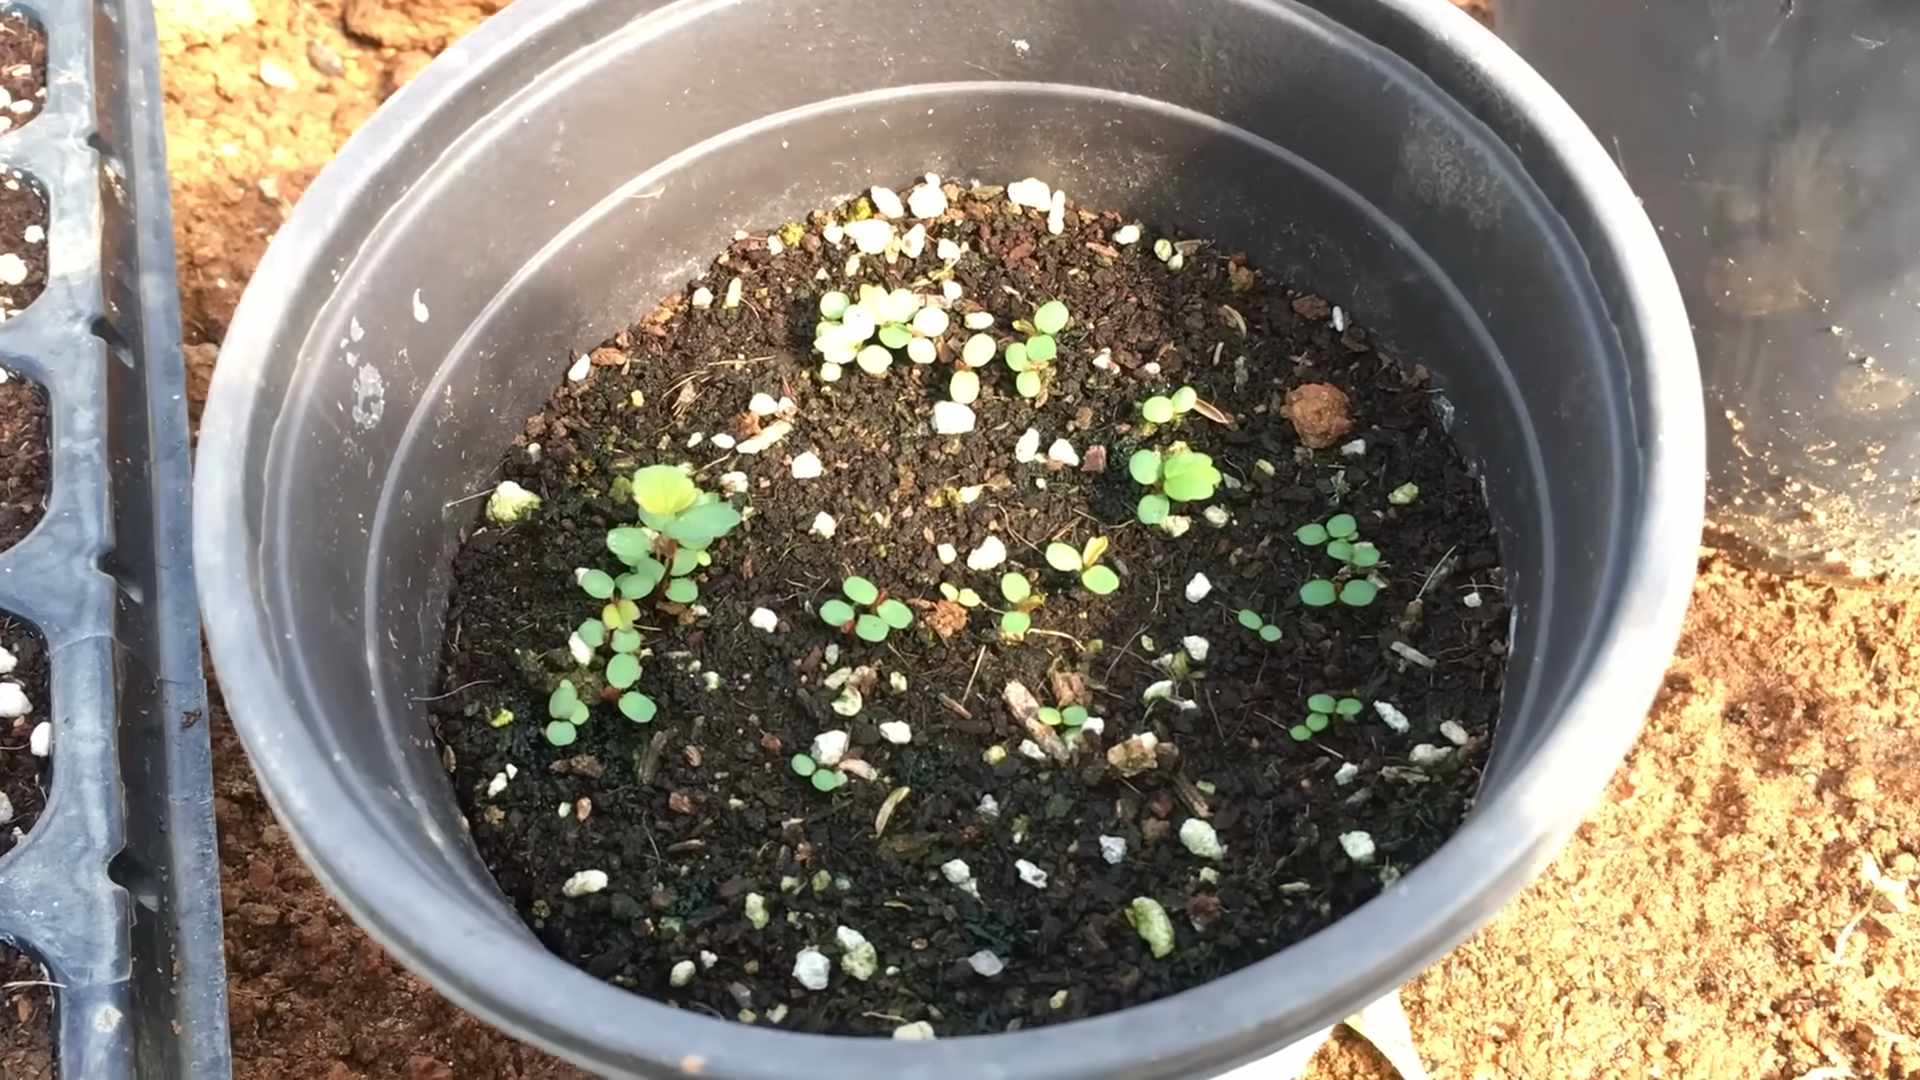
Phase 3: Germination and Early Seedling Care
Germination can take anywhere from 1 to 4 weeks, so be patient.
1. Monitor Moisture Levels: Check the soil moisture daily. The soil should be consistently moist but not waterlogged. Mist the soil with a spray bottle as needed.
2. Ventilation: Once you see seedlings emerging, start to gradually ventilate the trays or pots by lifting the plastic wrap or humidity dome for a few hours each day. This will help prevent fungal diseases.
3. Remove Plastic Wrap or Humidity Dome: After a week or so, you can remove the plastic wrap or humidity dome completely.
4. Provide Adequate Light: Ensure your seedlings are getting plenty of light. If you’re using grow lights, keep them on for 14-16 hours per day. If you’re relying on natural light, place the seedlings in a sunny window.
5. Thin Seedlings (If Necessary): If more than one seedling emerges in each cell or pot, thin them out by snipping off the weaker seedlings at the soil line. Leave only the strongest seedling in each cell or pot.
Phase 4: Transplanting Seedlings
Once your seedlings have developed a few sets of true leaves (the leaves that look like miniature strawberry leaves), it’s time to transplant them into larger pots.
1. Prepare Pots: Fill 3-4 inch pots with potting soil.
2. Gently Remove Seedlings: Carefully remove the seedlings from the seed starting trays or pots. Use a small spoon or fork to gently lift the seedlings, being careful not to damage the roots.
3. Plant Seedlings: Make a small hole in the center of each pot and gently place the seedling in the hole. Make sure the crown of the plant (the point where the roots meet the stem) is level with the soil surface.
4. Water Thoroughly: Water the newly transplanted seedlings thoroughly.
5. Provide Light and Warmth: Place the pots in a location with bright, indirect light and a temperature of around 65-70°F (18-21°C).
Phase 5: Ongoing Care
Now that your seedlings are transplanted, it’s important to provide them with proper care to ensure they grow into healthy, productive plants.
1. Watering: Water your strawberry plants regularly, keeping the soil consistently moist but not waterlogged. Water deeply when the top inch of soil feels dry to the touch.
2. Fertilizing: Feed your strawberry plants with a balanced liquid fertilizer every 2-3 weeks. Follow the instructions on the fertilizer label.
3. Light: Strawberry plants need at least 6-8 hours of sunlight per day. If you’re growing them indoors, make sure they’re getting enough light from grow lights or a sunny window.
4. Temperature: Strawberry plants prefer temperatures between 60-80°F (15-27°C).
5. Pest and Disease Control: Keep an eye out for common strawberry pests and diseases, such as aphids, spider mites, and powdery mildew. Treat any infestations or diseases promptly with appropriate organic or chemical controls.
6. Hardening Off: Before transplanting your strawberry plants outdoors, you’ll need to harden them off. This involves gradually exposing them to outdoor conditions over a period of 1-2 weeks. Start by placing the plants outdoors in a sheltered location for a few hours each day, gradually increasing the amount of time they spend outdoors.
Phase 6: Transplanting Outdoors (or into Larger Containers)
Once your strawberry plants are hardened off, you can transplant them into your garden or into larger containers.
1. Choose a Location: Select a location with well-drained soil and plenty of sunlight.
2. Prepare the Soil: Amend the soil with compost or other organic matter to improve drainage and fertility.
3. Plant the Strawberries: Dig a hole that’s slightly larger than the root ball of the strawberry plant. Gently remove the plant from its pot and place it in the hole. Make sure the crown of the plant is level with the soil surface.
4. Space Plants Properly: Space strawberry plants about 12-18 inches apart.
5. Water Thoroughly: Water the newly transplanted strawberry plants thoroughly.
6. Mulch: Apply a layer of mulch around the plants to help retain moisture, suppress weeds, and
Conclusion
So, there you have it! Growing strawberries from seed might seem daunting at first, but with a little patience and the right approach, you can cultivate your own delicious, homegrown berries. This DIY trick isn’t just about saving money; it’s about experiencing the satisfaction of nurturing life from a tiny seed to a bountiful harvest. Imagine the pride you’ll feel serving up a bowl of freshly picked strawberries that you grew yourself!
This method offers a level of control over your strawberry plants that you simply can’t achieve when buying starts. You get to choose the exact variety you want, ensuring you’re growing strawberries that perfectly suit your taste and local climate. Plus, starting from seed allows you to avoid potential diseases and pests that can sometimes hitchhike on commercially grown plants.
But the benefits don’t stop there. Growing strawberries from seed is also a fantastic learning experience, especially for children. It’s a hands-on way to teach them about the life cycle of plants, the importance of patience, and the rewards of hard work.
Ready to take your strawberry game to the next level? Consider experimenting with different varieties of strawberries. Try alpine strawberries for their intense flavor and continuous fruiting, or explore everbearing varieties for a longer harvest season. You can also experiment with different soil mixes to see what works best for your growing conditions. Some gardeners swear by adding a bit of composted manure to their seed starting mix, while others prefer a more sterile blend.
Don’t be afraid to get creative with your setup, too. If you’re short on space, consider growing your strawberry seedlings in a vertical planter or hanging basket. This can not only save space but also add a touch of beauty to your garden or balcony.
We encourage you to give this DIY trick a try. It’s a rewarding and fulfilling experience that will bring you closer to nature and provide you with a delicious harvest. And most importantly, don’t be discouraged if your first attempt isn’t perfect. Gardening is all about learning and experimenting.
Once you’ve successfully grown your own strawberries from seed, we’d love to hear about your experience! Share your tips, tricks, and photos in the comments below. Let’s create a community of strawberry-growing enthusiasts and help each other succeed. Remember, the journey of growing your own food is just as rewarding as the final product. So, grab your seeds, get your hands dirty, and start growing your own delicious strawberries today! This method of growing strawberries from seed is a game changer for any gardener.
Frequently Asked Questions (FAQ)
Q: How long does it take to grow strawberries from seed?
A: Growing strawberries from seed requires patience. Germination can take anywhere from 1 to 4 weeks, and it can take several months for the seedlings to mature enough to transplant outdoors. You likely won’t see a significant harvest until the following year. However, the wait is well worth it for the satisfaction of growing your own berries from scratch.
Q: What kind of soil is best for starting strawberry seeds?
A: A light, well-draining seed starting mix is ideal. Avoid using garden soil, as it can be too heavy and may contain pathogens that can harm your seedlings. You can purchase a pre-made seed starting mix or create your own by combining equal parts peat moss, perlite, and vermiculite. Ensure the mix is slightly acidic, with a pH between 5.5 and 6.5.
Q: Do strawberry seeds need light to germinate?
A: Yes, strawberry seeds need light to germinate. Surface sow the seeds, gently pressing them into the soil without covering them. Place the seed trays under grow lights or in a bright, sunny location. Maintain consistent moisture by misting the soil regularly.
Q: How often should I water strawberry seedlings?
A: Keep the soil consistently moist but not waterlogged. Water gently from the bottom to avoid disturbing the delicate seedlings. You can do this by placing the seed trays in a shallow tray of water and allowing the soil to absorb the moisture. Avoid overwatering, as this can lead to fungal diseases.
Q: When should I transplant my strawberry seedlings?
A: Transplant your strawberry seedlings when they have developed at least four true leaves and are large enough to handle without damaging them. This usually takes about 6-8 weeks after germination. Harden off the seedlings by gradually exposing them to outdoor conditions for a week before transplanting them into their permanent location.
Q: What is “hardening off” and why is it important?
A: Hardening off is the process of gradually acclimating your seedlings to outdoor conditions. This is important because seedlings grown indoors are sensitive to sunlight, wind, and temperature fluctuations. To harden off your seedlings, start by placing them outdoors in a sheltered location for a few hours each day, gradually increasing the amount of time they spend outside over the course of a week. This will help them adjust to the outdoor environment and prevent transplant shock.
Q: What kind of fertilizer should I use for strawberry plants?
A: Use a balanced fertilizer with an NPK ratio of 10-10-10 or 14-14-14. Apply the fertilizer according to the package directions, being careful not to over-fertilize, as this can burn the plants. You can also use organic fertilizers such as compost tea or fish emulsion.
Q: How do I protect my strawberry plants from pests and diseases?
A: Monitor your plants regularly for signs of pests and diseases. Common strawberry pests include aphids, spider mites, and slugs. You can control these pests with insecticidal soap, horticultural oil, or diatomaceous earth. Common strawberry diseases include gray mold, leaf spot, and powdery mildew. Prevent these diseases by providing good air circulation, avoiding overhead watering, and removing any infected leaves.
Q: Can I grow strawberries in containers?
A: Yes, strawberries grow well in containers. Choose a container that is at least 12 inches deep and wide. Use a well-draining potting mix and provide regular watering and fertilization. Container-grown strawberries may need to be watered more frequently than those grown in the ground.
Q: What are the best strawberry varieties to grow from seed?
A: Some popular strawberry varieties that are relatively easy to grow from seed include ‘Alpine’, ‘Everbearing’, and ‘Day-Neutral’ varieties. ‘Alpine’ strawberries are known for their intense flavor and continuous fruiting. ‘Everbearing’ varieties produce two main crops of berries per year, while ‘Day-Neutral’ varieties produce berries throughout the growing season. Research which varieties are best suited to your local climate and growing conditions.
Q: My strawberry seeds aren’t germinating. What could be the problem?
A: Several factors can contribute to poor germination. Ensure your seeds are fresh and viable. Strawberry seeds have a relatively short shelf life. Make sure the soil is consistently moist but not waterlogged. Provide adequate light and warmth. Strawberry seeds need light to germinate, and the ideal temperature for germination is between 70-75°F (21-24°C). Finally, be patient! Germination can take several weeks.
Q: How do I overwinter my strawberry plants?
A: In colder climates, strawberry plants need protection from freezing temperatures. Mulch around the plants with straw or pine needles to insulate the roots. You can also cover the plants with a row cover or cold frame. In milder climates, you may not need to provide any winter protection.
Leave a Comment