

Growing Sweet Potatoes at Home might seem like a daunting task reserved for seasoned farmers, but I’m here to tell you it’s totally achievable, even if you only have a small backyard or a sunny balcony! Forget those bland, store-bought spuds – imagine sinking your teeth into a sweet, earthy, and incredibly fresh sweet potato that you nurtured from sprout to harvest.
Sweet potatoes have a rich history, dating back thousands of years in Central and South America. They were a staple food for the Incas and other ancient civilizations, and their journey across the globe has made them a beloved ingredient in cuisines worldwide. From sweet potato pie in the American South to roasted sweet potatoes with spices in India, their versatility is undeniable.
But why bother growing your own? Well, for starters, you’ll have access to varieties you simply won’t find in supermarkets. Plus, you’ll know exactly what went into growing them – no mystery pesticides or questionable farming practices. More importantly, growing sweet potatoes at home is incredibly rewarding. There’s something magical about watching those vines spread and knowing that beneath the soil, delicious treasures are developing. This DIY guide will equip you with all the knowledge you need to successfully cultivate these nutritional powerhouses, from sprouting slips to harvesting your bounty. Let’s get our hands dirty and embark on this exciting gardening adventure together!
Growing Sweet Potatoes at Home: Your DIY Guide for a Bountiful Harvest
Hey gardening friends! Have you ever wondered how to grow those delicious, orange tubers right in your own garden? Sweet potatoes are not only incredibly tasty, but also surprisingly easy to grow if you know a few tricks. I’ll show you how you can achieve a bountiful harvest with simple methods and a little patience. Let’s get started!
What You Need: Preparation
Before we begin, we need to gather the right materials. Here’s a list to make sure you have everything ready:
- Sweet Potatoes: It’s best to use organic sweet potatoes, as they are less likely to have been treated with growth inhibitors.
- Water Glasses or Containers: Enough to partially submerge several sweet potatoes.
- Toothpicks: To stabilize the sweet potatoes in the water.
- Potting Soil: High-quality, well-draining potting soil is crucial.
- Compost: For extra nutrients.
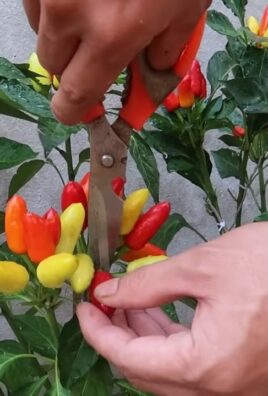
- Garden Scissors: For trimming the “slips” (the shoots from the sweet potato).
- Watering Can: For watering.
- Garden Gloves: To keep your hands clean.
- Garden Bed or Large Pots: Depending on how much space you have.
- Mulch (optional): Straw or grass clippings to retain moisture and suppress weeds.
Phase 1: Growing the “Slips” – Creating Sweet Potato Babies
The “slips” are the shoots that grow from the sweet potato, and they are what we will plant later. This step is crucial for success.
- Prepare the Sweet Potatoes: Wash your sweet potatoes thoroughly. You can leave them whole or cut them in half. Cutting them in half can speed up slip production.
- Attach Toothpicks: Insert four toothpicks about halfway into the sweet potato, spaced evenly. These will help stabilize the sweet potato in the water glass.
- Submerge in Water: Fill your water glasses or containers with water. Submerge the sweet potato so that the lower half (or the cut surface, if you’ve sliced it) is in the water. The upper half should remain dry.
- Place in a Warm, Bright Spot: Put the glasses in a warm, bright location, but not in direct sunlight. A windowsill works well.
- Change Water Regularly: Change the water every few days to avoid algae growth and to keep the water clean.
- Patience: After a few weeks (around 3-4), the first “slips” should start sprouting. They will look like small green shoots with leaves.
Phase 2: Planting the “Slips” – From Water to the Garden
Once the “slips” have grown to a decent size (about 15-20 cm), we can plant them.
- Cut the “Slips”: When the “slips” are large enough, carefully cut them from the sweet potato. Use clean garden scissors and cut about 2-3 cm above the sweet potato.
- Root the “Slips” (optional but recommended): You can root the cut “slips” in a glass of water before planting them in the soil. This increases the chances of success. Simply place the “slips” in a glass of water and wait until roots form (about 1 week).
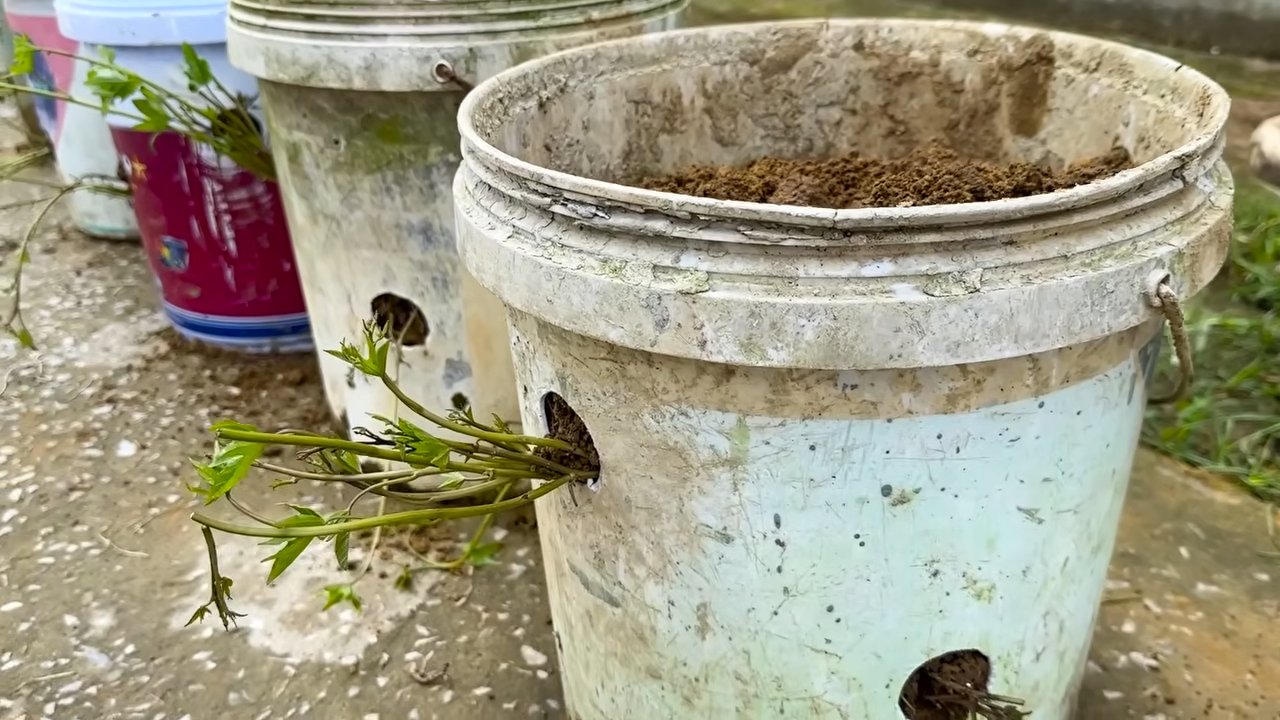
- Prepare the Garden Bed: While the “slips” are rooting (or if you skip this step), prepare your garden bed or pots. Sweet potatoes love loose, well-draining soil. Mix your potting soil with compost to enrich it with nutrients.
- Planting: Dig small holes about 30-45 cm apart. Place the “slips” (rooted or unrooted) into the holes and cover them with soil. Make sure the leaves stay above the soil.
- Watering: Water the freshly planted “slips” thoroughly.
Phase 3: Care and Harvest – Patience Pays Off
Now it’s time to care for your plants and wait for the harvest.
- Water Regularly: Sweet potatoes need regular watering, especially during the first few weeks after planting. Make sure the soil stays moist but not soaked.
- Weed Control: Keep your garden bed or pots free of weeds. Weeds compete with the sweet potatoes for nutrients and water.
- Mulching (optional): A layer of mulch (straw or grass clippings) helps retain moisture in the soil and suppress weeds.
- Fertilizing (optional): If you want, you can fertilize your sweet potatoes during the growing season with an organic fertilizer. Be sure to use a low-nitrogen fertilizer, as too much nitrogen will promote lush leaf growth but reduce tuber formation.
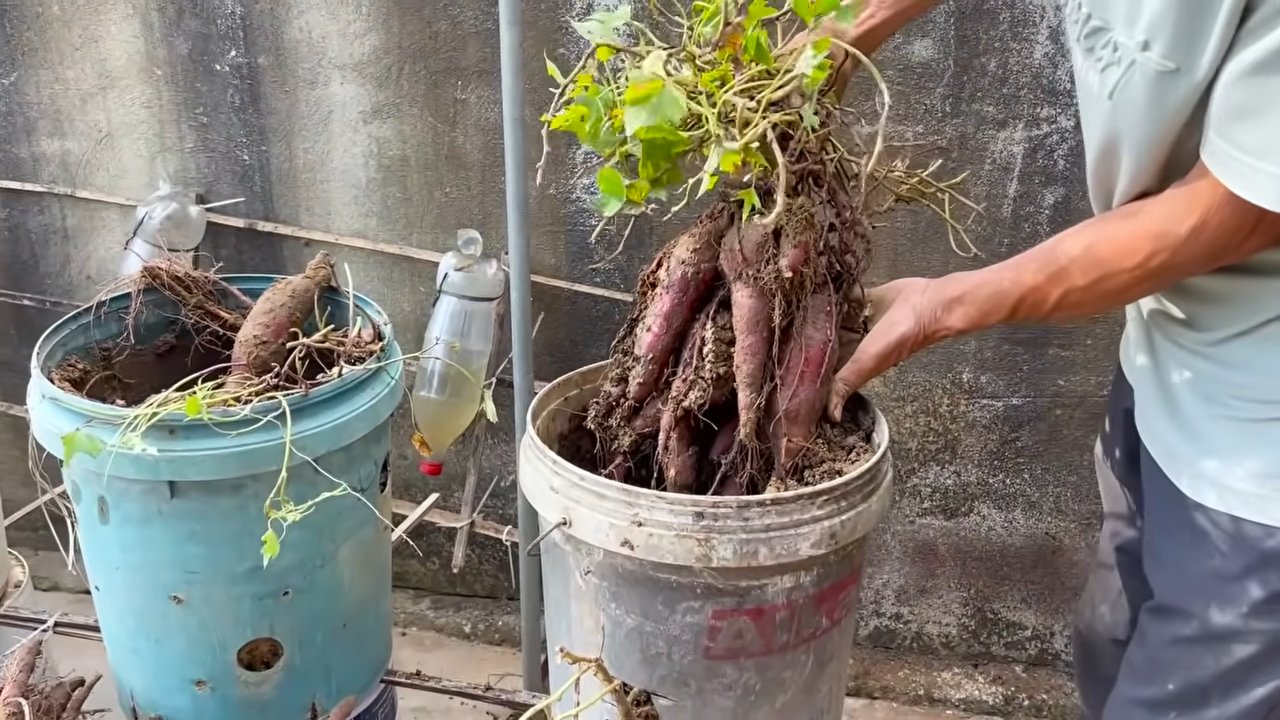
- Harvest Time: Sweet potatoes are usually ready for harvest after about 90-120 days. A sign that it’s time to harvest is when the leaves start to turn yellow and die back.
- Harvesting: Gently dig up the sweet potatoes. Be careful not to damage the tubers. It’s best to dig around the plants with a garden fork and gently lift them out.
- Curing and Hardening: Let the harvested sweet potatoes cure for a few days in a warm, dry place. This helps to harden the skin and ensures they last longer. Avoid direct sunlight while curing.
Additional Tips and Tricks
- Sunshine is Key: Sweet potatoes love the sun. Make sure your garden bed or pots get at least 6 hours of sunlight per day.
- Soil Quality: Loose, well-draining soil is crucial. Heavy clay soils can hinder tuber formation.
- Pests and Diseases: Sweet potatoes are relatively resistant to pests and diseases, but watch out for aphids and sweet potato beetles. Use organic pest control methods if necessary.
- Rotation: Change the location of your sweet potatoes every year to maintain soil quality and prevent diseases.
- Experiment: There are many different sweet potato varieties. Try different varieties to see which ones taste best and grow best in your climate.
Avoiding Common Mistakes
- Planting Too Early: Sweet potatoes are sensitive to cold. Wait until the risk of frost is gone before planting them.
- Too Much Nitrogen: Too much nitrogen in the fertilizer will promote leaf growth but reduce tuber formation.
- Not Enough Water: Sweet potatoes need regular watering, especially in the first weeks after planting.
- Damaging Tubers: Be careful when harvesting to avoid damaging the tubers. Damaged tubers spoil more quickly.
I hope this guide helps you grow your own sweet potatoes at home. It’s really a rewarding project, and I’m sure you’ll enjoy it! Good luck and happy harvesting!
Conclusion
So, there you have it! Growing sweet potatoes at home is not only achievable, but it’s also a deeply rewarding experience. From the initial thrill of coaxing slips from a humble sweet potato to the satisfaction of harvesting your own homegrown bounty, this DIY project offers a unique connection to your food. Forget the often bland, mass-produced sweet potatoes from the grocery store; imagine sinking your teeth into a vibrant, flavorful sweet potato that you nurtured from start to finish. The difference in taste and texture is truly remarkable.
This isn’t just about saving money (though that’s certainly a perk!). It’s about embracing a more sustainable lifestyle, reducing your carbon footprint, and gaining a deeper appreciation for the natural world. Plus, it’s a fantastic educational opportunity for kids (and adults!) to learn about plant life cycles and the magic of gardening.
But the best part? The possibilities are endless! Experiment with different varieties of sweet potatoes to discover your favorite flavor profile. Try growing them in containers if you’re short on space, or build a raised bed for a more traditional garden setting. You can even get creative with your slip-starting methods, using different types of jars or even suspending the sweet potato over water with toothpicks.
Don’t be afraid to get your hands dirty and embrace the learning process. There will be challenges along the way, but the rewards are well worth the effort. And remember, even if your first attempt isn’t perfect, you’ll learn valuable lessons that will help you succeed next time.
We wholeheartedly encourage you to give this DIY trick a try. It’s a fun, engaging, and ultimately delicious way to connect with your food and the environment. And once you’ve harvested your first crop of homegrown sweet potatoes, be sure to share your experience with us! We’d love to hear about your successes, your challenges, and any creative variations you’ve discovered. Share your photos and stories in the comments below – let’s build a community of home-grown sweet potato enthusiasts! Let’s all enjoy the fruits (or rather, the roots!) of our labor and savor the unparalleled taste of homegrown sweet potatoes.
Frequently Asked Questions (FAQ)
Q: What is the best time of year to start growing sweet potatoes?
A: The ideal time to start growing sweet potatoes is in the late spring or early summer, after the last frost has passed and the soil has warmed up to at least 65 degrees Fahrenheit (around 18 degrees Celsius). Sweet potatoes need a long growing season, typically around 100-120 days, so starting them early ensures they have enough time to mature before the first frost in the fall. If you live in a colder climate with a shorter growing season, you can start the slips indoors a few weeks earlier to give them a head start.
Q: How do I know when my sweet potatoes are ready to harvest?
A: Sweet potatoes are typically ready to harvest in the fall, before the first frost. A good indicator is when the vines start to yellow and die back. You can also gently dig around one of the plants to check the size of the potatoes. They should be a good size and have a firm texture. Avoid harvesting after a frost, as this can damage the potatoes and shorten their storage life.
Q: What kind of soil is best for growing sweet potatoes?
A: Sweet potatoes prefer well-drained, sandy loam soil that is rich in organic matter. They don’t do well in heavy clay soil, as this can restrict root growth and lead to misshapen potatoes. Before planting, amend your soil with compost or other organic matter to improve drainage and fertility. A slightly acidic soil pH of around 6.0-6.5 is ideal.
Q: How much sunlight do sweet potatoes need?
A: Sweet potatoes need at least 6-8 hours of direct sunlight per day to thrive. Choose a sunny location in your garden where they will receive plenty of light throughout the growing season. If you’re growing them in containers, make sure to place them in a spot that gets ample sunlight.
Q: How often should I water my sweet potatoes?
A: Sweet potatoes need consistent moisture, especially during the early stages of growth. Water them regularly, especially during dry spells. However, avoid overwatering, as this can lead to root rot. Once the plants are established, you can reduce watering slightly. A good rule of thumb is to water deeply when the top inch of soil feels dry to the touch.
Q: What are some common pests and diseases that affect sweet potatoes?
A: Some common pests that can affect sweet potatoes include sweet potato weevils, flea beetles, and aphids. Diseases include stem rot, scurf, and black rot. To prevent these problems, choose disease-resistant varieties, practice crop rotation, and keep your garden free of weeds and debris. You can also use organic pest control methods, such as insecticidal soap or neem oil, to control pests.
Q: Can I grow sweet potatoes in containers?
A: Yes, you can definitely grow sweet potatoes in containers! Choose a large container that is at least 12 inches deep and wide. Fill it with well-draining potting mix and plant your slips. Make sure the container has drainage holes to prevent waterlogging. Place the container in a sunny location and water regularly. Container-grown sweet potatoes may not produce as large of a yield as those grown in the ground, but they can still provide a delicious harvest.
Q: How do I cure sweet potatoes after harvesting?
A: Curing sweet potatoes is essential for improving their flavor and storage life. After harvesting, gently brush off any excess soil and let the potatoes dry in a warm, humid place (around 80-85 degrees Fahrenheit and 85-90% humidity) for about 7-10 days. This allows the skins to harden and any minor cuts or bruises to heal. After curing, store the sweet potatoes in a cool, dry, and well-ventilated place (around 55-60 degrees Fahrenheit) for several months.
Q: Can I eat the sweet potato leaves?
A: Yes, sweet potato leaves are edible and nutritious! They can be eaten raw in salads or cooked like spinach. They have a mild, slightly sweet flavor. Harvest the leaves when they are young and tender. Avoid eating leaves that have been treated with pesticides or herbicides.
Q: What are some creative ways to use my homegrown sweet potatoes?
A: The possibilities are endless! You can roast them, bake them, mash them, or fry them. Use them in soups, stews, casseroles, and pies. You can even make sweet potato fries or sweet potato chips. Get creative and experiment with different recipes to discover your favorite ways to enjoy your homegrown sweet potatoes. Don’t forget about sweet potato pie, a classic dessert that’s perfect for the holidays!
Leave a Comment