

Hanging bottle lettuce growing: sounds like something out of a futuristic farm, right? Well, it’s surprisingly simple and a fantastic way to bring fresh, delicious lettuce right to your doorstep, even if you’re short on space! Forget those pricey, pre-washed bags at the grocery store. I’m going to show you how to create your own vertical lettuce garden using recycled plastic bottles – it’s eco-friendly, budget-friendly, and incredibly rewarding.
The concept of vertical gardening isn’t new. In fact, evidence suggests that ancient civilizations, like those in Babylon with their famous Hanging Gardens, understood the benefits of growing plants upwards. While they used elaborate structures, we’re taking a more modern, DIY approach. Today, with increasing urbanization and smaller living spaces, the need for innovative gardening solutions is greater than ever. That’s where hanging bottle lettuce growing comes in!
Imagine stepping outside and snipping fresh lettuce leaves for your salad, knowing exactly where they came from and what went into growing them. No pesticides, no long trips to the store, just pure, homegrown goodness. This DIY project is perfect for apartment dwellers, balcony gardeners, or anyone looking to add a touch of green to their lives. Plus, it’s a great way to teach kids about gardening and sustainability. So, grab those empty plastic bottles, and let’s get started on this fun and practical project!
Hängende Salatgärten aus Plastikflaschen: Dein DIY-Guide für frischen Salat von der Wand
Hallo liebe Gartenfreunde! Habt ihr wenig Platz, aber trotzdem Lust auf frischen Salat aus dem eigenen Anbau? Dann habe ich genau das Richtige für euch: Hängende Salatgärten aus Plastikflaschen! Das ist nicht nur super platzsparend, sondern auch eine tolle Möglichkeit, Plastikmüll zu recyceln und eurem Balkon oder eurer Terrasse einen grünen Touch zu verleihen. Ich zeige euch, wie ihr das ganz einfach selbst machen könnt.
Was du brauchst: Die Materialliste
Bevor wir loslegen, hier eine Liste mit allen Materialien, die du für dein hängendes Salatparadies benötigst:
* Plastikflaschen: Am besten eignen sich 1,5- oder 2-Liter-Flaschen. Je nachdem, wie groß dein Garten werden soll, brauchst du entsprechend viele. Achte darauf, dass sie sauber und trocken sind.
* Schere oder Cuttermesser: Zum Zuschneiden der Flaschen. Sei bitte vorsichtig!
* Bohrmaschine oder Nagel und Hammer: Um Löcher für die Aufhängung und den Wasserablauf zu machen.
* Starkes Seil oder Draht: Zum Aufhängen der Flaschen.
* Erde: Am besten Blumenerde oder spezielle Gemüseerde.
* Salatsamen oder Jungpflanzen: Je nachdem, ob du lieber von Grund auf neu anfangen oder schneller ernten möchtest.
* Gießkanne oder Sprühflasche: Zum Bewässern deiner Salatpflanzen.
* Optional: Sprühfarbe oder Marker, um die Flaschen zu verzieren.
* Optional: Kies oder Tonscherben für eine Drainageschicht.
Phase 1: Die Vorbereitung der Flaschen
In dieser Phase kümmern wir uns um die Plastikflaschen und bereiten sie für ihre neue Aufgabe als Salatbehälter vor.
1. Reinigung: Zuerst solltest du die Plastikflaschen gründlich reinigen. Entferne alle Etiketten und spüle sie mit warmem Wasser und Spülmittel aus. Achte darauf, dass keine Rückstände zurückbleiben. Lass sie anschließend gut trocknen.
2. Zuschneiden: Jetzt kommt der spannende Teil: das Zuschneiden der Flaschen. Es gibt verschiedene Möglichkeiten, wie du das machen kannst. Ich zeige dir zwei Varianten:
* Variante 1: Horizontales Zuschneiden: Schneide die Flasche horizontal durch, etwa auf halber Höhe. Der obere Teil wird später als Trichter zum Befüllen mit Erde dienen. Der untere Teil wird zum eigentlichen Pflanzgefäß.
* Variante 2: Seitliches Zuschneiden: Schneide ein großes Rechteck oder Oval in die Seite der Flasche. Achte darauf, dass du genügend Platz für die Salatpflanzen hast. Diese Variante eignet sich besonders gut, wenn du mehrere Pflanzen in einer Flasche unterbringen möchtest.
Wichtig: Egal für welche Variante du dich entscheidest, achte darauf, dass die Schnittkanten glatt sind, um Verletzungen zu vermeiden. Du kannst sie eventuell mit Schleifpapier bearbeiten oder mit Klebeband abkleben.
3. Löcher bohren: Damit das Wasser gut ablaufen kann und sich keine Staunässe bildet, musst du Löcher in den Boden der Flaschen bohren. Verwende dafür eine Bohrmaschine oder einen Nagel und Hammer. Mach etwa 3-4 kleine Löcher.
4. Aufhängungslöcher: Jetzt bohren wir die Löcher für die Aufhängung. Je nachdem, wie du die Flaschen aufhängen möchtest, kannst du die Löcher entweder oben am Flaschenhals oder seitlich an den Flaschen bohren. Achte darauf, dass die Löcher groß genug für dein Seil oder deinen Draht sind.
5. Optional: Verzieren: Wenn du möchtest, kannst du die Flaschen jetzt noch verzieren. Verwende dafür Sprühfarbe, Marker oder beklebe sie mit bunten Papieren. Lass deiner Kreativität freien Lauf!
Phase 2: Das Bepflanzen der Flaschen
Jetzt geht es ans Eingemachte: Wir bepflanzen die vorbereiteten Flaschen mit Erde und Salat.
1. Drainageschicht: Um Staunässe zu vermeiden, kannst du eine Drainageschicht in den Boden der Flaschen legen. Verwende dafür Kies, Tonscherben oder Blähton.
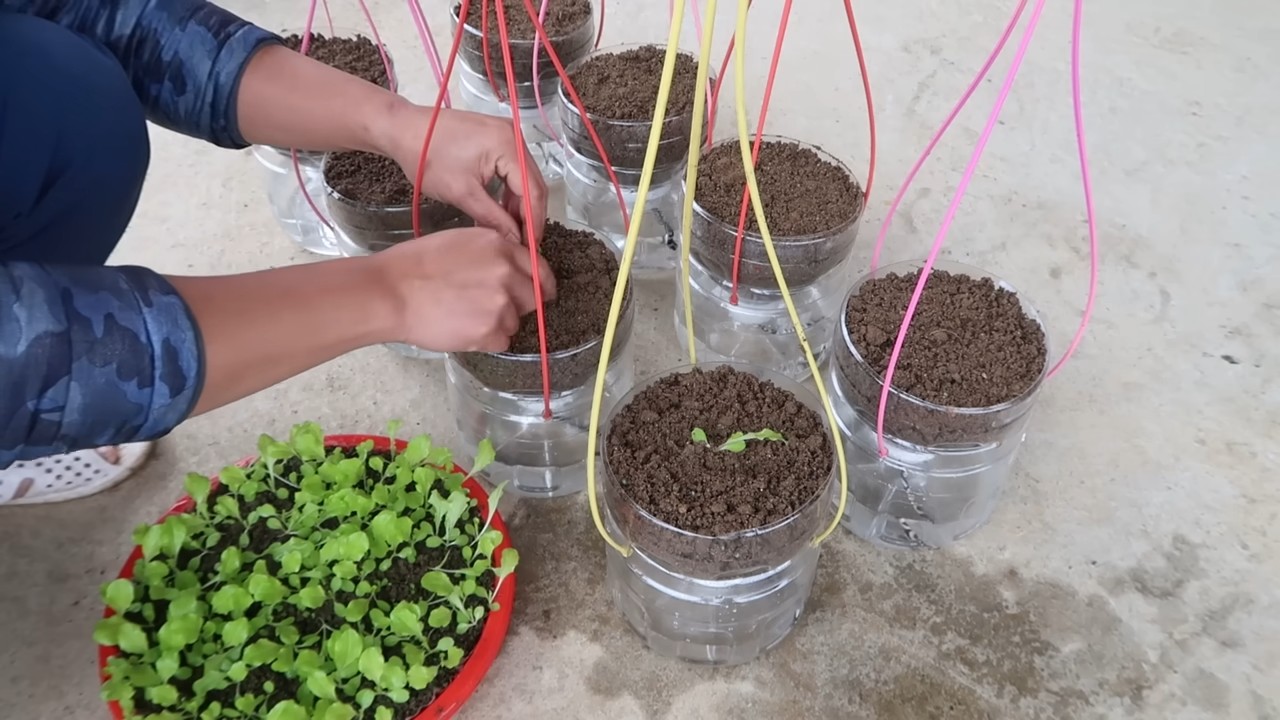
2. Erde einfüllen: Fülle die Flaschen mit Erde. Achte darauf, dass du die Erde nicht zu fest andrückst, damit die Wurzeln der Salatpflanzen genügend Platz zum Wachsen haben.
3. Salat pflanzen: Jetzt kannst du deine Salatsamen oder Jungpflanzen einsetzen. Wenn du Samen verwendest, achte darauf, dass du sie nicht zu tief in die Erde legst. Bei Jungpflanzen solltest du die Wurzeln vorsichtig lockern, bevor du sie einpflanzt.
4. Angießen: Gieße die Salatpflanzen nach dem Einpflanzen gründlich an. Achte darauf, dass die Erde gut durchfeuchtet ist.
Phase 3: Das Aufhängen und Pflegen des Salatgartens
Fast geschafft! Jetzt müssen wir den Salatgarten nur noch aufhängen und pflegen.
1. Aufhängen: Fädle das Seil oder den Draht durch die Aufhängungslöcher und befestige die Flaschen an einem geeigneten Ort. Das kann ein Balkongeländer, eine Wand oder ein Baum sein. Achte darauf, dass die Flaschen stabil hängen und nicht herunterfallen können. Du kannst die Flaschen entweder einzeln aufhängen oder mehrere Flaschen miteinander verbinden, um eine Art vertikalen Garten zu schaffen.
2. Bewässerung: Salat braucht regelmäßig Wasser, besonders an heißen Tagen. Gieße deine Salatpflanzen am besten morgens oder abends, wenn die Sonne nicht so stark scheint. Achte darauf, dass die Erde immer leicht feucht ist, aber nicht zu nass.
3. Düngung: Um das Wachstum deiner Salatpflanzen zu fördern, kannst du sie regelmäßig düngen. Verwende dafür einen organischen Dünger oder einen speziellen Gemüsedünger.
4. Sonneneinstrahlung: Salat braucht ausreichend Sonnenlicht, um gut zu wachsen. Stelle deinen hängenden Salatgarten an einen sonnigen oder halbschattigen Ort.
5. Schutz vor Schädlingen: Kontrolliere deine Salatpflanzen regelmäßig auf Schädlinge wie Schnecken oder Blattläuse. Bei Bedarf kannst du natürliche Schädlingsbekämpfungsmittel einsetzen.
Zusätzliche Tipps und Tricks
* Sortenwahl: Nicht alle Salatsorten eignen sich gleich gut für den Anbau in Flaschen. Am besten wählst du kleinwüchsige Sorten wie Pflücksalat, Feldsalat oder Rucola.
* Regelmäßiges Ernten: Pflücksalat kannst du nach und nach ernten, indem du immer nur die äußeren Blätter abschneidest. So kannst du über einen längeren Zeitraum frischen Salat genießen.
* Kombination mit anderen Kräutern: Du kannst deinen hängenden Salatgarten auch mit anderen Kräutern wie Petersilie, Schnittlauch oder Basilikum kombinieren. Das sorgt für mehr Vielfalt und Geschmack.
* Winterharte Sorten: Wenn du auch im Winter frischen Salat ernten möchtest, kannst du winterharte Sorten wie Feldsalat oder Winterportulak anbauen.
* Upcycling: Nutze auch andere Plastikbehälter wie Joghurtbecher oder Eisdosen für den Anbau von Salat. So kannst du noch mehr Müll recyceln.
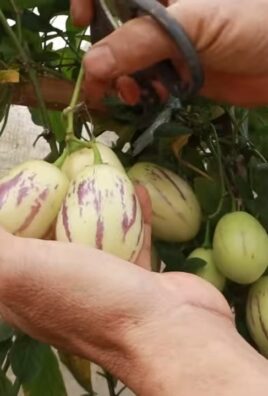
* Vertikale Gärten erweitern: Wenn du den Dreh raus hast, kannst du deinen vertikalen Garten mit anderen Gemüsesorten wie Erdbeeren, Tomaten oder Paprika erweitern.
Ich hoffe, diese Anleitung hat dir geholfen, deinen eigenen hängenden Salatgarten zu gestalten. Viel Spaß beim Gärtnern und guten Appetit!
Conclusion
So, there you have it! Transforming discarded plastic bottles into a thriving vertical lettuce garden is not just a fun project; it’s a sustainable, space-saving, and incredibly rewarding way to enjoy fresh, homegrown greens. This hanging bottle lettuce growing method offers a unique solution for urban gardeners, apartment dwellers, or anyone looking to maximize their yield in a limited space.
Why is this DIY trick a must-try? Because it’s more than just a gardening hack; it’s a statement. It’s a statement about reducing waste, embracing sustainability, and connecting with the food we eat. Imagine stepping outside your door and snipping off a handful of crisp, vibrant lettuce leaves for your salad, knowing you grew them yourself, using recycled materials, and minimizing your environmental impact. That’s the power of this simple yet effective technique.
Beyond the environmental benefits, this method is incredibly practical. It’s easy to set up, requires minimal maintenance, and allows you to grow lettuce virtually anywhere – a balcony, a patio, even a sunny windowsill. Plus, the vertical arrangement maximizes sunlight exposure and improves air circulation, leading to healthier, more productive plants.
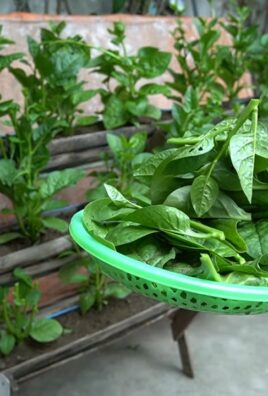
Looking for variations? Absolutely! While lettuce is the star of the show, you can easily adapt this method to grow other leafy greens like spinach, kale, or arugula. Experiment with different bottle sizes and arrangements to create a truly unique and personalized vertical garden. Consider adding herbs like basil, parsley, or mint to your hanging bottles for a fragrant and flavorful addition to your culinary creations. You can also paint the bottles to add a splash of color and personality to your garden. Just be sure to use non-toxic paint that won’t leach harmful chemicals into the soil.
Don’t be afraid to get creative with your setup. Use different types of rope or chain to hang your bottles, or create a tiered system for a more visually appealing display. You can even add a small drip irrigation system to automate watering and ensure your plants stay consistently hydrated.
We wholeheartedly encourage you to try this hanging bottle lettuce growing method. It’s a fantastic way to learn about gardening, connect with nature, and enjoy the satisfaction of growing your own food. It’s a project that’s both educational and delicious!
Once you’ve set up your vertical lettuce garden, we’d love to hear about your experience! Share your photos, tips, and challenges in the comments below. Let’s build a community of sustainable gardeners and inspire others to embrace this eco-friendly approach to growing fresh, healthy food. What are you waiting for? Grab some plastic bottles, some soil, and some lettuce seeds, and get growing!
Frequently Asked Questions (FAQ)
What type of plastic bottles are best for hanging bottle lettuce growing?
Ideally, you should use PET (polyethylene terephthalate) plastic bottles, which are commonly used for water and soda. These bottles are lightweight, durable, and readily available. Avoid using bottles made from PVC (polyvinyl chloride), as they can leach harmful chemicals into the soil. Make sure to thoroughly clean the bottles before using them to remove any residue or contaminants.
What kind of soil should I use for my hanging bottle lettuce garden?
A well-draining potting mix is essential for successful lettuce growth. Avoid using garden soil, as it can be too heavy and compact, hindering root development. A good potting mix should contain a blend of peat moss, perlite, and vermiculite. You can also add compost to enrich the soil and provide essential nutrients. Consider using an organic potting mix to ensure your lettuce is free from harmful chemicals.
How often should I water my hanging bottle lettuce plants?
The watering frequency will depend on the climate, the size of the bottles, and the type of potting mix you’re using. Generally, you should water your lettuce plants when the top inch of soil feels dry to the touch. Avoid overwatering, as this can lead to root rot. Ensure the bottles have drainage holes to allow excess water to escape. During hot weather, you may need to water your plants more frequently.
How much sunlight do hanging bottle lettuce plants need?
Lettuce thrives in full sun to partial shade. Aim for at least 4-6 hours of direct sunlight per day. If you’re growing your lettuce indoors, you may need to supplement with artificial lighting. A grow light can provide the necessary light spectrum for healthy growth. Rotate the bottles regularly to ensure all sides of the plants receive adequate sunlight.
What type of lettuce varieties are best suited for hanging bottle growing?
Loose-leaf lettuce varieties, such as romaine, butterhead, and leaf lettuce, are well-suited for hanging bottle growing. These varieties are relatively compact and easy to harvest. Avoid growing head lettuce varieties, as they require more space and may not thrive in the confined environment of a plastic bottle.
How do I fertilize my hanging bottle lettuce plants?
Lettuce plants benefit from regular fertilization. Use a balanced liquid fertilizer diluted to half strength. Apply the fertilizer every 2-3 weeks during the growing season. You can also add compost tea to the soil to provide essential nutrients. Avoid over-fertilizing, as this can lead to leggy growth and bitter-tasting leaves.
How do I prevent pests and diseases in my hanging bottle lettuce garden?
Regularly inspect your plants for signs of pests and diseases. Common lettuce pests include aphids, slugs, and snails. You can control these pests by handpicking them off the plants or using organic pest control methods, such as insecticidal soap or neem oil. To prevent diseases, ensure good air circulation and avoid overwatering. Remove any diseased leaves promptly to prevent the spread of infection.
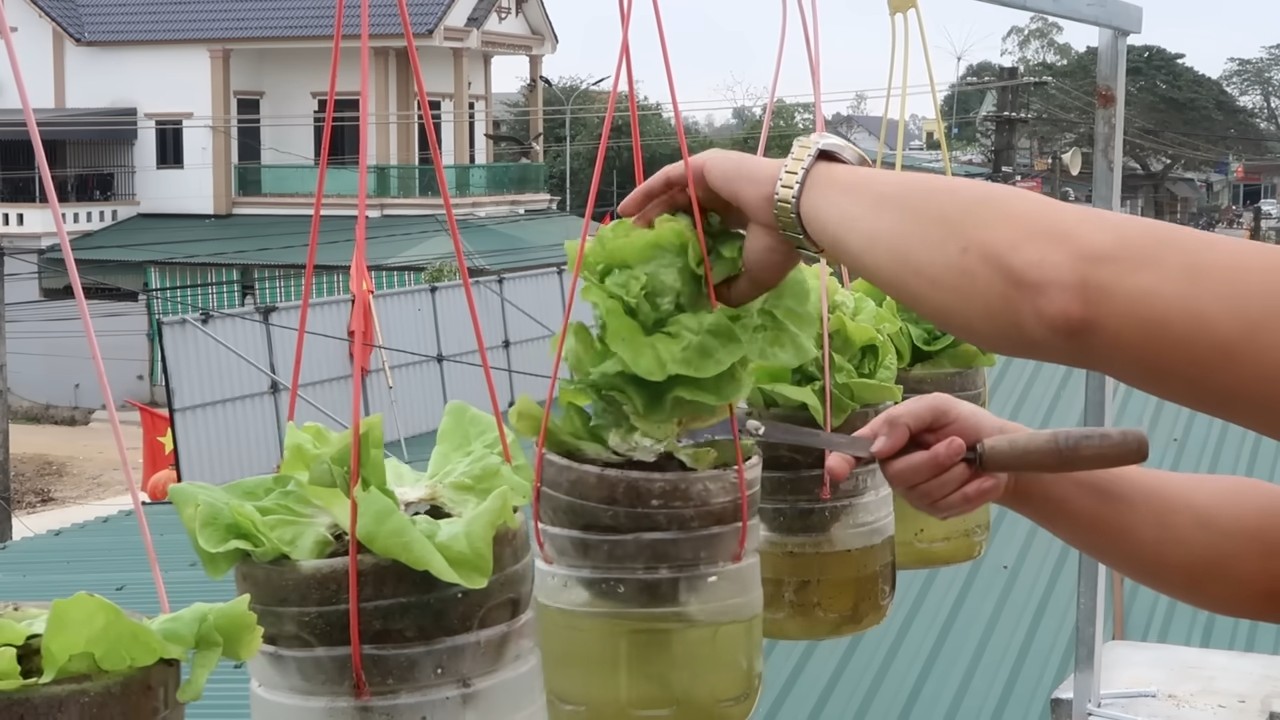
How do I harvest lettuce from my hanging bottle garden?
You can harvest lettuce leaves as needed, starting with the outer leaves. Simply snip off the leaves with scissors or a knife. Avoid harvesting more than one-third of the plant at a time, as this can stress the plant. Regular harvesting will encourage new growth and prolong the harvest season.
Can I grow lettuce in hanging bottles during the winter?
Yes, you can grow lettuce in hanging bottles during the winter, provided you protect the plants from frost and freezing temperatures. Move the bottles indoors or to a sheltered location, such as a greenhouse or cold frame. You may also need to supplement with artificial lighting to compensate for the shorter days.
How long will my hanging bottle lettuce plants last?
With proper care, your hanging bottle lettuce plants can last for several weeks or even months. However, lettuce is a cool-season crop and will eventually bolt (go to seed) in hot weather. Once the plants bolt, the leaves will become bitter and less palatable. To extend the harvest season, succession plant lettuce seeds every few weeks.

Leave a Comment