

Hanging mustard greens gardening: It’s more than just a quirky trend; it’s a revolution in how we think about fresh, homegrown food! Imagine stepping onto your balcony or into your kitchen and snipping off vibrant, peppery mustard greens for your salad or stir-fry, all grown in a beautiful, space-saving hanging garden. Sounds dreamy, right?
For centuries, cultures around the world have utilized vertical gardening techniques, from the Hanging Gardens of Babylon (one of the Seven Wonders of the Ancient World!) to the ingenious rooftop farms of modern cities. This isn’t just about aesthetics; it’s about resourcefulness, sustainability, and connecting with nature, even in the smallest of spaces.
In today’s fast-paced world, access to fresh, healthy produce can be a challenge. Store-bought greens often lack flavor and nutrients, and let’s be honest, they can be expensive! That’s where hanging mustard greens gardening comes in. I’m going to show you some simple, budget-friendly DIY tricks and hacks that will empower you to grow your own delicious mustard greens, no matter how limited your space may be.
This article is your ultimate guide to creating a thriving hanging mustard greens garden. We’ll cover everything from choosing the right containers and soil to providing optimal sunlight and watering techniques. Get ready to unleash your inner gardener and enjoy the satisfaction of harvesting your own fresh, flavorful mustard greens!
DIY Hanging Mustard Greens Garden: A Beginner’s Guide 🌱
Hello garden friends! I’m so excited to show you how to create your very own hanging mustard greens garden. Mustard greens aren’t just delicious and healthy—they’re also incredibly easy to grow, even if you don’t have a yard. With this DIY guide, you can harvest fresh, peppery leaves right outside your door (or on your balcony!). Let’s get started!
What You’ll Need: The Materials List
Before we dive in, here’s everything you’ll need for your hanging mustard greens paradise:
- Hanging baskets or planters: Choose ones with good drainage. Coco fiber or plastic baskets work great—they’re light and durable.
- High-quality potting soil: Use well-draining soil rich in organic matter. Avoid heavy garden soil that holds too much water.
- Mustard green seeds: Easy to find in garden centers or online. Choose a variety you enjoy—there are many flavors!
- Drainage material: Pebbles, clay shards, or expanded clay to prevent waterlogging.
- Hanging chains or ropes: Make sure they’re strong enough to hold the weight of the soil and plants.
- Watering can or hose: For keeping your greens hydrated.
- Garden shears or scissors: For harvesting leaves.
- Optional: Slow-release fertilizer for extra nutrients.
- Optional: Coco fiber liners if your baskets don’t already have them.
Step-by-Step Guide: Building Your Hanging Mustard Greens Garden
Don’t worry—it looks more complicated than it is! Here’s how I set mine up:
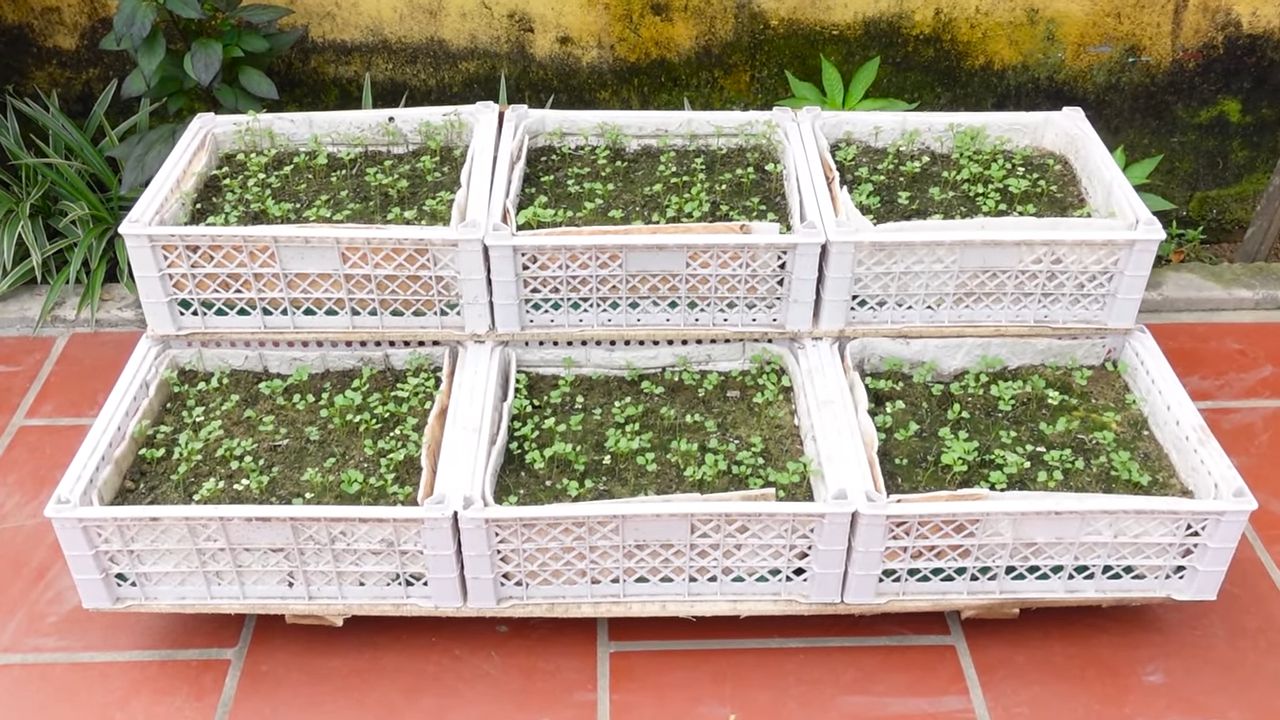
1. Prepare Your Baskets or Containers
- Check that your baskets have drainage holes. If not, drill a few at the bottom. This is crucial to prevent root rot.
- Line with coco fiber inserts if needed. They help hold the soil and improve drainage.
- Add a layer of drainage material (pebbles, clay shards, or expanded clay) at the bottom.
2. Add Soil
- Fill baskets with loose, high-quality potting soil.
- Leave about 2–3 cm (1 inch) of space from the top to prevent overflow when watering.
- Mix in a slow-release fertilizer if desired for steady nutrients.
3. Sow the Seeds
- Scatter mustard green seeds evenly across the soil surface.
- Press them lightly into the soil—they don’t need to be buried deep since they need light to germinate.
- Cover with a thin layer of soil (about 0.5 cm).
4. Water Gently
- Water with a watering can fitted with a fine rose or a spray bottle to avoid washing seeds away.
- Soil should be moist, not soggy.
5. Hang Your Baskets
- Attach the hanging chains or ropes securely.
- Choose a spot that gets 4–6 hours of sunlight daily—a sunny balcony or patio is perfect.
Caring for Your Mustard Greens
Mustard greens in hanging baskets are low-maintenance, but here are a few care tips:
- Watering:
- Check soil regularly; water when the top feels dry.
- Water early in the morning or late evening to reduce evaporation.
- Ensure excess water can drain away.
- Fertilizing:
- Use a liquid fertilizer every 2–3 weeks.
- Compost tea is a great organic option.
- Sunlight:
- At least 4–6 hours daily.
- If it’s too hot, provide shade during peak midday sun.
- Pest Control:
- Watch for aphids, cabbage moths, and snails.
- Use neem oil or insecticidal soap if needed.
- Attract ladybugs—they’re natural aphid hunters.
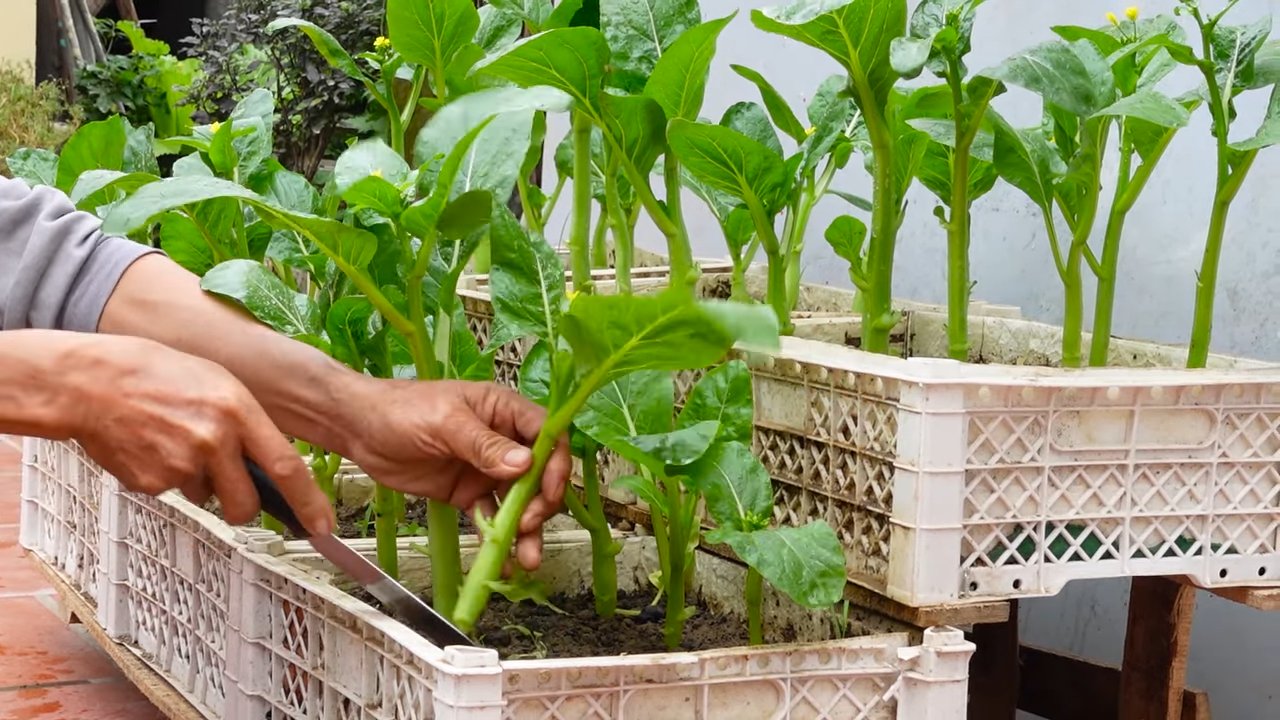
- Harvesting:
- Start harvesting leaves when they’re 10–15 cm long.
- Snip the outer leaves with scissors, leaving inner leaves to keep producing.
- Regular harvesting encourages new growth.
Common Problems & Solutions
- Yellow leaves: Often caused by overwatering, nutrient deficiency, or pests. Check soil moisture and fertilize as needed.
- Pale leaves: Usually due to insufficient sunlight. Move baskets to a sunnier location.
- Wilting: Can be heat stress or underwatering. Water more often and provide shade during very hot periods.
- Pests: Treat quickly with natural sprays or by handpicking.
Mustard Green Varieties to Try
Each variety has its own look and flavor:
- ‘Florida Broadleaf’ – classic, with wide, mild leaves.
- ‘Southern Giant Curled’ – crinkly leaves and a stronger flavor.
- ‘Red Giant’ – striking reddish-purple leaves with spicy kick.
- ‘Green Wave’ – heat- and bolt-resistant, great for longer seasons.
Final Thoughts
A hanging mustard greens garden is a fun, space-saving way to grow fresh, healthy greens—even without a yard. With just a little care, you’ll have a steady supply of zesty leaves to harvest and enjoy. Happy gardening, and may your baskets be overflowing with flavor!
Conclusion
So, there you have it! Transforming ordinary mustard greens into a stunning, space-saving, and incredibly productive vertical garden is not just a gardening trend; it’s a revolution in how we think about growing our own food. This DIY hanging mustard greens gardening project is more than just a way to cultivate fresh, peppery greens; it’s an opportunity to connect with nature, beautify your surroundings, and enjoy the unparalleled satisfaction of harvesting your own homegrown produce.
Why is this a must-try? Because it’s accessible to everyone, regardless of their gardening experience or the size of their living space. Whether you have a sprawling backyard or a tiny balcony, you can create a thriving vertical garden with just a few simple materials and a little bit of effort. Imagine stepping outside your door and snipping fresh mustard greens for your salad, stir-fry, or even a vibrant green smoothie. The taste is simply unmatched by anything you can buy in a store.
But the benefits extend beyond just the flavor. Vertical gardening maximizes space, allowing you to grow more in a smaller area. It also improves air circulation around the plants, reducing the risk of fungal diseases. And let’s not forget the aesthetic appeal! A wall of lush, green mustard greens is a beautiful and eye-catching addition to any home.
Looking for variations? Consider experimenting with different types of containers. You can use repurposed plastic bottles, hanging baskets, or even old burlap sacks. Get creative and find what works best for your space and style. You can also try companion planting. Marigolds, for example, can help deter pests, while basil can improve the flavor of your mustard greens.
Another exciting variation is to incorporate other leafy greens into your hanging garden. Imagine a tapestry of textures and flavors with spinach, kale, and lettuce alongside your mustard greens. The possibilities are endless!
We wholeheartedly encourage you to give this DIY hanging mustard greens gardening project a try. It’s a rewarding and fulfilling experience that will bring you closer to nature and provide you with a constant supply of fresh, healthy greens. Don’t be afraid to experiment, adapt, and make it your own.
And most importantly, we want to hear about your experience! Share your photos, tips, and challenges in the comments below. Let’s create a community of vertical gardeners and inspire each other to grow our own food, one hanging mustard green at a time. We are confident that you will find this method of growing mustard greens to be both efficient and enjoyable.
Frequently Asked Questions (FAQ)
What type of mustard greens are best for hanging gardens?
While most varieties of mustard greens will thrive in a hanging garden, some are better suited than others. Consider varieties that are relatively compact and don’t grow too tall, such as ‘Osaka Purple’ or ‘Florida Broadleaf’. These varieties are less likely to become top-heavy and easier to manage in a hanging container. However, feel free to experiment with other varieties to see what works best for your specific climate and growing conditions. The key is to provide adequate support and ensure the container is large enough to accommodate the plant’s root system.
How often should I water my hanging mustard greens?
Watering frequency depends on several factors, including the weather, the type of container you’re using, and the size of your plants. As a general rule, check the soil moisture daily. If the top inch of soil feels dry to the touch, it’s time to water. Hanging containers tend to dry out more quickly than in-ground gardens, so you may need to water more frequently, especially during hot, sunny weather. When watering, be sure to saturate the soil thoroughly until water drains out of the bottom of the container. Avoid overwatering, as this can lead to root rot.
What kind of soil should I use for my hanging mustard greens?
Use a well-draining potting mix specifically formulated for containers. Avoid using garden soil, as it can become compacted in containers and hinder drainage. A good potting mix will provide adequate aeration and drainage, which are essential for healthy root growth. You can also amend your potting mix with compost or other organic matter to improve its fertility and water-holding capacity.
How much sunlight do mustard greens need?
Mustard greens thrive in full sun, which means they need at least six hours of direct sunlight per day. However, they can also tolerate partial shade, especially in hot climates. If you live in an area with intense summer heat, consider providing some afternoon shade to prevent the leaves from scorching. If you’re growing your mustard greens indoors, you’ll need to supplement with artificial light, such as grow lights.
How do I fertilize my hanging mustard greens?
Mustard greens are heavy feeders, so they need regular fertilization to thrive. Use a balanced, water-soluble fertilizer every two to three weeks. Follow the instructions on the fertilizer package carefully. You can also amend your soil with compost or other organic matter to provide a slow-release source of nutrients. Avoid over-fertilizing, as this can lead to excessive leaf growth and reduced flavor.
How do I protect my mustard greens from pests and diseases?
Regularly inspect your plants for signs of pests or diseases. Common pests that affect mustard greens include aphids, flea beetles, and cabbage worms. You can control these pests with insecticidal soap, neem oil, or by handpicking them off the plants. To prevent diseases, ensure good air circulation around the plants and avoid overwatering. If you notice any signs of disease, such as yellowing leaves or spots, remove the affected leaves immediately.
When is the best time to harvest my mustard greens?
You can start harvesting mustard greens as soon as the leaves are large enough to eat, typically about 4-6 weeks after planting. Harvest the outer leaves first, leaving the inner leaves to continue growing. This will allow you to enjoy a continuous harvest throughout the growing season. Mustard greens are best harvested in the morning, when the leaves are crisp and tender.
Can I grow mustard greens indoors in a hanging garden?
Yes, you can absolutely grow mustard greens indoors in a hanging garden! The key is to provide adequate light, either through a sunny window or with the help of grow lights. Ensure the container has good drainage and use a well-draining potting mix. Monitor the soil moisture regularly and water as needed. With a little care and attention, you can enjoy fresh, homegrown mustard greens year-round, even if you don’t have an outdoor garden.
What are some creative ways to display my hanging mustard greens?
Get creative with your display! Use macrame hangers for a bohemian vibe, or repurpose old wooden crates for a rustic look. You can also create a living wall by attaching multiple hanging containers to a trellis or fence. Consider adding other decorative elements, such as colorful ribbons or wind chimes, to enhance the visual appeal of your hanging garden. The possibilities are endless!
How do I prevent my hanging containers from drying out too quickly?
To help retain moisture in your hanging containers, consider adding a layer of mulch to the top of the soil. You can use organic mulches such as straw, wood chips, or shredded leaves. You can also line the inside of your containers with a moisture-retentive material, such as coconut coir or a plastic liner with drainage holes. Grouping your hanging containers together can also help to create a more humid microclimate, which can reduce water loss.

Leave a Comment