

Harvest Spinach at Home – sounds like a dream, right? Imagine stepping into your backyard, not to mow the lawn, but to gather fresh, vibrant spinach for your salad or smoothie. It’s not just a dream; it’s an achievable reality with a few simple tricks and a little DIY spirit! For centuries, cultivating your own food has been a cornerstone of self-sufficiency and a connection to the earth. From ancient Roman gardens to the victory gardens of World War II, growing your own produce has always been a way to ensure fresh, healthy food is available.
But let’s be honest, not everyone has acres of land or the time to dedicate to intensive gardening. That’s where these DIY hacks come in! I’m going to share some easy-to-follow tips that will help you harvest spinach at home, even if you only have a small balcony or a sunny windowsill. These aren’t just random tips; they’re tried-and-true methods that I’ve personally used to enjoy a continuous supply of fresh spinach.
Why do you need these tricks? Because store-bought spinach can be expensive, and let’s face it, sometimes it’s not as fresh as we’d like. Plus, there’s something incredibly satisfying about nurturing a plant from seed to table. So, get ready to roll up your sleeves and discover the joy of growing and harvesting your own delicious spinach!
Harvesting Spinach Like a Pro: A DIY Guide
Hey there, fellow gardeners! I’m so excited to share my tried-and-true method for harvesting spinach right from your own backyard (or balcony!). Nothing beats the taste of fresh, homegrown spinach, and with this guide, you’ll be enjoying delicious salads and smoothies in no time. Let’s get started!
Understanding Spinach Growth and Harvesting
Before we dive into the nitty-gritty, let’s quickly cover the basics of spinach growth and what to look for when harvesting. Spinach is a cool-season crop, meaning it thrives in cooler temperatures. It’s relatively fast-growing, so you won’t have to wait too long to enjoy your harvest.
* **When to Harvest:** The ideal time to harvest spinach is when the leaves are about 4-6 inches long. You can start harvesting outer leaves as soon as they reach a usable size, allowing the inner leaves to continue growing. Avoid harvesting during the hottest part of the day, as the leaves will be more prone to wilting. Early morning or late evening is best.
* **Harvesting Method:** There are two main ways to harvest spinach: cut-and-come-again and whole plant harvest. Cut-and-come-again involves harvesting only the outer leaves, allowing the plant to continue producing. Whole plant harvest involves cutting the entire plant at the base. I prefer cut-and-come-again because it extends the harvest period.
* **Signs of Bolting:** Keep an eye out for signs of bolting, which is when the plant starts to produce a flower stalk. Bolting is triggered by hot weather and long days. Once spinach bolts, the leaves become bitter. If you see a flower stalk forming, harvest the entire plant immediately.
* **Tools You’ll Need:** You’ll need a sharp knife or scissors, a basket or container to collect your harvest, and optionally, gloves to keep your hands clean.
Step-by-Step Guide to Harvesting Spinach
Alright, let’s get our hands dirty! Here’s my step-by-step guide to harvesting spinach using the cut-and-come-again method:
1. **Prepare Your Tools:** Gather your sharp knife or scissors and your harvesting basket or container. I like to use a clean plastic container. Make sure your tools are clean to prevent the spread of disease.
2. **Identify Mature Leaves:** Look for the outer leaves of the spinach plant that are 4-6 inches long and appear healthy and vibrant. Avoid harvesting any leaves that are yellowed, damaged, or show signs of disease.
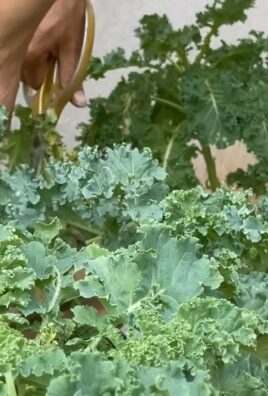
3. **Cut the Leaves:** Using your sharp knife or scissors, carefully cut the leaves about an inch above the soil line. Be sure to cut cleanly to avoid damaging the plant. I usually hold the leaf stem with one hand and cut with the other.
4. **Leave the Center Leaves:** It’s crucial to leave the center leaves intact. These are the new leaves that will continue to grow and provide you with future harvests. Think of it like giving your spinach plant a haircut – you’re just trimming the outer edges!
5. **Repeat the Process:** Continue harvesting the mature outer leaves from each of your spinach plants. Be sure to check each plant thoroughly and harvest all the ready-to-pick leaves.
6. **Handle with Care:** Gently place the harvested spinach leaves into your basket or container. Avoid packing them too tightly, as this can bruise the leaves.
7. **Wash and Store (or Use Immediately!):** Once you’ve finished harvesting, wash the spinach leaves thoroughly under cold running water to remove any dirt or debris. You can use a salad spinner to dry the leaves. If you’re not using the spinach immediately, store it in a plastic bag in the refrigerator. It should stay fresh for about a week.
Troubleshooting and Tips for a Bountiful Harvest
Even with the best intentions, things don’t always go as planned. Here are some common issues you might encounter and my tips for overcoming them:
* **Pest Problems:** Aphids, slugs, and snails are common spinach pests. Regularly inspect your plants for signs of infestation. You can handpick pests, use insecticidal soap, or try organic pest control methods like diatomaceous earth. I’ve had good luck with attracting ladybugs to my garden, as they are natural predators of aphids.
* **Disease Issues:** Spinach can be susceptible to fungal diseases like downy mildew. Ensure good air circulation around your plants by spacing them properly. Avoid overhead watering, as this can create a humid environment that promotes fungal growth. If you notice signs of disease, remove the affected leaves immediately.
* **Bolting:** As mentioned earlier, bolting is a common problem in hot weather. To prevent bolting, plant spinach in a shady location or provide shade during the hottest part of the day. Choose bolt-resistant varieties of spinach. If your spinach does bolt, harvest the entire plant immediately to salvage as much as possible.
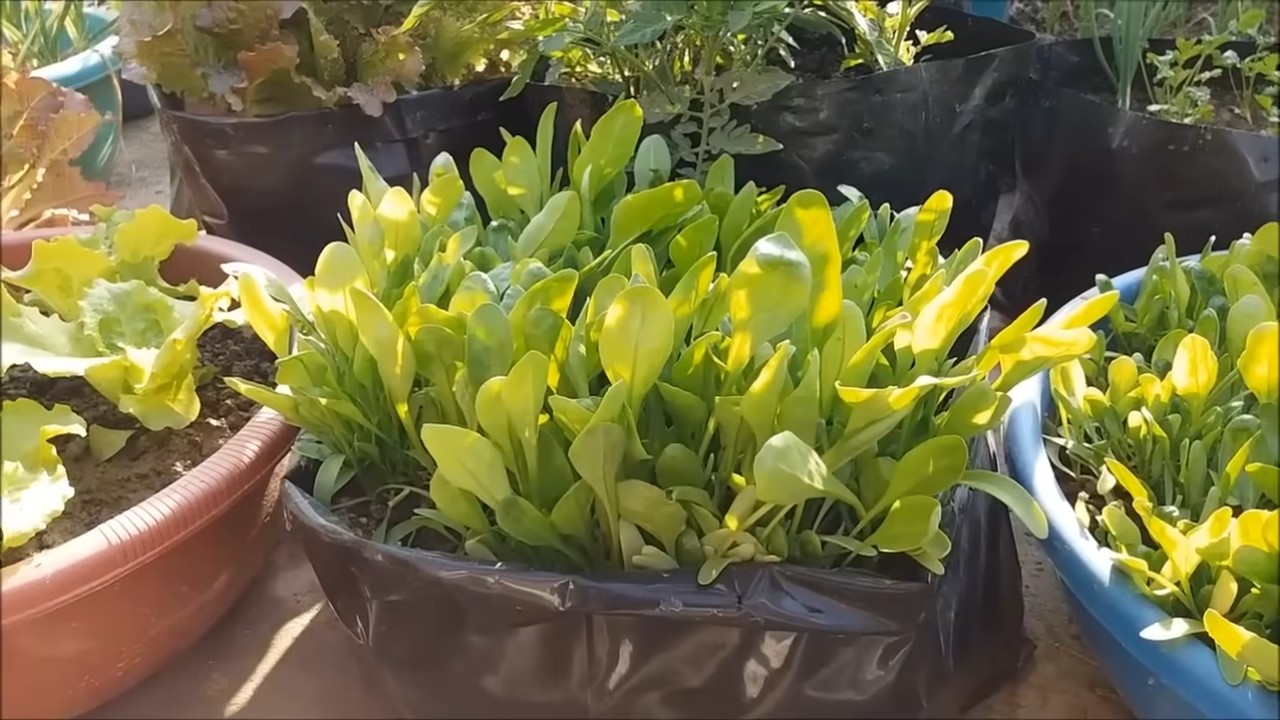
* **Leaf Yellowing:** Yellowing leaves can be a sign of nutrient deficiency. Spinach needs nitrogen, phosphorus, and potassium to thrive. Amend your soil with compost or use a balanced fertilizer to provide the necessary nutrients. Overwatering can also cause yellowing leaves, so make sure your soil is well-draining.
* **Extending Your Harvest:** To extend your spinach harvest, plant successive crops every few weeks. This will ensure a continuous supply of fresh spinach throughout the growing season. You can also try growing spinach in a cold frame or greenhouse to protect it from frost and extend the harvest into the winter months.
Creative Ways to Use Your Homegrown Spinach
Now that you’ve got a basket full of fresh spinach, what are you going to do with it? Here are some of my favorite ways to use homegrown spinach:
* **Salads:** Spinach is a classic salad ingredient. Toss it with your favorite vegetables, fruits, nuts, and dressings. I love a spinach salad with strawberries, goat cheese, and balsamic vinaigrette.
* **Smoothies:** Spinach is a great way to add nutrients to your smoothies without adding a lot of flavor. It blends well with fruits like bananas, berries, and mangoes.
* **Sautéed Spinach:** Sautéed spinach is a quick and easy side dish. Simply sauté the spinach with garlic and olive oil until wilted. You can also add other vegetables like mushrooms or onions.
* **Spinach Dip:** Spinach dip is a crowd-pleasing appetizer. Mix cooked spinach with cream cheese, sour cream, mayonnaise, and seasonings. Serve with crackers, vegetables, or bread.
* **Spinach and Ricotta Stuffed Shells:** This is a hearty and delicious pasta dish. Stuff jumbo pasta shells with a mixture of spinach, ricotta cheese, and seasonings. Bake in a tomato sauce until bubbly.
* **Spinach Quiche:** Spinach quiche is a great way to use up a lot of spinach. Mix cooked spinach with eggs, cheese, and cream. Pour into a pie crust and bake until set.
* **Spinach Pesto:** Use spinach instead of basil to make a unique and flavorful pesto. Blend spinach with garlic, pine nuts, Parmesan cheese, and olive oil. Serve with pasta, sandwiches, or as a dip.
Enjoying the Fruits (or Vegetables!) of Your Labor
Harvesting your own spinach is a rewarding experience. Not only do you get to enjoy fresh, delicious produce, but you also get the satisfaction of knowing that you grew it yourself. I hope this guide has been helpful and inspires you to start growing your own spinach. Happy gardening!
Conclusion
So, there you have it! Harvesting spinach at home isn’t just a way to save money; it’s a gateway to fresher, more flavorful meals and a deeper connection with the food you eat. Imagine the satisfaction of snipping vibrant green leaves just moments before adding them to your salad, smoothie, or favorite cooked dish. The difference in taste and texture compared to store-bought spinach is truly remarkable.
This DIY trick is a must-try for anyone who appreciates fresh produce and enjoys a touch of gardening, no matter how small your space. Even a simple container garden on a balcony or windowsill can yield a surprising amount of spinach. Plus, by harvesting only what you need, you minimize waste and ensure that your spinach plant continues to produce throughout the growing season.
Beyond the basic method outlined, there are plenty of ways to customize your spinach harvesting experience. For instance, if you prefer baby spinach, harvest the leaves when they are smaller and more tender. If you want larger, more mature leaves for cooking, allow them to grow a bit longer. You can also experiment with different varieties of spinach to find your favorite flavor profile. Some varieties are sweeter, while others have a slightly more earthy taste. Consider trying ‘Bloomsdale Long Standing’ for its heat tolerance or ‘Winter Bloomsdale’ for its cold hardiness.
Don’t be afraid to get creative with your spinach harvest! Add it to omelets, soups, pasta dishes, or even use it as a pizza topping. The possibilities are endless. And remember, freshly harvested spinach wilts quickly, so it’s best to use it as soon as possible after picking. If you need to store it, wrap it loosely in a damp paper towel and place it in a plastic bag in the refrigerator.
We wholeheartedly encourage you to give this DIY trick a try. It’s simple, rewarding, and a fantastic way to enjoy the benefits of fresh, homegrown produce. We are confident that you will find that learning how to harvest spinach at home is a game-changer for your culinary adventures.
But don’t just take our word for it! We want to hear about your experiences. Share your tips, tricks, and favorite spinach recipes in the comments below. Let us know what varieties you’ve tried, what challenges you’ve faced, and what successes you’ve celebrated. Your feedback will not only help other readers but also inspire us to continue sharing valuable gardening and cooking tips. Happy harvesting!
Frequently Asked Questions (FAQ)
What is the best time of day to harvest spinach?
The best time to harvest spinach is in the morning, after the dew has dried but before the sun gets too hot. This is when the leaves are at their most crisp and hydrated. Harvesting in the heat of the day can cause the leaves to wilt more quickly.
How often can I harvest spinach from the same plant?
You can harvest spinach multiple times from the same plant, typically every 1-2 weeks, depending on the growing conditions and the variety of spinach. The key is to only harvest the outer leaves, leaving the inner leaves to continue growing. This allows the plant to regenerate and produce more leaves over time. With proper care, you can enjoy a continuous harvest of spinach for several weeks or even months.
What if my spinach plant starts to bolt (flower)?
Bolting, or flowering, is a natural process that occurs when spinach plants are exposed to high temperatures or long days. Once a spinach plant bolts, the leaves tend to become bitter and less palatable. To prevent bolting, try to plant spinach in a location that receives partial shade, especially during the hottest part of the day. You can also choose bolt-resistant varieties of spinach. If your spinach plant does start to bolt, you can still harvest the remaining leaves, but be aware that they may have a slightly bitter taste. You can also try cutting off the flower stalks to encourage the plant to produce more leaves, but this is not always effective.
How do I store harvested spinach to keep it fresh?
To store harvested spinach and keep it fresh for as long as possible, follow these steps:
1. Gently rinse the spinach leaves under cool water to remove any dirt or debris.
2. Pat the leaves dry with a clean paper towel or use a salad spinner to remove excess water.
3. Wrap the spinach leaves loosely in a clean, dry paper towel.
4. Place the wrapped spinach in a plastic bag or container.
5. Store the spinach in the refrigerator crisper drawer.
This method will help to keep the spinach leaves hydrated and prevent them from wilting. Properly stored spinach can last for up to a week in the refrigerator.
Can I freeze spinach that I have harvested?
Yes, you can freeze spinach that you have harvested. Freezing is a great way to preserve spinach for longer periods. Here’s how to do it:
1. Wash the spinach thoroughly to remove any dirt or debris.
2. Blanch the spinach by placing it in boiling water for 1-2 minutes. This helps to preserve the color and flavor of the spinach.
3. Immediately transfer the blanched spinach to a bowl of ice water to stop the cooking process.
4. Drain the spinach and squeeze out any excess water.
5. Place the spinach in freezer bags or containers, removing as much air as possible.
6. Label the bags or containers with the date and freeze.
Frozen spinach can last for up to 8-12 months in the freezer.
What are some common pests or diseases that affect spinach plants?
Some common pests that affect spinach plants include aphids, leaf miners, and spider mites. Diseases that can affect spinach include downy mildew, white rust, and fusarium wilt. To prevent pest and disease problems, choose disease-resistant varieties of spinach, practice good garden hygiene, and monitor your plants regularly for any signs of infestation or disease. If you do notice any problems, take action promptly to control the pests or diseases before they spread. Organic pest control methods, such as insecticidal soap or neem oil, can be effective for controlling many common spinach pests.
Is it better to cut or pull spinach leaves when harvesting?
It is generally better to cut spinach leaves when harvesting, rather than pulling them. Cutting the leaves with scissors or a sharp knife allows the plant to regenerate and produce more leaves. Pulling the leaves can damage the plant’s roots and slow down its growth. When cutting the leaves, make sure to leave about an inch of stem attached to the plant.
Can I grow spinach indoors?
Yes, you can grow spinach indoors, especially during the colder months. To grow spinach indoors, you will need a sunny location or grow lights, well-draining soil, and a container that is at least 6 inches deep. Keep the soil moist but not waterlogged, and fertilize the plants regularly with a balanced fertilizer. Indoor spinach plants may not grow as large as outdoor plants, but you can still enjoy a continuous harvest of fresh spinach leaves.
What kind of fertilizer is best for spinach?
Spinach benefits from a fertilizer that is high in nitrogen, which promotes leafy growth. A balanced fertilizer with a ratio of 10-5-5 (Nitrogen-Phosphorus-Potassium) is a good choice. You can also use organic fertilizers such as compost, aged manure, or fish emulsion. Apply the fertilizer according to the package directions, and avoid over-fertilizing, which can burn the plants.
How do I know when spinach is ready to harvest?
Spinach is ready to harvest when the leaves are large enough to eat, typically about 4-6 inches long. The exact size will depend on your preference and the variety of spinach. The leaves should be a deep green color and free from any signs of damage or disease. You can harvest the outer leaves as needed, leaving the inner leaves to continue growing.

Leave a Comment