

Harvesting Ginger at Home can feel like uncovering buried treasure! Imagine the satisfaction of digging into your own garden and pulling out fresh, fragrant ginger root, ready to spice up your favorite dishes. For centuries, ginger has been prized not only for its culinary uses but also for its medicinal properties, playing a significant role in traditional medicine across Asia and beyond. From soothing upset stomachs to adding a zing to stir-fries, ginger is a versatile ingredient that deserves a spot in every kitchen.
But why rely on store-bought ginger when you can easily grow your own? Many people are intimidated by the thought of growing ginger, believing it requires a tropical climate or expert gardening skills. That’s where this DIY guide comes in! I’m here to show you that harvesting ginger at home is not only possible but also surprisingly simple, even if you’re a beginner gardener.
This article will provide you with easy-to-follow steps and practical tips to successfully grow and harvest your own ginger. Say goodbye to bland meals and hello to the vibrant flavor of homegrown ginger. Let’s get started!
Harvesting Ginger in Your Own Garden: A Step-by-Step Guide
Hello dear gardening friends! Are you tired of expensive ginger from the supermarket? Today, I’ll show you how to grow and harvest your own ginger at home. It’s easier than you think, and the fresh flavor is unbeatable!
What You Need for the Ginger Harvest:
Before we get started, here’s a small list of the things you’ll need for the ginger harvest:
- A digging fork or spade
- Gardening gloves (optional, but recommended)
- Scissors or a sharp knife
- A bucket or basin for the harvested ginger
- A garden hose or watering can (to clean the ginger)
- A sunny day (or at least a day without heavy rain)
When is the Right Time to Harvest Ginger?
The best time to harvest ginger depends on various factors, but generally:
- Ripening Time: Ginger needs about 8-10 months to fully ripen. So, if you planted it in the spring (March/April), you can harvest it in late autumn (November/December).
- Leaves: A good sign of ripeness is when the leaves turn yellow and die. This means the plant is directing its energy into the rhizomes (the ginger roots).
- Frost: You should harvest the ginger before the first frost arrives, as frost can damage the rhizomes.
- Partial Harvest: You can also harvest ginger earlier if you only need a small amount. Simply dig out part of the rhizome and leave the rest to keep growing.
Step-by-Step Guide to Harvesting Ginger:
Now, let’s get into it! Here’s a detailed guide on how to successfully harvest your ginger:
- Preparation: Choose a day when the soil is not too wet. Slightly moist soil is ideal because it’s easier to work with. Put on your gardening gloves (if you have them) and prepare your tools.
- Uncover the Plant: Using the digging fork or spade, gently dig around the ginger plant. Be careful not to damage the rhizomes. Start about 20-30 cm from the plant and slowly work your way in.
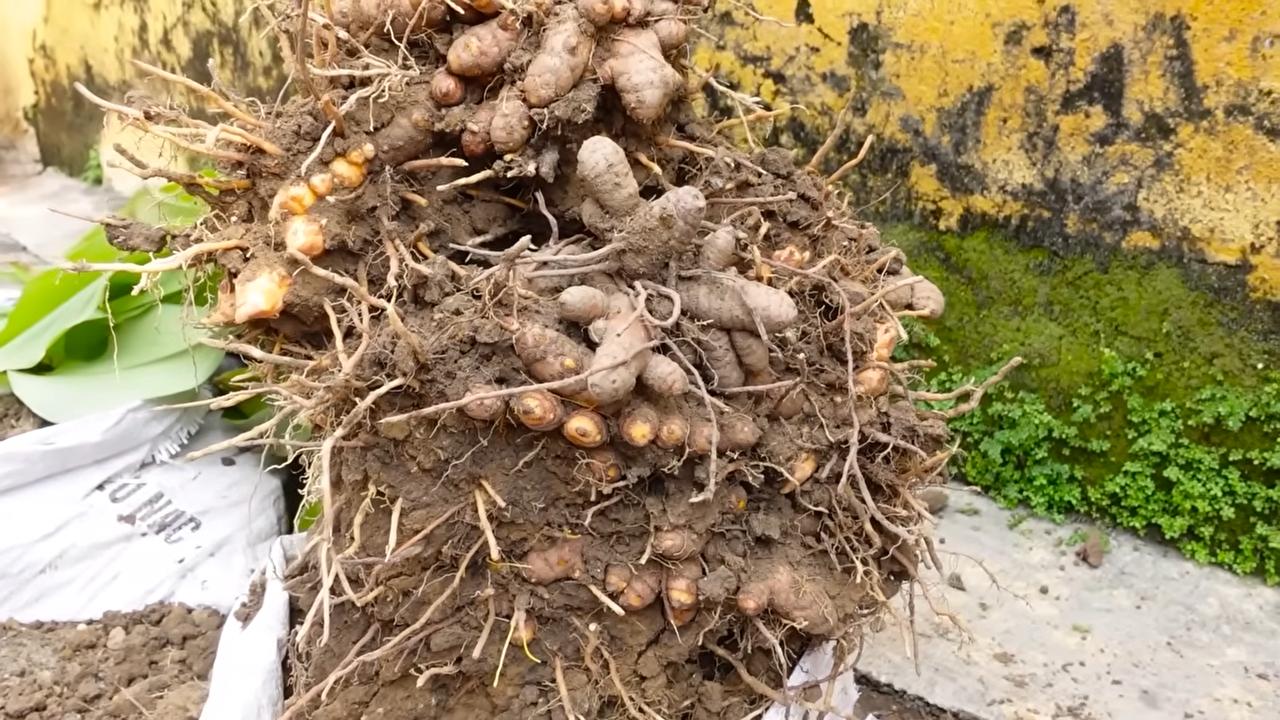
- Lift the Rhizomes: Once you’ve uncovered the plant, gently lift it with the digging fork or spade. Try to take as many rhizomes as possible. Sometimes the rhizomes can break off easily, so be patient and careful.
- Shake Off the Soil: Gently shake the soil off the rhizomes. You can also use your hands to remove the soil. Avoid rubbing the rhizomes too harshly, as this can damage the skin.
- Cleaning: Rinse the rhizomes with a garden hose or watering can to remove any remaining soil. You can also use a soft brush to remove stubborn dirt.
- Drying: Place the cleaned rhizomes in a warm, dry, and well-ventilated area to dry. Avoid direct sunlight, as this can dry them out. Let them dry for a few hours or overnight.
- Cutting and Storing:
- For Immediate Use: You can use the rhizomes immediately. Simply cut off the required amount and use it in your dishes, teas, or smoothies.
- For Storage: If you want to store the ginger, cut off the leaves and roots. Leave about 2-3 cm of the roots attached to the rhizomes.
- Storage Methods:
- Refrigerator: Wrap the rhizomes in paper towels and place them in a plastic bag or airtight container. Store them in the refrigerator. They will last for about 2-3 weeks this way.
- Freezer: You can also freeze the ginger. Peel it and cut it into slices or grate it. Place it in a freezer bag and freeze. It will last for several months.
- Pickling: You can also pickle the ginger in vinegar or alcohol. This extends its shelf life and gives it a unique flavor.
- Drying: You can dry the ginger as well. Cut it into thin slices and place it in a dehydrator or oven at low temperature. Dried ginger lasts a very long time.
Storing Ginger for the Next Season:
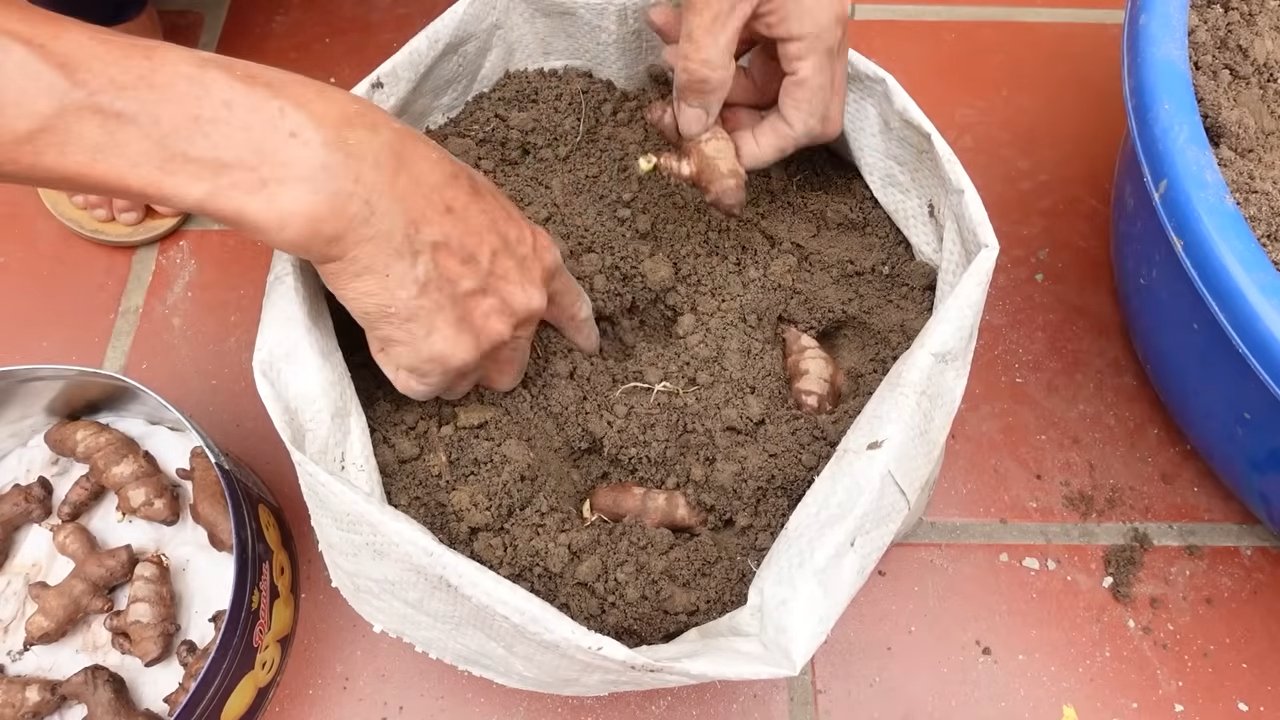
If you want to grow ginger again next year, you should save some rhizomes. Select healthy, strong rhizomes and store them in the refrigerator as described above. In the spring, you can plant them again in pots and start the process over.
Common Mistakes to Avoid:
Here are some common mistakes to avoid when harvesting ginger:
- Harvesting Too Early: Wait until the leaves turn yellow and die before harvesting.
- Damaging the Rhizomes: Be careful when digging to avoid damaging the rhizomes.
- Improper Storage: Store the ginger correctly to avoid rotting.
- Neglecting Preparation: Prepare your tools and work area before you begin.
Additional Tips and Tricks:
- Soil Improvement: Improve the soil before planting by adding compost or organic fertilizer.
- Watering: Water the ginger regularly, especially during the growing season.
- Pest Protection: Keep an eye out for pests and treat them with natural methods if needed.
- Mulching: Mulch the soil around the ginger plants to retain moisture and suppress weeds.
Conclusion:
I hope this guide has helped you successfully harvest your own ginger. With a little patience and care, you can enjoy fresh, aromatic ginger from your own garden. Have fun gardening!
Conclusion
So, there you have it! Harvesting ginger at home is not only surprisingly simple but also incredibly rewarding. Imagine the satisfaction of using freshly dug, vibrant ginger in your cooking, knowing exactly where it came from and how it was grown. Forget the bland, often fibrous ginger you find at the supermarket; homegrown ginger bursts with an unparalleled intensity of flavor and aroma.
This DIY trick is a must-try for several compelling reasons. First, it’s economical. Over time, growing your own ginger can significantly reduce your grocery bills, especially if you’re a frequent user of this versatile spice. Second, it’s sustainable. By growing your own, you’re reducing your reliance on commercially grown ginger, which often involves long-distance transportation and potentially harmful agricultural practices. Third, and perhaps most importantly, it’s about the quality. Freshly harvested ginger is simply superior in taste and texture.
But the benefits don’t stop there. Harvesting ginger at home allows you to experiment with different varieties. While common ginger is readily available, you can explore growing other types like galangal or turmeric, expanding your culinary horizons and adding unique flavors to your dishes. Consider planting your ginger in containers of varying sizes to control the size of your harvest. Smaller containers will yield smaller rhizomes, perfect for single-use recipes, while larger containers will allow for a more substantial harvest.
Another variation to consider is the timing of your harvest. For young, tender ginger with a milder flavor, harvest earlier in the season. For a more mature, pungent ginger with a thicker skin, wait until later in the season, closer to the plant’s dormancy period. Experimenting with these different harvest times will allow you to tailor the flavor profile of your ginger to your specific needs and preferences.
Don’t be intimidated by the prospect of growing your own ginger. It’s a relatively low-maintenance plant that thrives in warm, humid conditions. With a little bit of care and attention, you’ll be rewarded with a bountiful harvest of fresh, flavorful ginger that will elevate your cooking to new heights.
We wholeheartedly encourage you to give this DIY trick a try. It’s a fun, educational, and ultimately delicious experience. Once you’ve harvested your first batch of homegrown ginger, we’d love to hear about your experience. Share your tips, tricks, and favorite recipes in the comments below. Let’s build a community of home gardeners and ginger enthusiasts! We are confident that once you experience the difference of fresh, homegrown ginger, you’ll never go back to store-bought again. So, grab a rhizome, get your hands dirty, and embark on your own ginger-growing adventure today!
Frequently Asked Questions (FAQ)
1. What is the best time of year to plant ginger?
The ideal time to plant ginger is in early spring, after the last frost. Ginger thrives in warm, humid conditions, so planting it when the weather is consistently warm will give it the best start. If you live in a colder climate, you can start your ginger indoors in a pot a few weeks before the last frost and then transplant it outdoors once the weather warms up.
2. What kind of soil is best for growing ginger?
Ginger prefers well-draining soil that is rich in organic matter. A slightly acidic soil pH of around 6.0 to 6.5 is ideal. You can amend your soil with compost, aged manure, or other organic materials to improve its drainage and fertility. Avoid heavy clay soils, as they can retain too much moisture and lead to root rot.
3. How much sunlight does ginger need?
Ginger needs partial shade to thrive. Direct sunlight can scorch the leaves, so it’s best to plant it in a location that receives morning sun and afternoon shade. If you’re growing ginger indoors, place it near a window that receives bright, indirect light.
4. How often should I water my ginger plant?
Ginger needs consistent moisture, but it’s important not to overwater it. Water deeply when the top inch of soil feels dry to the touch. Avoid letting the soil dry out completely, but also avoid letting it become waterlogged. During the warmer months, you may need to water more frequently.
5. How long does it take for ginger to mature and be ready for harvest?
Ginger typically takes about 8-10 months to mature and be ready for harvest. You can start harvesting small pieces of ginger after about 4 months, but the flavor will be milder. For a more mature, pungent ginger, wait until the plant is about 8-10 months old. The leaves will start to turn yellow and die back when the ginger is ready to harvest.
6. How do I harvest ginger?
To harvest ginger, gently dig around the plant with a garden fork or shovel. Be careful not to damage the rhizomes. Once you’ve loosened the soil, carefully lift the plant out of the ground. Brush off any excess soil and then separate the rhizomes from the plant. You can use a sharp knife to cut the rhizomes into smaller pieces.
7. How do I store harvested ginger?
Freshly harvested ginger can be stored in the refrigerator for several weeks. Wrap it in a paper towel and place it in a plastic bag or container. You can also freeze ginger for longer storage. To freeze ginger, peel it and then grate or slice it. Place the grated or sliced ginger in a freezer bag or container and freeze.
8. Can I grow ginger in a container?
Yes, ginger can be grown successfully in containers. Choose a pot that is at least 12 inches deep and wide to allow the rhizomes to spread. Use a well-draining potting mix and follow the same watering and fertilizing guidelines as you would for ginger grown in the ground. Container-grown ginger may need to be watered more frequently than ginger grown in the ground.
9. What are some common problems that affect ginger plants?
Some common problems that affect ginger plants include root rot, fungal diseases, and pests such as aphids and spider mites. Root rot can be prevented by planting ginger in well-draining soil and avoiding overwatering. Fungal diseases can be treated with a fungicide. Pests can be controlled with insecticidal soap or neem oil.
10. Can I regrow ginger from store-bought ginger?
Yes, you can often regrow ginger from store-bought ginger, but it’s not always successful. Look for ginger rhizomes that are plump and have visible “eyes” or buds. Soak the rhizome in water overnight before planting it in a pot of well-draining soil. Keep the soil moist and warm, and be patient. It may take several weeks for the ginger to sprout. Note that some commercially sold ginger may be treated to prevent sprouting, so success is not guaranteed.

Leave a Comment