

Home cleaning tips and tricks 鈥?who doesn’t need a few more of those up their sleeve? Let’s be honest, keeping a house sparkling can feel like a never-ending battle, especially with busy lives and, let’s face it, a general aversion to scrubbing! But what if I told you that conquering the chaos and achieving a clean, fresh home doesn’t have to involve hours of back-breaking labor or a cabinet full of harsh chemicals?
For centuries, cultures around the globe have developed ingenious methods for maintaining their homes, often relying on natural ingredients and clever techniques passed down through generations. Think of your grandmother’s secret weapon for removing stains or that old wives’ tale about using vinegar for everything 鈥?these aren’t just quaint anecdotes; they’re testaments to the power of simple, effective solutions.
That’s why I’m so excited to share these home cleaning tips and tricks with you. This isn’t about achieving some unattainable level of perfection; it’s about finding practical, DIY hacks that fit into your lifestyle, save you time and money, and maybe even make the process a little more enjoyable. We’ll explore everything from tackling stubborn grime with everyday items to creating your own eco-friendly cleaning solutions. Get ready to transform your cleaning routine and reclaim your weekends!
DIY Home Cleaning Hacks: Sparkling Clean on a Budget!
Hey there, fellow cleaning enthusiasts! I’m always on the lookout for ways to keep my home sparkling without breaking the bank. Store-bought cleaners can be expensive and often contain harsh chemicals. So, I’ve compiled some of my favorite DIY home cleaning hacks that are effective, eco-friendly, and easy on the wallet. Let’s get started!
Cleaning Solutions You Can Make Yourself
Before we dive into specific areas, let’s whip up some all-purpose cleaning solutions that you’ll use throughout these hacks.
* All-Purpose Cleaner: This is my go-to for most surfaces.
* Glass Cleaner: Say goodbye to streaks!
* Oven Cleaner: A natural alternative to harsh chemicals.
* Drain Cleaner: Unclog those drains without calling a plumber.
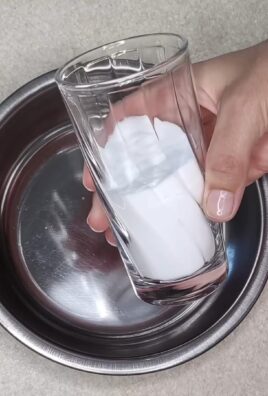
All-Purpose Cleaner Recipe
This cleaner is fantastic for countertops, sinks, and even floors.
1. Gather your supplies: You’ll need an empty spray bottle, 1 cup of white vinegar, 2 cups of water, and about 10-20 drops of your favorite essential oil (lemon, lavender, and tea tree are great choices).
2. Combine ingredients: Pour the vinegar and water into the spray bottle.
3. Add essential oils: Add your chosen essential oils. The essential oils not only provide a pleasant scent but also have antibacterial properties.
4. Shake well: Secure the spray nozzle and shake the bottle thoroughly to combine all the ingredients.
5. Label your bottle: Don’t forget to label your bottle so you know what’s inside!
Streak-Free Glass Cleaner Recipe
This cleaner will leave your windows and mirrors sparkling.
1. Gather your supplies: You’ll need an empty spray bottle, 1/4 cup of white vinegar, 2 cups of water, and 1/2 teaspoon of liquid dish soap (optional).
2. Combine ingredients: Pour the vinegar, water, and dish soap (if using) into the spray bottle.
3. Shake gently: Secure the spray nozzle and gently shake the bottle to combine the ingredients. Avoid creating too many bubbles if you’re using dish soap.
4. Label your bottle: Label the bottle clearly.
DIY Oven Cleaner
This is a powerful, non-toxic way to clean your oven.
1. Gather your supplies: You’ll need baking soda, water, and an empty spray bottle filled with white vinegar.
2. Make a paste: In a bowl, mix 1/2 cup of baking soda with enough water to form a spreadable paste.
3. Apply the paste: Spread the baking soda paste all over the inside of your oven, avoiding the heating elements.
4. Let it sit: Let the paste sit for at least 12 hours, or even overnight.
5. Spray with vinegar: The next day, spray the baking soda paste with vinegar. It will fizz!
6. Wipe clean: Use a damp cloth or sponge to wipe away the baking soda and vinegar. You may need to scrub a bit for stubborn spots.
7. Rinse: Rinse the oven with clean water to remove any remaining residue.
Natural Drain Cleaner
This is a great alternative to harsh chemical drain cleaners.
1. Gather your supplies: You’ll need 1/2 cup of baking soda, 1 cup of white vinegar, and boiling water.
2. Pour in baking soda: Pour the baking soda down the drain.
3. Add vinegar: Follow with the vinegar. It will fizz!
4. Let it sit: Let the mixture sit for 30 minutes.
5. Flush with boiling water: Pour a pot of boiling water down the drain to flush away the clog.
6. Repeat if necessary: If the drain is still clogged, repeat the process.
Cleaning Specific Areas of Your Home
Now that we have our cleaning solutions, let’s tackle some specific areas of your home.
* Kitchen Cleaning Hacks
* Bathroom Cleaning Hacks
* Living Room Cleaning Hacks
Kitchen Cleaning Hacks
The kitchen is often the heart of the home, but it can also be a breeding ground for messes. Here are some tips to keep it clean.
1. Clean your microwave with vinegar:
* Combine vinegar and water: Mix 1 cup of water and 1/4 cup of vinegar in a microwave-safe bowl.
* Microwave: Microwave the mixture for 5 minutes, allowing the steam to loosen any stuck-on food.
* Wipe clean: Carefully remove the bowl (it will be hot!) and wipe down the inside of the microwave with a clean cloth.
2. De-gunk your stovetop:
* Sprinkle with baking soda: Sprinkle baking soda over the stovetop.
* Spray with vinegar: Spray the baking soda with vinegar.
* Let it sit: Let the mixture sit for 15-20 minutes.
* Scrub and wipe: Scrub the stovetop with a sponge or cloth, then wipe clean.
3. Freshen your dishwasher:
* Vinegar rinse: Place a dishwasher-safe cup filled with white vinegar on the top rack of your dishwasher.
* Run a cycle: Run the dishwasher on a hot cycle. This will help remove grease and odors.
* Baking soda freshener: Sprinkle a cup of baking soda on the bottom of the dishwasher and let it sit overnight. Run a short cycle in the morning to freshen it up.
4. Clean your cutting boards:
* Lemon and salt: Sprinkle coarse salt on your cutting board. Cut a lemon in half and use it to scrub the salt into the board.
* Rinse: Rinse the cutting board with warm water.
5. Clean your sink:
* Baking soda scrub: Sprinkle baking soda in your sink and scrub with a damp sponge.
* Vinegar rinse: Rinse with vinegar for extra shine.
Bathroom Cleaning Hacks
Bathrooms can be tricky to clean, but these hacks will make it easier.
1. Clean your showerhead:
* Vinegar soak: Fill a plastic bag with white vinegar and secure it around your showerhead with a rubber band, ensuring the showerhead is submerged in the vinegar.
* Soak overnight: Let it soak overnight.
* Remove and rinse: Remove the bag and run the shower to flush out any remaining vinegar and mineral deposits.
2. Remove soap scum from shower doors:
* Vinegar spray: Spray your shower doors with white vinegar.
* Let it sit: Let it sit for 15-20 minutes.
* Wipe clean: Wipe clean with a sponge or cloth.
3. Clean your toilet bowl:
* Baking soda and vinegar: Pour 1 cup of baking soda into the toilet bowl, followed by 2 cups of white vinegar.
* Let it fizz: Let the mixture fizz for 30 minutes.
* Scrub and flush: Scrub the bowl with a toilet brush and flush.
4. Clean your bathroom mirror:
* Use your homemade glass cleaner: Spray your homemade glass cleaner onto the mirror and wipe clean with a microfiber cloth.
5. Clean grout:
* Baking soda paste: Mix baking soda with a little water to form a paste.
* Apply to grout: Apply the paste to the grout lines.
* Scrub: Scrub with an old toothbrush.
* Rinse: Rinse with water.
Living Room Cleaning Hacks
The living room is where we relax and entertain, so keeping it clean is important.
1. Freshen your carpets and rugs:
* Baking soda deodorizer: Sprinkle baking soda liberally over your carpets and rugs.
* Let it sit: Let it sit for at least 30 minutes, or even overnight.
* Vacuum: Vacuum up the baking soda.
2. Clean your upholstery:
* Test first: Before cleaning your entire piece of furniture, test your cleaning solution on an inconspicuous area to ensure it doesn’t damage the fabric.
* Mix cleaning solution: Mix a small amount of mild dish soap with warm water.
* Apply and blot: Dip a clean cloth into the solution and gently blot the stain. Avoid rubbing, as this can spread the stain.
* Dry

Conclusion
So, there you have it! Mastering these DIY home cleaning tips and tricks isn’t just about saving money; it’s about taking control of your living space and creating a healthier, happier environment for yourself and your loved ones. We’ve explored simple yet effective solutions using ingredients you likely already have in your pantry, transforming everyday items into powerful cleaning agents.
The beauty of these methods lies in their versatility. Feel free to experiment and adapt them to your specific needs and preferences. For instance, if you find the scent of vinegar too strong, infuse it with citrus peels for a refreshing aroma. If you’re tackling stubborn stains on upholstery, consider adding a few drops of essential oil with stain-fighting properties, like lemon or tea tree oil, to your cleaning solution. Remember to always test a small, inconspicuous area first to ensure colorfastness.
Beyond the basic recipes, consider these variations to elevate your cleaning game:
* **DIY All-Purpose Cleaner Boost:** Add a tablespoon of borax to your all-purpose cleaner recipe for extra cleaning power, especially for greasy surfaces.
* **Homemade Furniture Polish:** Combine olive oil and lemon juice in a 2:1 ratio for a natural furniture polish that nourishes wood and leaves a beautiful shine.
* **Toilet Bowl Fizzers:** Mix baking soda, citric acid, and a few drops of your favorite essential oil, then press into molds and let dry. Drop one into the toilet bowl for a refreshing and cleaning fizz.
* **Window Cleaning Power-Up:** For streak-free windows, add a tablespoon of cornstarch to your vinegar and water solution.
These DIY home cleaning tips and tricks are not just about cleaning; they’re about creating a sustainable and eco-friendly lifestyle. By reducing your reliance on harsh chemicals, you’re contributing to a healthier planet and a safer home. Plus, the satisfaction of creating your own cleaning products is truly rewarding.
We understand that trying new things can sometimes be daunting, but we encourage you to take the plunge and give these DIY methods a try. Start with one or two that resonate with you and see the difference they can make. You might be surprised at how effective and enjoyable these simple solutions can be.
Don’t just take our word for it! We’re eager to hear about your experiences with these DIY home cleaning tips and tricks. Share your successes, your challenges, and any variations you’ve discovered in the comments below. Your insights could help others on their journey to a cleaner, greener home. Let’s build a community of DIY cleaning enthusiasts and learn from each other. We are confident that you will find these tips to be a game changer in your home cleaning routine.
Frequently Asked Questions (FAQ)
Q: Are these DIY cleaning solutions safe for all surfaces?
A: While most of these DIY cleaning solutions are generally safe for a wide range of surfaces, it’s always best to test them on a small, inconspicuous area first. This is especially important for delicate surfaces like marble, granite, or antique furniture. Avoid using acidic solutions like vinegar or lemon juice on these surfaces, as they can etch or damage them. For wooden surfaces, always use a soft cloth and avoid excessive moisture. If you’re unsure about a particular surface, consult the manufacturer’s instructions or a professional cleaner.
Q: Can I use essential oils in all of these recipes?
A: Yes, essential oils can be a wonderful addition to many DIY cleaning recipes, adding fragrance and potentially enhancing their cleaning power. However, it’s important to use them safely and responsibly. Always use pure, therapeutic-grade essential oils and dilute them properly. A general guideline is to use 10-15 drops of essential oil per cup of cleaning solution. Some essential oils, like tea tree, lemon, lavender, and eucalyptus, have natural antibacterial and antifungal properties, making them particularly effective for cleaning. Be mindful of allergies and sensitivities when choosing essential oils, and avoid using them around pets or children if they have known sensitivities. Also, avoid using citrus oils on surfaces that are sensitive to acid.
Q: How long can I store these DIY cleaning solutions?
A: The shelf life of DIY cleaning solutions can vary depending on the ingredients used. Solutions containing water are more prone to bacterial growth and should be used within a week or two. Solutions made with vinegar, alcohol, or essential oils tend to have a longer shelf life, typically lasting for several months. To maximize the shelf life of your DIY cleaning solutions, store them in airtight containers in a cool, dark place. Label each container with the date it was made so you can keep track of its age. If you notice any changes in color, odor, or consistency, discard the solution.
Q: Are these DIY cleaning solutions effective against tough stains and grime?
A: Many of these DIY cleaning solutions are surprisingly effective against tough stains and grime. However, the effectiveness can depend on the type of stain, the surface it’s on, and the age of the stain. For stubborn stains, you may need to pre-treat the area with a paste of baking soda and water or a solution of vinegar and water. Let the solution sit for a few minutes before scrubbing gently with a soft cloth or brush. For greasy grime, try using a solution of dish soap and hot water. For mildew and mold, a solution of bleach and water (always use caution and proper ventilation) or a vinegar solution can be effective. Remember to always test the solution on a small, inconspicuous area first to ensure it doesn’t damage the surface.
Q: Can I use these DIY cleaning solutions if I have allergies or sensitivities?
A: If you have allergies or sensitivities, it’s important to be cautious when using any cleaning product, including DIY solutions. Read the ingredient list carefully and avoid using any ingredients that you know you’re allergic to. When using essential oils, choose those that are known to be gentle and non-irritating, such as lavender or chamomile. Wear gloves and a mask when cleaning to protect your skin and respiratory system. Ensure proper ventilation in the area you’re cleaning. If you experience any allergic reactions, such as skin irritation, sneezing, or difficulty breathing, stop using the solution immediately and consult a doctor. You can also try making smaller batches of the solutions to test your tolerance before making a larger quantity.
Q: What are some alternatives to vinegar for those who don’t like the smell?
A: While vinegar is a powerful and versatile cleaning agent, its strong smell can be off-putting to some. Fortunately, there are several alternatives you can use. Lemon juice is a great option, as it has similar acidic properties and a pleasant citrus scent. Baking soda is another effective alternative, especially for scrubbing and deodorizing. Hydrogen peroxide is a good choice for disinfecting and removing stains. You can also use a mild dish soap diluted in water for general cleaning. Infusing vinegar with citrus peels or herbs can also help to mask the smell.
Q: How can I make my DIY cleaning routine more eco-friendly?
A: There are many ways to make your DIY cleaning routine more eco-friendly. Start by using reusable containers and spray bottles instead of disposable ones. Choose ingredients that are biodegradable and sustainably sourced. Avoid using harsh chemicals that can pollute the environment. Compost food scraps and other organic waste to reduce landfill waste. Use microfiber cloths instead of paper towels, as they can be washed and reused multiple times. Consider using a refillable cleaning product system to reduce plastic waste. By making small changes to your cleaning habits, you can significantly reduce your environmental impact.
Leave a Comment