

Home Hacks You Need to Know: Ready to transform your living space with simple, clever tricks? I’m so excited to share some amazing DIY solutions that will save you time, money, and a whole lot of frustration! For centuries, resourceful individuals have been developing ingenious ways to improve their homes, from ancient Roman plumbing systems to the clever space-saving designs of traditional Japanese homes. This spirit of innovation lives on, and I’m here to bring you some of the best home hacks you need to know in the modern age.
Let’s face it, maintaining a home can be overwhelming. Whether it’s dealing with stubborn stains, organizing cluttered spaces, or tackling minor repairs, there’s always something to do. That’s where these DIY tricks come in. They offer practical, affordable solutions to common household problems, empowering you to take control of your environment and create a more comfortable, efficient, and enjoyable living space. So, grab your toolbox (or maybe just a lemon and some baking soda!), and let’s dive into these game-changing home hacks!

Transform Your Home with These Genius DIY Hacks!
Alright, let’s dive into some seriously cool DIY home hacks that will not only save you money but also add a touch of your personality to your space. I’ve tried and tested these myself, and trust me, they’re game-changers!
Hack 1: Turn Old T-Shirts into Reusable Shopping Bags
This is one of my absolute favorites! It’s eco-friendly, super easy, and a great way to give those old band tees a new life.
What you’ll need:
* An old t-shirt (preferably one without side seams for a stronger bag)
* Sharp scissors
* A ruler or measuring tape (optional, but helpful for even fringe)
* A marker or pen (optional, for marking fringe length)
Step-by-Step Instructions:
1. Prepare the T-Shirt: Lay your t-shirt flat on a table or the floor. Smooth out any wrinkles.
2. Cut off the Neckline: Using your scissors, carefully cut off the neckline. You can cut a wide scoop neck or a more shallow, rounded neck – it’s totally up to you! I usually go for a wider scoop neck for a more open bag.
3. Cut off the Sleeves: Next, cut off the sleeves. Try to cut as close to the seam as possible for a clean look.
4. Create the Fringe: This is where the magic happens! At the bottom of the t-shirt, start cutting strips of fabric, creating fringe. Aim for strips that are about 1-2 inches wide and 3-4 inches long. You can use a ruler and marker to mark the length of the fringe if you want it to be super precise. I usually just eyeball it, though!
5. Tie the Fringe: Now, this is the key to making the bag sturdy. Take two adjacent strips of fringe and tie them together in a tight knot. Repeat this all the way around the bottom of the t-shirt.
6. Second Row of Knots (Optional but Recommended): For extra strength, tie a second row of knots. This time, tie each knot using one strand from the knot above it and one strand from the adjacent knot. This creates a sort of “netting” effect.
7. Reinforce the Handles (Optional): If you’re planning on carrying heavy items in your bag, you might want to reinforce the handles. You can do this by sewing a few rows of stitching along the shoulder seams where the handles are. Or, you can simply tie a knot at the base of each handle for added strength.
8. Enjoy Your Reusable Bag! That’s it! You’ve now transformed an old t-shirt into a stylish and eco-friendly shopping bag.
Hack 2: DIY Coffee Filter Diffuser
This is a fantastic way to freshen up any room in your house without spending a fortune on store-bought diffusers. Plus, you get to choose your favorite scents!
What you’ll need:
* A small glass jar or vase (an old jam jar works perfectly!)
* Coffee filters (the cone-shaped ones work best)
* Bamboo skewers or wooden dowels
* Essential oils of your choice
* A carrier oil (like fractionated coconut oil, sweet almond oil, or even baby oil)
* Scissors (optional, for trimming skewers)
Step-by-Step Instructions:
1. Prepare the Jar: Make sure your jar or vase is clean and dry.
2. Mix the Diffuser Solution: In the jar, combine your essential oils and carrier oil. A good starting ratio is about 10-20 drops of essential oil per 1/4 cup of carrier oil. You can adjust the ratio to your liking, depending on how strong you want the scent to be. I personally love using lavender and eucalyptus for a relaxing scent.
3. Prepare the Coffee Filter Flowers: This is the fun part! Take a coffee filter and fold it in half, then in half again. You should now have a cone shape.
4. Shape the Petals: Using your fingers, gently crumple and shape the edges of the coffee filter to resemble petals. You can make them pointy, rounded, or even slightly torn for a more natural look.
5. Create the Flower Center: Take another coffee filter and roll it tightly into a small cylinder. This will be the center of your flower.
6. Attach the Flower Center: Place the rolled coffee filter cylinder inside the center of your “petals” and secure it with a small dab of glue (optional, but it helps keep the flower together).
7. Attach the Skewer: Carefully insert the bamboo skewer or wooden dowel into the bottom of the flower, pushing it through the layers of coffee filter. You might need to use a little bit of glue to secure it in place.
8. Repeat: Repeat steps 3-7 to create as many coffee filter flowers as you like. I usually make about 5-7 flowers for a small jar.
9. Arrange the Flowers: Place the coffee filter flowers into the jar with the essential oil mixture. The skewers will act as wicks, drawing the scented oil up into the flowers and releasing the fragrance into the air.
10. Trim the Skewers (Optional): If the skewers are too long, you can trim them with scissors to the desired length.
11. Enjoy Your DIY Diffuser! That’s it! You’ve created a beautiful and fragrant DIY diffuser using coffee filters. The scent will last for several weeks, depending on the amount of essential oil you use.
Hack 3: Revive Old Furniture with Chalk Paint
Don’t throw away that old dresser or side table just yet! With a little chalk paint and some elbow grease, you can give it a whole new lease on life.
What you’ll need:
* Old furniture piece
* Chalk paint (available at most craft stores or online)
* Paintbrushes (a good quality brush is essential!)
* Sandpaper (medium and fine grit)
* Wax or sealant (optional, but recommended for durability)
* Clean cloths
* Painter’s tape (optional, for masking off areas)
Phase 1: Preparation
1. Clean the Furniture: Thoroughly clean the furniture piece with soap and water to remove any dirt, dust, or grease. Let it dry completely.
2. Sand (Optional): If the furniture has a glossy finish or any loose paint, lightly sand it with medium-grit sandpaper to create a better surface for the chalk paint to adhere to. Wipe away any sanding dust with a clean cloth.
3. Tape Off Areas (Optional): If you want to paint only certain parts of the furniture, use painter’s tape to mask off the areas you don’t want to paint.
Phase 2: Painting
1. Apply the First Coat of Chalk Paint: Using your paintbrush, apply a thin, even coat of chalk paint to the furniture. Don’t worry about getting perfect coverage on the first coat.
2. Let it Dry: Allow the first coat of paint to dry completely. This usually takes about 1-2 hours, depending on the humidity.
3. Apply the Second Coat of Chalk Paint: Apply a second coat of chalk paint, again aiming for thin, even coverage. This coat will provide better coverage and a more uniform finish.
4. Let it Dry: Allow the second coat of paint to dry completely.
Phase 3: Finishing
1. Sand (Optional): For a distressed look, lightly sand the edges and corners of the furniture with fine-grit sandpaper. This will reveal the original finish underneath and create a worn, vintage feel. You can also sand the entire surface for a smoother finish.
2. Wax or Sealant: Apply a coat of wax or sealant to protect the chalk paint and give it a durable finish. Follow the instructions on the product label. I usually use a clear wax, but you can also use a tinted wax to add depth and character.
3. Buff: After the wax or sealant has dried, buff the furniture with a clean cloth to create a smooth, polished finish.
4. Remove Painter’s Tape (If Used): Carefully remove the painter’s tape from any areas you masked off.
5. Enjoy Your Revived Furniture! Step back and admire your handiwork! You’ve transformed an old, tired piece of furniture into a beautiful and unique statement piece.
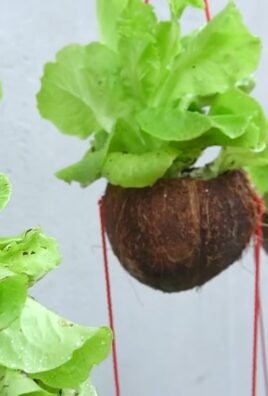
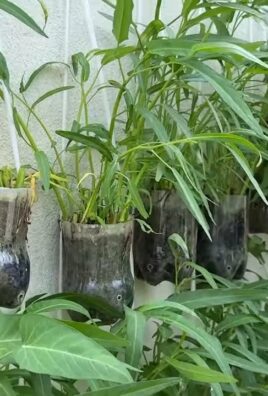
Hack 4: Create a Vertical Herb Garden from Pallets
Bring some greenery into your home (or balcony!) with this easy and affordable vertical herb garden.
What you’ll need:
* A wooden pallet (look for heat-treated pallets, marked with “HT,” as they are safer for gardening)
* Heavy-duty landscape fabric
* Staple gun
Conclusion
So, there you have it! This simple yet incredibly effective DIY trick is more than just a clever shortcut; it’s a game-changer for anyone looking to streamline their daily routines and save money. We’ve explored how to create your own [Home Hacks You Need to Know] solution, and hopefully, you’re already envisioning the possibilities.
Why is this a must-try? Because it empowers you to take control of your environment and resources. Instead of relying on expensive, pre-packaged alternatives, you can craft a personalized solution that perfectly fits your needs and preferences. It’s about reducing waste, saving money, and feeling a sense of accomplishment from creating something useful with your own hands.
But the beauty of this DIY approach lies in its adaptability. Feel free to experiment with different ingredients and variations to find what works best for you. For example, if you’re looking for a stronger cleaning solution, you could add a few drops of tea tree oil for its antibacterial properties. Or, if you prefer a more subtle scent, try using lavender or chamomile essential oils. The possibilities are truly endless!
Consider these variations:
* **For a more concentrated solution:** Reduce the amount of water used.
* **For sensitive skin:** Use distilled water and hypoallergenic ingredients.
* **For a specific cleaning task:** Research ingredients known for their effectiveness in that area (e.g., vinegar for descaling).
* **For a natural fragrance:** Infuse your solution with citrus peels or herbs.
We genuinely believe that this [Home Hacks You Need to Know] method will revolutionize the way you approach everyday tasks. It’s not just about saving a few dollars; it’s about embracing a more sustainable and resourceful lifestyle.
Now, it’s your turn! We strongly encourage you to give this DIY trick a try. Gather your ingredients, follow the steps, and experience the satisfaction of creating your own effective and affordable solution.
But don’t stop there! We want to hear about your experiences. Share your tips, variations, and successes in the comments section below. Let’s build a community of DIY enthusiasts who are passionate about finding creative and sustainable solutions for everyday challenges. Your insights could inspire others and help us all learn and grow together.
We’re confident that once you try this [Home Hacks You Need to Know] approach, you’ll wonder how you ever lived without it. It’s a simple, effective, and rewarding way to take control of your home and your resources. So, go ahead, give it a try, and let us know what you think! We can’t wait to hear from you.
Frequently Asked Questions
What if I don’t have all the ingredients listed?
Don’t worry! The beauty of DIY is its flexibility. While the listed ingredients are recommended for optimal results, you can often substitute them with similar items you already have on hand. For example, if you don’t have white vinegar, you could try using lemon juice as a substitute. Just be sure to research the properties of the substitute ingredient to ensure it’s suitable for the intended purpose. If you are missing a key ingredient, consider if the hack is still worth doing, or if you should wait until you have all the ingredients.
Is this DIY solution safe to use on all surfaces?
It’s always a good idea to test any new cleaning solution on a small, inconspicuous area first, especially on delicate surfaces like wood or painted walls. This will help you ensure that the solution doesn’t cause any damage or discoloration. If you’re unsure about a particular surface, consult the manufacturer’s instructions or a professional cleaner. Also, be mindful of combining ingredients that could create harmful fumes. Always research the safety of mixing different cleaning agents before experimenting.
How long will this DIY solution last?
The shelf life of your DIY solution will depend on the ingredients you use. Solutions made with fresh ingredients, like citrus peels or herbs, may have a shorter shelf life than those made with more stable ingredients. To maximize the shelf life, store your solution in an airtight container in a cool, dark place. It’s also a good idea to label the container with the date you made the solution so you can keep track of its age. If you notice any changes in color, odor, or consistency, it’s best to discard the solution and make a fresh batch.
Can I use essential oils in this DIY solution?
Yes, absolutely! Essential oils can add a pleasant fragrance and even enhance the cleaning properties of your DIY solution. However, it’s important to use essential oils safely and responsibly. Always dilute essential oils properly before adding them to your solution, and be sure to choose oils that are safe for the intended use. Some essential oils can be irritating to the skin or harmful to pets, so do your research before using them. A few drops are usually sufficient to add fragrance and boost cleaning power.
How can I make this DIY solution more eco-friendly?
There are several ways to make your DIY solution even more eco-friendly. First, choose ingredients that are sustainably sourced and biodegradable. Second, use reusable containers to store your solution. Third, consider composting any leftover ingredients, such as citrus peels or herbs. Finally, be mindful of the amount of solution you use and avoid overusing it. By making small changes to your DIY practices, you can significantly reduce your environmental impact.
What are some other [Home Hacks You Need to Know] that I can try?
The world of home hacks is vast and exciting! You can explore DIY cleaning solutions for various purposes, such as making your own laundry detergent, fabric softener, or dish soap. You can also find hacks for organizing your home, decluttering your space, and saving energy. Online resources like Pinterest, YouTube, and DIY blogs are great places to discover new and innovative home hacks. Remember to always prioritize safety and research any hack thoroughly before trying it.
What if my DIY solution doesn’t work as well as I expected?
Don’t be discouraged! Sometimes, DIY solutions require a bit of tweaking to get them just right. If your solution isn’t working as well as you hoped, try adjusting the proportions of the ingredients or experimenting with different variations. It’s also important to consider the specific task you’re using the solution for. Some DIY solutions may be more effective for certain cleaning tasks than others. If you’re still having trouble, consult online resources or ask for advice from other DIY enthusiasts. Remember, practice makes perfect!
Leave a Comment