

Home Hydroponics Vegetables: Imagine harvesting crisp lettuce, juicy tomatoes, and vibrant herbs right from your living room, regardless of the season! Sounds like a futuristic dream, right? Well, it’s not! It’s the reality of home hydroponics, and I’m here to show you how you can easily dive into this fascinating world of soilless gardening with some clever DIY tricks.
Hydroponics, the art of growing plants without soil, has a surprisingly rich history. While modern hydroponics took shape in the 20th century, its roots can be traced back to ancient civilizations like the Hanging Gardens of Babylon and the floating gardens of the Aztecs. These ingenious methods demonstrate humanity’s long-standing desire to cultivate food in innovative ways.
In today’s fast-paced world, many of us lack the space, time, or even the ideal climate for traditional gardening. That’s where home hydroponics vegetables come to the rescue! This DIY guide will equip you with simple, cost-effective hacks to create your own thriving hydroponic garden. You’ll learn how to build your own systems, choose the right nutrients, and troubleshoot common issues. Say goodbye to store-bought produce and hello to fresh, flavorful, and sustainable vegetables grown right at your fingertips. Let’s get started!
DIY Home Hydroponics: Grow Your Own Vegetables Indoors!
Hey there, fellow plant enthusiasts! Ever dreamed of having fresh, delicious vegetables right at your fingertips, no matter the season? Well, I’m here to tell you that dream can become a reality with a DIY hydroponics system! It might sound intimidating, but trust me, it’s totally doable, even for beginners. I’m going to walk you through building a simple yet effective system that will have you harvesting your own greens in no time.
What is Hydroponics, Anyway?
Before we dive in, let’s quickly cover what hydroponics actually is. Simply put, it’s growing plants without soil, using nutrient-rich water solutions. This means no more messy dirt, fewer pests, and often faster growth rates! Plus, you can do it indoors, making it perfect for apartment dwellers or anyone who wants to garden year-round.
Choosing Your Hydroponic System: The Kratky Method
There are many different hydroponic methods out there, but for this DIY project, we’re going to focus on the Kratky method. Why? Because it’s super simple, requires minimal maintenance, and doesn’t need any pumps or electricity! It’s a passive system, meaning the plants take up the nutrients as needed, without any intervention from us.
Materials You’ll Need
Okay, let’s gather our supplies. You can find most of these at your local hardware store or online. Here’s what you’ll need:
* A container: This will hold your nutrient solution and plants. I recommend a dark-colored plastic storage bin (around 5-10 gallons) to prevent algae growth. A dark color helps block light.
* Net pots: These are small, slotted pots that will hold your plants and allow their roots to reach the nutrient solution. You’ll need one for each plant you want to grow. 3-inch net pots are a good size.
* Growing medium: This provides support for your plants’ roots. I like to use rockwool cubes or coco coir, but you can also use perlite or a combination of these.
* Hydroponic nutrients: These are specially formulated fertilizers that contain all the essential nutrients your plants need. Make sure to get a nutrient solution specifically designed for hydroponics. Look for a two-part nutrient solution (A & B) for best results.
* pH testing kit: Maintaining the correct pH level is crucial for nutrient absorption. A simple pH testing kit (either liquid or digital) will help you monitor and adjust the pH of your nutrient solution.
* pH Up and pH Down solutions: These are used to adjust the pH of your nutrient solution if it’s too high or too low.
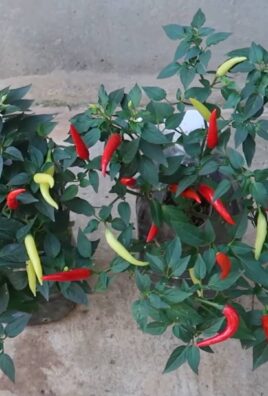
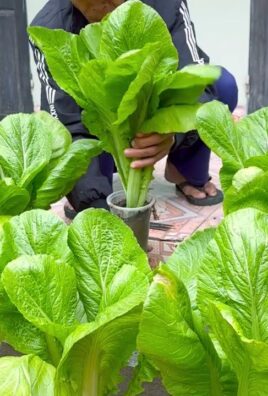
* Seeds or seedlings: Choose vegetables that are well-suited for hydroponics, such as lettuce, spinach, herbs (like basil and mint), strawberries, and even smaller varieties of tomatoes or peppers.
* Drill with a hole saw attachment: This is for creating holes in the lid of your container to hold the net pots. The hole saw should be the same size as the diameter of your net pots.
* Measuring cups and spoons: For accurately measuring your nutrient solution.
* Water: Tap water is usually fine, but if your tap water is heavily chlorinated, let it sit out for 24 hours to allow the chlorine to evaporate.
* Optional: An air stone and air pump can be added to oxygenate the nutrient solution, but it’s not strictly necessary for the Kratky method, especially for leafy greens.
Step-by-Step Instructions: Building Your Kratky System
Alright, let’s get our hands dirty (well, not really, since we’re doing hydroponics!). Follow these steps to build your own Kratky system:
1. Prepare the Container Lid:
* First, decide how many plants you want to grow in your container. Space them out evenly on the lid, leaving enough room for each plant to grow.
* Using your hole saw attachment and drill, carefully cut holes in the lid where you want to place your net pots. Make sure the holes are the right size so the net pots fit snugly.
* Clean the lid thoroughly to remove any plastic shavings or debris.
2. Prepare the Net Pots and Growing Medium:
* If you’re using rockwool cubes, soak them in water for a few hours before using them. This will help them retain moisture.
* If you’re using coco coir, rinse it thoroughly to remove any excess salts.
* Place your chosen growing medium into the net pots, filling them about two-thirds full.
3. Plant Your Seeds or Seedlings:
* If you’re starting from seeds, sow a few seeds in each net pot, gently pressing them into the growing medium.
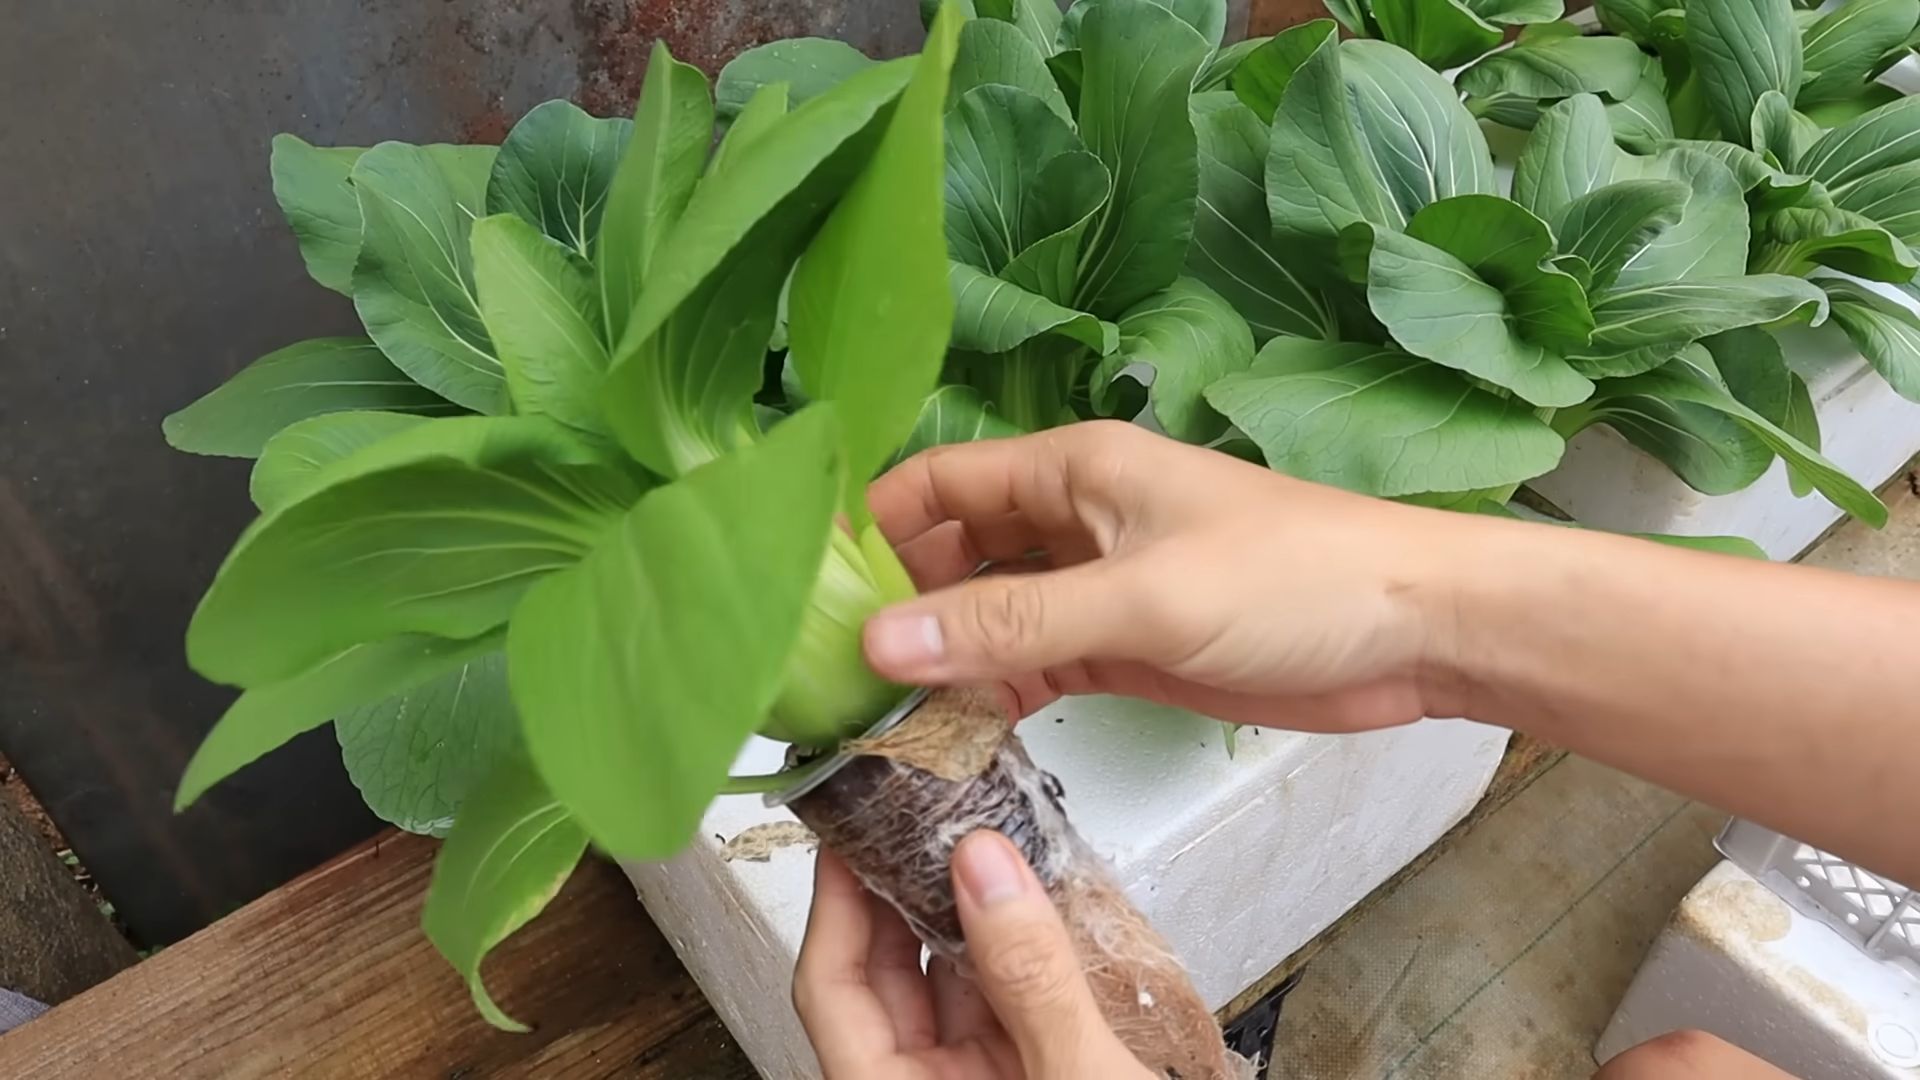
* If you’re using seedlings, carefully remove them from their starter containers and place them in the net pots, making sure the roots are surrounded by the growing medium.
* Add more growing medium around the seedlings to provide support.
4. Prepare the Nutrient Solution:
* Fill your container with water, leaving a few inches of space at the top.
* Using your measuring cups and spoons, add the hydroponic nutrients according to the manufacturer’s instructions. Be sure to add Part A first, mix well, and then add Part B. Never mix Part A and Part B concentrates directly together, as this can cause nutrient lockout.
* Use your pH testing kit to check the pH of the nutrient solution. The ideal pH range for most hydroponic vegetables is between 5.5 and 6.5.
* If the pH is too high, add a small amount of pH Down solution and mix well. If the pH is too low, add a small amount of pH Up solution and mix well. Retest the pH and repeat until it’s within the desired range.
5. Assemble the System:
* Carefully place the net pots with your plants into the holes in the lid.
* Place the lid on top of the container, making sure it’s secure.
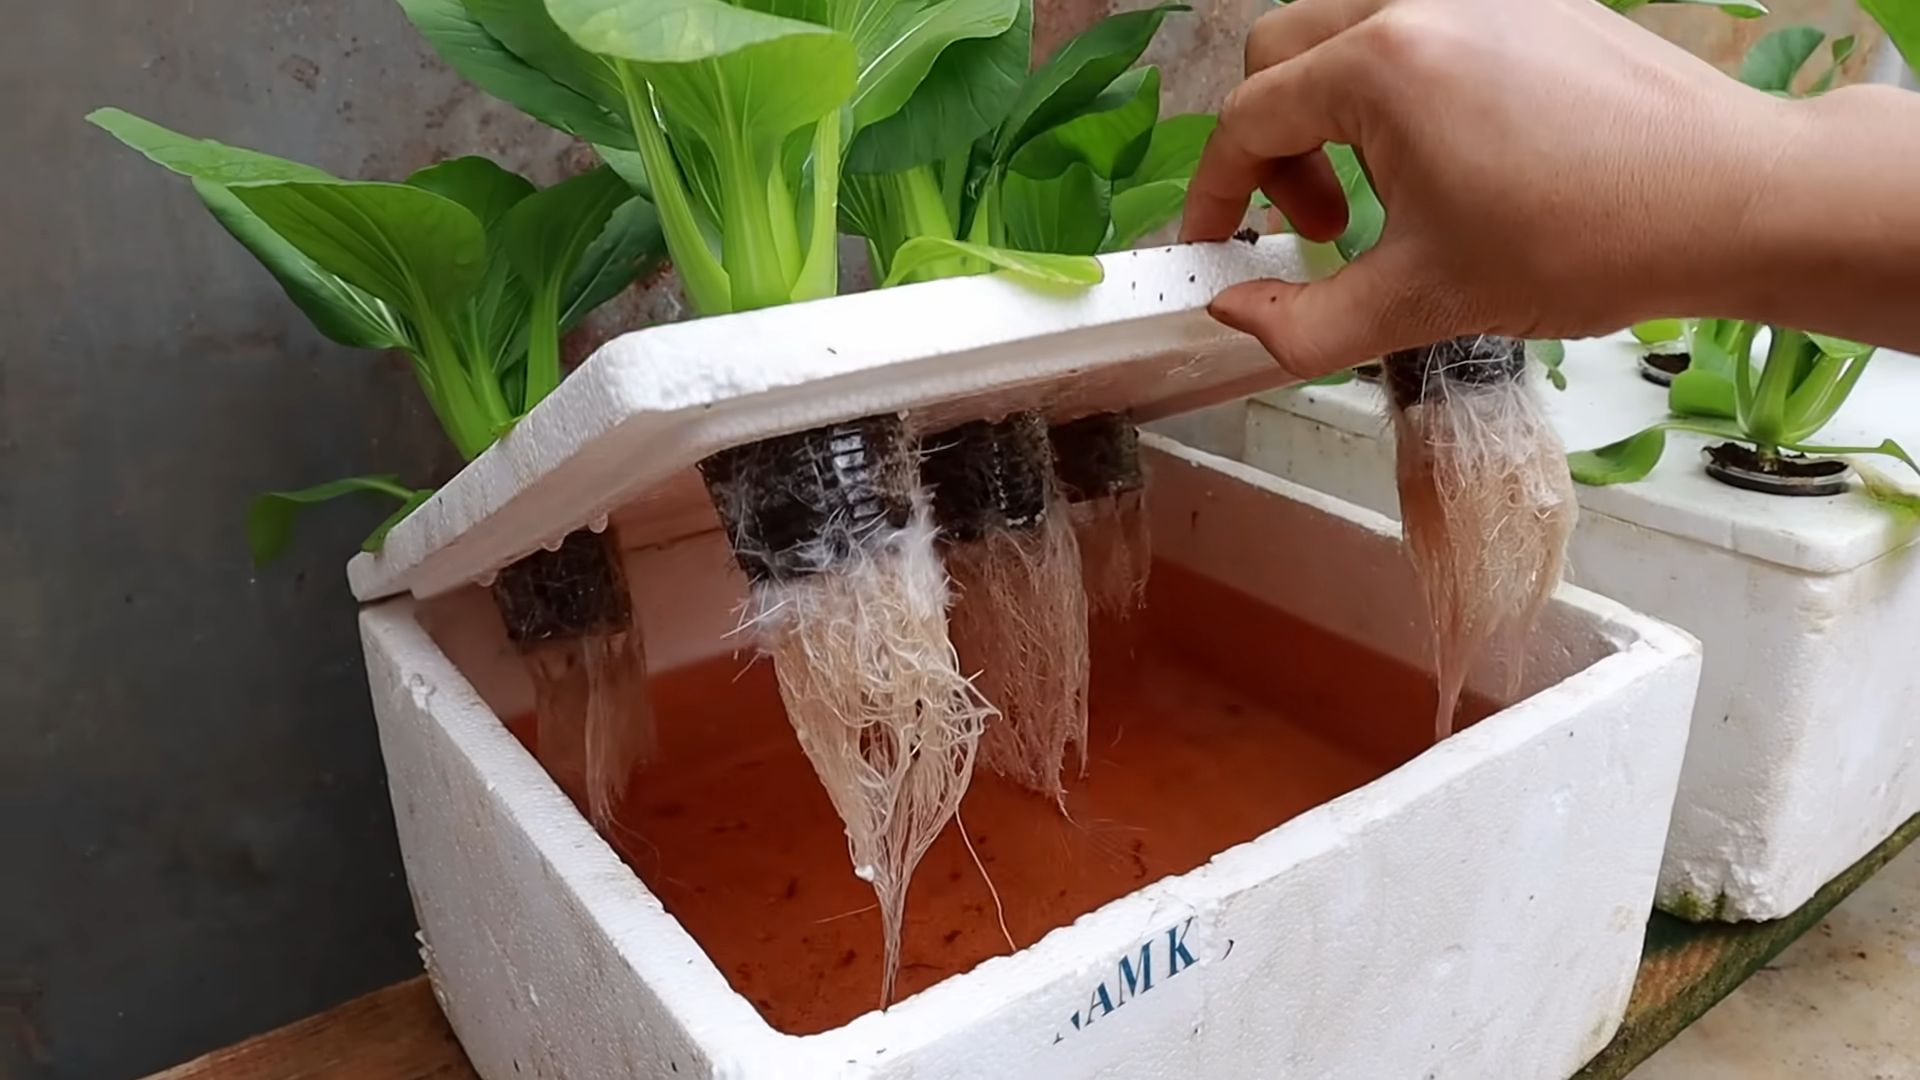
* The bottom of the net pots should be submerged in the nutrient solution. This is crucial for the Kratky method, as the roots will gradually grow down into the solution.
6. Provide Light and Air Circulation:
* Place your hydroponic system in a location that receives plenty of sunlight (at least 6-8 hours per day). If you don’t have enough natural light, you can use grow lights. LED grow lights are energy-efficient and work well for hydroponics.
* Ensure there’s good air circulation around your plants to prevent fungal diseases. A small fan can help with this.
Maintaining Your Hydroponic System
Now that your system is up and running, here’s how to keep your plants happy and healthy:
* Monitor the Water Level: As your plants grow, they’ll absorb water from the nutrient solution. Check the water level regularly and add more nutrient solution as needed, maintaining the correct pH level. The water level will drop over time, leaving an air gap between the water and the top of the roots. This is normal and essential for the Kratky method, as it allows the roots to access oxygen.
* Check the pH Regularly: The pH of the nutrient solution can fluctuate over time, so it’s important to check it regularly (at least once a week) and adjust it as needed.
* Change the Nutrient Solution: Over time, the nutrient solution will become depleted of nutrients and can accumulate salts. I recommend changing the nutrient solution every 2-4 weeks, depending on the type of plants you’re growing and their growth rate.
* Prune Your Plants: Pruning can help improve air circulation and encourage bushier growth. Remove any yellowing or dead leaves.
* Watch Out for Pests and Diseases: While hydroponics is generally less prone to pests and diseases than soil-based gardening, it’s still important to be vigilant. Inspect your plants regularly for any signs of problems, such as aphids, whiteflies, or fungal diseases. If you spot any issues, address them promptly with appropriate organic pest control methods.
Hey there, fellow plant enthusiasts! Ever dreamed of having fresh, delicious vegetables right at your fingertips, no matter the season? Well, I’m here to tell you that dream can become a reality with a DIY hydroponics system! It might sound intimidating, but trust me, it’s totally doable, even for beginners. I’m going to walk you through building a simple yet effective system that will have you harvesting your own greens in no time.
What is Hydroponics, Anyway?
Before we dive in, let’s quickly cover what hydroponics actually is. Simply put, it’s growing plants without soil, using nutrient-rich water solutions. This means no more messy dirt, fewer pests, and often faster growth rates! Plus, you can do it indoors, making it perfect for apartment dwellers or anyone who wants to garden year-round.
Choosing Your Hydroponic System: The Kratky Method
There are many different hydroponic methods out there, but for this DIY project, we’re going to focus on the Kratky method. Why? Because it’s super simple, requires minimal maintenance, and doesn’t need any pumps or electricity! It’s a passive system, meaning the plants take up the nutrients as needed, without any intervention from us.
Materials You’ll Need
Okay, let’s gather our supplies. You can find most of these at your local hardware store or online. Here’s what you’ll need:
* A container: This will hold your nutrient solution and plants. I recommend a dark-colored plastic storage bin (around 5-10 gallons) to prevent algae growth. A dark color helps block light.
* Net pots: These are small, slotted pots that will hold your plants and allow their roots to reach the nutrient solution. You’ll need one for each plant you want to grow. 3-inch net pots are a good size.
* Growing medium: This provides support for your plants’ roots. I like to use rockwool cubes or coco coir, but you can also use perlite or a combination of these.
* Hydroponic nutrients: These are specially formulated fertilizers that contain all the essential nutrients your plants need. Make sure to get a nutrient solution specifically designed for hydroponics. Look for a two-part nutrient solution (A & B) for best results.
* pH testing kit: Maintaining the correct pH level is crucial for nutrient absorption. A simple pH testing kit (either liquid or digital) will help you monitor and adjust the pH of your nutrient solution.
* pH Up and pH Down solutions: These are used to adjust the pH of your nutrient solution if it’s too high or too low.
* Seeds or seedlings: Choose vegetables that are well-suited for hydroponics, such as lettuce, spinach, herbs (like basil and mint), strawberries, and even smaller varieties of tomatoes or peppers.
* Drill with a hole saw attachment: This is for creating holes in the lid of your container to hold the net pots. The hole saw should be the same size as the diameter of your net pots.
* Measuring cups and spoons: For accurately measuring your nutrient solution.
* Water: Tap water is usually fine, but if your tap water is heavily chlorinated, let it sit out for 24 hours to allow the chlorine to evaporate.
* Optional: An air stone and air pump can be added to oxygenate the nutrient solution, but it’s not strictly necessary for the Kratky method, especially for leafy greens.
Step-by-Step Instructions: Building Your Kratky System
Alright, let’s get our hands dirty (well, not really, since we’re doing hydroponics!). Follow these steps to build your own Kratky system:
1. Prepare the Container Lid:
* First, decide how many plants you want to grow in your container. Space them out evenly on the lid, leaving enough room for each plant to grow.
* Using your hole saw attachment and drill, carefully cut holes in the lid where you want to place your net pots. Make sure the holes are the right size so the net pots fit snugly.
* Clean the lid thoroughly to remove any plastic shavings or debris.
2. Prepare the Net Pots and Growing Medium:
* If you’re using rockwool cubes, soak them in water for a few hours before using them. This will help them retain moisture.
* If you’re using coco coir, rinse it thoroughly to remove any excess salts.
* Place your chosen growing medium into the net pots, filling them about two-thirds full.
3. Plant Your Seeds or Seedlings:
* If you’re starting from seeds, sow a few seeds in each net pot, gently pressing them into the growing medium.
* If you’re using seedlings, carefully remove them from their starter containers and place them in the net pots, making sure the roots are surrounded by the growing medium.
* Add more growing medium around the seedlings to provide support.
4. Prepare the Nutrient Solution:
* Fill your container with water, leaving a few inches of space at the top.
* Using your measuring cups and spoons, add the hydroponic nutrients according to the manufacturer’s instructions. Be sure to add Part A first, mix well, and then add Part B. Never mix Part A and Part B concentrates directly together, as this can cause nutrient lockout.
* Use your pH testing kit to check the pH of the nutrient solution. The ideal pH range for most hydroponic vegetables is between 5.5 and 6.5.
* If the pH is too high, add a small amount of pH Down solution and mix well. If the pH is too low, add a small amount of pH Up solution and mix well. Retest the pH and repeat until it’s within the desired range.
5. Assemble the System:
* Carefully place the net pots with your plants into the holes in the lid.
* Place the lid on top of the container, making sure it’s secure.
* The bottom of the net pots should be submerged in the nutrient solution. This is crucial for the Kratky method, as the roots will gradually grow down into the solution.
6. Provide Light and Air Circulation:
* Place your hydroponic system in a location that receives plenty of sunlight (at least 6-8 hours per day). If you don’t have enough natural light, you can use grow lights. LED grow lights are energy-efficient and work well for hydroponics.
* Ensure there’s good air circulation around your plants to prevent fungal diseases. A small fan can help with this.
Maintaining Your Hydroponic System
Now that your system is up and running, here’s how to keep your plants happy and healthy:
* Monitor the Water Level: As your plants grow, they’ll absorb water from the nutrient solution. Check the water level regularly and add more nutrient solution as needed, maintaining the correct pH level. The water level will drop over time, leaving an air gap between the water and the top of the roots. This is normal and essential for the Kratky method, as it allows the roots to access oxygen.
* Check the pH Regularly: The pH of the nutrient solution can fluctuate over time, so it’s important to check it regularly (at least once a week) and adjust it as needed.
* Change the Nutrient Solution: Over time, the nutrient solution will become depleted of nutrients and can accumulate salts. I recommend changing the nutrient solution every 2-4 weeks, depending on the type of plants you’re growing and their growth rate.
* Prune Your Plants: Pruning can help improve air circulation and encourage bushier growth. Remove any yellowing or dead leaves.
* Watch Out for Pests and Diseases: While hydroponics is generally less prone to pests and diseases than soil-based gardening, it’s still important to be vigilant. Inspect your plants regularly for any signs of problems, such as aphids, whiteflies, or fungal diseases. If you spot any issues, address them promptly with appropriate organic pest control methods.
* Harvest Your Vegetables: Once your vegetables are ready to harvest, simply cut them off the plant. With proper care, your hydroponic system will continue to produce fresh vegetables for months to come!
Troubleshooting Tips
Even with the best planning, you might encounter some challenges along the way. Here are a few common issues and how to address them:
* Yellowing Leaves: This can be a sign of nutrient deficiency. Make sure you’re using the correct nutrient solution and that the pH is within the optimal range.
* Slow Growth: This could be due to insufficient light, incorrect pH, or nutrient deficiencies. Check all these factors and adjust as needed.
* Algae Growth: Algae can grow in the nutrient solution if it’s exposed to too much light. Use a dark-colored container and keep the system out of
Conclusion
So, there you have it! A simple, effective, and surprisingly rewarding way to bring the bounty of fresh vegetables right into your home. This DIY home hydroponics vegetables system isn’t just a project; it’s an investment in your health, your sustainability, and your connection to the food you eat. Forget those bland, store-bought veggies that have traveled miles and lost their flavor along the way. Imagine plucking a crisp, juicy tomato or a vibrant, leafy lettuce directly from your indoor garden, knowing exactly where it came from and how it was grown.
This method offers a fantastic alternative for those with limited outdoor space, challenging climates, or simply a desire to experiment with innovative gardening techniques. It’s also a fantastic educational opportunity for children, teaching them about plant life cycles, nutrient requirements, and the importance of sustainable food production.
But the best part? The possibilities are endless! Feel free to experiment with different types of vegetables. Leafy greens like spinach, kale, and lettuce thrive in hydroponic systems, as do herbs like basil, mint, and parsley. You can even try your hand at growing strawberries, peppers, or even dwarf tomatoes. The key is to research the specific needs of each plant and adjust your nutrient solution and lighting accordingly.
Don’t be afraid to get creative with your setup! You can repurpose old containers, build your own custom frames, or even integrate your hydroponic system into your existing home decor. The only limit is your imagination.
We understand that venturing into the world of hydroponics can seem daunting at first, but trust us, it’s much easier than you think. With a little bit of planning, some basic materials, and a willingness to learn, you can be enjoying fresh, homegrown vegetables in no time.
Ready to take the plunge? We wholeheartedly encourage you to give this DIY home hydroponics vegetables system a try. We’re confident that you’ll be amazed by the results. And more importantly, we want to hear about your experience! Share your successes, your challenges, and your creative adaptations in the comments below. Let’s build a community of home hydroponic gardeners and learn from each other. Together, we can cultivate a greener, healthier, and more sustainable future, one delicious vegetable at a time.
Frequently Asked Questions (FAQ)
What exactly is hydroponics, and why should I try it?
Hydroponics is a method of growing plants without soil, using mineral nutrient solutions in water. Instead of soil providing nutrients, the water solution directly feeds the roots. There are several compelling reasons to try hydroponics, especially for growing vegetables at home. First, it often results in faster growth rates and higher yields compared to traditional soil-based gardening. Second, it requires less space, making it ideal for apartments, balconies, or indoor setups. Third, it uses less water, as the nutrient solution is recirculated. Fourth, you have greater control over the growing environment, minimizing pests and diseases. Finally, it’s a fascinating and rewarding way to connect with your food and learn about plant science.
What are the best vegetables to start with for a beginner hydroponic gardener?
For beginners, we highly recommend starting with leafy greens like lettuce, spinach, and kale. These vegetables are relatively easy to grow, have short growing cycles, and are quite forgiving of minor nutrient imbalances. Herbs like basil, mint, and parsley are also excellent choices. They are relatively low-maintenance and can add a burst of flavor to your meals. Avoid starting with fruiting vegetables like tomatoes or peppers until you have a good understanding of the basics, as they require more precise nutrient management and environmental control.
What kind of lighting do I need for my home hydroponic system?
The type of lighting you need depends on the vegetables you’re growing and the amount of natural light available. Leafy greens and herbs generally require less intense light than fruiting vegetables. If you have a sunny window that provides at least 6 hours of direct sunlight per day, that may be sufficient for some leafy greens. However, for optimal growth, especially indoors, we recommend using artificial grow lights. LED grow lights are the most energy-efficient and long-lasting option. Fluorescent grow lights are a more affordable alternative, but they produce less light and need to be replaced more frequently. The specific wattage and spectrum of light you need will depend on the size of your system and the types of vegetables you’re growing. Research the specific lighting requirements of your chosen vegetables for best results.
What kind of nutrient solution should I use?
You can purchase pre-mixed hydroponic nutrient solutions specifically formulated for vegetables. These solutions typically come in two or three parts that you mix together according to the instructions on the label. Alternatively, you can mix your own nutrient solution using individual nutrient salts, but this requires more knowledge and precision. When choosing a nutrient solution, make sure it’s specifically designed for hydroponics and contains all the essential macronutrients (nitrogen, phosphorus, potassium) and micronutrients (iron, manganese, zinc, copper, boron, molybdenum) that plants need to thrive. Follow the manufacturer’s instructions carefully to avoid over- or under-fertilizing your plants.
How often should I change the nutrient solution?
The frequency of nutrient solution changes depends on the size of your system, the types of vegetables you’re growing, and the rate at which they’re consuming nutrients. As a general rule, you should change the nutrient solution every 1-2 weeks. However, it’s important to monitor the pH and EC (electrical conductivity) of the solution regularly. The pH should be between 5.5 and 6.5 for most vegetables. The EC measures the concentration of nutrients in the solution. If the pH or EC drifts outside the optimal range, it’s a sign that the nutrient solution needs to be changed.
How do I prevent algae growth in my hydroponic system?
Algae growth is a common problem in hydroponic systems, as algae thrive in moist, nutrient-rich environments with plenty of light. To prevent algae growth, keep your nutrient solution covered and shielded from direct sunlight. Use opaque containers and tubing to block light from reaching the solution. You can also add a small amount of hydrogen peroxide to the solution to kill algae. However, be careful not to add too much, as it can also harm your plants. Regularly clean your system to remove any algae that does grow.
What do I do if my plants start to show signs of nutrient deficiencies?
Nutrient deficiencies can manifest in various ways, such as yellowing leaves, stunted growth, or deformed fruits. If you suspect a nutrient deficiency, first check the pH and EC of your nutrient solution to ensure they are within the optimal range. If the pH and EC are correct, you may need to adjust the nutrient solution to provide the missing nutrients. Research the specific nutrient deficiency symptoms for your chosen vegetables to identify the problem and choose the appropriate solution. You can also consult with a hydroponics expert or online forum for advice.
Can I grow organic vegetables using hydroponics?
While hydroponics is not inherently organic, it is possible to grow vegetables using organic nutrient solutions. However, it’s important to note that the definition of “organic” in hydroponics is still debated, as traditional organic certification standards are based on soil-based agriculture. Look for nutrient solutions that are certified organic by a reputable organization. Also, ensure that all other components of your system, such as the containers and growing media, are made from organic materials.
How do I deal with pests and diseases in my hydroponic system?
While hydroponics can minimize pests and diseases compared to soil-based gardening, they can still occur. Regularly inspect your plants for signs of pests or diseases. If you find any, take action immediately to prevent them from spreading. You can use organic pest control methods, such as insecticidal soap or neem oil, to control pests. For diseases, ensure good air circulation and avoid overwatering. You can also use organic fungicides to treat fungal infections.
Where can I find more information and resources about home hydroponics vegetables?
There are many excellent resources available online and in libraries about home hydroponics vegetables. Search for reputable websites, blogs, and forums dedicated to hydroponics. Look for books and articles that provide detailed information on specific vegetables and hydroponic techniques. You can also connect with other hydroponic gardeners in your community or online to share tips and advice. Don’t be afraid to experiment and learn from your mistakes. The most important thing is to have fun and enjoy the process of growing your own fresh, healthy vegetables at home.

Leave a Comment