

Honeydew Growing Tips: Ever dreamt of biting into a perfectly ripe, juicy honeydew melon, bursting with sweetness, straight from your own backyard? I know I have! There’s something incredibly satisfying about nurturing a plant from seed to fruit, and with the right knowledge, growing your own honeydew is totally achievable, even if you’re a beginner gardener.
For centuries, melons like honeydew have been cultivated across various cultures, prized for their refreshing taste and nutritional benefits. From ancient Egypt to the royal gardens of Europe, melons have held a special place in culinary history. But you don’t need to be royalty to enjoy the fruits (or rather, melons!) of your labor.
Many people shy away from growing honeydew, thinking it’s too difficult or requires a sprawling farm. But that’s where these honeydew growing tips come in! I’m going to share some simple, effective DIY tricks and hacks that will help you cultivate healthy, delicious honeydew melons, even in a small garden or container. Imagine the satisfaction of serving a homegrown honeydew salad at your next summer gathering or simply enjoying a sweet slice on a warm afternoon. Let’s get started and turn your gardening dreams into a delicious reality!
DIY Guide: How to Grow Your Own Honey Melons
Hey everyone! I love honey melons, and what could be better than growing them yourself? It’s not as hard as you think, and the taste of homegrown melons is just unbeatable. In this guide, I’ll show you step by step how to successfully grow your own honey melons. Let’s get started!
What You Need:
Before we begin, here’s a list of the essentials for growing honey melons:
- Honey melon seeds (best to choose a variety suited for your climate)
- Seedling pots or trays
- Seed-starting soil
- Garden soil or compost
- A sunny spot (at least 6-8 hours of sunlight per day)
- Watering can or garden hose
- Mulch (straw, wood chips, or similar)
- Support for climbing (optional but recommended)
- Garden shears
- Fertilizer (optional, but it can promote growth)
Phase 1: Starting the Seeds
Starting your honey melon seeds is the first and most important step. This is where you lay the foundation for a successful harvest.
Step 1: Seed Preparation
- Soak the seeds: To speed up germination, soak the seeds in lukewarm water for 24 hours. This helps soften the hard outer shell, which can boost germination rates.
Step 2: Sowing the Seeds
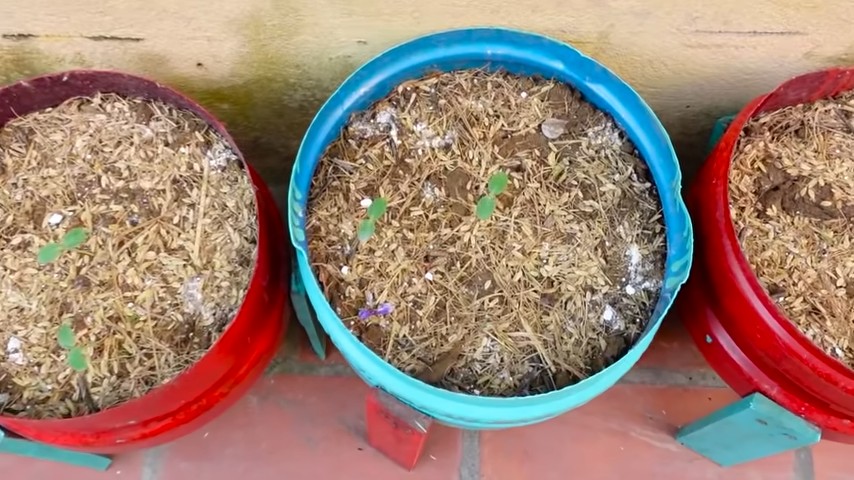
- Fill the pots: Fill your seedling pots or trays with seed-starting soil. Press the soil lightly down.
- Sow the seeds: Place 2-3 seeds per pot about 1-2 cm deep in the soil. Cover the seeds with a thin layer of soil.
- Water gently: Water the seeds gently, ensuring the soil is moist but not soaked.
Step 3: Warmth and Light
- Place in a warm spot: Set the pots in a warm, bright location, ideally between 20 and 25°C. A windowsill or mini greenhouse works well.
- Keep soil moist: Maintain consistent moisture, but avoid standing water.
Step 4: Patience
- Wait for germination: Germination usually takes 7-14 days. Once the first seedlings appear, remove the weaker ones, leaving the strongest seedling in each pot.
Phase 2: Preparing the Garden Bed
While the seeds are germinating, you can prepare your garden bed. Honey melons love the sun and need nutrient-rich soil.
Step 1: Choosing the Location
- Sun is key: Select a sunny spot that receives at least 6-8 hours of sunlight daily. Honey melons thrive in warm conditions.
Step 2: Preparing the Soil
- Loosen the soil: Break up the soil with a shovel or garden fork, removing any weeds or stones.
- Improve soil quality: Mix in compost or well-rotted manure for a rich, nutrient-dense soil. I also add a bit of horn shavings for extra nourishment.
Step 3: Forming the Bed
- Shape the bed: Lightly mound the bed to improve drainage. Honey melons do not like standing water, so the soil should drain well.
- Mulch (optional): You can cover the bed with mulch at this stage to help retain moisture and suppress weeds.
Phase 3: Transplanting the Seedlings
Once the plants are strong enough and the weather is warm, it’s time to transplant your honey melon seedlings into the garden.
Step 1: Hardening Off
- Acclimatize the plants: Before planting them outdoors, gradually introduce the seedlings to outdoor conditions by placing them outside for a few hours each day. Start by keeping them in the shade, and increase exposure to sunlight over a week.
Step 2: Planting Time
- Wait for frost-free weather: Only transplant your seedlings after the last frost, usually around mid-May.
- Spacing: Space the seedlings about 50-60 cm apart, giving them room to grow.
- Digging holes: Dig holes large enough for the root balls of your seedlings.
Step 3: Planting
- Set the plants: Carefully place the seedlings into the holes. The top of the root ball should be level with the soil surface.
- Fill and press: Fill the holes with soil and gently press down to secure the plants.
- Water generously: Water the seedlings thoroughly to help them settle in.
Step 4: Support (Optional)
- Use a support structure: Honey melons can grow large and sprawling. Providing a trellis or support can prevent them from touching the ground, reducing the risk of rot. I prefer using a simple wire frame or a fence.
Phase 4: Care and Maintenance
Proper care is key to a bountiful honey melon harvest.
Step 1: Watering
- Water regularly: Honey melons require consistent watering, especially during dry spells. Ensure the soil is always moist but not soggy. Water early in the morning to let the leaves dry during the day, preventing fungal diseases.
Step 2: Fertilizing (Optional)
- Use organic fertilizers: Feed the plants every 2-3 weeks with organic fertilizer, such as compost tea or nettle liquid manure, which promotes growth and fruiting.
Step 3: Pruning and Managing Growth
- Prune regularly: Trim off any side shoots or excess leaves to encourage fruit growth along the main stem.
- Remove dead or damaged leaves: Prevent the spread of diseases by removing yellowing or diseased leaves.
Step 4: Pest Control
- Watch out for pests: Common pests include aphids, cucumber beetles, and snails. Check the plants regularly for signs of infestation.
- Use natural pest control: You can apply neem oil or insecticidal soap to manage pests, and encourage beneficial insects like ladybugs.
Phase 5: Harvesting the Melons
Finally, the moment you’ve been waiting for – harvesting your honey melons!
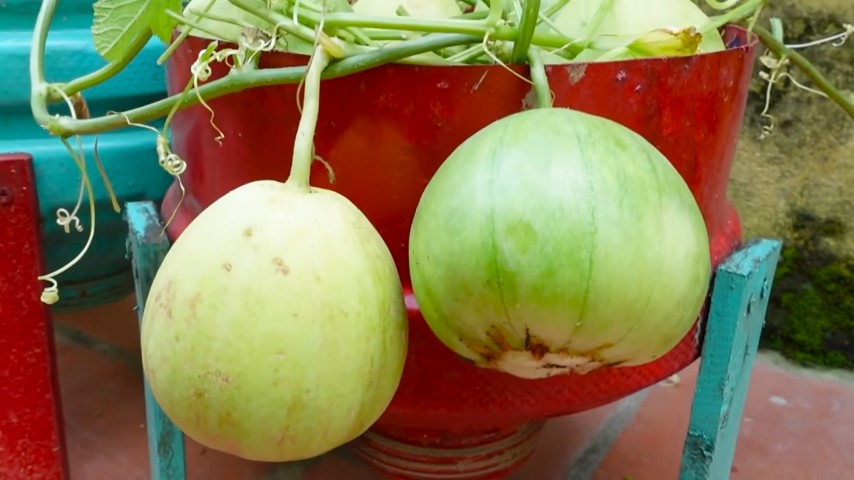
Step 1: Recognizing Ripeness
- Look for a sweet scent: Honey melons are ripe when they emit a sweet fragrance.
- Check for softness: Gently press on the melon. It should give slightly under pressure.
- Color change: The melon’s skin will transition from green to yellowish when it’s ready.
Step 2: Harvesting
- Cut carefully: Use garden shears to cut the melon from the vine, leaving a small stem attached.
Step 3: Enjoying
- Cool and serve: Honey melons are best enjoyed chilled. Slice and serve them as a refreshing snack or add to fruit salads.
Additional Tips and Tricks:
- Variety Selection: Choose a honey melon variety suited for your climate. Some melons may do better in specific regions.
- Pollination: To encourage fruiting, hand-pollinate the flowers by transferring pollen from male to female blooms with a small brush.
- Protect from birds: Birds love honey melons! Protect your harvest by using bird nets or scarecrows.
- Storage: Honey melons don’t last long once ripe, so store them in the fridge and consume within a few days.
Conclusion
I hope this guide helps you successfully grow your own honey melons. It’s such a rewarding feeling to harvest your own melons and enjoy them fresh from the garden. Happy gardening, and I wish you a great harvest!
Conclusion
So, there you have it! Mastering these honeydew growing tips isn’t just about cultivating a delicious melon; it’s about unlocking a rewarding gardening experience. From selecting the perfect seeds to nurturing your vines through their various stages, each step contributes to the ultimate goal: a sweet, juicy honeydew melon grown with your own two hands.
Why is this DIY approach a must-try? Because store-bought honeydew, while convenient, often lacks the intense flavor and satisfying sweetness of a homegrown melon. Commercial growers prioritize yield and shelf life, sometimes at the expense of taste. By taking control of the growing process, you can ensure your honeydew receives the optimal care and attention it needs to develop its full potential. Plus, there’s an undeniable satisfaction in harvesting something you’ve nurtured from seed to fruit.
But the journey doesn’t end with the basic techniques. Feel free to experiment! Try different varieties of honeydew, such as the Honey Globe or the Temptation. Consider companion planting with herbs like basil or marigolds to deter pests and enhance flavor. You can also explore different trellising methods to maximize space and improve air circulation. For those in cooler climates, starting your seeds indoors and using row covers can extend your growing season and protect your plants from frost.
Remember, gardening is a learning process. Don’t be discouraged if you encounter challenges along the way. Each season brings new opportunities to refine your techniques and improve your results. The key is to observe your plants closely, adapt to their needs, and never stop learning.
We wholeheartedly encourage you to put these honeydew growing tips into practice. Imagine biting into a perfectly ripe, sun-warmed honeydew melon that you grew yourself. It’s a taste of summer that’s truly worth the effort.
And finally, we want to hear about your experiences! Share your successes, your challenges, and any unique techniques you discover along the way. Your insights can help other gardeners on their own honeydew-growing journeys. Post pictures of your thriving vines and bountiful harvests on social media using #HomegrownHoneydew. Let’s create a community of passionate honeydew enthusiasts! Happy gardening!
Frequently Asked Questions (FAQ)
What is the best time to plant honeydew?
The ideal time to plant honeydew melons is after the last frost, when the soil temperature has reached at least 65°F (18°C). Honeydew melons are warm-season crops and are sensitive to cold temperatures. Planting too early can stunt their growth or even kill them. In most regions, this typically falls between late spring and early summer. If you live in an area with a short growing season, consider starting your seeds indoors 4-6 weeks before the last expected frost. This will give your plants a head start and allow them to mature before the weather turns cold.
How much sunlight do honeydew melons need?
Honeydew melons require at least 6-8 hours of direct sunlight per day to thrive. Sunlight is essential for photosynthesis, the process by which plants convert light energy into chemical energy for growth and fruit production. Choose a planting location that receives full sun throughout the day. If your garden doesn’t get enough sunlight, you may need to supplement with artificial grow lights. Insufficient sunlight can result in smaller, less flavorful melons.
What type of soil is best for growing honeydew?
Honeydew melons prefer well-drained, fertile soil with a pH between 6.0 and 6.8. The soil should be rich in organic matter, such as compost or well-rotted manure. Before planting, amend the soil with these materials to improve its fertility and drainage. Avoid heavy clay soils, as they can retain too much water and lead to root rot. If you have clay soil, consider adding sand or other drainage-improving amendments. A soil test can help you determine the pH and nutrient levels of your soil and guide you in making necessary adjustments.
How often should I water my honeydew plants?
Honeydew melons need consistent watering, especially during hot, dry weather. Water deeply and regularly, aiming to keep the soil consistently moist but not waterlogged. Avoid overhead watering, as this can promote fungal diseases. Instead, use a soaker hose or drip irrigation to deliver water directly to the roots. During fruit development, increase watering to ensure the melons receive adequate moisture. However, reduce watering as the melons ripen to prevent them from cracking.
What are some common pests and diseases that affect honeydew melons?
Honeydew melons are susceptible to various pests and diseases, including aphids, squash bugs, vine borers, powdery mildew, and fusarium wilt. Regularly inspect your plants for signs of infestation or disease. Use organic pest control methods, such as insecticidal soap or neem oil, to control pests. To prevent diseases, ensure good air circulation around your plants, avoid overhead watering, and practice crop rotation. Choose disease-resistant varieties of honeydew melons whenever possible.
How do I know when my honeydew melon is ripe?
Determining when a honeydew melon is ripe can be tricky, but there are a few key indicators to look for. The skin should turn from a pale green to a creamy yellow color. The blossom end (the end opposite the stem) should be slightly soft and give slightly to gentle pressure. The stem should also begin to crack or slip easily from the vine. Ripe honeydew melons will also have a sweet, fragrant aroma. Avoid picking melons that are still hard and green, as they will not ripen properly off the vine.
Can I grow honeydew melons in containers?
Yes, you can grow honeydew melons in containers, but you’ll need a large container (at least 20 gallons) to accommodate their extensive root system. Choose a container with good drainage and fill it with a high-quality potting mix. Provide a trellis or other support for the vines to climb. Container-grown honeydew melons may require more frequent watering and fertilization than those grown in the ground. Select a compact or bush variety of honeydew melon for container growing.
How do I fertilize my honeydew plants?
Honeydew melons benefit from regular fertilization throughout the growing season. Use a balanced fertilizer (e.g., 10-10-10) at planting time, and then side-dress with a nitrogen-rich fertilizer when the vines begin to run. Once the melons start to develop, switch to a fertilizer that is higher in phosphorus and potassium to promote fruit development. Avoid over-fertilizing, as this can lead to excessive vine growth and reduced fruit production. Follow the instructions on the fertilizer label carefully.
How can I improve the sweetness of my honeydew melons?
Several factors can influence the sweetness of honeydew melons, including sunlight, water, and soil fertility. Ensure your plants receive plenty of sunlight and water them consistently, especially during fruit development. Avoid over-watering as the melons ripen, as this can dilute their flavor. Amend the soil with compost or other organic matter to improve its fertility. You can also try adding Epsom salts to the soil, as magnesium can enhance sweetness. Choose varieties known for their sweetness.
What should I do if my honeydew melon vines are not producing fruit?
If your honeydew melon vines are not producing fruit, there could be several reasons. First, ensure that your plants are receiving enough sunlight and water. Second, check for signs of pests or diseases that could be affecting fruit production. Third, make sure your plants are being properly pollinated. Honeydew melons require pollination to set fruit. If you are not seeing bees or other pollinators in your garden, you may need to hand-pollinate the flowers. Finally, be patient. It can take several weeks for honeydew melons to develop after pollination.

Leave a Comment