

Indoor vegetable gardening: Ever dreamt of plucking a ripe tomato straight from the vine, right in your own kitchen? Or snipping fresh herbs for dinner, even when the snow is falling outside? I know I have! The idea of bringing the bounty of the garden indoors is incredibly appealing, and it’s more achievable than you might think.
For centuries, people have sought ways to cultivate plants indoors, from the elaborate orangeries of European royalty to the humble windowsill herb gardens of everyday homes. This desire to connect with nature, regardless of the season or climate, speaks to a deep-seated human need. Today, with concerns about food security and a growing interest in sustainable living, indoor vegetable gardening is experiencing a major resurgence.
But let’s be honest, getting started can feel overwhelming. Where do you begin? What do you need? That’s where this DIY guide comes in! I’m going to share some of my favorite, tried-and-true tricks and hacks to help you create a thriving indoor vegetable garden, no matter your experience level or the size of your space. Forget expensive equipment and complicated setups. We’re focusing on simple, affordable, and effective methods that will have you harvesting fresh produce in no time. Get ready to unleash your inner green thumb and transform your home into a year-round edible oasis!

Dein eigener Indoor-Gemüsegarten: So klappt’s!
Hey Gärtner-Freunde! Habt ihr auch genug von teurem, geschmacklosem Gemüse aus dem Supermarkt? Oder wohnt ihr vielleicht in einer Wohnung ohne Garten und träumt trotzdem von frischen Kräutern und knackigem Gemüse? Dann seid ihr hier genau richtig! Ich zeige euch, wie ihr euren eigenen Indoor-Gemüsegarten anlegen könnt – ganz einfach und ohne viel Aufwand. Lasst uns loslegen!
Was du für deinen Indoor-Gemüsegarten brauchst
Bevor wir mit dem Pflanzen beginnen, brauchen wir natürlich das richtige Equipment. Keine Sorge, ihr müsst nicht gleich ein Vermögen ausgeben. Viele Dinge habt ihr vielleicht schon zu Hause. Hier eine Liste der wichtigsten Dinge:
* Saatgut: Wählt Gemüsesorten, die sich gut für den Anbau in Innenräumen eignen (dazu später mehr).
* Anzuchterde: Spezielle Anzuchterde ist nährstoffarm und locker, ideal für die Keimung der Samen.
* Töpfe oder Behälter: Von kleinen Anzuchttöpfen bis hin zu größeren Pflanzgefäßen ist alles möglich. Achtet auf eine gute Drainage!
* Pflanzenerde: Nachdem die Sämlinge etwas größer sind, brauchen sie nährstoffreichere Erde.
* Pflanzenlampe (optional, aber empfohlen): Gerade im Winter oder in dunkleren Wohnungen sorgt eine Pflanzenlampe für ausreichend Licht.
* Sprühflasche: Zum Befeuchten der Erde und der jungen Pflanzen.
* Gießkanne: Zum Bewässern der Pflanzen, wenn sie größer sind.
* Dünger: Flüssigdünger oder Langzeitdünger, um die Pflanzen mit Nährstoffen zu versorgen.
* Schere oder Messer: Zum Vereinzeln der Sämlinge und zum Ernten.
* Etiketten: Um die verschiedenen Gemüsesorten zu kennzeichnen.
* Ein sonniger Platz oder eine Pflanzenlampe: Gemüse braucht Licht!
Welches Gemüse eignet sich für den Indoor-Anbau?
Nicht jedes Gemüse fühlt sich in Innenräumen wohl. Einige Sorten sind aber besonders pflegeleicht und liefern auch ohne Garten eine reiche Ernte. Hier meine Top-Empfehlungen:
* Kräuter: Basilikum, Petersilie, Schnittlauch, Minze, Oregano, Thymian – Kräuter sind super einfach anzubauen und bringen frischen Geschmack in eure Küche.
* Salat: Pflücksalat, Feldsalat, Rucola – Salat wächst schnell und kann mehrmals geerntet werden.
* Radieschen: Radieschen sind unkompliziert und liefern schon nach wenigen Wochen eine knackige Ernte.
* Chili und Paprika: Chili und Paprika brauchen etwas mehr Licht und Wärme, aber mit einer Pflanzenlampe klappt es auch in Innenräumen.
* Tomaten (kleine Sorten): Buschtomaten oder Cherrytomaten sind ideal für den Anbau im Topf.
* Spinat: Babyspinat wächst schnell und kann mehrmals geerntet werden.
* Zwiebeln und Knoblauch: Frühlingszwiebeln und Knoblauchgrün sind einfach anzubauen und bringen Würze in eure Gerichte.
* Microgreens: Kresse, Senf, Rettich – Microgreens sind super schnellwachsend und liefern eine geballte Ladung an Nährstoffen.
Schritt-für-Schritt-Anleitung: So ziehst du dein eigenes Gemüse
Jetzt geht’s ans Eingemachte! Ich zeige euch, wie ihr Schritt für Schritt euren eigenen Indoor-Gemüsegarten anlegt.
1. Vorbereitung der Anzucht
1. Wähle deine Samen aus: Entscheide dich für die Gemüsesorten, die du anbauen möchtest. Achte auf die Angaben auf der Saatguttüte bezüglich der Keimdauer und der Lichtbedürfnisse.
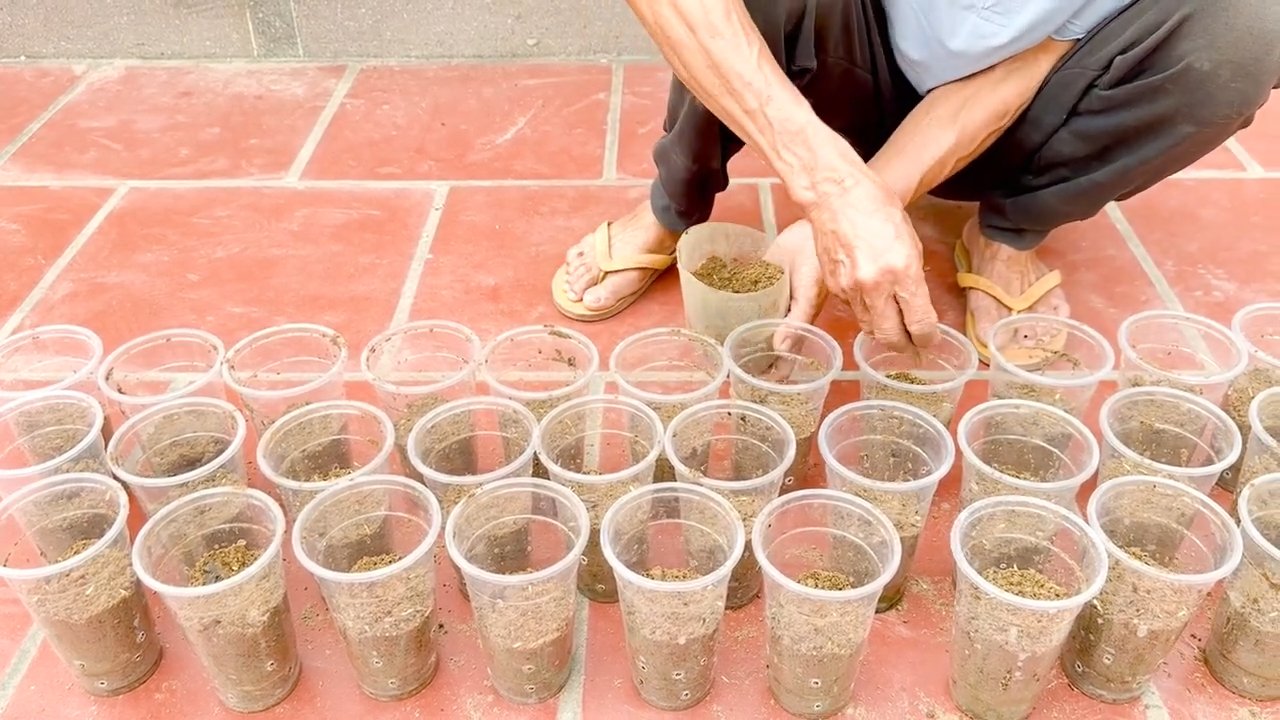
2. Fülle die Anzuchttöpfe: Fülle die Anzuchttöpfe oder eine Anzuchtschale mit Anzuchterde. Drücke die Erde leicht an.
3. Säe die Samen aus: Verteile die Samen gleichmäßig auf der Erde. Achte darauf, dass du nicht zu viele Samen in einen Topf säst. Bedecke die Samen mit einer dünnen Schicht Erde.
4. Befeuchte die Erde: Besprühe die Erde vorsichtig mit einer Sprühflasche. Die Erde sollte feucht, aber nicht nass sein.
5. Decke die Anzucht ab (optional): Um die Luftfeuchtigkeit zu erhöhen, kannst du die Anzuchttöpfe mit einer durchsichtigen Folie oder einem Deckel abdecken. Achte darauf, dass die Folie nicht direkt auf der Erde aufliegt.
6. Stelle die Anzucht an einen warmen Ort: Die meisten Samen keimen am besten bei einer Temperatur von 20-25 Grad Celsius. Stelle die Anzucht an einen warmen Ort, z.B. auf eine Fensterbank über der Heizung oder in der Nähe eines Heizkörpers.
2. Pflege der Sämlinge
1. Kontrolliere die Feuchtigkeit: Überprüfe regelmäßig die Feuchtigkeit der Erde. Die Erde sollte immer leicht feucht sein. Besprühe die Erde bei Bedarf mit einer Sprühflasche.
2. Lüfte die Anzucht: Wenn du die Anzucht abgedeckt hast, lüfte sie regelmäßig, um Schimmelbildung zu vermeiden.
3. Entferne die Abdeckung: Sobald die ersten Sämlinge aus der Erde sprießen, kannst du die Abdeckung entfernen.
4. Stelle die Sämlinge an einen hellen Ort: Die Sämlinge brauchen jetzt viel Licht. Stelle sie an einen hellen Ort, z.B. auf eine Fensterbank oder unter eine Pflanzenlampe.
5. Vereinzele die Sämlinge: Wenn die Sämlinge zu dicht stehen, musst du sie vereinzeln. Entferne die schwächsten Sämlinge, so dass die verbleibenden Pflanzen genügend Platz zum Wachsen haben.
6. Gieße die Sämlinge vorsichtig: Gieße die Sämlinge vorsichtig mit einer Gießkanne oder einer Sprühflasche. Vermeide Staunässe.
3. Umtopfen und Weiterpflege
1. Wähle größere Töpfe: Sobald die Sämlinge groß genug sind (ca. 5-10 cm), musst du sie in größere Töpfe umtopfen. Wähle Töpfe mit einem Durchmesser von mindestens 15 cm.
2. Fülle die Töpfe mit Pflanzenerde: Fülle die Töpfe mit Pflanzenerde. Drücke die Erde leicht an.
3. Hebe die Sämlinge vorsichtig aus: Hebe die Sämlinge vorsichtig aus den Anzuchttöpfen. Achte darauf, die Wurzeln nicht zu beschädigen.
4. Pflanze die Sämlinge in die neuen Töpfe: Pflanze die Sämlinge in die neuen Töpfe. Die Oberkante des Wurzelballens sollte mit der Erdoberfläche abschließen.
5. Gieße die Pflanzen: Gieße die Pflanzen nach dem Umtopfen gründlich.
6. Dünge die Pflanzen: Beginne nach einigen Wochen mit dem Düngen der Pflanzen. Verwende einen Flüssigdünger oder einen Langzeitdünger. Beachte die Dosierungsanleitung auf der Verpackung.
7. Gieße die Pflanzen regelmäßig: Gieße die Pflanzen regelmäßig, aber vermeide Staunässe. Die Erde sollte immer leicht feucht sein.
8. Sorge für ausreichend Licht: Die Pflanzen brauchen viel Licht. Stelle sie an einen hellen Ort oder verwende eine Pflanzenlampe.
9. Drehe die Töpfe regelmäßig: Drehe die Töpfe regelmäßig, damit die Pflanzen gleichmäßig wachsen.
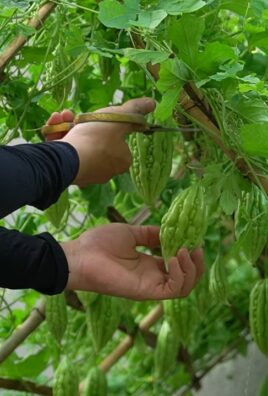
10. Ernte dein Gemüse: Sobald das Gemüse reif ist, kannst du es ernten. Ernte regelmäßig, um die Produktion neuer Früchte anzuregen.
Zusätzliche Tipps für deinen Indoor-Gemüsegarten
* Achte auf die richtige Temperatur: Die meisten Gemüsesorten fühlen sich bei einer Temperatur von 18-25 Grad Celsius wohl.
* Vermeide Zugluft: Zugluft kann die Pflanzen schädigen. Stelle die Pflanzen nicht in der Nähe von Fenstern oder Türen auf
Conclusion
So, there you have it! Transforming your living space into a thriving, miniature farm with **indoor vegetable gardening** is not only achievable but also incredibly rewarding. We’ve explored the simple yet effective DIY trick of using repurposed containers and readily available materials to create a sustainable and budget-friendly system for growing your own fresh produce.
Why is this a must-try? Because it empowers you to take control of your food source, reduces your carbon footprint, and adds a touch of vibrant greenery to your home. Imagine the satisfaction of harvesting your own juicy tomatoes, crisp lettuce, or flavorful herbs, all grown right on your windowsill or balcony. No more relying solely on grocery stores with their often-questionable produce quality and environmental impact.
Beyond the practical benefits, indoor vegetable gardening offers a therapeutic and engaging hobby. Nurturing your plants, watching them grow, and ultimately enjoying the fruits (and vegetables!) of your labor is a deeply fulfilling experience. It’s a fantastic way to connect with nature, even in the heart of the city.
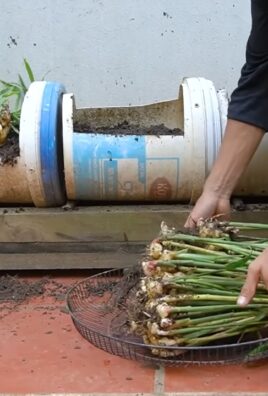
But the possibilities don’t end here! Feel free to experiment with different container sizes, soil mixtures, and lighting arrangements to find what works best for your specific space and preferences. Consider adding companion plants to your garden to naturally deter pests and enhance growth. For example, basil planted near tomatoes can improve their flavor and repel insects. You could also explore vertical gardening techniques to maximize space in smaller apartments. Think hanging planters, stacked shelves, or even DIY pallet gardens.
And don’t be afraid to get creative with your container choices! Old teacups, mason jars, or even repurposed plastic bottles can all be transformed into charming and functional planters. Just be sure to provide adequate drainage to prevent root rot.
We encourage you to embrace this DIY trick and embark on your own indoor vegetable gardening adventure. Start small, learn as you go, and most importantly, have fun! The journey of growing your own food is a rewarding one, filled with learning, discovery, and delicious harvests.
Once you’ve given it a try, we’d love to hear about your experience! Share your photos, tips, and challenges in the comments below. Let’s create a community of indoor gardeners, supporting each other and inspiring others to grow their own food, no matter where they live. Together, we can cultivate a greener, healthier, and more sustainable future, one indoor garden at a time. So, grab your seeds, gather your containers, and get growing! Your taste buds (and the planet) will thank you.
Frequently Asked Questions (FAQ)
What are the best vegetables to grow indoors for beginners?
For beginners venturing into indoor vegetable gardening, some of the easiest and most rewarding options include:
* **Leafy Greens:** Lettuce, spinach, kale, and arugula are relatively low-maintenance and can be harvested continuously as needed. They thrive in bright, indirect light and don’t require a lot of space.
* **Herbs:** Basil, mint, parsley, chives, and oregano are all excellent choices for indoor growing. They add flavor to your meals and are relatively easy to care for. Most herbs prefer a sunny windowsill.
* **Radishes:** These fast-growing root vegetables can be harvested in as little as a month. They require well-drained soil and plenty of sunlight.
* **Cherry Tomatoes:** With proper support and adequate sunlight, cherry tomatoes can thrive indoors. Choose a compact variety specifically bred for container gardening.
* **Peppers:** Similar to tomatoes, peppers need plenty of sunlight and well-drained soil. Opt for smaller varieties like chili peppers or bell peppers.
How much sunlight do indoor vegetables need?
Most vegetables require at least 6-8 hours of direct sunlight per day to thrive. If you don’t have a south-facing window that provides sufficient sunlight, you may need to supplement with artificial grow lights. LED grow lights are energy-efficient and provide the full spectrum of light that plants need for photosynthesis. Position the grow lights a few inches above the plants and adjust the height as they grow.
What type of soil should I use for indoor vegetable gardening?
Avoid using garden soil for indoor containers, as it can be too heavy and may contain pests or diseases. Instead, opt for a high-quality potting mix specifically formulated for container gardening. These mixes are typically lightweight, well-draining, and contain essential nutrients for plant growth. You can also create your own potting mix by combining equal parts peat moss, perlite, and vermiculite.
How often should I water my indoor vegetables?
The frequency of watering depends on several factors, including the type of vegetable, the size of the container, and the temperature and humidity of your home. As a general rule, water when the top inch of soil feels dry to the touch. Avoid overwatering, as this can lead to root rot. Ensure that your containers have drainage holes to allow excess water to escape.
How do I deal with pests in my indoor vegetable garden?
Pests can be a problem in indoor gardens, but there are several natural and effective ways to control them. Regularly inspect your plants for signs of pests, such as aphids, spider mites, or whiteflies. You can often remove pests by hand or with a strong spray of water. Insecticidal soap or neem oil can also be used to control infestations. Avoid using harsh chemicals, as they can harm your plants and contaminate your produce.
Can I grow vegetables indoors year-round?
Yes, with proper planning and care, you can grow vegetables indoors year-round. Choose vegetables that are well-suited to indoor growing conditions and provide them with adequate sunlight, water, and nutrients. You may need to adjust your growing practices depending on the season. For example, you may need to supplement with grow lights during the winter months when natural sunlight is limited.
How do I fertilize my indoor vegetables?
Indoor vegetables need regular fertilization to thrive. Use a balanced liquid fertilizer specifically formulated for vegetables. Follow the instructions on the fertilizer label for proper dilution and application. Fertilize your plants every 2-4 weeks, depending on their growth rate and nutrient needs.
What size container should I use for indoor vegetable gardening?
The size of the container depends on the type of vegetable you are growing. Leafy greens and herbs can be grown in smaller containers, while larger vegetables like tomatoes and peppers require larger pots. As a general rule, choose a container that is at least 6-8 inches in diameter for smaller vegetables and 12-18 inches in diameter for larger vegetables.
How do I pollinate my indoor vegetables?
Some vegetables, such as tomatoes and peppers, require pollination to produce fruit. Since there are no bees or other pollinators indoors, you will need to hand-pollinate your plants. Use a small paintbrush or cotton swab to transfer pollen from the male flower parts (anthers) to the female flower parts (pistils). You can also gently shake the plants to help release pollen.
What are some common mistakes to avoid when starting an indoor vegetable garden?
Some common mistakes to avoid include:
* Using garden soil instead of potting mix.
* Overwatering or underwatering your plants.
* Not providing enough sunlight.
* Using containers without drainage holes.
* Not fertilizing your plants regularly.
* Ignoring pest problems.
By avoiding these mistakes and following the tips outlined in this guide, you can successfully grow your own fresh and delicious vegetables indoors. Happy gardening!
Leave a Comment