

Lazy gardener cabbage growing doesn’t have to be an oxymoron! Let’s face it, we all love the idea of a bountiful garden overflowing with fresh, homegrown vegetables, but sometimes the reality of weeding, watering, and constant tending can feel a little… overwhelming. Have you ever dreamed of harvesting crisp, delicious cabbages without spending hours toiling in the soil? Well, you’re in the right place!
Cabbage, a staple in cuisines around the world for centuries, boasts a rich history. From its humble beginnings as a wild leafy green to its cultivation by the ancient Romans and Greeks, cabbage has nourished generations. But who says you need to be a seasoned farmer to enjoy this versatile vegetable?
In this article, I’m going to share some ingenious DIY tricks and hacks that will allow even the laziest gardener (like myself!) to successfully grow cabbages. We’ll explore simple techniques to minimize effort, maximize yield, and enjoy the satisfaction of harvesting your own homegrown goodness. Forget back-breaking labor and endless hours of weeding; with these tips, lazy gardener cabbage growing becomes a reality. Get ready to unlock the secrets to a thriving cabbage patch with minimal fuss!
Der faule Gärtner: Kohl anbauen leicht gemacht!
Hey Leute, ich bin’s, euer fauler Gärtner-Freund! Ihr wollt frischen, knackigen Kohl aus dem eigenen Garten, aber habt keine Lust auf stundenlange Arbeit? Keine Sorge, ich zeige euch, wie ihr mit minimalem Aufwand eine reiche Kohlernte einfahren könnt. Dieser Guide ist perfekt für alle, die wenig Zeit haben, aber trotzdem nicht auf selbstangebautes Gemüse verzichten wollen. Los geht’s!
Warum Kohl für faule Gärtner ideal ist
Kohl mag vielleicht nicht die erste Pflanze sein, die einem in den Sinn kommt, wenn man an “einfach” denkt, aber glaubt mir, mit den richtigen Tricks kann man ihn super unkompliziert anbauen. Hier sind ein paar Gründe, warum Kohl perfekt für faule Gärtner ist:
* Robustheit: Kohl ist relativ widerstandsfähig gegen Schädlinge und Krankheiten, besonders wenn man die richtigen Sorten wählt.
* Vielseitigkeit: Es gibt unzählige Kohlsorten, von Weißkohl über Rotkohl bis hin zu Grünkohl und Rosenkohl. Da ist für jeden Geschmack etwas dabei.
* Lagerfähigkeit: Viele Kohlsorten lassen sich gut lagern, sodass ihr auch im Winter noch von eurer Ernte profitieren könnt.
* Nährstoffreich: Kohl ist vollgepackt mit Vitaminen und Mineralstoffen – ein echter Gesundheitsbooster!
Die Vorbereitung: Der Schlüssel zum faulen Erfolg
Die Vorbereitung ist das A und O, um später möglichst wenig Arbeit zu haben. Hier sind die wichtigsten Schritte:
1. Die richtige Sorte wählen:
* Frühkohl: Ideal für eine frühe Ernte, braucht aber etwas mehr Aufmerksamkeit.
* Spätkohl: Robuster und lagerfähiger, perfekt für faule Gärtner. Sorten wie “Brunswick” oder “Langedijker Dauerweiß” sind empfehlenswert.
* Rosenkohl: Braucht etwas länger, ist aber sehr pflegeleicht, sobald er angewachsen ist.
* Grünkohl: Super robust und winterhart, kann den ganzen Winter über geerntet werden.
* Rotkohl: Auch sehr pflegeleicht und gut lagerfähig.
2. Den richtigen Standort finden:
* Sonnig: Kohl braucht mindestens 6 Stunden Sonne pro Tag.
* Gut durchlässiger Boden: Staunässe mag Kohl gar nicht.
* Windgeschützt: Besonders junge Pflanzen sind empfindlich gegen Wind.
3. Den Boden vorbereiten:
* Kompost: Reichert den Boden mit Nährstoffen an und verbessert die Struktur. Eine ordentliche Schicht Kompost (ca. 5-10 cm) ist ideal.
* Langzeitdünger: Ein organischer Langzeitdünger versorgt die Pflanzen über einen längeren Zeitraum mit Nährstoffen. Hornspäne sind eine gute Wahl.
* Boden lockern: Den Boden gründlich lockern, damit die Wurzeln gut wachsen können.
Die Aussaat oder Pflanzung: Der faule Weg zum Kohl
Es gibt zwei Möglichkeiten, Kohl anzubauen: Aussaat oder Pflanzung von Jungpflanzen. Für faule Gärtner empfehle ich die Pflanzung von Jungpflanzen, da sie weniger Arbeit macht und schneller zum Erfolg führt.
1. Aussaat (optional):
* Vorkultur: Ab März in Anzuchtschalen oder Töpfen aussäen.
* Direktsaat: Ab Mai direkt ins Beet säen.
* Saattiefe: Ca. 1 cm.
* Keimdauer: Ca. 1-2 Wochen.
* Pikieren: Wenn die Pflanzen groß genug sind, in größere Töpfe pikieren.
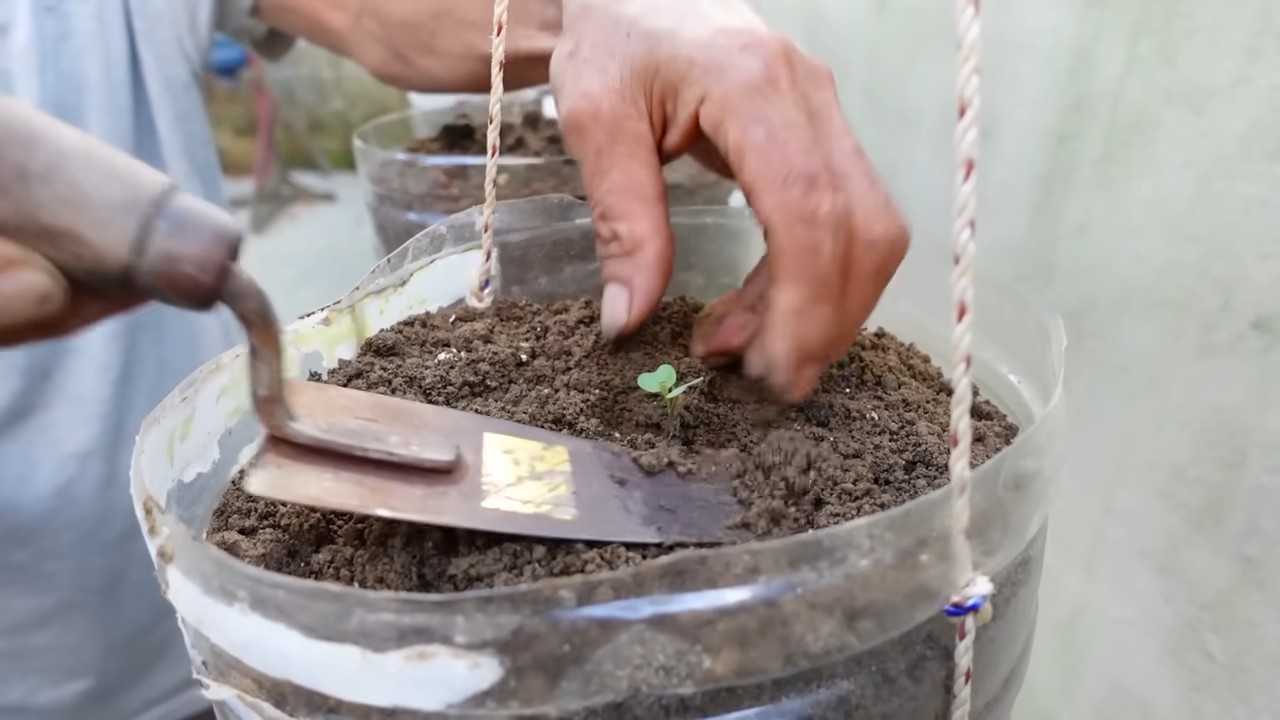
2. Pflanzung von Jungpflanzen (empfohlen):
* Kaufen: Jungpflanzen im Gartencenter oder online kaufen. Achtet auf gesunde, kräftige Pflanzen.
* Pflanzzeitpunkt: Ab Mitte Mai, wenn keine Frostgefahr mehr besteht.
* Pflanzabstand: Je nach Kohlsorte 40-60 cm zwischen den Pflanzen und 60-80 cm zwischen den Reihen.
* Pflanzloch: Ein Loch graben, das etwas größer ist als der Wurzelballen.
* Pflanze einsetzen: Die Pflanze vorsichtig aus dem Topf nehmen und ins Pflanzloch setzen.
* Angießen: Gründlich angießen.
Die Pflege: Weniger ist mehr!
Jetzt kommt der beste Teil: Die Pflege ist minimal! Hier sind meine faulen Gärtner-Tipps:
1. Gießen:
* Regelmäßig: Kohl braucht regelmäßig Wasser, besonders in trockenen Perioden.
* Morgens: Am besten morgens gießen, damit die Blätter abtrocknen können und Pilzkrankheiten vermieden werden.
* Mulchen: Eine Mulchschicht aus Stroh oder Rasenschnitt hält den Boden feucht und unterdrückt Unkraut.
2. Düngen:
* Nachdüngen: Nach ca. 4-6 Wochen mit einem organischen Dünger nachdüngen. Brennnesseljauche ist ein super Dünger und lässt sich leicht selbst herstellen.
* Weniger ist mehr: Überdüngung kann zu weichen, anfälligen Pflanzen führen.
3. Unkraut jäten:
* Regelmäßig: Unkraut regelmäßig entfernen, damit es dem Kohl keine Nährstoffe wegnimmt.
* Mulchen: Eine Mulchschicht hilft, Unkraut zu unterdrücken.
4. Schutz vor Schädlingen:
* Kohlweißling: Ein Netz über die Pflanzen spannen, um zu verhindern, dass der Kohlweißling seine Eier ablegt.
* Erdflöhe: Regelmäßig gießen und den Boden feucht halten.
* Schnecken: Schneckenkorn oder Schneckenzäune verwenden.
* Nützlinge fördern: Marienkäfer, Florfliegen und Schlupfwespen helfen, Schädlinge zu bekämpfen.
Die Ernte: Der Lohn der faulen Mühe
Endlich ist es soweit: Die Ernte! Der Zeitpunkt hängt von der Kohlsorte ab.
1. Weißkohl, Rotkohl: Wenn die Köpfe fest und prall sind.
2. Rosenkohl: Wenn die Röschen fest geschlossen sind.
3. Grünkohl: Kann den ganzen Winter über geerntet werden. Die Blätter werden nach dem ersten Frost süßer.
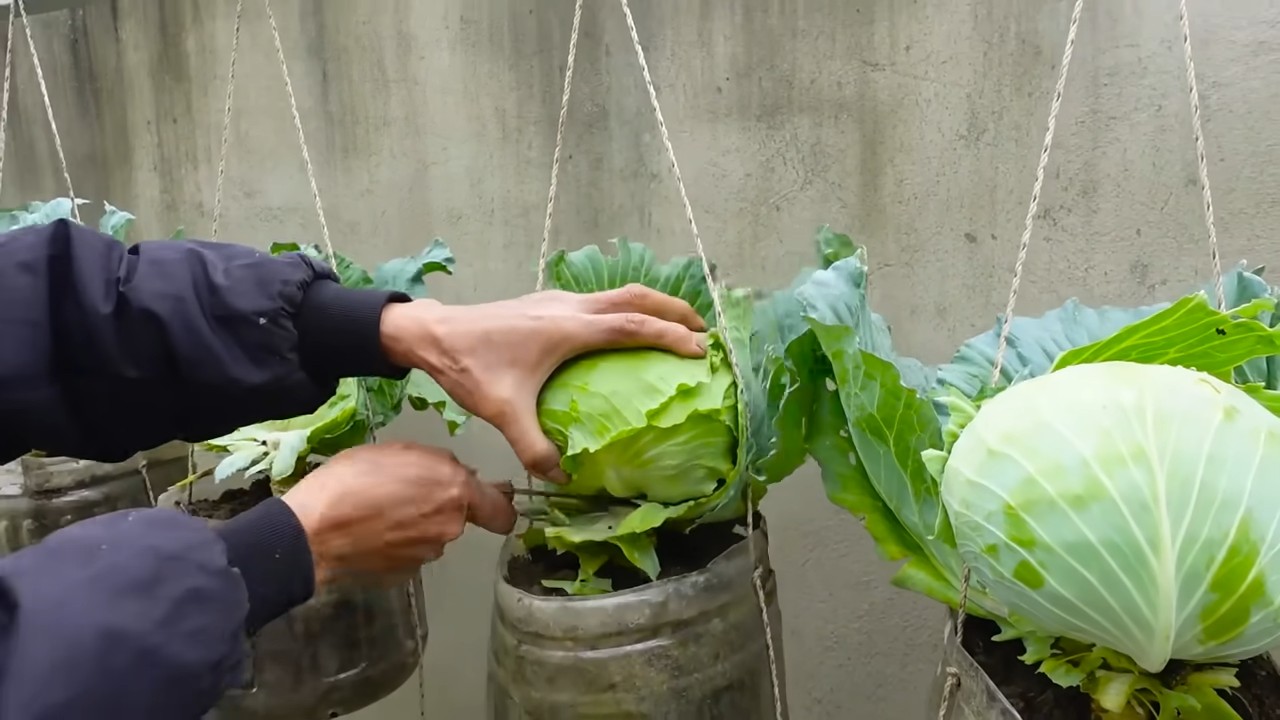
So erntet ihr richtig:
* Kopfkohl: Den Kopf mit einem scharfen Messer abschneiden.
* Rosenkohl: Die Röschen von unten nach oben abbrechen.
* Grünkohl: Die Blätter von unten nach oben abpflücken.
Extra-Tipps für faule Gärtner
* Mischkultur: Pflanzt Kohl zusammen mit anderen Pflanzen, die Schädlinge abwehren oder den Boden verbessern. Gute Partner sind z.B. Ringelblumen, Kapuzinerkresse, Salbei oder Thymian.
* Fruchtfolge: Baut Kohl nicht jedes Jahr am selben Standort an, um Krankheiten und Schädlingen vorzubeugen.
* Selbstversorger-Tipp: Legt euch einen Komposthaufen an, um euren eigenen Dünger herzustellen.
* No-Dig-Methode: Wenn ihr noch fauler sein wollt, könnt ihr Kohl auch nach der No-Dig-Methode anbauen. Dabei wird der Boden nicht umgegraben, sondern nur mit Kompost und Mulch bedeckt.
So, meine lieben faulen Gärtner, jetzt seid ihr bestens gerüstet, um euren eigenen Kohl anzubauen. Mit diesen Tipps und Tricks könnt ihr eine reiche Ernte einfahren, ohne euch dabei zu verausgaben. Viel Spaß beim Gärtnern! Und denkt daran: Faul sein ist erlaubt, solange das Ergebnis stimmt!
Conclusion
So, there you have it! The lazy gardener’s secret weapon for bountiful cabbage harvests. This DIY trick, born out of necessity and a healthy dose of horticultural laziness, is more than just a shortcut; it’s a game-changer for anyone who wants to enjoy fresh, homegrown cabbage without the back-breaking labor and constant vigilance.
Why is this a must-try? Because it drastically reduces weeding, minimizes watering, and provides a nutrient-rich environment directly at the roots of your cabbage plants. Think of it as a self-feeding, self-mulching system that allows you to focus on other aspects of your garden (or, let’s be honest, relaxing with a good book!). The reduced workload alone makes it worth its weight in gold, especially for those with limited time or physical constraints. Plus, you’re repurposing materials that might otherwise end up in the landfill, making it an environmentally friendly choice.
But don’t think this is a one-size-fits-all solution. Feel free to experiment and adapt the technique to suit your specific needs and resources. For example, instead of cardboard, you could use thick layers of newspaper (just be sure to remove any glossy inserts). You can also enrich the soil mixture with other organic materials like composted manure or worm castings for an extra boost of nutrients. Consider adding a layer of straw mulch on top of the cardboard to further suppress weeds and retain moisture, especially in hotter climates.
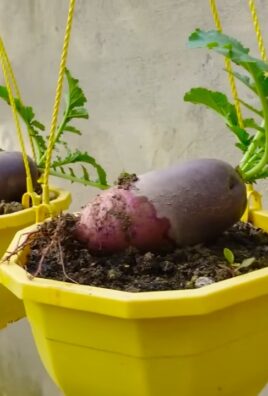
Another variation is to use different types of containers. While plastic pots are convenient, you could also use repurposed buckets, old tires (with proper drainage), or even create raised beds lined with cardboard. The key is to ensure good drainage and adequate space for the cabbage roots to develop.
Don’t be afraid to get creative! Perhaps you want to incorporate companion planting into your lazy gardener cabbage growing system. Marigolds, for instance, can help deter pests, while dill attracts beneficial insects. Experiment with different combinations to find what works best for your garden.
The beauty of this method lies in its simplicity and adaptability. It’s a testament to the fact that gardening doesn’t have to be a chore. It can be a rewarding and enjoyable experience, even for the laziest of gardeners.
We wholeheartedly encourage you to give this DIY trick a try. You’ll be amazed at how much easier it is to grow delicious, healthy cabbage with minimal effort. And most importantly, we want to hear about your experience! Share your photos, tips, and variations in the comments below. Let’s build a community of lazy gardeners who are passionate about growing their own food. What worked for you? What challenges did you face? What ingenious modifications did you come up with? Your feedback will help others discover the joy of effortless cabbage growing. So, get out there, get your hands dirty (or not, if you prefer gloves!), and start growing your own delicious cabbage the lazy way!
Frequently Asked Questions (FAQ)
What type of cardboard should I use?
Ideally, you should use plain, unprinted cardboard. Avoid cardboard with glossy finishes, excessive tape, or heavy printing, as these may contain chemicals that could leach into the soil. Brown corrugated cardboard is the best option. Remove any tape or labels before using the cardboard. If you’re concerned about ink, use the plain side facing down towards the soil.
How often do I need to water the cabbage plants grown using this method?
One of the advantages of this method is reduced watering frequency. The cardboard helps retain moisture in the soil. However, you still need to monitor the soil moisture levels, especially during hot and dry periods. Water deeply when the top inch of soil feels dry to the touch. A good rule of thumb is to water thoroughly every few days, but adjust based on your local climate and weather conditions.
What kind of soil should I use?
A well-draining, nutrient-rich soil is essential for healthy cabbage growth. A mix of compost, garden soil, and a little bit of sand or perlite is ideal. The compost provides essential nutrients, the garden soil provides structure, and the sand or perlite improves drainage. You can also add a slow-release fertilizer to the soil mix to provide a steady supply of nutrients throughout the growing season.
How do I protect my cabbage plants from pests?
While this method helps reduce pest problems by creating a barrier between the plants and the soil, you may still encounter some pests. Common cabbage pests include cabbage worms, aphids, and slugs. Regularly inspect your plants for signs of infestation. You can use organic pest control methods such as insecticidal soap, neem oil, or diatomaceous earth to control these pests. Companion planting with marigolds or dill can also help deter pests. Row covers can provide a physical barrier against many common pests.
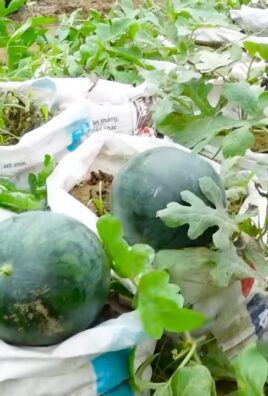
Can I use this method for other vegetables besides cabbage?
Yes, this method can be adapted for other vegetables that benefit from consistent moisture and weed control. Tomatoes, peppers, and zucchini are good candidates. However, you may need to adjust the size of the container and the type of soil mix depending on the specific needs of the vegetable. For example, tomatoes prefer a slightly acidic soil, while peppers prefer a well-draining soil.
How long does it take for cabbage to mature using this method?
The time it takes for cabbage to mature depends on the variety and the growing conditions. Generally, cabbage takes between 60 and 100 days to mature from transplant. This method can potentially shorten the growing time by providing a more favorable growing environment. Be sure to check the seed packet or plant tag for the specific maturity date of your cabbage variety.
What if the cardboard starts to decompose?
The cardboard will naturally decompose over time, which is actually beneficial as it adds organic matter to the soil. However, if the cardboard decomposes too quickly, you may need to add another layer. You can also use thicker cardboard or reinforce it with other materials like wood chips or straw.
Is this method suitable for all climates?
This method is generally suitable for most climates, but you may need to make some adjustments based on your local conditions. In hot climates, you may need to provide extra shade and water more frequently. In cold climates, you may need to protect the plants from frost.
Can I start cabbage seeds directly in the cardboard container?
While you can technically start cabbage seeds directly in the cardboard container, it’s generally recommended to start them indoors in seed trays or small pots and then transplant them into the container once they are large enough. This gives the seedlings a head start and protects them from pests and diseases.
What are the benefits of lazy gardener cabbage growing compared to traditional methods?
The benefits are numerous! Reduced weeding, less watering, improved soil health, reduced pest problems, and increased yields are just a few of the advantages. It’s a more sustainable and environmentally friendly way to grow cabbage, and it’s perfect for busy gardeners who want to enjoy fresh, homegrown produce without all the hard work. Plus, the **lazy gardener cabbage growing** method allows for better resource management and promotes a healthier garden ecosystem.
Leave a Comment