

Malabar spinach growing tips are what you need to unlock a world of fresh, vibrant greens right in your backyard! Forget those bland, store-bought veggies. I’m going to show you how to cultivate this nutritional powerhouse with ease. Imagine stepping outside and harvesting your own delicious, leafy greens for salads, stir-fries, or even soups. It’s easier than you think!
Malabar spinach, also known as Basella alba, isn’t actually spinach, but a climbing vine with similar-tasting leaves. It has a rich history, particularly in Asian and African cuisines, where it’s been used for centuries not only for its culinary value but also for its medicinal properties. Think of it as a superfood with a story!
Why do you need these Malabar spinach growing tips? Because growing your own food is incredibly rewarding! Not only do you get to enjoy fresh, organic produce, but you also reduce your carbon footprint and connect with nature. Plus, Malabar spinach is incredibly easy to grow, even for beginners. It’s heat-tolerant, pest-resistant, and thrives in a variety of conditions. So, ditch the grocery store and let’s get growing! I’m excited to share my secrets to a bountiful Malabar spinach harvest.
Growing Malabar Spinach: A DIY Guide for Lush, Edible Greens
Alright, fellow gardening enthusiasts! Let’s dive into the wonderful world of Malabar spinach (Basella alba). This isn’t your typical spinach; it’s a heat-loving vine that thrives in warm weather, producing delicious, slightly succulent leaves perfect for salads, stir-fries, and soups. I’m going to walk you through everything you need to know to successfully grow your own Malabar spinach, from seed to harvest. Get ready for some serious green goodness!
What You’ll Need
Before we get started, let’s gather our supplies. Here’s a checklist to make sure you’re prepared:
* Malabar spinach seeds or cuttings (seeds are more common to start with)
* Seed starting trays or small pots
* Seed starting mix or well-draining potting soil
* A larger pot or garden bed (at least 12 inches deep and wide)
* Well-draining garden soil amended with compost or aged manure
* A trellis, fence, or other support structure (Malabar spinach is a vine!)
* Watering can or hose
* Gardening gloves
* Optional: Liquid fertilizer (balanced or nitrogen-rich)
Starting from Seed: A Step-by-Step Guide
Malabar spinach seeds have a tough outer coating, so we need to give them a little head start. Here’s how to get those seeds germinating:
1. Scarify the Seeds: This sounds fancy, but it’s just a way to help water penetrate the seed coat. Gently rub the seeds with sandpaper or nick them with a knife. Be careful not to damage the inside of the seed! I usually just use a nail file and lightly scratch the surface.
2. Soak the Seeds: Place the scarified seeds in a glass of warm water and let them soak for 24-48 hours. This will further soften the seed coat and encourage germination. You’ll probably see some of them start to swell up.
3. Prepare Your Seed Starting Trays: Fill your seed starting trays or small pots with seed starting mix. Moisten the soil thoroughly but don’t let it get soggy.
4. Sow the Seeds: Plant the soaked seeds about ½ inch deep in the soil. Gently cover them with soil and pat it down lightly.
5. Provide Warmth and Moisture: Malabar spinach loves warmth! Keep the seed starting trays in a warm location, ideally between 70-80°F (21-27°C). You can use a heat mat to help maintain the temperature. Keep the soil consistently moist by misting it with water as needed.
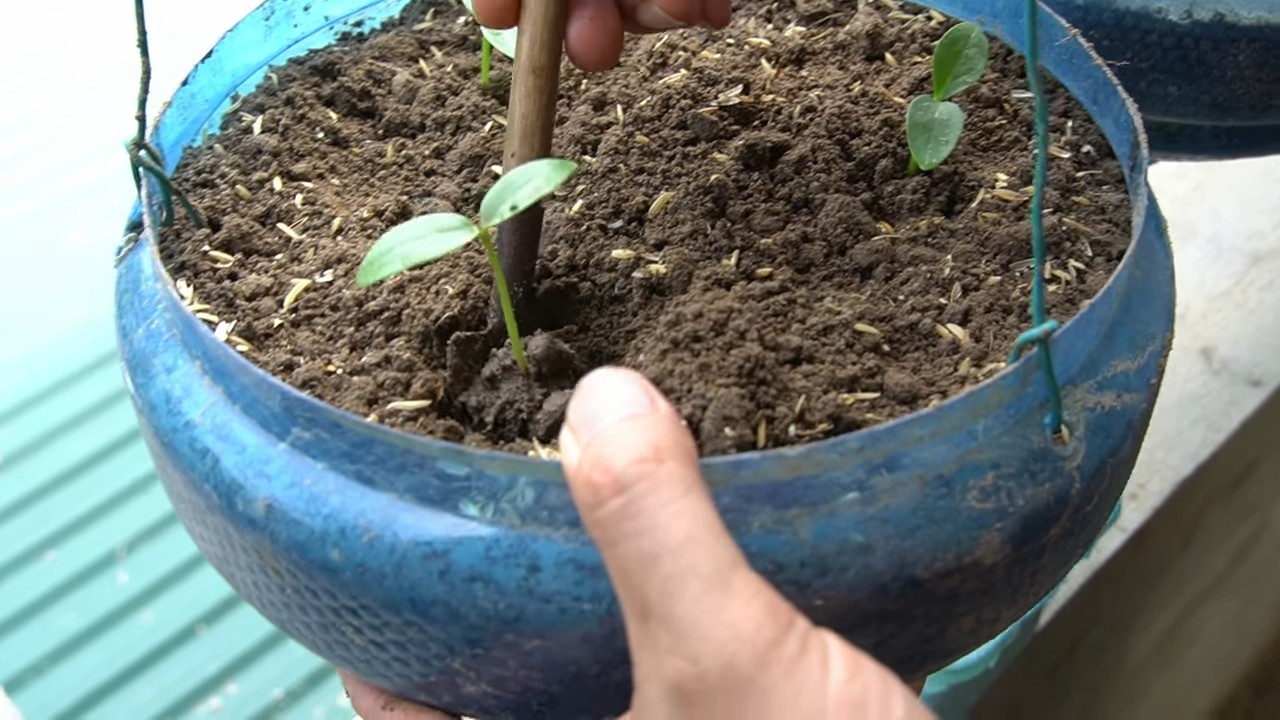
6. Wait Patiently: Germination can take anywhere from 7-21 days, so be patient. Once the seedlings emerge, provide them with plenty of light. A sunny windowsill or grow light will work well.
7. Thin the Seedlings: If you planted multiple seeds in each cell, thin them out to one strong seedling per cell once they have a few sets of true leaves.
Transplanting Your Seedlings
Once your seedlings have developed several sets of true leaves and the weather has warmed up (soil temperature above 60°F or 15°C), it’s time to transplant them into their permanent home.
1. Harden Off the Seedlings: Before transplanting, you need to acclimate the seedlings to outdoor conditions. This process is called “hardening off.” Gradually expose the seedlings to increasing amounts of sunlight and wind over a period of 7-10 days. Start by placing them in a sheltered location for an hour or two each day, gradually increasing the time and exposure.
2. Prepare the Planting Site: Choose a sunny location with well-draining soil. Amend the soil with compost or aged manure to improve its fertility and drainage. Malabar spinach prefers slightly acidic to neutral soil (pH 6.5-7.0).
3. Install a Support Structure: Remember, Malabar spinach is a vine! Install a trellis, fence, or other support structure before you transplant the seedlings. This will give them something to climb on as they grow. I’ve used everything from bamboo stakes to old ladders as supports.
4. Transplant the Seedlings: Gently remove the seedlings from their trays or pots, being careful not to damage the roots. Plant them about 12-18 inches apart, making sure the top of the root ball is level with the surrounding soil.
5. Water Thoroughly: After transplanting, water the seedlings thoroughly to help them settle in.
Growing Malabar Spinach from Cuttings (An Alternative Method)
If you have access to an existing Malabar spinach plant, you can easily propagate it from cuttings. This is a faster way to get started than growing from seed.
1. Take Cuttings: Choose healthy stems that are about 4-6 inches long. Remove the lower leaves, leaving only a few leaves at the top.
2. Root the Cuttings: You can root the cuttings in water or directly in soil.
* Water Method: Place the cuttings in a glass of water, making sure the lower nodes (where the leaves were removed) are submerged. Change the water every few days. Roots should start to appear within a week or two. Once the roots are about an inch long, you can transplant the cuttings into pots or directly into the garden.
* Soil Method: Dip the cut end of the cuttings in rooting hormone (optional). Plant the cuttings in small pots filled with well-draining potting mix. Keep the soil moist and provide indirect sunlight. Roots should develop within a few weeks.
3. Transplant the Rooted Cuttings: Once the cuttings have developed a good root system, transplant them into their permanent location, following the same steps as for seedlings.
Caring for Your Malabar Spinach
Now that your Malabar spinach is planted, here’s how to keep it happy and healthy:
* Watering: Water regularly, especially during hot, dry weather. Malabar spinach prefers consistently moist soil, but avoid overwatering, which can lead to root rot. I usually water deeply a couple of times a week, depending on the weather.
* Fertilizing: Feed your Malabar spinach with a balanced or nitrogen-rich liquid fertilizer every 2-3 weeks. This will encourage lush growth and abundant leaves. Follow the instructions on the fertilizer label.
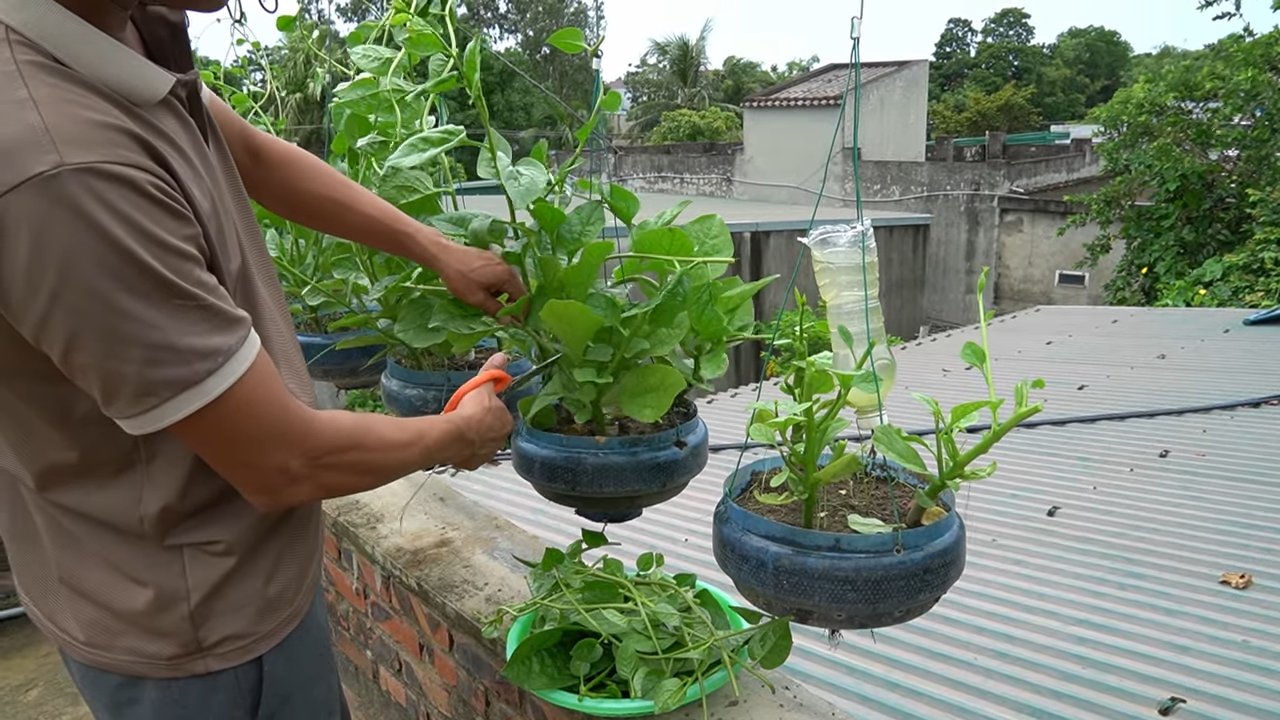
* Pruning: Prune the vines regularly to encourage branching and bushier growth. You can also pinch off the tips of the vines to promote leaf production. Don’t be afraid to harvest frequently; the more you harvest, the more it will grow!
* Pest and Disease Control: Malabar spinach is generally pest and disease resistant. However, keep an eye out for common garden pests like aphids and spider mites. If you spot any pests, treat them with insecticidal soap or neem oil. Good air circulation can help prevent fungal diseases.
Harvesting Your Bounty
The best part! You can start harvesting Malabar spinach leaves as soon as the plant is established and has plenty of foliage.
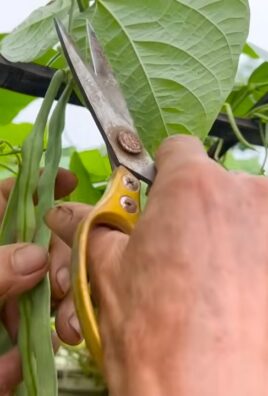
* Harvesting Leaves: Simply snip off the leaves with scissors or your fingers. You can harvest individual leaves or entire stems. The younger, more tender leaves are the most flavorful.
* Harvesting Tips: Regular harvesting will encourage the plant to produce more leaves. Don’t be afraid to harvest frequently!
* Storage: Malabar spinach leaves can be stored in the refrigerator for several days. Wrap them in a damp paper towel and place them in a plastic bag.
Troubleshooting
Even with the best care, you might encounter a few challenges. Here are some common problems and how to address them:
* Slow Growth: If your Malabar spinach isn’t growing as quickly as you’d like, make sure it’s getting enough sunlight, water, and fertilizer. Soil that is too compacted can also hinder growth.
* Yellowing Leaves: Yellowing leaves can be a sign of overwatering, nutrient deficiency, or pest infestation. Check the soil moisture and adjust your watering accordingly. Fertilize the plant with a balanced fertilizer. Inspect the leaves for pests.
* Pest Infestation: Treat pest infestations with insecticidal soap or neem oil.
* Flowering: Malabar spinach can flower in hot weather. While the flowers are edible, they can make the leaves taste slightly bitter. Pinch off the flowers to encourage leaf production.
Enjoying Your Harvest
Now that you’ve successfully grown and harvested your Malabar spinach, it’s time to enjoy the fruits (or rather, leaves!) of your labor. Malabar spinach can be used in a variety of dishes. Here are a few ideas:
* Salads: Add fresh Malabar spinach leaves to your salads for a slightly succulent and refreshing flavor.
* Stir-fries: Use Malabar spinach in stir-fries as a substitute for regular spinach. It holds its shape well and doesn’t get as slimy.
* Sou
Conclusion
So, there you have it! Mastering the art of growing Malabar spinach doesn’t require a green thumb blessed by the gardening gods. It’s about understanding its needs, providing the right environment, and being a little patient. This DIY approach, focusing on readily available resources and simple techniques, unlocks a world of fresh, nutritious greens right in your backyard or even on your balcony.
Why is this a must-try? Because store-bought spinach, while convenient, often lacks the vibrant flavor and nutritional punch of homegrown varieties. Plus, you have complete control over what goes into your plants, ensuring they are free from harmful pesticides and chemicals. Imagine the satisfaction of harvesting your own lush, green leaves, knowing you nurtured them from seedling to salad plate.
Beyond the basic techniques, there’s plenty of room for experimentation. Try different soil mixes to see what your Malabar spinach responds to best. Some gardeners swear by adding coffee grounds to the soil for an extra nitrogen boost. Others prefer using a trellis system for vertical growth, maximizing space and creating a stunning green wall. You can even experiment with different companion plants to deter pests naturally. Basil, for example, is known to repel aphids, a common Malabar spinach pest.
Consider these variations to tailor your Malabar spinach growing experience:
* Container Gardening: If you’re short on space, Malabar spinach thrives in containers. Choose a large pot (at least 12 inches in diameter) with good drainage.
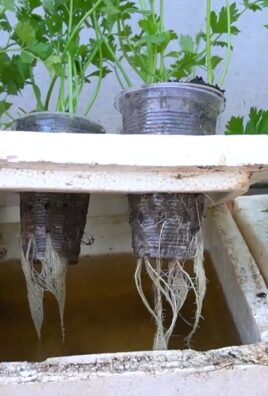
* Hydroponics: For the adventurous gardener, hydroponic systems offer a soilless alternative. Malabar spinach adapts well to hydroponic setups, providing rapid growth and high yields.
* Seed Saving: Once your plants mature, consider saving the seeds for future planting. This ensures a continuous supply of Malabar spinach and allows you to adapt the plants to your specific climate and growing conditions.
* Different Varieties: While the green-stemmed variety is most common, explore other cultivars like the red-stemmed Malabar spinach for a touch of visual appeal in your garden.
Ultimately, the best way to learn is by doing. Don’t be afraid to get your hands dirty, experiment with different techniques, and observe how your Malabar spinach responds. The rewards – fresh, delicious greens and the satisfaction of growing your own food – are well worth the effort.
We’re confident that with these tips, you’ll be enjoying a bountiful harvest of Malabar spinach in no time. So, grab your seeds, prepare your soil, and embark on this rewarding gardening adventure.
And now, we want to hear from you! Have you tried growing Malabar spinach before? What challenges did you face, and what successes did you achieve? Share your experiences, tips, and photos in the comments below. Let’s create a community of Malabar spinach enthusiasts and learn from each other. Your insights could be invaluable to other gardeners just starting out. Let’s all learn together how to improve our Malabar spinach growing tips.
FAQ
Frequently Asked Questions About Growing Malabar Spinach
Q: How long does it take for Malabar spinach to grow?
A: Malabar spinach is a relatively fast-growing plant, especially in warm weather. You can expect to start harvesting leaves about 60-70 days after planting seeds. However, the exact time can vary depending on factors like temperature, sunlight, and soil fertility. Providing optimal conditions will encourage faster growth.
Q: What kind of soil is best for Malabar spinach?
A: Malabar spinach prefers well-draining soil that is rich in organic matter. A slightly acidic to neutral pH (around 6.0 to 7.0) is ideal. Amend your soil with compost or well-rotted manure before planting to improve its fertility and drainage. If you’re growing in containers, use a high-quality potting mix.
Q: How much sunlight does Malabar spinach need?
A: Malabar spinach thrives in full sun, requiring at least 6-8 hours of direct sunlight per day. However, in very hot climates, it can benefit from some afternoon shade to prevent the leaves from scorching. If you’re growing indoors, provide supplemental lighting to ensure adequate sunlight exposure.
Q: How often should I water Malabar spinach?
A: Malabar spinach needs consistent moisture, especially during hot weather. Water deeply whenever the top inch of soil feels dry to the touch. Avoid overwatering, as this can lead to root rot. Mulching around the plants can help retain moisture and suppress weeds.
Q: Does Malabar spinach need fertilizer?
A: Yes, Malabar spinach benefits from regular fertilization, especially during its active growing season. Use a balanced fertilizer or one that is higher in nitrogen to promote leafy growth. You can also use organic fertilizers like compost tea or fish emulsion. Apply fertilizer according to the package instructions.
Q: What are some common pests and diseases that affect Malabar spinach?
A: Malabar spinach is generally resistant to pests and diseases, but it can be susceptible to aphids, spider mites, and leaf miners. Regularly inspect your plants for signs of infestation and take action promptly. You can use insecticidal soap or neem oil to control these pests. Good air circulation and proper watering can help prevent fungal diseases.
Q: Can I eat Malabar spinach raw?
A: Yes, you can eat Malabar spinach raw, especially the young, tender leaves. However, the older leaves can be slightly mucilaginous (slimy) when eaten raw. Cooking the leaves reduces the mucilage and makes them more palatable.
Q: How do I harvest Malabar spinach?
A: You can start harvesting Malabar spinach leaves when they are about 4-6 inches long. Simply snip off the leaves with scissors or pruning shears, leaving about an inch of stem. Regular harvesting encourages the plant to produce more leaves.
Q: How do I save seeds from Malabar spinach?
A: To save seeds from Malabar spinach, allow some of the flowers to mature and form berries. Once the berries turn dark purple or black, they are ready to harvest. Remove the seeds from the berries and dry them thoroughly before storing them in an airtight container in a cool, dark place.
Q: Is Malabar spinach a perennial or an annual?
A: Malabar spinach is technically a perennial in tropical climates, but it is typically grown as an annual in temperate regions. It is sensitive to frost and will die back in cold weather. However, if you live in a warm climate, it may survive the winter and regrow in the spring.
Q: Can I grow Malabar spinach indoors?
A: Yes, you can grow Malabar spinach indoors, but you will need to provide adequate sunlight or supplemental lighting. Choose a large pot with good drainage and use a high-quality potting mix. Water regularly and fertilize as needed. You may also need to provide a trellis or support for the vines to climb.
Q: What are some good companion plants for Malabar spinach?
A: Good companion plants for Malabar spinach include basil, marigolds, and nasturtiums. Basil repels aphids, while marigolds deter nematodes. Nasturtiums attract beneficial insects that prey on pests.
Q: How can I prevent my Malabar spinach from becoming too leggy?
A: To prevent your Malabar spinach from becoming too leggy, provide adequate sunlight and prune the vines regularly. Pruning encourages the plant to produce more side shoots and become bushier. You can also pinch off the growing tips to promote branching.
Q: My Malabar spinach leaves are turning yellow. What could be the problem?
A: Yellowing leaves on Malabar spinach can be caused by several factors, including nutrient deficiencies, overwatering, or pest infestations. Check the soil pH and nutrient levels, ensure proper drainage, and inspect the plants for pests. Adjust your watering and fertilization practices as needed.
Q: Is Malabar spinach the same as regular spinach?
A: No, Malabar spinach is not the same as regular spinach. While both are leafy green vegetables, they belong to different plant families. Malabar spinach is more heat-tolerant and has a slightly different flavor and texture than regular spinach. It is also a vining plant, while regular spinach is a low-growing plant.

Leave a Comment