

Mushroom Growing Kitchen Bowl: Imagine harvesting fresh, delicious mushrooms right from your kitchen counter! Sounds like something out of a fairytale, doesn’t it? Well, it’s not! This DIY guide will show you how to transform an ordinary kitchen bowl into a thriving mushroom farm. Forget expensive kits and complicated setups; we’re going back to basics with a simple, sustainable, and incredibly rewarding project.
Cultivating mushrooms has a rich history, dating back centuries in various cultures. From ancient Chinese medicinal practices to European culinary traditions, mushrooms have always held a special place. Now, you can bring that history and flavor into your own home.
Why should you try this mushroom growing kitchen bowl trick? Because it’s fun, educational, and provides you with a constant supply of fresh, organic mushrooms. In today’s world, where we’re increasingly conscious of where our food comes from, this DIY project empowers you to take control of your food source. Plus, it’s a fantastic way to reduce food waste by utilizing kitchen scraps and creating a closed-loop system. I’m excited to show you how easy and satisfying it can be!

Grow Your Own Gourmet Mushrooms in a Kitchen Bowl!
Hey there, fellow fungi fanatics! Ever dreamt of harvesting fresh, delicious mushrooms right from your kitchen counter? Well, dream no more! I’m going to walk you through a super simple, surprisingly rewarding DIY project: growing mushrooms in a kitchen bowl. It’s easier than you think, and the taste of homegrown mushrooms is absolutely unbeatable.
What You’ll Need: The Mushroom Growing Arsenal
Before we dive in, let’s gather our supplies. Don’t worry, you probably have most of these lying around already!
* A Kitchen Bowl: Any size will do, but a medium-sized bowl (around 8-10 inches in diameter) is a good starting point. Make sure it’s clean!
* Mushroom Spawn: This is the key ingredient! You can find mushroom spawn online or at your local garden center. Oyster mushrooms are a great choice for beginners because they’re relatively easy to grow and very forgiving. You can choose from different varieties like Pearl Oyster, Blue Oyster, or Pink Oyster.
* Substrate: This is the food source for your mushrooms. Straw is a popular and readily available option. You can also use hardwood sawdust pellets (like those used for wood stoves) or even coffee grounds (though these are best mixed with straw or sawdust).
* A Large Pot or Container: For pasteurizing the substrate.
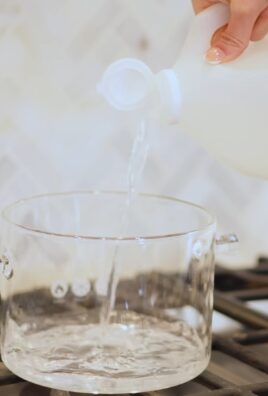
* Water: Lots of it!
* Spray Bottle: To keep the substrate moist.
* Plastic Wrap or a Clear Plastic Bag: To create a humid environment.
* Rubbing Alcohol: For sanitizing your hands and tools.
* Gloves (Optional): To keep things extra clean.
* Thermometer (Optional): To monitor the substrate temperature during pasteurization.
Preparing the Substrate: The Mushroom’s Meal Prep
This is arguably the most important step. A properly prepared substrate will prevent contamination and provide the perfect environment for your mushrooms to thrive.
1. Chop the Straw (if using): If you’re using straw, chop it into smaller pieces, about 2-3 inches long. This will make it easier to pack into the bowl and will increase the surface area for the mushroom mycelium to colonize.
2. Pasteurize the Substrate: This process kills off any competing organisms that could hinder mushroom growth.
* For Straw: Fill your large pot or container with water and bring it to a simmer (around 160-180°F or 71-82°C). Submerge the chopped straw in the hot water and let it soak for 1-2 hours. Use a weight to keep the straw submerged. The goal is to heat the straw enough to kill unwanted organisms but not so much that it becomes completely sterile (which would kill beneficial microbes as well).
* For Hardwood Sawdust Pellets: Add the pellets to a container and slowly add hot water until they are fully saturated and have expanded into sawdust. Let them cool down to room temperature. Pasteurization is less critical for sawdust pellets as they are often already partially sterilized during the manufacturing process.
* For Coffee Grounds: Coffee grounds are already pasteurized during the brewing process, so you don’t need to do anything extra. However, it’s best to use fresh coffee grounds (within a day or two) to minimize the risk of contamination.
3. Drain the Substrate: After pasteurization, carefully drain the excess water from the substrate. You want it to be moist but not soaking wet. A good test is to squeeze a handful of the substrate – it should feel damp, and only a few drops of water should come out.
Inoculating the Substrate: Planting the Mushroom Seeds
Now comes the fun part – introducing the mushroom spawn to the substrate!
1. Sanitize Everything: Before you start, thoroughly sanitize your hands, the bowl, and any tools you’ll be using with rubbing alcohol. This will help prevent contamination.
2. Layer the Substrate and Spawn: Start by placing a layer of the pasteurized substrate at the bottom of the bowl. Then, sprinkle a layer of mushroom spawn over the substrate. Repeat this process, layering substrate and spawn, until the bowl is almost full. Make sure the final layer is a layer of substrate.
3. Compact the Substrate: Gently press down on the substrate to compact it slightly. This will help the mycelium (the vegetative part of the mushroom) spread throughout the substrate.
4. Cover the Bowl: Cover the bowl with plastic wrap or a clear plastic bag. This will help create a humid environment, which is essential for mushroom growth. Poke a few small holes in the plastic wrap or bag to allow for some air exchange.
Incubation: The Waiting Game
This is where patience comes in. The mycelium needs time to colonize the substrate before mushrooms will start to form.
1. Find a Suitable Location: Place the bowl in a dark, humid location with a temperature between 65-75°F (18-24°C). A closet, basement, or even under the sink can work well. Avoid direct sunlight, as this can dry out the substrate and inhibit mushroom growth.
2. Maintain Humidity: Check the substrate regularly to make sure it stays moist. If it starts to dry out, spray it lightly with water using a spray bottle. You want the substrate to be damp, but not soaking wet.
3. Monitor Colonization: Over the next few weeks, you should start to see white, fuzzy growth spreading throughout the substrate. This is the mycelium colonizing the substrate. The time it takes for full colonization will vary depending on the type of mushroom spawn you’re using and the environmental conditions, but it typically takes 2-4 weeks.
Fruiting: The Mushroom Magic
Once the substrate is fully colonized, it’s time to trigger fruiting – the formation of mushrooms!
1. Increase Airflow: Remove the plastic wrap or bag and move the bowl to a location with more airflow. This will help stimulate mushroom formation.
2. Increase Light: While mushrooms don’t need a lot of light, they do need some light to develop properly. Move the bowl to a location with indirect light, or provide artificial light for a few hours each day.
3. Maintain Humidity: Continue to mist the substrate regularly to maintain a high level of humidity. You can also place a humidity dome over the bowl (a clear plastic container with holes for ventilation) to help trap moisture.
4. Wait for Pins: After a few days to a week, you should start to see small mushroom “pins” forming on the surface of the substrate. These are the baby mushrooms!
5. Watch Them Grow: The pins will grow rapidly over the next few days, developing into mature mushrooms.
Harvesting: The Fruits (or Fungi) of Your Labor
Harvesting your mushrooms at the right time is crucial for optimal flavor and texture.
1. Harvest When Mature: Harvest the mushrooms when the caps are fully developed but before they start to release spores. For oyster mushrooms, this is typically when the caps are still slightly curled downwards.
2. Twist and Pull: To harvest, gently twist and pull the mushrooms from the substrate. Try to remove the entire cluster of mushrooms at once.
3. Clean and Enjoy: Brush off any excess substrate from the mushrooms and enjoy them fresh! They’re delicious sautéed, grilled, or added to soups and stews.
Second Flush and Beyond: Keeping the Mushroom Party Going
After you harvest your first flush of mushrooms, don’t throw away the substrate! You can often get several more flushes of mushrooms from the same substrate.
1. Soak the Substrate: After harvesting, soak the substrate in water for 12-24 hours. This will rehydrate the substrate and stimulate another flush of mushrooms.
2. Drain and Repeat: Drain the excess water from the substrate and repeat the fruiting process.
3. Expect Diminishing Returns: Each subsequent flush of mushrooms will typically be smaller than the previous one. Eventually, the substrate will become depleted of nutrients, and it will no longer produce mushrooms.
Troubleshooting: When Things Go Wrong (and How to Fix Them)
Even with the best intentions, things can sometimes go wrong. Here are a few common problems and how to troubleshoot them:
* Contamination: If you see green, black, or other colored mold growing on the substrate, it’s likely contaminated. Unfortunately, there’s not much you can do to save a contaminated batch. Dispose of the substrate properly and start over with a fresh batch. To prevent contamination, make sure to sanitize everything thoroughly and use clean water.
* Slow Colonization: If the mycelium is taking a long time to colonize the substrate, it could be due to low temperature, low humidity, or poor air exchange. Make sure the temperature is within the optimal range, keep the substrate moist, and provide adequate airflow.
* Small

Conclusion
So, there you have it! Transforming your humble kitchen bowl into a thriving mushroom farm is not just a fun project; it’s a gateway to fresh, flavorful fungi right at your fingertips. We’ve walked you through the simple steps, highlighting the ease and accessibility of this DIY method. Forget expensive kits and complicated setups. This method proves that cultivating your own delicious mushrooms can be surprisingly straightforward and incredibly rewarding.
Why is this DIY mushroom growing trick a must-try? Because it empowers you to take control of your food source, reduces your reliance on store-bought produce (often shipped from afar), and connects you with the fascinating world of mycology. Imagine the satisfaction of harvesting your own oyster mushrooms, shiitakes, or even lion’s mane, knowing you nurtured them from start to finish. The flavor of homegrown mushrooms is undeniably superior, bursting with an earthy richness that elevates any dish.
But the benefits extend beyond taste. Growing your own mushrooms is an environmentally conscious choice. It minimizes your carbon footprint by eliminating transportation costs and reduces the need for plastic packaging. Plus, the spent substrate (the material the mushrooms grow on) can be composted and used to enrich your garden soil, creating a closed-loop system that benefits both you and the planet.
Looking for variations? Absolutely! Experiment with different types of mushrooms. Oyster mushrooms are particularly well-suited for this method due to their aggressive growth and tolerance for a wide range of substrates. Shiitake mushrooms offer a more complex flavor profile but require a bit more patience. Lion’s mane, with its unique texture and medicinal properties, is another exciting option for the adventurous grower.
Consider using different substrates as well. While pasteurized straw is a popular choice, you can also experiment with coffee grounds, cardboard, or even hardwood sawdust, depending on the type of mushroom you’re growing. Remember to research the specific needs of each mushroom variety to ensure optimal growth.
Another variation involves controlling the humidity. While the plastic wrap or bag helps retain moisture, you can further enhance humidity by misting the substrate regularly with a spray bottle. A humidity tent made from a larger plastic bag can also be beneficial, especially in drier environments.
Don’t be afraid to get creative with your setup. You can use different types of bowls, containers, or even repurposed materials. The key is to ensure proper drainage and ventilation to prevent mold growth.
We wholeheartedly encourage you to embark on this exciting journey of DIY mushroom cultivation. It’s a rewarding experience that will not only provide you with delicious, homegrown mushrooms but also deepen your appreciation for the natural world.
So, grab a bowl, gather your supplies, and get ready to witness the magic of mushroom growth firsthand. And most importantly, we want to hear about your experiences! Share your photos, tips, and challenges in the comments below. Let’s build a community of DIY mushroom growers and learn from each other’s successes and failures. Your insights could inspire others to take the plunge and discover the joys of growing their own food. Let us know how your **mushroom growing kitchen bowl** experiment goes!
Frequently Asked Questions (FAQ)
What type of mushrooms are best for growing in a kitchen bowl?
Oyster mushrooms are generally considered the easiest and most forgiving for beginners. They are fast-growing, tolerate a wide range of substrates, and produce abundant yields. Shiitake mushrooms are another popular choice, but they require a bit more patience and attention to detail. Lion’s mane mushrooms are also gaining popularity, but they can be more challenging to cultivate. Ultimately, the best type of mushroom for you will depend on your experience level, the availability of resources, and your personal preferences. Research the specific needs of each mushroom variety before you begin.
What kind of substrate should I use?
Pasteurized straw is a common and readily available substrate for oyster mushrooms. You can also use coffee grounds, cardboard, or hardwood sawdust, depending on the type of mushroom you’re growing. Coffee grounds are particularly beneficial for oyster mushrooms, as they are rich in nutrients and readily available. Cardboard is a sustainable and cost-effective option, but it requires proper preparation to ensure it is free from contaminants. Hardwood sawdust is best suited for shiitake mushrooms and other wood-loving species. Regardless of the substrate you choose, it is crucial to pasteurize it properly to kill any competing organisms that could hinder mushroom growth.
How do I pasteurize the substrate?
Pasteurization is essential to eliminate competing organisms that could prevent your mushrooms from growing. There are several methods for pasteurizing substrate, including:
* **Hot Water Pasteurization:** Submerge the substrate in hot water (around 160-180°F or 71-82°C) for 1-2 hours. This is a simple and effective method for straw and other bulky substrates.
* **Steam Pasteurization:** Steam the substrate in a pressure cooker or steamer for 1-2 hours. This method is more effective at killing heat-resistant organisms.
* **Lime Pasteurization:** Soak the substrate in a lime solution (calcium hydroxide) for 12-24 hours. This method is commonly used for straw and other alkaline-tolerant substrates.
Always allow the substrate to cool completely before inoculating it with mushroom spawn.
How do I inoculate the substrate with mushroom spawn?
Inoculation is the process of introducing mushroom spawn (the “seeds” of the mushroom) to the pasteurized substrate. To inoculate, simply mix the spawn thoroughly with the substrate, ensuring that it is evenly distributed. The amount of spawn you need will depend on the type of mushroom and the size of your container. A general rule of thumb is to use around 5-10% spawn by weight of the substrate.
How long does it take for mushrooms to grow?
The time it takes for mushrooms to grow will vary depending on the type of mushroom, the substrate, and the environmental conditions. Oyster mushrooms typically fruit within 1-2 weeks of inoculation, while shiitake mushrooms can take several months. Maintaining optimal humidity, temperature, and light levels is crucial for promoting rapid growth.
What are the ideal growing conditions for mushrooms?
Mushrooms thrive in humid, dark, and cool environments. The ideal temperature range for most edible mushrooms is between 60-75°F (15-24°C). Humidity should be maintained at around 80-90%. While mushrooms don’t require direct sunlight, they do need some light to trigger fruiting. A dimly lit room or a spot near a window is usually sufficient.
How do I maintain humidity?
Maintaining adequate humidity is crucial for mushroom growth. You can increase humidity by:
* Covering the bowl with plastic wrap or a plastic bag.
* Misting the substrate regularly with a spray bottle.
* Placing the bowl in a humidity tent or greenhouse.
* Using a humidifier in the growing area.
How do I know when the mushrooms are ready to harvest?
Mushrooms are typically ready to harvest when the caps have fully expanded and the gills are visible. The exact timing will vary depending on the type of mushroom. Oyster mushrooms are best harvested when the caps are still slightly curled downwards. Shiitake mushrooms are ready when the caps have flattened out and the edges have begun to curl upwards.
What if I see mold growing on the substrate?
Mold contamination is a common problem in mushroom cultivation. If you see mold growing on the substrate, it is important to remove it immediately to prevent it from spreading. You can try scraping off the moldy area and spraying the remaining substrate with a diluted hydrogen peroxide solution. However, if the mold is widespread, it is best to discard the entire batch and start over. To prevent mold contamination, ensure that your substrate is properly pasteurized and that your growing environment is clean and well-ventilated.
Can I reuse the substrate after harvesting mushrooms?
Yes, you can reuse the spent substrate as compost in your garden. It is a rich source of nutrients and organic matter that can improve soil fertility. You can also use it as a mulch around plants to help retain moisture and suppress weeds.


Leave a Comment