

Plastic Bottle Kale Planter: Transform your trash into treasure and grow your own delicious kale with this incredibly easy and rewarding DIY project! Are you tired of throwing away those empty plastic bottles? What if I told you they could be the secret to a thriving, space-saving garden?
For centuries, resourceful gardeners have found innovative ways to cultivate food, often born out of necessity. From ancient terraced gardens to modern-day vertical farms, the spirit of making the most of available resources has always been at the heart of gardening. This plastic bottle kale planter project taps into that same resourceful spirit, offering a sustainable and budget-friendly way to enjoy fresh, homegrown kale.
Why kale, and why plastic bottles? Well, kale is a nutritional powerhouse, packed with vitamins and antioxidants, and growing your own ensures you have access to fresh, organic greens whenever you want. And let’s face it, plastic waste is a huge problem. This DIY project offers a simple, effective way to reduce your environmental footprint while simultaneously boosting your health and well-being. Plus, it’s a fantastic project for kids, teaching them about recycling, gardening, and healthy eating all in one go! So, grab those empty bottles, and let’s get started on creating your very own vertical kale garden!
DIY Upcycled Plastic Bottle Kale Planter: Grow Your Greens Sustainably!
Hey there, fellow gardening enthusiasts! I’m super excited to share this awesome DIY project with you: turning those empty plastic bottles into thriving kale planters. Not only is this a fantastic way to recycle and reduce waste, but it also allows you to grow fresh, healthy kale right at home, even if you have limited space. Let’s get started!
Materials You’ll Need:
* Empty plastic bottles (2-liter soda bottles or similar work great!)
* Scissors or a craft knife
* Potting soil
* Kale seeds or seedlings
* Drill or nail (for drainage holes)
* Watering can or hose
* Optional: Spray paint (for decorating your planters)
* Optional: Twine or rope (for hanging planters)
Tools You Might Find Helpful:
* Gloves (to protect your hands)
* Measuring tape or ruler
* Marker or pen
Preparing the Plastic Bottles
This is where we transform those discarded bottles into something useful!
1. Clean the Bottles: First things first, give your plastic bottles a good rinse with soap and water. Make sure to remove any labels and sticky residue. A clean bottle is a happy bottle!
2. Cut the Bottles: Now, decide how you want to cut your bottles. There are a few options here:
* Option 1: Horizontal Cut (Self-Watering Planter): This method creates a self-watering planter. Cut the bottle horizontally about 2/3 of the way up from the bottom. Invert the top portion and place it inside the bottom portion. The neck of the bottle will act as a wick, drawing water up to the soil.
* Option 2: Vertical Cut (Hanging Planter): Cut a rectangular opening on one side of the bottle, leaving the top and bottom intact. This creates a trough-like planter perfect for hanging.
* Option 3: Simple Cut (Basic Planter): Simply cut the bottle in half horizontally. You’ll have two separate planters.
I personally love the self-watering option because it’s so convenient, but feel free to choose whichever method suits your needs and preferences. If you’re going with the self-watering method, make sure the cut is clean and even. For the vertical cut, be careful not to make the opening too large, as it could weaken the structure of the bottle.
3. Smooth the Edges: After cutting, the edges of the plastic can be sharp. Use scissors or a craft knife to carefully smooth them out. You can also use sandpaper for a smoother finish. This is especially important if you have kids or pets around.
4. Add Drainage Holes: This is crucial for healthy kale growth! If you’re using the horizontal cut method, drill or poke several drainage holes in the bottom of the *bottom* portion of the bottle. If you’re using the vertical or simple cut method, drill or poke holes in the bottom of each planter. I usually make about 4-5 holes, each about ¼ inch in diameter. Make sure the holes are large enough to allow water to drain freely, but not so large that the soil will fall out.
5. Optional: Decorate Your Planters: This is where you can get creative! Use spray paint to give your planters a pop of color. You can also use markers, stickers, or even decoupage to personalize them. If you’re using spray paint, make sure to do it in a well-ventilated area and let the paint dry completely before moving on to the next step. I like to use bright, cheerful colors to add a bit of fun to my garden.
Planting the Kale
Now for the fun part – planting your kale!
1. Prepare the Soil: Fill your planters with high-quality potting soil. I recommend using a mix that’s specifically formulated for vegetables, as it will provide the nutrients your kale needs to thrive. Don’t pack the soil too tightly, as this can restrict root growth.
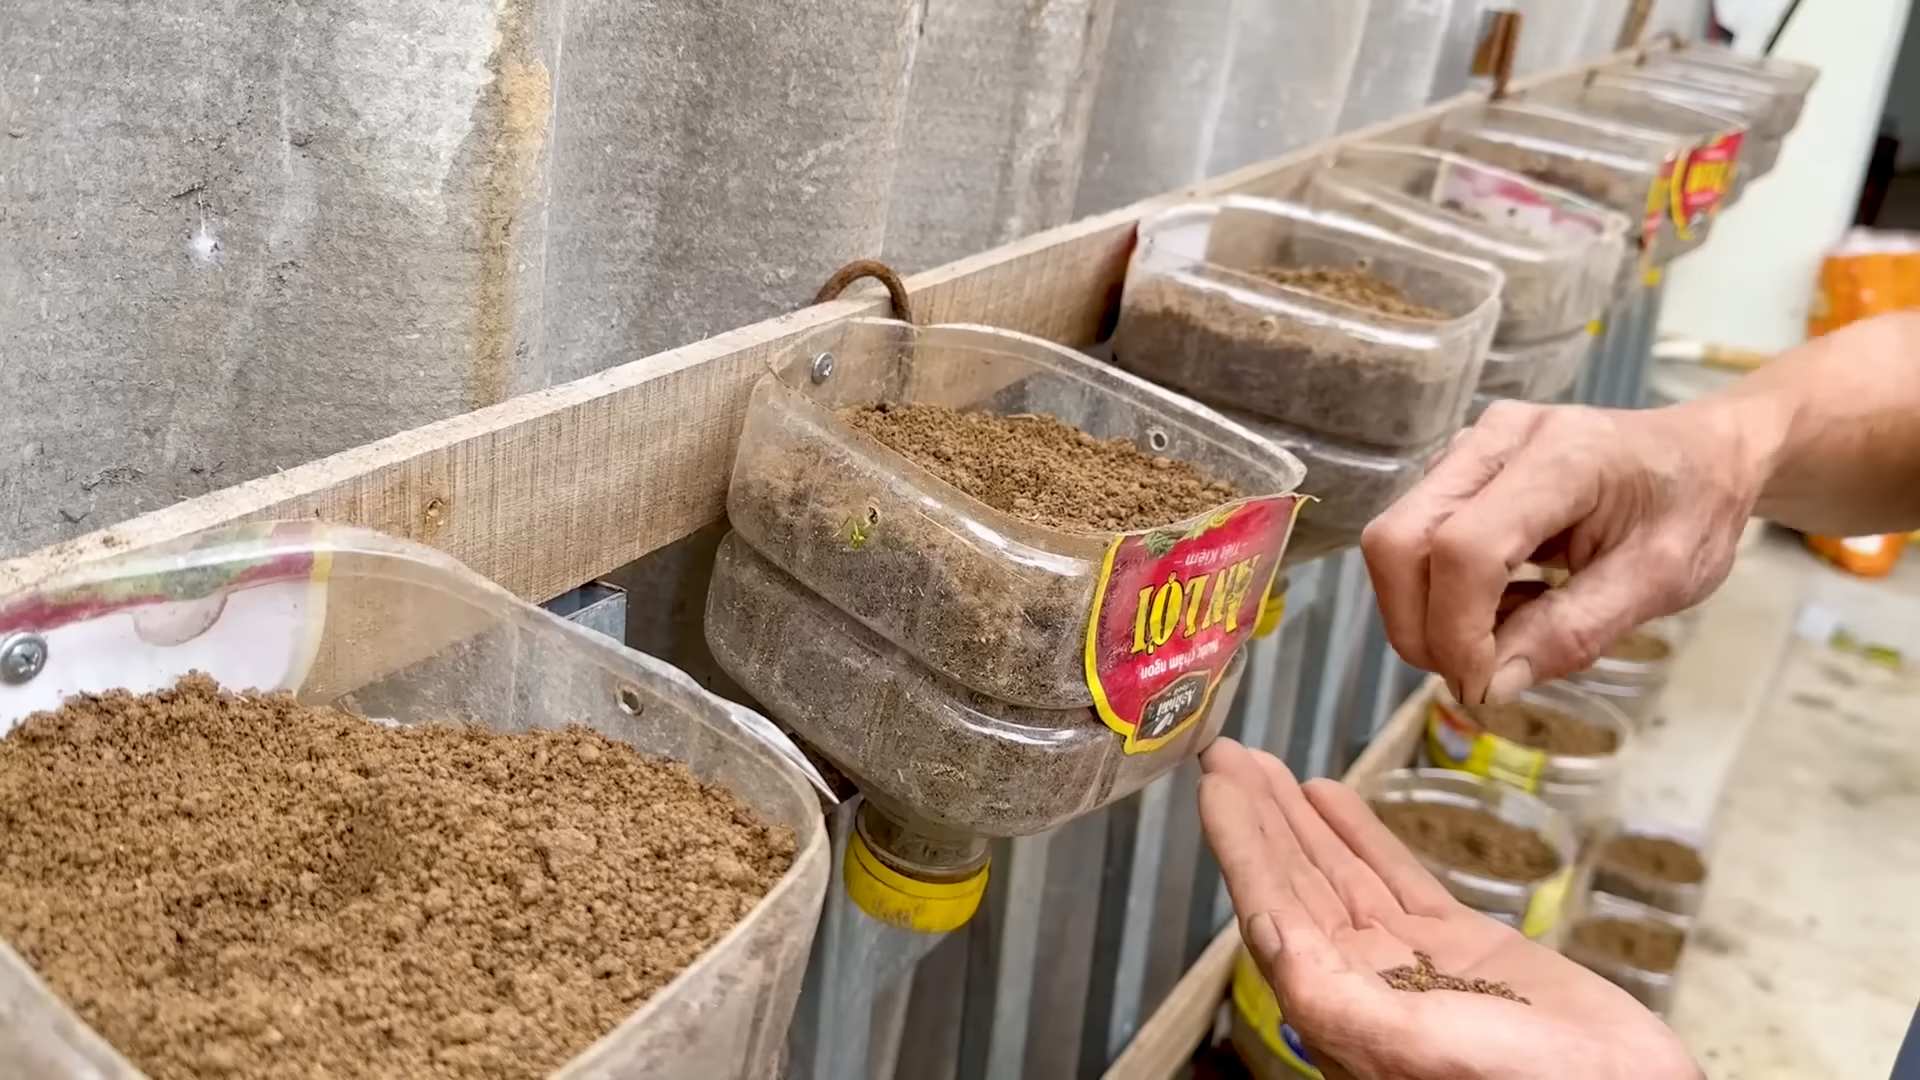
2. Plant the Seeds or Seedlings:
* From Seeds: If you’re starting from seeds, sow them about ½ inch deep and 1 inch apart. Gently cover them with soil and water thoroughly. Keep the soil moist but not soggy until the seeds germinate, which usually takes about 7-10 days.
* From Seedlings: If you’re using seedlings, gently remove them from their containers and loosen the roots slightly. Dig a small hole in the soil and place the seedling in the hole, making sure the top of the root ball is level with the soil surface. Gently fill in the hole with soil and water thoroughly.
I personally prefer starting with seedlings because it’s a bit faster and easier, but starting from seeds is definitely more economical.
3. Water Thoroughly: After planting, water your kale thoroughly. This will help settle the soil and encourage root growth.
4. Place in a Sunny Location: Kale needs at least 6 hours of sunlight per day to thrive. Place your planters in a sunny spot in your garden or on your balcony. If you don’t have a lot of sunlight, you can supplement with grow lights.
Caring for Your Kale
A little TLC goes a long way!
1. Water Regularly: Kale needs consistent moisture to grow well. Water your plants whenever the top inch of soil feels dry to the touch. Avoid overwatering, as this can lead to root rot. The self-watering planters are great for this, as they help maintain a consistent level of moisture.
2. Fertilize: Kale is a heavy feeder, so it’s important to fertilize regularly. Use a balanced fertilizer that’s specifically formulated for vegetables. Follow the instructions on the fertilizer package. I like to use organic fertilizers whenever possible.
3. Pest Control: Keep an eye out for pests like aphids, cabbage worms, and slugs. If you spot any pests, you can try hand-picking them off the plants or using an organic insecticide. I’ve found that a mixture of water and dish soap can be effective against aphids.
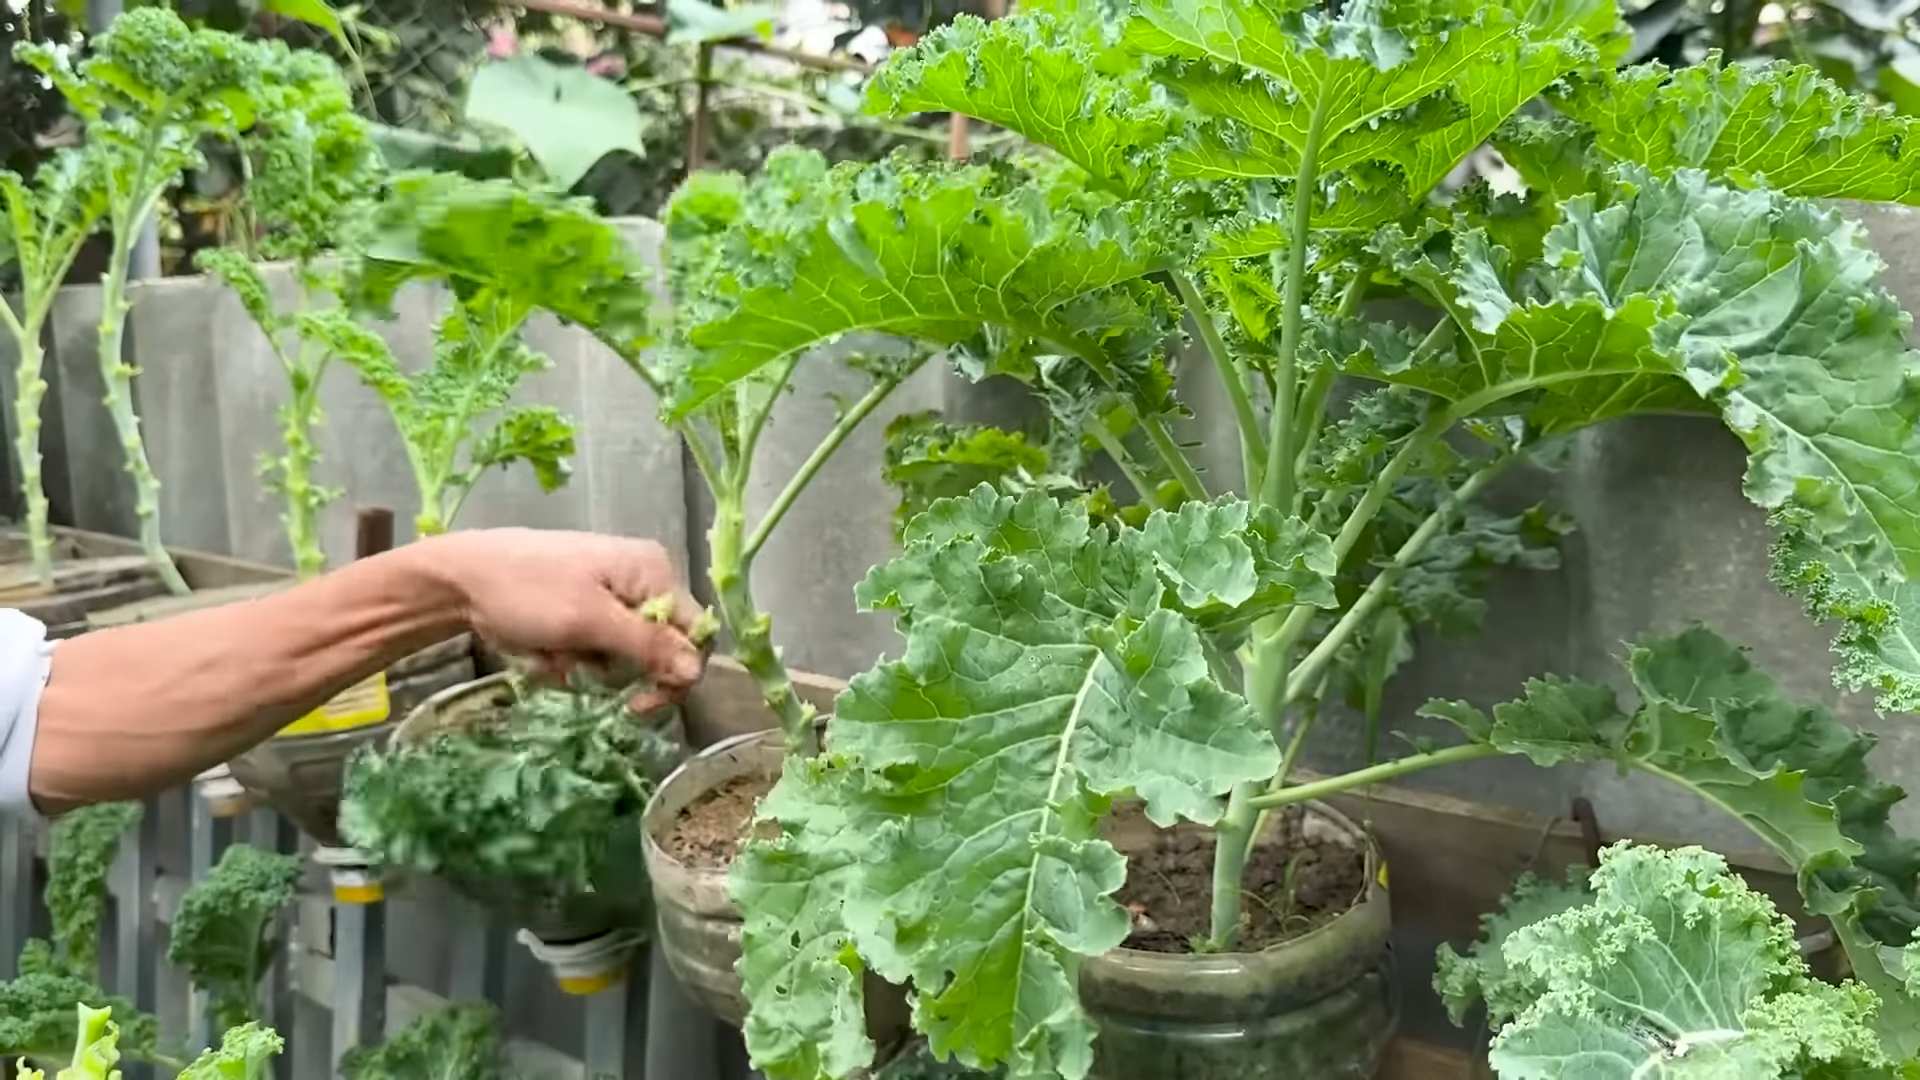
4. Harvesting: You can start harvesting kale leaves when they’re about 4-6 inches long. Simply cut the outer leaves off the plant, leaving the inner leaves to continue growing. This will encourage the plant to produce more leaves. I love adding fresh kale to salads, smoothies, and soups.
Hanging Your Planters (Optional)
If you opted for the vertical cut method, you can easily hang your planters.
1. Drill Hanging Holes: Drill two small holes near the top of the bottle, on either side of the opening.
2. Attach Twine or Rope: Thread twine or rope through the holes and tie a knot to secure it. Make sure the twine or rope is strong enough to support the weight of the planter and the soil.
3. Hang Your Planters: Hang your planters from a fence, railing, or hook. Make sure they’re in a sunny location and that they’re easily accessible for watering and harvesting.
Troubleshooting
Even with the best care, you might encounter a few challenges. Here are some common issues and how to address them:
* Yellowing Leaves: This could be a sign of overwatering, underwatering, or nutrient deficiency. Check the soil moisture and adjust your watering schedule accordingly. Fertilize your plants to provide them with the nutrients they need.
* Leggy Growth: This usually indicates a lack of sunlight. Move your planters to a sunnier location or supplement with grow lights.
* Pest Infestation: As mentioned earlier, keep an eye out for pests and take action as soon as you spot them.
Enjoy Your Homegrown Kale!
And there you have it! You’ve successfully transformed empty plastic bottles into thriving kale planters. Not only are you reducing waste and helping the environment, but you’re also enjoying fresh, healthy kale right from your own garden. I hope you found this DIY project helpful and inspiring. Happy gardening!
Conclusion
So, there you have it! Transforming a humble plastic bottle into a thriving kale planter is not just a fun project; it’s a sustainable solution, a budget-friendly gardening hack, and a surprisingly effective way to grow your own fresh greens. In a world increasingly conscious of waste and the importance of local food sources, this DIY project ticks all the right boxes.
Why is this a must-try? Because it’s incredibly simple. You don’t need a green thumb or expensive equipment. With a few basic tools and a discarded plastic bottle, you can create a mini-garden that fits perfectly on a balcony, windowsill, or even a small patio. It’s a fantastic way to introduce children to the joys of gardening and teach them about recycling and resourcefulness. Plus, there’s nothing quite like the satisfaction of harvesting your own kale, knowing you grew it yourself from something that would have otherwise ended up in a landfill.
But the benefits extend beyond the practical. This project fosters creativity and encourages experimentation. Feel free to personalize your planters with paint, markers, or even decorative twine. Consider using different sizes of bottles to create a tiered effect or grouping several planters together for a more visually appealing display.
Looking for variations? Absolutely! While we’ve focused on kale, this method works beautifully for other leafy greens like spinach, lettuce, and even herbs like basil and parsley. You can also adapt the design to accommodate larger plants by using bigger bottles and adjusting the drainage accordingly. For a more advanced setup, explore adding a self-watering system using a wick and a reservoir at the bottom of the bottle. This is especially helpful if you tend to forget to water your plants regularly.
The key takeaway is that this project is adaptable to your needs and preferences. Don’t be afraid to experiment and find what works best for you. The beauty of DIY is that there are no hard and fast rules.
We wholeheartedly encourage you to give this plastic bottle kale planter project a try. It’s a rewarding experience that combines sustainability, creativity, and the joy of growing your own food. Once you’ve created your own mini-kale garden, we’d love to hear about your experience! Share your photos, tips, and any variations you’ve tried in the comments below. Let’s inspire each other to embrace sustainable gardening practices and make the most of the resources we have. Happy planting!
Frequently Asked Questions (FAQs)
What type of plastic bottle is best for this project?
Ideally, you should use a sturdy plastic bottle, such as those used for water, juice, or soda. Avoid using thin, flimsy bottles, as they may not be able to support the weight of the soil and plants. Bottles made from PET (polyethylene terephthalate) are a good choice, as they are durable and recyclable. Make sure the bottle is clean and free of any residue before you start.
How do I ensure proper drainage in my plastic bottle planter?
Drainage is crucial to prevent waterlogging and root rot. When creating your planter, make sure to drill or poke several drainage holes in the bottom of the bottle. You can also add a layer of gravel or small stones to the bottom of the bottle before adding the soil. This will help to improve drainage and prevent the soil from clogging the drainage holes.
What type of soil should I use for my kale planter?
Use a well-draining potting mix that is rich in organic matter. Avoid using garden soil, as it can be too heavy and compact, which can hinder drainage and root growth. You can also amend your potting mix with compost or other organic materials to improve its fertility and water-holding capacity. A mix of potting soil, compost, and perlite or vermiculite is a good option.
How often should I water my kale plants in the plastic bottle planter?
The frequency of watering will depend on several factors, including the weather, the size of the bottle, and the type of soil you are using. Generally, you should water your kale plants when the top inch of soil feels dry to the touch. Avoid overwatering, as this can lead to root rot. Check the soil moisture regularly and adjust your watering schedule accordingly. During hot, dry weather, you may need to water your plants more frequently.
Where is the best location to place my plastic bottle kale planter?
Kale thrives in full sun, so choose a location that receives at least 6 hours of direct sunlight per day. If you live in a hot climate, you may need to provide some afternoon shade to prevent the leaves from scorching. A balcony, windowsill, or patio that faces south or west is usually a good option. You can also use grow lights if you don’t have access to a sunny location.
How do I fertilize my kale plants in the plastic bottle planter?
Kale is a heavy feeder, so it’s important to fertilize your plants regularly to ensure healthy growth. You can use a balanced liquid fertilizer or a slow-release granular fertilizer. Follow the instructions on the fertilizer package carefully. Avoid over-fertilizing, as this can damage the plants. You can also amend the soil with compost or other organic materials to provide a slow-release source of nutrients.
How do I protect my kale plants from pests and diseases?
Regularly inspect your plants for signs of pests or diseases. Common pests that affect kale include aphids, cabbage worms, and flea beetles. You can control these pests by handpicking them off the plants, using insecticidal soap, or applying neem oil. Diseases that can affect kale include powdery mildew and black rot. To prevent these diseases, ensure good air circulation around the plants and avoid overwatering. You can also use a fungicide if necessary.
Can I grow kale indoors in a plastic bottle planter?
Yes, you can grow kale indoors in a plastic bottle planter, but you will need to provide adequate light. Place the planter near a sunny window or use grow lights to supplement the natural light. Kale needs at least 6 hours of light per day to thrive. You may also need to adjust your watering schedule, as indoor plants tend to dry out more slowly than outdoor plants.
How long does it take for kale to grow in a plastic bottle planter?
Kale typically takes about 50-75 days to mature, depending on the variety and growing conditions. You can start harvesting the outer leaves once they are large enough to eat. Continue harvesting the leaves as needed, and the plant will continue to produce new leaves. With proper care, your kale plant can continue to produce for several months.
What are some other plants I can grow in a plastic bottle planter besides kale?
Many other plants can be successfully grown in plastic bottle planters, including lettuce, spinach, herbs (such as basil, parsley, and mint), strawberries, and even some smaller vegetables like radishes and peppers. The key is to choose plants that are well-suited to container gardening and that have similar growing requirements. Be sure to provide adequate drainage and use a well-draining potting mix.

Leave a Comment