

Plastic Tub Bitter Melon: Ever dreamt of harvesting your own fresh, slightly bitter, and incredibly healthy bitter melon right from your backyard, even if you don’t have a sprawling garden? I know I have! For years, I thought growing this unique vegetable was only for those with acres of land and a green thumb blessed by the gardening gods. But guess what? I discovered the magic of growing plastic tub bitter melon, and it’s easier than you think!
Bitter melon, also known as bitter gourd, has a rich history, deeply rooted in Asian and African cultures where it’s been used for centuries, not just as a food source but also for its medicinal properties. Think of it as nature’s little pharmacy, packed with vitamins and antioxidants. But let’s be honest, finding fresh, high-quality bitter melon at the grocery store can be a challenge, and sometimes, the prices are enough to make you wince.
That’s where this DIY guide comes in! I’m going to show you how to cultivate your very own thriving bitter melon plants using simple plastic tubs. This method is perfect for apartment dwellers, balcony gardeners, or anyone with limited space. Imagine the satisfaction of snipping off a perfectly ripe bitter melon, knowing you grew it yourself. Plus, you’ll have a constant supply of this nutritional powerhouse right at your fingertips. So, ditch the store-bought stuff and let’s get our hands dirty! I promise, growing plastic tub bitter melon is a rewarding experience you won’t regret.
DIY Bitter Melon Growing in a Plastic Tub: A Beginner’s Guide
Hey there, fellow gardening enthusiasts! Ever thought about growing your own bitter melon? It might sound intimidating, but trust me, it’s totally doable, even if you don’t have a sprawling garden. I’m going to walk you through how to grow this unique and healthy vegetable right in a plastic tub. It’s a fun and rewarding project, and you’ll be enjoying fresh, homegrown bitter melon before you know it!
What You’ll Need: The Essential Supplies
Before we dive in, let’s gather everything we need. This will make the process smooth and enjoyable.
* A Large Plastic Tub: Look for a tub that’s at least 18 inches in diameter and 12 inches deep. The bigger, the better, as bitter melon vines can get quite extensive. Make sure it has drainage holes! If not, you’ll need to drill some.
* Bitter Melon Seeds: You can find these at most garden centers or online. Choose a variety that suits your climate.
* High-Quality Potting Mix: Avoid using garden soil directly, as it can compact and hinder drainage. A well-draining potting mix is crucial.
* Compost or Aged Manure: This will enrich the soil and provide essential nutrients for your bitter melon plants.
* Trellis or Support Structure: Bitter melon is a vine, so it needs something to climb on. A trellis, bamboo stakes, or even a sturdy tomato cage will work.
* Watering Can or Hose: For regular watering.
* Gardening Gloves: To keep your hands clean and protected.
* Optional: Seed Starting Tray and Dome: If you prefer to start your seeds indoors.
* Optional: Fertilizer: A balanced, water-soluble fertilizer to boost growth.
Phase 1: Seed Starting (Optional but Recommended)
Starting your bitter melon seeds indoors gives them a head start, especially if you live in a cooler climate. Here’s how I do it:
1. Soaking the Seeds: Bitter melon seeds have a tough outer shell. To improve germination, soak them in warm water for 24 hours. This helps soften the shell and encourages sprouting.
2. Preparing the Seed Starting Tray: Fill your seed starting tray with a seed starting mix. Moisten the mix thoroughly.
3. Planting the Seeds: Make a small hole (about ½ inch deep) in each cell of the tray. Place one seed in each hole and cover it gently with the seed starting mix.
4. Providing Warmth and Moisture: Cover the tray with a humidity dome or plastic wrap to create a mini-greenhouse effect. Place the tray in a warm location (around 75-85°F). A heat mat can be helpful if your home is cooler.
5. Monitoring Germination: Keep the soil consistently moist, but not soggy. Check the tray daily for signs of germination. Bitter melon seeds typically germinate in 7-14 days.
6. Providing Light: Once the seedlings emerge, remove the humidity dome and provide them with plenty of light. A sunny windowsill or grow lights will work well.
7. Hardening Off: Before transplanting the seedlings outdoors, you need to “harden them off.” This means gradually exposing them to outdoor conditions over a period of 7-10 days. Start by placing them in a sheltered location for a few hours each day, gradually increasing the amount of time they spend outdoors.
Phase 2: Preparing the Plastic Tub
Now that we have our seeds started (or if you’re going directly to planting), let’s get the tub ready.
1. Ensuring Drainage: This is crucial! If your tub doesn’t have drainage holes, drill several (at least 4-5) in the bottom. This prevents waterlogging, which can rot the roots.
2. Adding a Layer of Gravel (Optional): I like to add a layer of gravel or small stones to the bottom of the tub to further improve drainage. This isn’t strictly necessary, but it can be helpful.
3. Mixing the Soil: In a large container or wheelbarrow, mix your potting mix with compost or aged manure. A good ratio is about 2 parts potting mix to 1 part compost. This will provide a nutrient-rich environment for your bitter melon plants.
4. Filling the Tub: Fill the plastic tub with the soil mixture, leaving a few inches of space at the top.
Phase 3: Planting the Bitter Melon
Whether you started your seeds indoors or are planting directly, this step is where the magic happens.
1. Transplanting Seedlings (If Applicable): Gently remove the seedlings from the seed starting tray. Be careful not to damage the roots. Make a small hole in the soil in the tub and carefully place the seedling in the hole. Gently pat the soil around the base of the seedling.
2. Direct Sowing (If Applicable): If you’re planting directly, sow the seeds about ½ inch deep and 2-3 inches apart. You can thin them later if too many germinate.
3. Watering Thoroughly: After planting, water the soil thoroughly. This helps settle the soil around the roots and provides the plants with the moisture they need to get started.
Phase 4: Providing Support
Bitter melon vines need something to climb on. Providing a sturdy support structure is essential for healthy growth and fruit production.
1. Installing the Trellis or Support: Place your trellis or support structure in the tub, making sure it’s securely anchored. You can use bamboo stakes, a tomato cage, or a commercially available trellis.
2. Guiding the Vines: As the bitter melon vines grow, gently guide them onto the trellis or support structure. You can use plant ties or twine to secure them in place.
Phase 5: Ongoing Care and Maintenance
Growing bitter melon is an ongoing process. Here’s what you need to do to keep your plants healthy and productive.
1. Watering Regularly: Bitter melon plants need consistent moisture, especially during hot weather. Water deeply whenever the top inch of soil feels dry to the touch. Avoid overwatering, as this can lead to root rot.
2. Fertilizing: Feed your bitter melon plants with a balanced, water-soluble fertilizer every 2-3 weeks. Follow the instructions on the fertilizer package.
3. Sunlight: Bitter melon plants need at least 6-8 hours of sunlight per day. Place your plastic tub in a sunny location.
4. Pruning: Pruning can help improve air circulation and encourage fruit production. Remove any dead or yellowing leaves. You can also pinch back the tips of the vines to encourage branching.
5. Pest and Disease Control: Keep an eye out for pests and diseases. Common pests include aphids, spider mites, and squash bugs. You can control these pests with insecticidal soap or neem oil. Common diseases include powdery mildew and fungal leaf spots. You can prevent these diseases by providing good air circulation and avoiding overwatering.
6. Pollination: Bitter melon plants have separate male and female flowers. You may need to hand-pollinate the flowers to ensure fruit production. To hand-pollinate, use a small paintbrush to transfer pollen from the male flowers to the female flowers. The female flowers have a small, immature fruit at the base.
Phase 6: Harvesting Your Bitter Melon
The moment you’ve been waiting for! Harvesting your homegrown bitter melon.
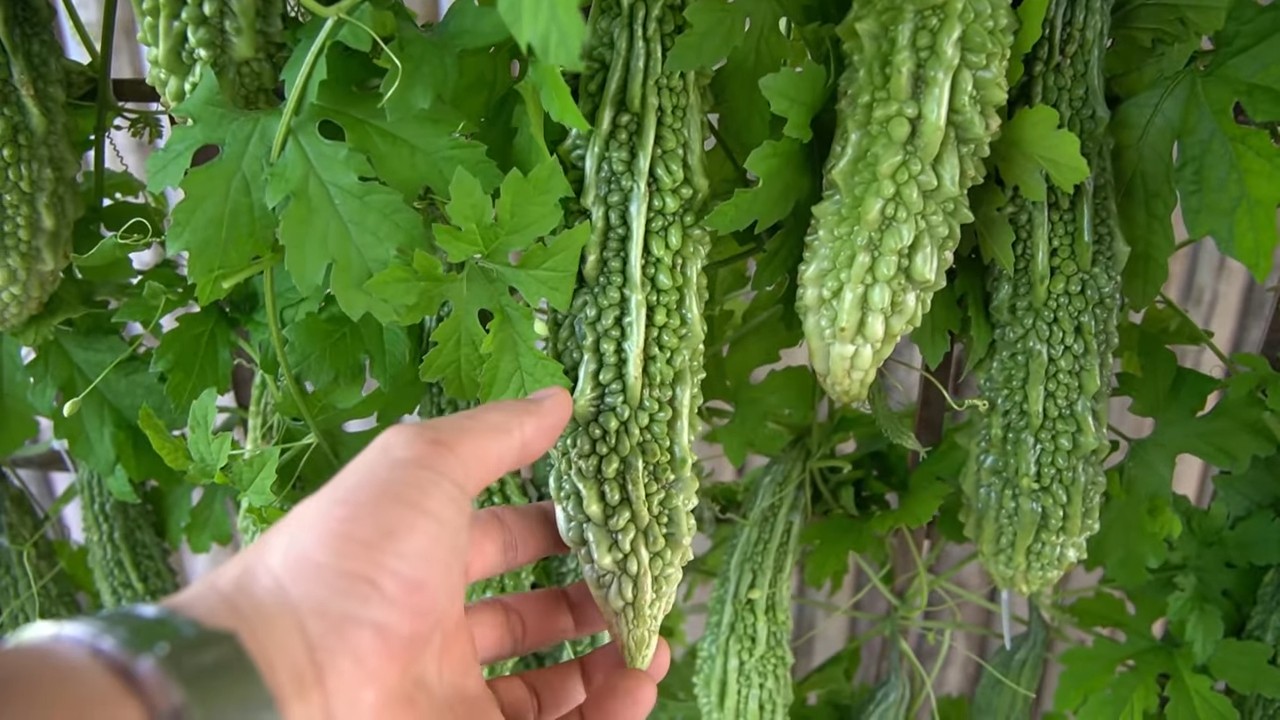
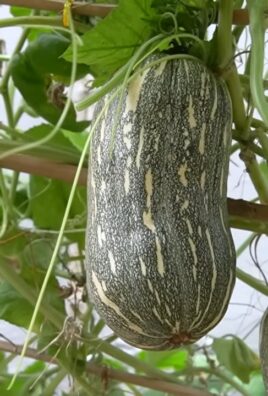
1. Knowing When to Harvest: Bitter melon fruits are typically ready to harvest about 2-3 months after planting. The fruits should be firm and green, but not too hard. They should also be about 6-8 inches long.
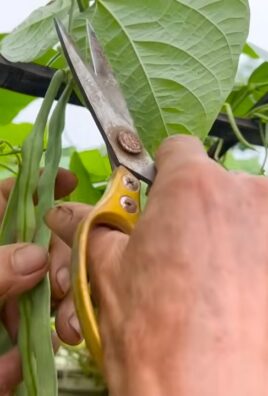
2. Harvesting Carefully: Use a sharp knife or pruning shears to cut the fruits from the vine. Be careful not to damage the vine.
3. Enjoying Your Harvest: Bitter melon can be eaten raw or cooked. It has a slightly bitter taste, which some people find appealing. You can reduce the bitterness by soaking the slices in salt water for a few minutes before cooking. Bitter melon is a good source of vitamins, minerals, and antioxidants.
And there you have it! Growing bitter melon in a plastic tub is a rewarding experience. With a little care and attention, you can enjoy fresh, homegrown bitter melon right from your own patio or balcony. Happy gardening!

Conclusion
So, there you have it! Transforming a simple plastic tub into a thriving bitter melon garden is not only achievable, but incredibly rewarding. We’ve walked you through the process, highlighting the ease and cost-effectiveness of this DIY project. But why should you actually give this a try?
First and foremost, growing your own bitter melon guarantees freshness and quality. You know exactly what goes into your food – no pesticides, no questionable fertilizers, just pure, homegrown goodness. Imagine the satisfaction of harvesting your own bitter melon, knowing you nurtured it from seed to table.
Beyond the health benefits, this DIY project is a fantastic way to connect with nature, even if you live in an apartment or have limited outdoor space. The act of tending to your plants, watching them grow, and finally harvesting your own produce is incredibly therapeutic and fulfilling. It’s a small oasis of green in your everyday life.
And let’s not forget the versatility of bitter melon itself! While its slightly bitter taste might be an acquired one, it’s a culinary chameleon. You can stir-fry it with eggs, stuff it with meat, add it to soups, or even juice it for a healthy boost. The possibilities are endless!
Ready to take your bitter melon cultivation to the next level? Consider these variations:
* Trellis Support: While we’ve focused on a basic setup, providing a more elaborate trellis system will encourage vertical growth and maximize your yield. Experiment with different trellis designs to find what works best for your space and aesthetic.
* Companion Planting: Introduce companion plants like basil or marigolds to deter pests and attract beneficial insects. This natural pest control method will keep your bitter melon healthy and thriving.
* Fertilizer Experimentation: While compost is a great base, explore different organic fertilizers to see what yields the best results. Fish emulsion, seaweed extract, and bone meal are all excellent options.
* Different Bitter Melon Varieties: There are numerous varieties of bitter melon, each with its own unique characteristics. Experiment with different varieties to find your favorite flavor and texture. Some are less bitter than others, making them more palatable for those new to this vegetable.
This DIY plastic tub bitter melon garden is more than just a gardening project; it’s an investment in your health, well-being, and connection to nature. It’s a chance to learn, experiment, and enjoy the fruits (or rather, vegetables) of your labor.
So, what are you waiting for? Grab a plastic tub, some soil, and bitter melon seeds, and embark on this exciting gardening adventure! We’re confident that you’ll be amazed by the results.
We’d love to hear about your experience! Share your photos, tips, and challenges in the comments below. Let’s build a community of DIY bitter melon growers and inspire others to embrace the joy of homegrown produce. Don’t forget to tag us in your social media posts using #DIYBitterMelonGarden. Happy gardening!
Frequently Asked Questions (FAQ)
What size plastic tub is best for growing bitter melon?
The ideal size for your plastic tub depends on the variety of bitter melon you’re growing and the space you have available. However, as a general guideline, a tub that is at least 18 inches in diameter and 12 inches deep is recommended. This provides ample space for the roots to develop and allows for sufficient drainage. Larger tubs, such as those around 24 inches in diameter and 18 inches deep, are even better, especially if you plan to grow multiple plants in the same container. Ensure the tub is sturdy enough to support the weight of the soil and mature plants. Remember to drill drainage holes at the bottom to prevent waterlogging.
How often should I water my bitter melon plants in a plastic tub?
Watering frequency depends on several factors, including the weather, the size of the tub, and the type of soil you’re using. Generally, you should water your bitter melon plants when the top inch of soil feels dry to the touch. During hot, dry weather, this might mean watering every day or even twice a day. In cooler, more humid conditions, you might only need to water every few days. Avoid overwatering, as this can lead to root rot. A good rule of thumb is to water deeply until you see water draining from the bottom of the tub. This ensures that the roots are thoroughly hydrated. Monitor your plants closely and adjust your watering schedule as needed.
What type of soil is best for growing bitter melon in a plastic tub?
Bitter melon thrives in well-draining, nutrient-rich soil. A good potting mix specifically formulated for vegetables is an excellent choice. You can also create your own mix by combining equal parts of garden soil, compost, and perlite or vermiculite. The garden soil provides essential nutrients, the compost adds organic matter and improves drainage, and the perlite or vermiculite enhances aeration and prevents the soil from becoming compacted. Avoid using heavy clay soil, as it can retain too much water and suffocate the roots. Before planting, amend the soil with a slow-release fertilizer to provide a steady supply of nutrients throughout the growing season.
How much sunlight does bitter melon need to grow in a plastic tub?
Bitter melon requires at least 6-8 hours of direct sunlight per day to thrive. Choose a location for your plastic tub that receives plenty of sunlight throughout the day. If you live in a particularly hot climate, providing some afternoon shade can help prevent the plants from getting scorched. If you’re growing your bitter melon indoors, supplement with grow lights to ensure they receive adequate light. Insufficient sunlight can lead to stunted growth, reduced flowering, and poor fruit production.
How do I deal with pests and diseases affecting my bitter melon plants?
Regularly inspect your bitter melon plants for signs of pests and diseases. Common pests include aphids, spider mites, and squash bugs. You can control these pests by spraying the plants with insecticidal soap or neem oil. For diseases like powdery mildew, ensure good air circulation and avoid overhead watering. You can also treat affected plants with a fungicide. Companion planting with herbs like basil or marigolds can help deter pests naturally. Remove any diseased or infested leaves promptly to prevent the problem from spreading. Maintaining healthy soil and providing adequate sunlight and water will also help your plants resist pests and diseases.
When is the best time to harvest bitter melon from my plastic tub garden?
Bitter melon is typically ready to harvest about 8-12 weeks after planting. The fruits should be firm, green (or white, depending on the variety), and about 6-8 inches long. Avoid letting the fruits turn yellow or orange, as this indicates that they are overripe and will become more bitter. Use a sharp knife or pruning shears to cut the fruits from the vine, leaving a small stem attached. Harvest regularly to encourage continued fruit production.
Can I grow bitter melon in a plastic tub indoors?
Yes, you can grow bitter melon in a plastic tub indoors, but it requires careful attention to ensure the plants receive adequate light, water, and nutrients. Place the tub near a sunny window that receives at least 6-8 hours of direct sunlight per day. Supplement with grow lights if necessary. Maintain a consistent watering schedule, allowing the soil to dry slightly between waterings. Provide a trellis or other support for the vines to climb. Pollinate the flowers manually using a small brush to transfer pollen from the male flowers to the female flowers. With proper care, you can successfully grow bitter melon indoors and enjoy fresh, homegrown produce year-round.
How do I save seeds from my bitter melon for future planting?
To save seeds from your bitter melon, allow a few fruits to fully ripen on the vine until they turn yellow or orange. Once the fruits are ripe, carefully cut them open and scoop out the seeds. Wash the seeds thoroughly to remove any pulp. Spread the seeds out on a paper towel and allow them to dry completely for several days. Store the dried seeds in an airtight container in a cool, dark, and dry place. Properly stored seeds can remain viable for several years. Remember that seeds saved from hybrid varieties may not produce plants that are true to type.
Leave a Comment