

Regrow green onions from scraps? Yes, you read that right! Imagine never having to buy green onions again. Sounds like a dream, doesn’t it? Well, it’s a dream that can easily become your reality with this simple and incredibly rewarding DIY trick. For generations, resourceful gardeners have been finding ways to maximize their harvests and minimize waste, and this method of regrowing green onions is a perfect example of that ingenuity.
Think about it: how often do you use just the green parts of your green onions, tossing the white bulbs into the compost (or worse, the trash)? It’s time to change that habit! This isn’t just about saving a few bucks; it’s about embracing a more sustainable lifestyle and connecting with the magic of nature right in your own kitchen. Plus, who doesn’t love a quick and easy win? This DIY project is so simple, even the most novice gardener (like me, sometimes!) can achieve success.
In this article, I’m going to show you exactly how to regrow green onions from scraps, step-by-step. We’ll cover everything from preparing your scraps to choosing the right container and ensuring your green onions thrive. Get ready to impress your friends and family with your newfound gardening prowess and enjoy a constant supply of fresh, flavorful green onions at your fingertips!
Regrowing Green Onions: A DIY Guide to Endless Scallions!
Hey there, fellow green thumb enthusiasts! Are you tired of buying green onions only to use a tiny bit and watch the rest wilt away in your fridge? Well, I’ve got a super simple and satisfying DIY hack for you: regrowing green onions from scraps! It’s incredibly easy, saves you money, and gives you a constant supply of fresh scallions right at your fingertips. Trust me, once you start, you’ll never look at a green onion the same way again.
What You’ll Need
Before we dive in, let’s gather our supplies. The beauty of this project is that you probably already have everything you need!
* Green Onion Scraps: This is the star of the show! You’ll need the white part of the green onion, including the roots (or what’s left of them). Aim for at least an inch or two of the white base.
* A Glass or Jar: Any small glass or jar will do. I like to use old jam jars or even a repurposed drinking glass.
* Water: Tap water is perfectly fine.
* Optional: Potting Soil and a Small Pot: If you want to transition your green onions to soil for longer-term growth and larger yields, you’ll need these.
* Scissors or a Knife: For harvesting your regrown green onions.
The Water Propagation Method: Quick and Easy!
This is the simplest method, perfect for beginners. It’s a great way to get started and see results quickly.
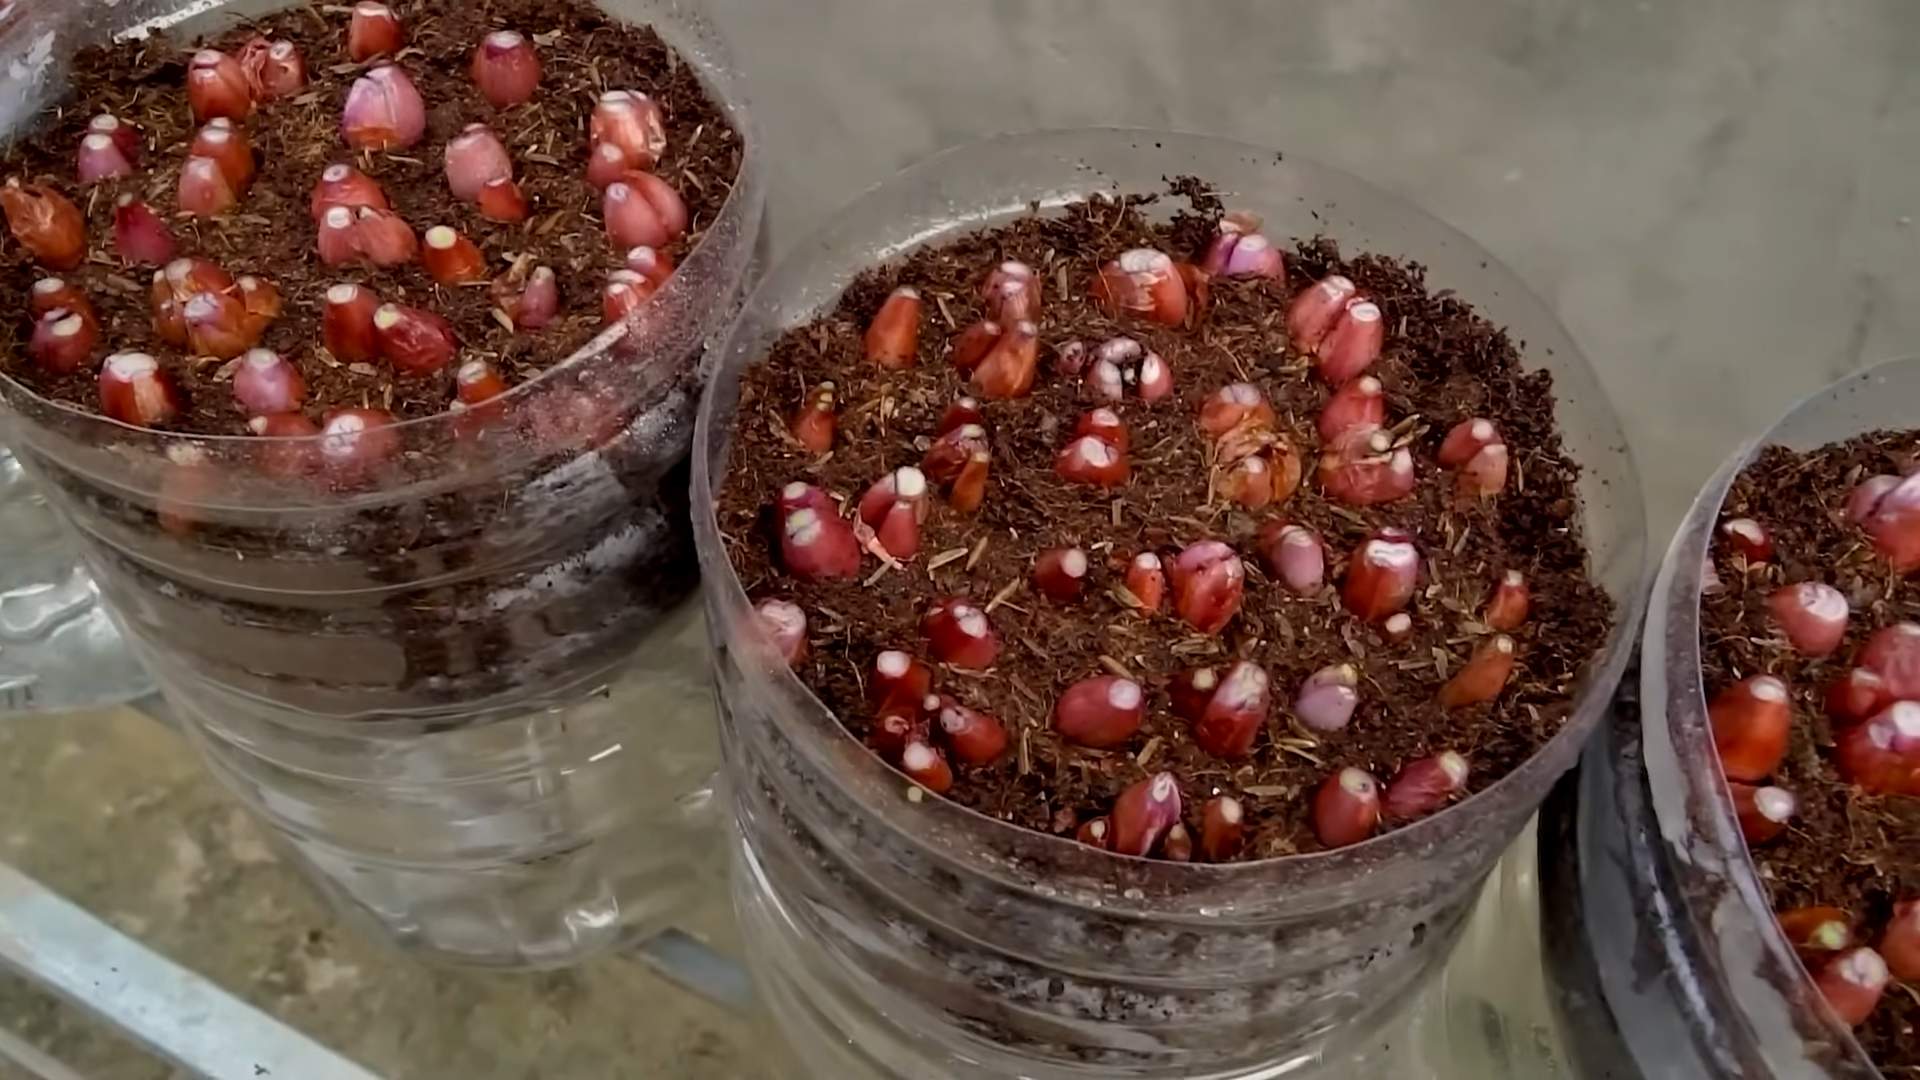
1. Prepare Your Scraps: After you’ve used the green parts of your green onions in your cooking, don’t toss the white ends! Trim the very bottom of the white part, removing any mushy or dead roots. This will encourage fresh root growth. Leave at least an inch or two of the white base intact.
2. Place in Water: Fill your glass or jar with enough water to cover the roots and the very bottom of the white part of the green onion. You don’t want to submerge the entire white section, just the root area.
3. Find a Sunny Spot: Place the glass with your green onion scraps in a bright, sunny location. A windowsill is ideal. Green onions need sunlight to grow, so the more light they get, the better.
4. Change the Water Regularly: This is crucial! Change the water every one to two days to prevent bacteria growth and keep the water fresh. This will help your green onions thrive.
5. Watch Them Grow! Within a few days, you should start to see new green shoots emerging from the top. The roots will also start to grow longer and stronger. It’s so exciting to watch!
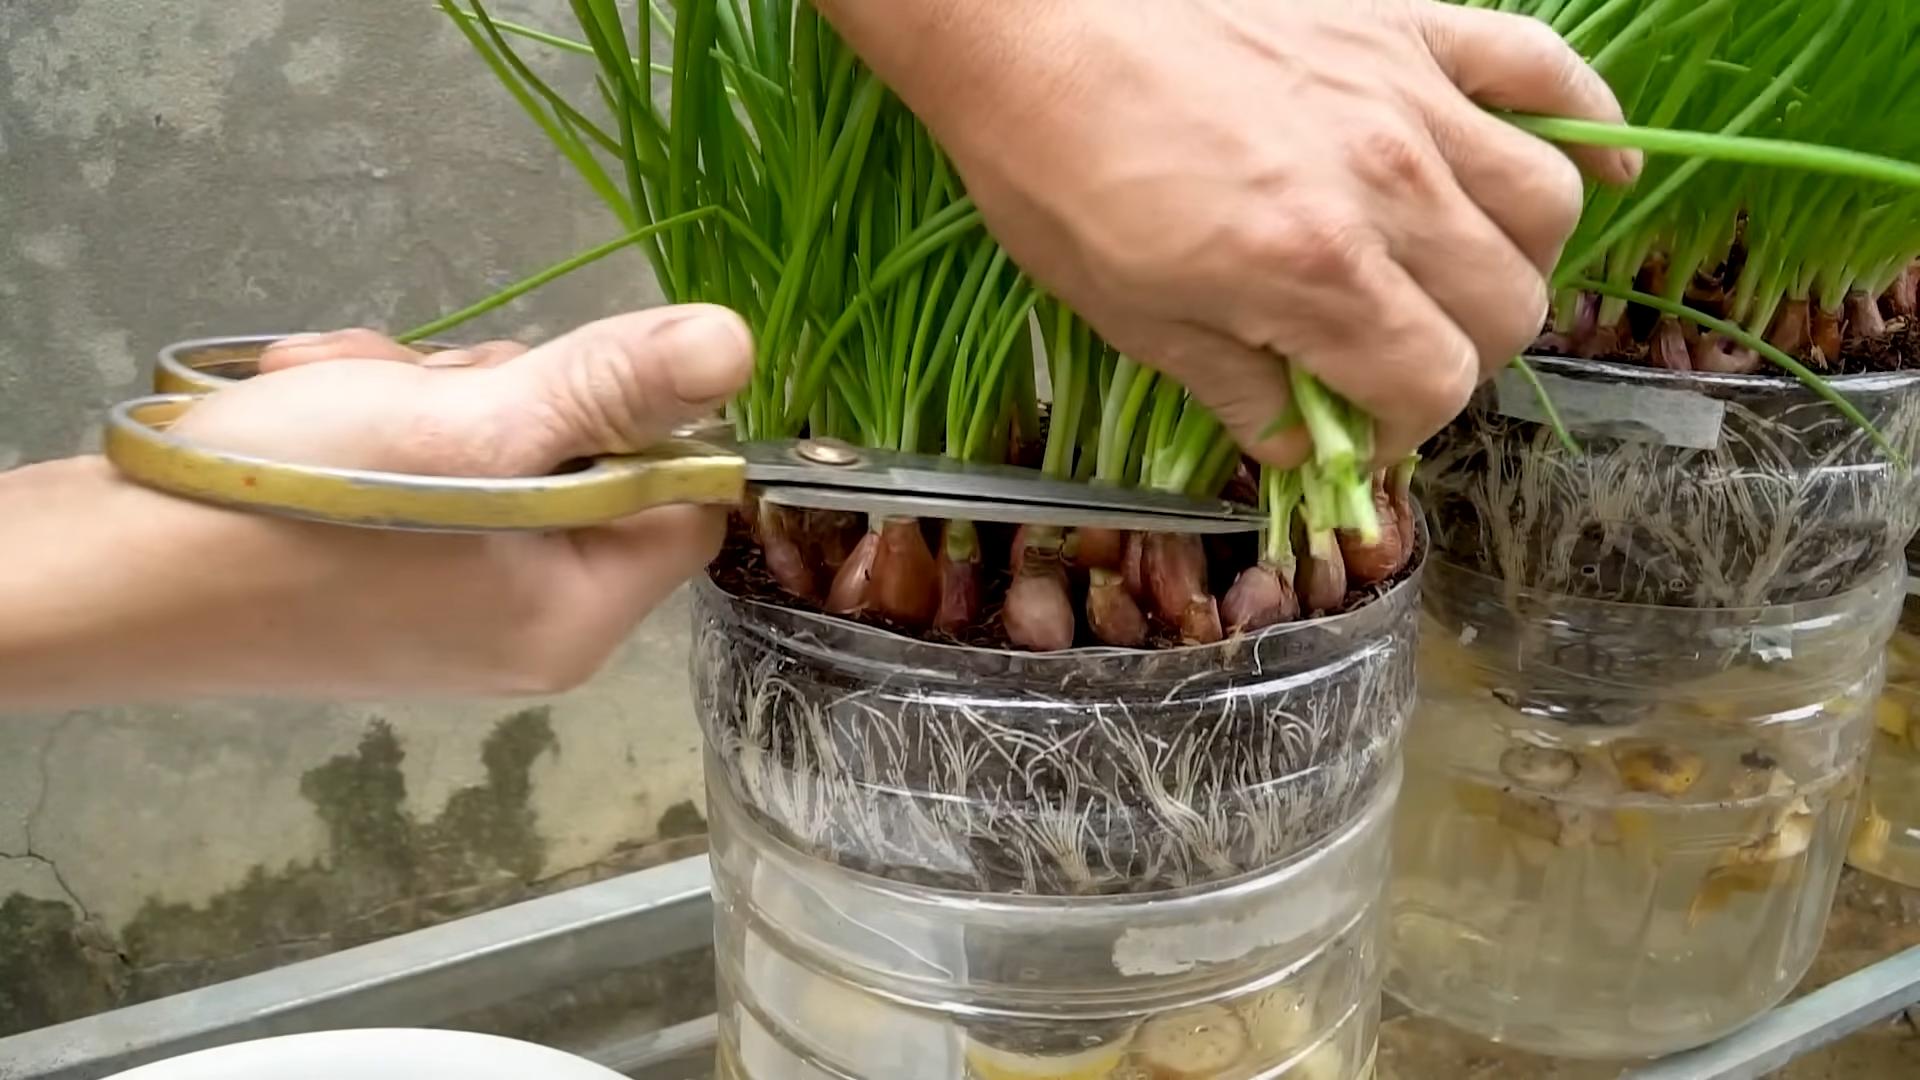
6. Harvest Your Green Onions: Once the green shoots are a few inches long, you can start harvesting! Use scissors to snip off the green parts you need, leaving about an inch or two of green growth at the base. This will allow the green onions to continue growing.
7. Repeat and Enjoy: Keep changing the water regularly and harvesting as needed. You can continue to regrow green onions in water for several weeks, even months! Eventually, the growth may slow down, and it’s time to consider transplanting them to soil.
Transplanting to Soil: For Long-Term Growth
If you want to enjoy a more substantial harvest and keep your green onions growing for a longer period, transplanting them to soil is the way to go.
1. Prepare Your Pot: Choose a small pot with drainage holes. Fill it with good-quality potting soil. Moisten the soil thoroughly before planting.
2. Carefully Remove from Water: Gently remove the green onion scraps from the water. Be careful not to damage the roots.
3. Plant the Green Onions: Make a small hole in the soil and plant the green onion scraps, burying the white part up to where the green shoots begin. Gently press the soil around the base of the green onions to secure them.
4. Water Well: Water the newly planted green onions thoroughly.
5. Find a Sunny Spot: Place the pot in a sunny location, just like when they were in water.
6. Water Regularly: Keep the soil consistently moist, but not soggy. Water when the top inch of soil feels dry to the touch.
7. Fertilize (Optional): To encourage even more growth, you can fertilize your green onions every few weeks with a diluted liquid fertilizer.
8. Harvest and Enjoy: Just like with the water method, you can harvest the green parts as needed. The green onions will continue to grow and produce new shoots.
Troubleshooting Tips
Even with the simplest DIY projects, sometimes things don’t go exactly as planned. Here are a few common issues you might encounter and how to fix them:
* Yellowing Leaves: This can be caused by several factors, including lack of sunlight, overwatering, or nutrient deficiency. Make sure your green onions are getting enough sunlight, and adjust your watering schedule accordingly. If you’re growing them in soil, consider fertilizing them.
* Slow Growth: Slow growth is often due to insufficient sunlight or lack of nutrients. Move your green onions to a sunnier location and consider fertilizing them if they’re in soil.
* Rotting Roots: Rotting roots are usually caused by overwatering or stagnant water. Make sure you’re changing the water regularly if you’re using the water propagation method, and avoid overwatering if you’re growing them in soil.
* Pests: While green onions are relatively pest-resistant, they can occasionally be affected by aphids or other small insects. If you notice any pests, try spraying them with a mixture of water and a few drops of dish soap.
Tips for Success
Here are a few extra tips to help you get the most out of your green onion regrowing adventure:
* Start with Healthy Scraps: The healthier the green onion scraps you start with, the better your chances of success. Choose scraps that are firm and have healthy-looking roots.
* Don’t Overcrowd: If you’re growing multiple green onions in the same container, make sure they have enough space to grow. Overcrowding can lead to stunted growth and other problems.
* Experiment with Different Varieties: There are many different varieties of green onions, so feel free to experiment and see which ones grow best for you.
* Enjoy the Process! Regrowing green onions is a fun and rewarding project. Don’t be afraid to experiment and learn as you go.
Beyond the Basics: Creative Uses for Your Regrown Green Onions
Okay, so you’ve got a thriving supply of regrown green onions. Now what? Here are a few creative ways to use them in your cooking:
* Garnish: The classic use! Sprinkle chopped green onions on soups, salads, tacos, stir-fries, and just about anything else that could use a pop of fresh flavor.
* Flavor Booster: Add chopped green onions to omelets, scrambled eggs, mashed potatoes, or dips for an extra layer of flavor.
* Ingredient: Use chopped green onions as an ingredient in stir-fries, sauces, or marinades.
* Green Onion Oil: Infuse oil with green onions for a flavorful cooking oil or drizzle. Simply heat oil on low with chopped green onions until fragrant, then strain.
* Green Onion Pancakes: A delicious and savory snack or side dish.
So there you have it! Everything you need to know to regrow green onions from scraps. It’s a simple, sustainable, and satisfying way to add fresh flavor to your meals. Happy growing!
Conclusion
So, there you have it! Regrowing green onions from scraps isn’t just a fun kitchen experiment; it’s a genuinely practical way to reduce food waste, save money, and enjoy a constant supply of fresh, flavorful green onions right at your fingertips. It’s a small change that can make a big difference, both in your wallet and in your commitment to sustainable living.
Why is this DIY trick a must-try? Because it’s incredibly easy, requires minimal effort, and yields surprisingly rewarding results. Forget constantly buying bunches of green onions that inevitably wilt away in your refrigerator. With this method, you’ll always have a fresh supply ready to add a zesty kick to your favorite dishes. Think about it: a sprinkle of freshly chopped green onions elevates everything from scrambled eggs and tacos to soups and salads. And knowing you grew them yourself? That’s an extra layer of satisfaction you just can’t buy.
But the benefits don’t stop there. This project is also a fantastic way to get kids involved in gardening and teach them about the life cycle of plants. It’s a hands-on learning experience that’s both educational and engaging. Plus, it’s a great conversation starter! Imagine sharing your regrown green onions with friends and family – they’ll be amazed by your resourcefulness.
Looking for variations? Absolutely! While water propagation is the simplest method, you can also transplant your regrown green onions into soil for even more robust growth. Just make sure to choose a well-draining potting mix and provide plenty of sunlight. Another variation is to experiment with different types of onions. While green onions are the easiest to regrow, you can also try this method with scallions or even the tops of leeks. The results may vary, but it’s always fun to experiment! You can also try different containers. While a simple glass of water works perfectly, you can also use a mason jar, a repurposed plastic container, or even a dedicated propagation station. The key is to choose a container that’s stable and allows the roots to grow freely.
We encourage you to give this DIY trick a try. It’s a simple, sustainable, and satisfying way to add fresh flavor to your meals. And once you’ve experienced the joy of regrowing your own green onions, we’re confident you’ll be hooked!
Don’t just take our word for it – try it yourself and see the magic unfold. And most importantly, we want to hear about your experience! Share your photos, tips, and stories in the comments below. Let’s create a community of green onion growers and inspire others to embrace this simple yet powerful DIY trick. What are you waiting for? Grab those green onion scraps and get growing! Let us know how your **regrow green onions** project goes!
Frequently Asked Questions (FAQ)
How long does it take for green onions to regrow?
Typically, you’ll start to see noticeable regrowth within a few days. Within a week, you should have a significant amount of new green growth. The speed of regrowth depends on factors like the temperature, sunlight, and the health of the original green onion. Warmer temperatures and plenty of sunlight will encourage faster growth.
What part of the green onion do I need to regrow it?
You need the white bulb end with the roots attached (or the potential for roots to grow). Cut off the green tops, leaving about 2 inches of the white part intact. This is the portion you’ll use to regrow your green onions. Make sure there are some root nubs or small roots visible for the best chance of success.
Can I regrow green onions in soil instead of water?
Yes, absolutely! While water propagation is a great way to start, transplanting your regrown green onions into soil will allow them to grow even larger and more robust. Once the roots have developed in water (usually after a week or two), you can carefully plant them in a pot filled with well-draining potting mix. Make sure to bury the white bulb end completely, leaving the green shoots exposed. Water regularly and provide plenty of sunlight.
How often should I change the water when regrowing green onions in water?
It’s recommended to change the water every one to two days. This helps prevent the water from becoming cloudy or stagnant, which can hinder growth and potentially lead to rot. Fresh water provides the green onions with the necessary oxygen and nutrients for healthy regrowth.
How much sunlight do regrowing green onions need?
Green onions thrive in bright, indirect sunlight. Place your container near a sunny window where they can receive at least 6 hours of sunlight per day. If you don’t have a sunny window, you can supplement with a grow light. Insufficient sunlight can result in leggy, weak growth.
Can I regrow green onions indefinitely?
While you can regrow green onions multiple times from the same base, the regrowth will eventually slow down and become less vigorous. After several cycles, the base may become depleted of nutrients. To maintain a continuous supply of fresh green onions, it’s best to start new batches regularly.
What if my green onions start to rot?
If you notice any signs of rot, such as a slimy texture or foul odor, remove the affected parts immediately. Change the water more frequently and ensure that the green onions are not overcrowded in the container. If the rot persists, it may be necessary to discard the affected green onion and start with a fresh one.
Can I use tap water to regrow green onions?
Tap water is generally fine to use, but it’s best to let it sit out for a few hours to allow the chlorine to dissipate. Alternatively, you can use filtered water. Avoid using softened water, as it may contain high levels of sodium, which can be harmful to plants.
What kind of container is best for regrowing green onions?
Any container that can hold water and support the green onion base will work. A small glass, jar, or even a repurposed plastic container are all suitable options. The container should be stable and wide enough to prevent the green onions from tipping over.
How do I harvest the regrown green onions?
You can harvest the regrown green onions by simply snipping off the green tops with scissors. Leave about an inch or two of the green shoots intact to allow for continued growth. Harvest as needed, and enjoy your fresh, homegrown green onions!
Can I fertilize my regrowing green onions?
While not essential, fertilizing your regrowing green onions can boost their growth and productivity. You can add a diluted liquid fertilizer to the water every few weeks. Be sure to follow the instructions on the fertilizer packaging to avoid over-fertilizing, which can damage the plants.
Are there any pests or diseases that affect regrowing green onions?
Regrowing green onions are generally pest and disease-resistant. However, they can occasionally be affected by aphids or fungal diseases. If you notice any pests, you can try washing them off with a strong stream of water or using an insecticidal soap. To prevent fungal diseases, ensure good air circulation and avoid overwatering.
Can I regrow other types of onions besides green onions?
Yes, you can try regrowing other types of onions, such as scallions, leeks, and even shallots. The success rate may vary depending on the type of onion and the growing conditions. The process is generally the same as with green onions: cut off the top, leaving the root end intact, and place it in water or soil.
Is regrowing green onions a good way to save money?
Absolutely! Regrowing green onions can significantly reduce your grocery bill, especially if you use green onions frequently. Instead of constantly buying new bunches, you can simply regrow them from scraps, providing you with a continuous supply of fresh green onions at no extra cost. Over time, the savings can really add up.
What are some creative ways to use regrown green onions?
The possibilities are endless! Use your regrown green onions to garnish soups, salads, tacos, and stir-fries. Add them to omelets, scrambled eggs, or quiches. Mix them into dips, sauces, or marinades. You can even use them to make green onion pancakes or scallion oil. Let your imagination run wild and experiment with different ways to incorporate your fresh, homegrown green onions into your favorite dishes.
Leave a Comment