

Rooftop Okra Gardening: Imagine stepping onto your rooftop and harvesting fresh, vibrant okra, ready to be transformed into a delicious meal. Sounds like a dream, right? Well, it doesn’t have to be! This DIY guide will unlock the secrets to successfully growing okra in the unique environment of your rooftop garden.
Okra, with its origins tracing back to Africa, has been a culinary staple for centuries, finding its way into diverse cuisines across the globe. From hearty gumbos in the American South to flavorful curries in India, okra’s versatility is undeniable. But what if I told you that you could cultivate this incredible vegetable right above your head, even in the heart of the city?
Many people shy away from rooftop gardening, thinking it’s too complicated or requires extensive knowledge. But with a few clever tricks and some DIY ingenuity, you can transform your underutilized rooftop space into a thriving edible oasis. This article will provide you with practical, step-by-step instructions, from choosing the right containers and soil to mastering watering techniques and pest control, all tailored specifically for rooftop okra gardening.
Why is this DIY trick so important? Because access to fresh, healthy produce shouldn’t be limited by your living situation. Growing your own okra on your rooftop not only provides you with nutritious food but also connects you with nature, reduces your carbon footprint, and adds a touch of beauty to your urban landscape. So, let’s get started and turn your rooftop into an okra paradise!
Rooftop Okra Gardening: A Beginner’s Guide to Growing Your Own!
Hey there, fellow gardening enthusiasts! Ever thought about turning your rooftop into a vibrant, okra-producing oasis? I’m here to tell you, it’s totally doable! Growing okra on your rooftop is not only a fun and rewarding experience, but it also provides you with fresh, delicious veggies right at your doorstep. Plus, imagine the bragging rights! This guide will walk you through every step, from choosing the right containers to harvesting your bounty. Let’s get started!
Choosing the Right Location and Containers
Before we even think about seeds, let’s talk about location and containers. These are crucial for a successful rooftop okra garden.
* Sunlight is Key: Okra *loves* sunshine. Aim for a spot on your rooftop that gets at least 6-8 hours of direct sunlight each day. This is non-negotiable!
* Weight Considerations: Rooftops have weight limits, so be mindful of the combined weight of your containers, soil, and mature okra plants. Consult with a structural engineer if you have any concerns about your roof’s load-bearing capacity. Safety first!
* Container Size Matters: Okra plants need room to grow. Choose containers that are at least 12 inches deep and 12 inches in diameter. Larger is generally better, as it allows for more root development.
* Drainage is Essential: Make sure your containers have adequate drainage holes. Okra doesn’t like soggy roots.
* Container Material: You can use plastic, terracotta, or even fabric pots. Plastic is lightweight and retains moisture well, while terracotta is more breathable but can dry out faster. Fabric pots are great for air pruning roots, promoting healthier growth.
* Consider Wind: Rooftops can be windy. Choose sturdy containers that won’t easily tip over. You might also consider a windbreak if your rooftop is particularly exposed.
Preparing the Soil
Okra needs well-draining, fertile soil to thrive. Here’s how to prepare the perfect mix:
* Start with a Good Base: Use a high-quality potting mix specifically designed for containers. Avoid using garden soil, as it can become compacted in containers and doesn’t drain well.
* Amend with Compost: Mix in plenty of compost to add nutrients and improve drainage. Compost is like a superfood for your plants!
* Add Perlite or Vermiculite: These materials help improve drainage and aeration.
* Consider Slow-Release Fertilizer: Incorporate a slow-release fertilizer into the soil mix to provide a steady supply of nutrients throughout the growing season. Follow the instructions on the fertilizer package.
* Test the pH: Okra prefers a slightly acidic to neutral soil pH (around 6.0-7.0). You can test the pH using a soil testing kit and amend the soil accordingly.
Planting Your Okra Seeds
Now for the fun part – planting!
1. Timing is Everything: Okra is a warm-season crop, so wait until the soil has warmed up to at least 65°F (18°C) before planting. This is usually a few weeks after the last frost.
2. Direct Sowing is Best: Okra doesn’t transplant well, so it’s best to sow the seeds directly into your containers.
3. Soak the Seeds: Soak the okra seeds in water for 24 hours before planting. This will help soften the seed coat and improve germination.
4. Planting Depth: Plant the seeds about ½ inch deep.
5. Spacing: Plant 2-3 seeds per container, and then thin to one strong seedling once they emerge.
6. Water Gently: Water the soil gently after planting, being careful not to dislodge the seeds.
7. Keep it Warm: Place the containers in a warm, sunny location. Germination usually takes 7-14 days.
Caring for Your Okra Plants
Once your okra seedlings emerge, it’s time to provide them with the care they need to flourish.
* Watering: Water regularly, especially during hot, dry weather. Okra needs consistent moisture, but avoid overwatering, which can lead to root rot. Check the soil moisture by sticking your finger into the soil. If the top inch feels dry, it’s time to water.
* Fertilizing: Feed your okra plants every 2-3 weeks with a balanced liquid fertilizer. Follow the instructions on the fertilizer package.
* Mulching: Apply a layer of mulch around the base of the plants to help retain moisture, suppress weeds, and regulate soil temperature. Straw, wood chips, or shredded leaves work well.
* Pruning: Prune off any yellowing or dead leaves to improve air circulation and prevent disease.
* Pest Control: Keep an eye out for pests such as aphids, spider mites, and okra worms. Treat infestations promptly with insecticidal soap or neem oil.
* Support: As your okra plants grow taller, they may need support. Use stakes or cages to prevent them from falling over, especially in windy conditions.
Harvesting Your Okra
The moment you’ve been waiting for! Harvesting okra is crucial for continued production.
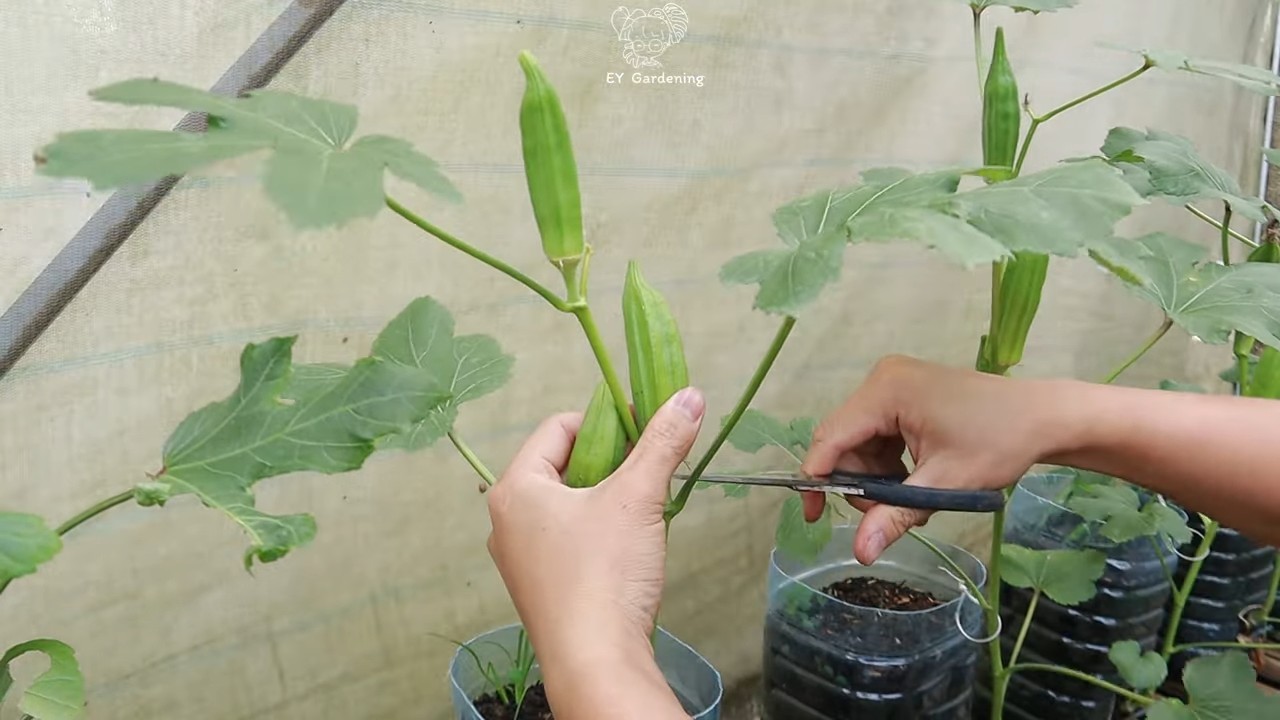
1. Timing is Key: Okra pods are best harvested when they are young and tender, usually 2-4 inches long. Overripe pods become tough and fibrous.
2. Harvest Frequently: Check your plants daily and harvest any pods that are ready. Regular harvesting encourages the plant to produce more pods.
3. Use a Sharp Knife or Pruners: Cut the pods from the plant using a sharp knife or pruners. Be careful not to damage the plant.
4. Wear Gloves: Okra plants have tiny spines that can irritate the skin, so it’s best to wear gloves when harvesting.
5. Store Properly: Store harvested okra pods in the refrigerator for up to a week.
Troubleshooting Common Problems
Even with the best care, you might encounter some challenges along the way. Here are some common problems and how to address them:
* Yellowing Leaves: This could be a sign of nutrient deficiency, overwatering, or pest infestation. Check the soil moisture, fertilize if necessary, and inspect the plants for pests.
* Stunted Growth: This could be caused by poor soil, lack of sunlight, or root-bound plants. Make sure your plants are getting enough sunlight, fertilize regularly, and consider transplanting to a larger container if necessary.
* Lack of Pod Production: This could be due to insufficient pollination, high temperatures, or nutrient deficiency. Hand-pollinate the flowers if necessary, provide shade during the hottest part of the day, and fertilize regularly.
* Pest Infestations: Treat infestations promptly with insecticidal soap or neem oil.
* Disease: Prevent disease by providing good air circulation, avoiding overwatering, and removing any infected leaves.
Choosing Okra Varieties for Containers
Not all okra varieties are created equal when it comes to container gardening. Here are a few that I’ve found to be particularly well-suited for growing in pots:
* ‘Clemson Spineless’: This is a classic okra variety that produces dark green, spineless pods. It’s relatively compact and well-suited for containers.
* ‘Burgundy’: This variety produces beautiful red pods that add a splash of color to your garden. It’s also relatively compact and productive.
* ‘Baby Bubba’: As the name suggests, this is a dwarf okra variety that’s perfect for small containers. It produces small, tender pods.
* ‘Emerald’: This variety produces long, slender, dark green pods. It’s known for its excellent flavor and productivity.
* ‘Annie Oakley II’: This is a hybrid okra variety that’s known for its early maturity and high yields. It’s also relatively compact and well-suited for containers.
Extending the Growing Season
Depending on your climate, you may be able to extend the okra growing season by using some simple techniques:
* Start Seeds Indoors: Start your okra seeds indoors 4-6 weeks before the last frost. This will give you a head start on the growing season.
* Use Row Covers: Cover your plants with row covers to protect them from frost and cold temperatures.
* Move Containers Indoors: If you have a sunny indoor space, you can move your containers indoors during cold snaps.
* Choose Early-Maturing Varieties: Select okra varieties that mature quickly to maximize your harvest.
Enjoying Your Rooftop Okra Harvest
Congratulations! You’ve successfully grown okra on your rooftop. Now it’s time to enjoy the fruits (or rather, vegetables) of your labor. Okra is a versatile vegetable that can be used in a variety of dishes. Here are a few ideas:
* Fried Okra: A

Conclusion
So, there you have it! Transforming your rooftop into a thriving okra garden is not only achievable, but it’s also incredibly rewarding. We’ve walked you through the essential steps, from selecting the right containers and soil to nurturing your okra plants for a bountiful harvest. But why should you embark on this green rooftop adventure?
First and foremost, growing your own okra provides you with access to fresh, organic produce right at your doorstep. Imagine stepping onto your rooftop and picking plump, vibrant okra pods, knowing exactly where they came from and what went into their cultivation. This is a far cry from the often-uncertain origins and potential pesticide exposure of store-bought vegetables.
Beyond the health benefits, rooftop okra gardening is a fantastic way to connect with nature, even in the heart of the city. The simple act of tending to your plants – watering, fertilizing, and observing their growth – can be incredibly therapeutic and grounding. It’s a chance to escape the stresses of daily life and immerse yourself in the beauty and wonder of the natural world.
Moreover, a rooftop garden adds aesthetic appeal to your living space. A lush, green oasis on your rooftop can transform a previously unused area into a vibrant and inviting sanctuary. It’s a conversation starter, a source of pride, and a testament to your commitment to sustainable living.
Now, let’s talk about variations. While we’ve focused on the basics of rooftop okra gardening, there’s plenty of room for experimentation and personalization. Consider companion planting – basil, marigolds, and peppers are all excellent choices that can help deter pests and enhance the growth of your okra. You could also explore different varieties of okra, from the classic Clemson Spineless to the colorful Burgundy okra.
For those with limited space, consider vertical gardening techniques. Trellises or stacked planters can maximize your growing area and add visual interest to your rooftop garden. And if you’re feeling adventurous, why not try growing other vegetables alongside your okra? Tomatoes, eggplants, and herbs all thrive in similar conditions and can create a diverse and productive rooftop ecosystem.
But the most important thing is to just get started! Don’t be intimidated by the prospect of rooftop gardening. With a little planning, preparation, and dedication, you can create a thriving okra garden that will provide you with fresh produce, a connection to nature, and a sense of accomplishment.
We encourage you to embrace the challenge and embark on your own rooftop okra gardening journey. And once you’ve experienced the joy of harvesting your own homegrown okra, we’d love to hear about it! Share your photos, tips, and experiences with us in the comments below. Let’s create a community of rooftop gardeners who are passionate about growing their own food and sharing their knowledge with others. Remember, the key to successful rooftop okra gardening is consistent care and attention. So, get your hands dirty, embrace the learning process, and enjoy the fruits (or rather, vegetables) of your labor!
Frequently Asked Questions (FAQ)
What kind of containers are best for rooftop okra gardening?
Choosing the right containers is crucial for successful rooftop okra gardening. Opt for containers that are at least 12 inches deep and wide to accommodate the okra’s root system. Fabric pots, plastic containers, and terracotta pots are all viable options. Fabric pots offer excellent drainage and aeration, while plastic containers are lightweight and durable. Terracotta pots are aesthetically pleasing but can dry out quickly, so you’ll need to water more frequently. Ensure that your containers have drainage holes to prevent waterlogging, which can lead to root rot. Consider the weight of the containers, especially when they’re filled with soil and plants, to ensure that your rooftop can support the load.
What type of soil should I use for my rooftop okra garden?
Okra thrives in well-draining, fertile soil. A good potting mix specifically designed for vegetables is ideal. Avoid using garden soil, as it can be too heavy and compact for container gardening. You can also create your own potting mix by combining equal parts of compost, peat moss (or coconut coir), and perlite or vermiculite. Compost provides essential nutrients, peat moss or coconut coir helps retain moisture, and perlite or vermiculite improves drainage and aeration. Before planting, amend the soil with a slow-release fertilizer to provide a steady supply of nutrients throughout the growing season.
How often should I water my okra plants on the rooftop?
Watering frequency depends on several factors, including the weather, the type of container, and the size of the plant. Generally, okra plants need consistent moisture, especially during hot and dry periods. Check the soil moisture regularly by sticking your finger about an inch into the soil. If it feels dry, it’s time to water. Water deeply until the water drains out of the drainage holes. Avoid overwatering, as this can lead to root rot. During cooler weather, you may need to water less frequently. Mulching around the base of the plants can help retain moisture and reduce the need for frequent watering.
How much sunlight does okra need to grow well on a rooftop?
Okra requires at least 6-8 hours of direct sunlight per day to thrive. Choose a location on your rooftop that receives ample sunlight throughout the day. If your rooftop is partially shaded, try to position your okra plants in the sunniest spot. If you’re growing okra in containers, you can move them around to maximize their exposure to sunlight. Insufficient sunlight can result in stunted growth, reduced flowering, and lower yields.
What are some common pests and diseases that affect okra, and how can I prevent them?
Common pests that affect okra include aphids, spider mites, and okra stink bugs. To prevent pest infestations, inspect your plants regularly for signs of damage. You can control aphids and spider mites by spraying them with a strong stream of water or using insecticidal soap. Okra stink bugs can be handpicked or controlled with neem oil. Diseases that can affect okra include powdery mildew and root rot. To prevent powdery mildew, ensure good air circulation around your plants and avoid overhead watering. To prevent root rot, use well-draining soil and avoid overwatering.
How and when should I harvest my okra?
Okra pods are typically ready for harvest 50-60 days after planting. Harvest the pods when they are 2-4 inches long and still tender. Use a sharp knife or pruning shears to cut the pods from the plant. Harvest okra frequently, every 1-2 days, to encourage continued production. Overripe okra pods become tough and fibrous.
Can I grow okra in a small space on my rooftop?
Absolutely! Even if you have limited space on your rooftop, you can still grow okra successfully. Choose compact varieties of okra and utilize vertical gardening techniques, such as trellises or stacked planters, to maximize your growing area. Companion planting with herbs and other vegetables can also help optimize space utilization.
What are some good companion plants for okra?
Okra benefits from companion planting with several other vegetables and herbs. Basil, marigolds, and peppers are all excellent choices. Basil helps repel pests, marigolds attract beneficial insects, and peppers can provide shade and support. Avoid planting okra near fennel, as it can inhibit its growth.
How can I fertilize my okra plants on the rooftop?
Okra plants benefit from regular fertilization throughout the growing season. Use a balanced fertilizer with equal parts nitrogen, phosphorus, and potassium. You can also use a fertilizer specifically formulated for vegetables. Apply the fertilizer according to the package instructions. Avoid over-fertilizing, as this can lead to excessive foliage growth and reduced flowering.
Is rooftop okra gardening safe for my roof?
Rooftop gardening can be safe if done properly. Before starting a rooftop garden, consult with a structural engineer or building professional to ensure that your roof can support the added weight of the containers, soil, and plants. Use lightweight containers and soil mixes to minimize the load. Distribute the weight evenly across the roof. Install a waterproof membrane to protect the roof from water damage. Regularly inspect the roof for any signs of leaks or structural issues.


Leave a Comment