

Salt cleaning hacks – who knew something so simple could be so powerful around the house? I’m always on the lookout for easy, affordable, and effective ways to keep my home sparkling, and I’ve discovered that humble salt is a true cleaning champion. Forget expensive, chemical-laden cleaners; we’re going back to basics with this incredible natural resource!
Salt has been valued for its preserving and purifying properties for centuries. Think about ancient civilizations using salt to preserve food and even as a form of currency! Its cleaning power, however, is often overlooked. But trust me, once you start using these salt cleaning hacks, you’ll wonder how you ever lived without them.
Let’s face it, keeping a home clean can be a real chore. We’re all busy, and nobody wants to spend hours scrubbing. That’s where these DIY salt cleaning tricks come in. They’re quick, easy, and use ingredients you probably already have in your pantry. From tackling stubborn stains to deodorizing smelly spaces, these hacks will save you time, money, and effort. So, are you ready to unlock the cleaning potential of salt? Let’s dive into some amazing salt cleaning hacks that will transform your cleaning routine!
Growing Cape Gooseberries at Home: A DIY Guide
Hey there, fellow gardening enthusiasts! I’m so excited to share my experience with growing cape gooseberries (also known as golden berries or physalis) at home. These little golden gems are not only delicious but also surprisingly easy to cultivate, even if you’re a beginner gardener like I once was. This guide will walk you through every step, from seed to harvest, ensuring you have a bountiful supply of these tangy treats.
Choosing Your Variety and Starting Seeds
Before we dive into the nitty-gritty, let’s talk about choosing the right variety and starting your seeds.
* Variety Selection: While there are several varieties of cape gooseberries, the most common and easiest to grow is *Physalis peruviana*. It’s known for its sweet-tart flavor and prolific fruit production.
* Starting Seeds Indoors (Recommended): Starting seeds indoors gives your plants a head start, especially if you live in a region with a shorter growing season. I highly recommend this method.
* Direct Sowing (Alternative): You can also sow seeds directly into the ground after the last frost, but the plants might take longer to mature and produce fruit.
Step-by-Step Seed Starting:
1. Gather Your Supplies: You’ll need cape gooseberry seeds, seed starting trays or small pots, seed starting mix (a light, well-draining soil), a spray bottle, and a warm, sunny location or a grow light.
2. Prepare the Seed Starting Mix: Moisten the seed starting mix with water until it’s damp but not soggy.
3. Sow the Seeds: Fill the seed starting trays or pots with the moistened mix. Sow the seeds about ¼ inch deep, placing 2-3 seeds per cell or pot.
4. Cover and Water: Gently cover the seeds with a thin layer of seed starting mix. Use the spray bottle to mist the surface of the soil. Avoid overwatering, as this can lead to fungal diseases.
5. Provide Warmth and Light: Place the seed starting trays or pots in a warm location (around 70-75°F or 21-24°C). If you don’t have a sunny windowsill, use a grow light. Keep the light on for 14-16 hours per day.
6. Maintain Moisture: Keep the soil consistently moist but not waterlogged. Check the soil daily and mist with water as needed.
7. Thin Seedlings (If Necessary): Once the seedlings emerge (usually within 1-3 weeks), thin them to one strong seedling per cell or pot. Snip off the weaker seedlings at the soil line with scissors.
8. Harden Off Seedlings: Before transplanting the seedlings outdoors, you’ll need to harden them off. This process gradually acclimates the plants to outdoor conditions. Start by placing the seedlings outdoors in a sheltered location for a few hours each day, gradually increasing the amount of time they spend outside over the course of a week or two.
Preparing the Garden Bed
Now that your seedlings are growing strong, it’s time to prepare the garden bed.
* Sunlight: Cape gooseberries thrive in full sun, so choose a location that receives at least 6-8 hours of direct sunlight per day.
* Soil: They prefer well-draining soil that is rich in organic matter.
* Soil pH: The ideal soil pH is between 6.0 and 6.8.
Step-by-Step Garden Bed Preparation:
1. Clear the Area: Remove any weeds, grass, rocks, or debris from the garden bed.
2. Amend the Soil: Dig in plenty of compost or well-rotted manure to improve soil drainage and fertility. I usually add a generous layer, about 2-3 inches thick.
3. Test the Soil pH (Optional): If you’re unsure about your soil pH, you can test it using a soil testing kit. Amend the soil as needed to achieve the ideal pH range. Lime can be added to raise the pH, while sulfur can be added to lower it.
4. Create Planting Holes: Dig planting holes that are slightly larger than the root balls of your seedlings. Space the holes about 2-3 feet apart. This gives the plants enough room to grow and spread.
Transplanting Seedlings and Ongoing Care
With the garden bed prepped, it’s time to transplant your seedlings and provide them with the ongoing care they need to flourish.
* Timing: Transplant the seedlings outdoors after the last frost, when the soil has warmed up.
* Watering: Water deeply and regularly, especially during dry periods.
* Fertilizing: Fertilize every few weeks with a balanced fertilizer.
* Support: Cape gooseberry plants can become quite bushy and may need support, especially when laden with fruit.
Step-by-Step Transplanting and Care:
1. Carefully Remove Seedlings: Gently remove the seedlings from their seed starting trays or pots, being careful not to damage the roots.
2. Plant the Seedlings: Place each seedling in a planting hole and backfill with soil. Make sure the top of the root ball is level with the surrounding soil.
3. Water Thoroughly: Water the seedlings thoroughly after planting.
4. Mulch: Apply a layer of mulch around the plants to help retain moisture, suppress weeds, and regulate soil temperature. I like to use straw or wood chips.
5. Fertilize: Fertilize the plants every 2-3 weeks with a balanced fertilizer, following the instructions on the fertilizer package. I prefer using an organic fertilizer.
6. Provide Support: As the plants grow, they may need support to prevent them from sprawling. You can use stakes, cages, or trellises. I’ve found that tomato cages work really well.
7. Water Regularly: Water the plants deeply and regularly, especially during dry periods. Cape gooseberries need consistent moisture to produce abundant fruit.
8. Pest and Disease Control: Keep an eye out for pests and diseases. Common pests include aphids and whiteflies. Diseases can include fungal infections. Treat any problems promptly with appropriate organic pest control methods or fungicides. I’ve had good luck with neem oil for pest control.
9. Pruning (Optional): Pruning isn’t strictly necessary, but you can prune the plants to improve air circulation and encourage bushier growth. Remove any dead, damaged, or crossing branches.
Harvesting and Storing Cape Gooseberries
The most rewarding part of growing cape gooseberries is, of course, the harvest!
* Harvest Time: The fruits are ready to harvest when the papery husks turn brown and dry, and the fruits inside are golden yellow.
* Harvesting Technique: Gently squeeze the husk to release the fruit. If the fruit is ripe, it will easily detach from the stem.
* Storage: Cape gooseberries can be stored in their husks at room temperature for several weeks. For longer storage, you can refrigerate them or freeze them.
Step-by-Step Harvesting and Storage:
1. Check for Ripeness: Regularly check the plants for ripe fruits. The husks should be dry and papery, and the fruits inside should be golden yellow.
2. Harvest the Fruits: Gently squeeze the husk to release the fruit. If the fruit is ripe, it will easily detach from the stem.
3. Remove the Husks (Optional): You can remove the husks before storing the fruits, but they will last longer if stored in their husks.
4. Store at Room Temperature: Store the fruits in their husks at room temperature for several weeks.
5. Refrigerate: For longer storage, refrigerate the fruits in their husks. They will last for several months in the refrigerator.
6. Freeze: You can also freeze the fruits. Spread them out on a baking sheet and freeze them until solid. Then, transfer them to a freezer bag or container. Frozen cape gooseberries can be stored for up to a year.
Enjoying Your Harvest
Now that you’ve harvested your cape gooseberries, it’s time to enjoy them!
* Eating Fresh: Cape gooseberries are delicious eaten fresh, straight from the plant.
* Culinary Uses: They can also be used in a variety of culinary applications, such as jams, jellies, pies, sauces, and salads.
* Nutritional Benefits: Cape gooseberries are a good source of vitamins A and C, as well as antioxidants.
I hope this guide has inspired you to grow your own cape gooseberries at home. It’s a rewarding experience that will provide you with a delicious and nutritious treat. Happy gardening!
Conclusion
So, there you have it! This simple yet incredibly effective salt cleaning hacks method is a game-changer for anyone looking to maintain a sparkling clean home without relying on harsh chemicals or expensive cleaning products. We’ve explored how the abrasive nature of salt, combined with its natural disinfecting properties, can tackle a wide range of cleaning challenges, from scrubbing stubborn stains in your cookware to deodorizing your garbage disposal.
Why is this a must-try? Because it’s economical, eco-friendly, and surprisingly powerful. Think about it: you likely already have salt in your pantry. No need to run to the store for specialized cleaners filled with ingredients you can’t even pronounce. This DIY approach puts you in control, allowing you to customize your cleaning solutions and reduce your environmental footprint.
But the benefits don’t stop there. Salt is gentle enough for many surfaces, yet tough enough to cut through grease and grime. It’s a versatile cleaning agent that can be used in countless ways around your home.
Ready to take your salt cleaning hacks to the next level? Consider these variations:
* **Infused Salt Scrub:** Add a few drops of your favorite essential oil (lemon, lavender, or tea tree are excellent choices) to your salt for an aromatic and antibacterial boost. This is perfect for cleaning sinks and countertops.
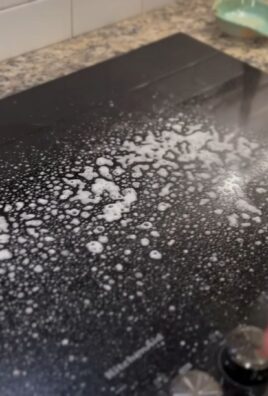
* **Salt and Vinegar Power Paste:** Combine salt with white vinegar to create a potent paste for tackling tough stains on grout or in your oven. Be sure to test this mixture on an inconspicuous area first, as vinegar can be acidic.
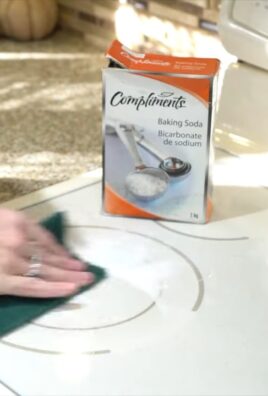
* **Salt and Baking Soda Combo:** For a gentle yet effective abrasive cleaner, mix equal parts salt and baking soda. This is ideal for cleaning delicate surfaces like stainless steel or porcelain.
We’re confident that once you experience the cleaning power of salt, you’ll be amazed at how simple and effective it is. It’s a return to basics, a way to clean your home naturally and affordably.
Don’t just take our word for it, though. We encourage you to try these salt cleaning hacks for yourself and see the difference it makes. Experiment with different variations, find what works best for your home, and most importantly, share your experiences with us! We’d love to hear your success stories, tips, and tricks in the comments below. Let’s build a community of salt cleaning enthusiasts and discover even more ways to harness the power of this humble ingredient. Your feedback will not only help others but also inspire us to continue exploring and sharing innovative cleaning solutions. So, grab your salt shaker and get ready to transform your cleaning routine!
Frequently Asked Questions (FAQs)
Is salt safe to use on all surfaces?
While salt is generally safe for many surfaces, it’s crucial to exercise caution, especially on delicate or easily scratched materials. Avoid using coarse salt on polished surfaces like marble, granite, or certain types of stainless steel, as it can cause scratches. Always test a small, inconspicuous area first to ensure that the salt doesn’t damage the surface. For delicate surfaces, consider using finely ground salt or dissolving the salt in water to create a less abrasive solution. When in doubt, err on the side of caution and opt for a gentler cleaning method.
What kind of salt is best for cleaning?
The best type of salt for cleaning depends on the specific task. For general scrubbing and stain removal, coarse salt (like sea salt or kosher salt) is often preferred due to its abrasive texture. However, for more delicate surfaces or when you want to avoid scratching, finely ground salt (like table salt) is a better choice. Epsom salt can also be used for cleaning, particularly for removing mildew and deodorizing. Experiment with different types of salt to see which works best for your needs.
Can I use salt to clean my oven?
Yes, salt can be used to clean your oven, but it’s important to use it correctly. Sprinkle a generous amount of salt on spills or splatters while the oven is still warm (but not hot). The salt will absorb the grease and make it easier to scrub away once the oven has cooled down. For tougher stains, you can create a paste of salt and water or salt and vinegar and apply it to the affected areas. Let the paste sit for a few minutes before scrubbing with a non-abrasive sponge or cloth. Remember to remove all traces of salt before using the oven again.
How do I clean my garbage disposal with salt?
Cleaning your garbage disposal with salt is a simple and effective way to deodorize and remove buildup. Pour about a cup of coarse salt down the drain, followed by a cup of ice cubes. Turn on the cold water and run the disposal for about a minute. The salt and ice will help to scrub the inside of the disposal and dislodge any food particles or grease. You can also add a few lemon or orange peels for a fresh scent. Repeat this process every few weeks to keep your garbage disposal clean and odor-free.
Will salt damage my stainless steel appliances?
While salt can be used to clean stainless steel, it’s important to use it carefully to avoid scratching. Avoid using coarse salt directly on stainless steel surfaces. Instead, dissolve the salt in water to create a mild cleaning solution. Apply the solution to the stainless steel with a soft cloth or sponge and gently wipe away any dirt or grime. Rinse with clean water and dry thoroughly with a clean cloth to prevent water spots. Always test the solution on an inconspicuous area first to ensure that it doesn’t damage the finish.
Can salt remove hard water stains?
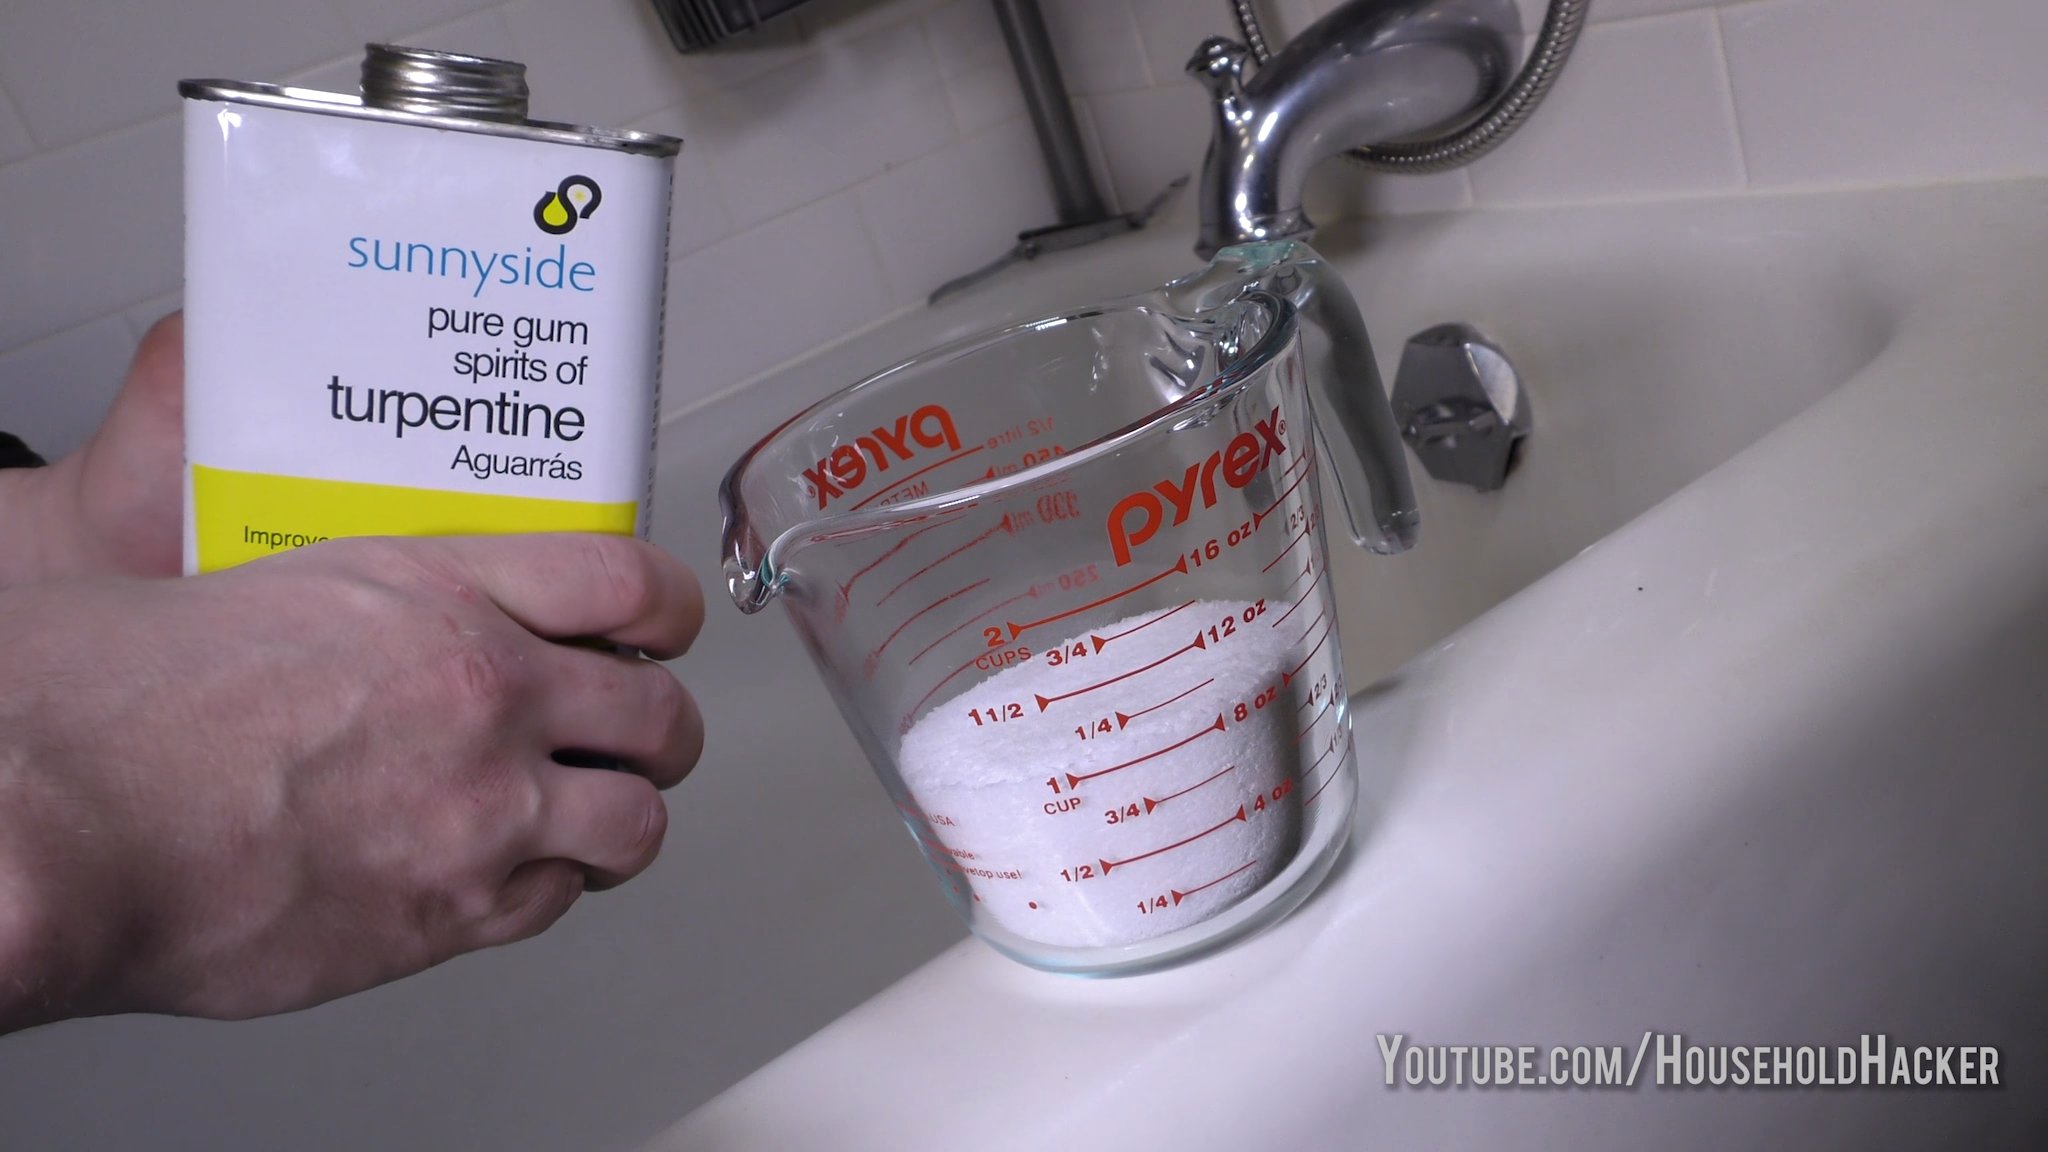
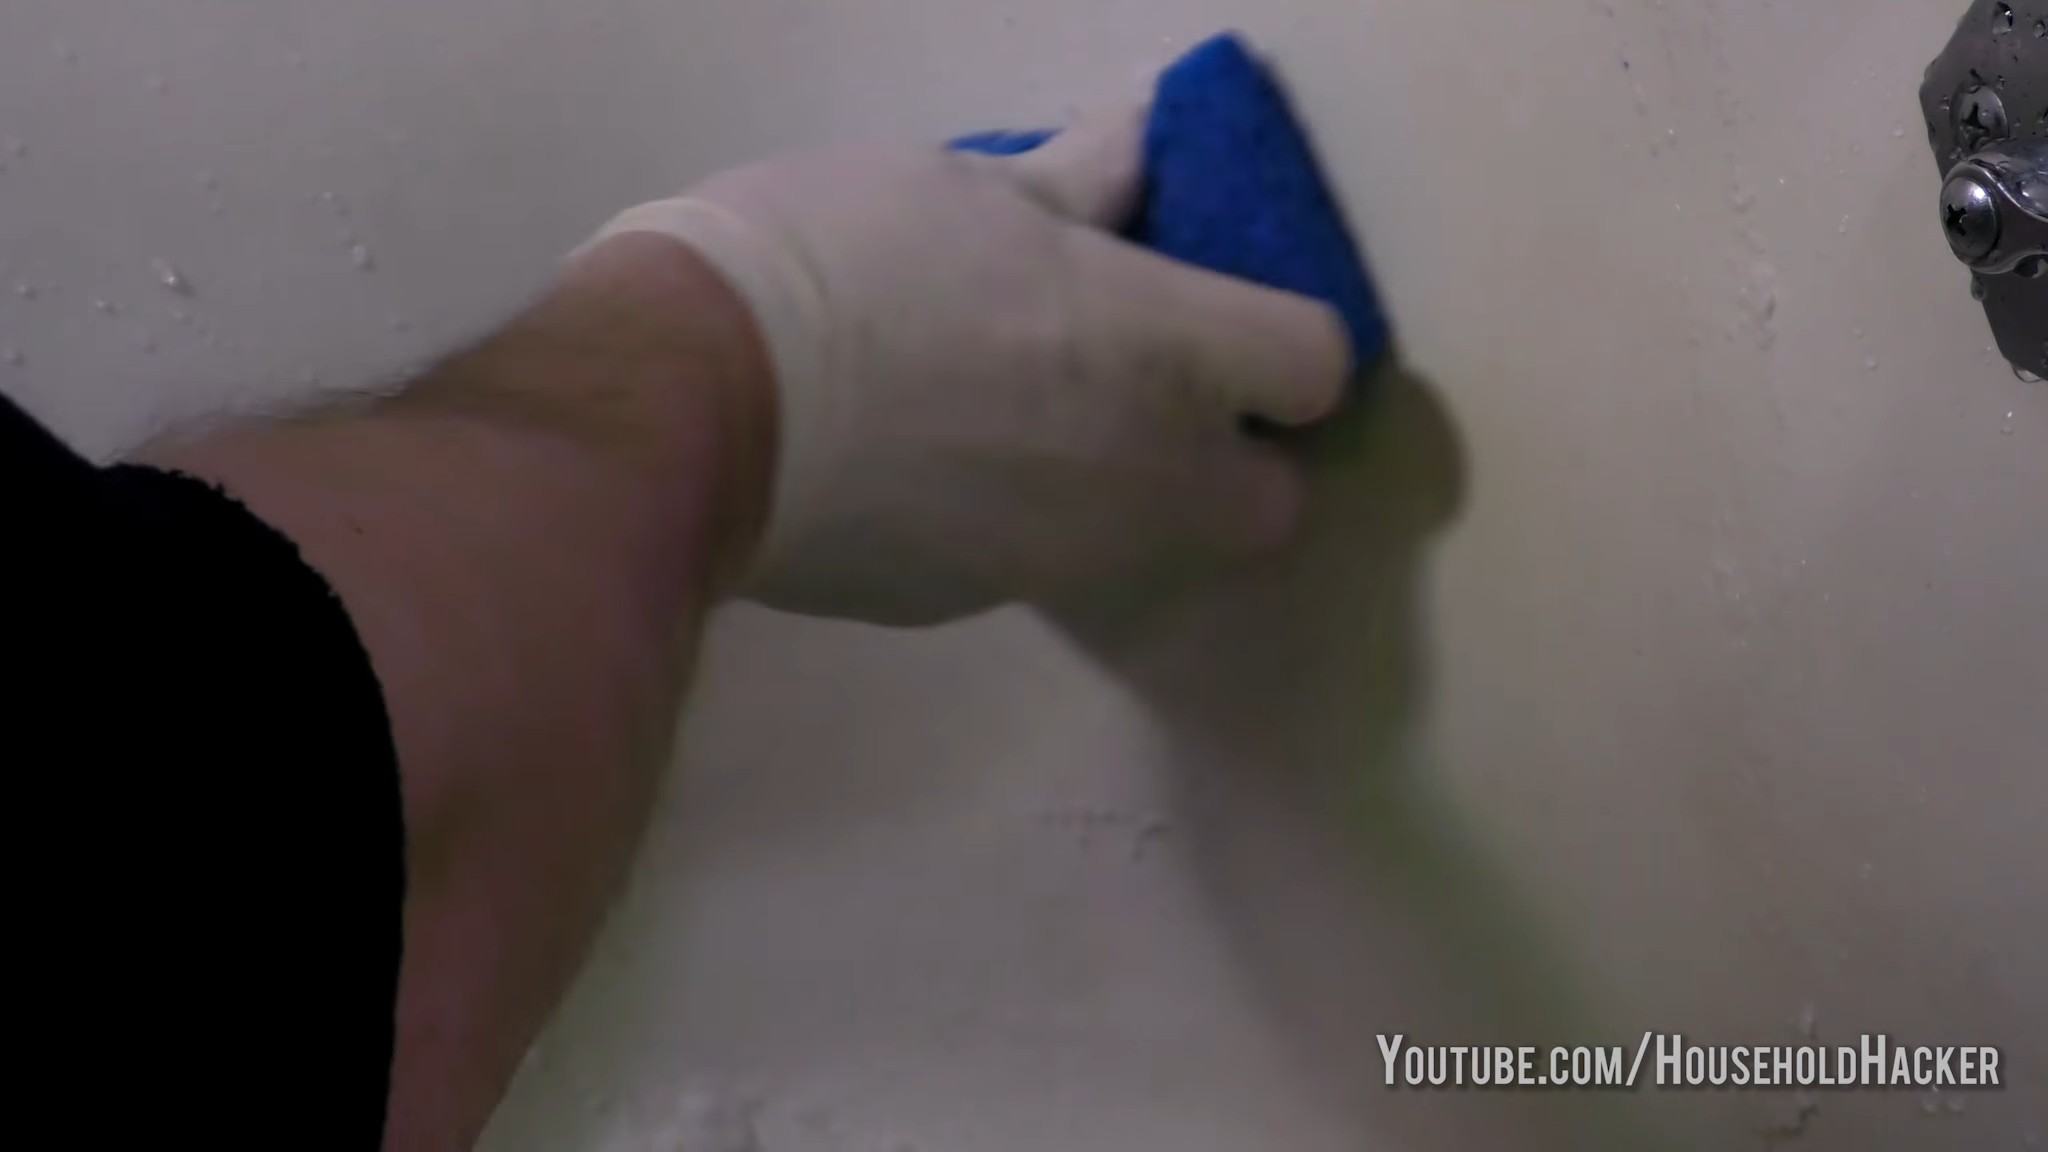
Yes, salt can be effective in removing hard water stains, especially when combined with vinegar. Create a paste of salt and white vinegar and apply it to the affected areas, such as faucets, showerheads, or tiles. Let the paste sit for a few minutes to allow the vinegar to dissolve the mineral deposits. Then, scrub with a non-abrasive sponge or cloth and rinse with clean water. Dry thoroughly to prevent new stains from forming. For stubborn stains, you may need to repeat the process or use a stronger vinegar solution.
Is salt an effective disinfectant?
While salt does have some antibacterial properties, it’s not as effective as a dedicated disinfectant like bleach or hydrogen peroxide. Salt can help to inhibit the growth of bacteria and fungi, but it won’t kill all germs. For surfaces that require thorough disinfection, it’s best to use a stronger disinfectant. However, salt can be a good option for general cleaning and deodorizing, especially in areas where you want to avoid harsh chemicals.
How often should I use salt for cleaning?
The frequency of using salt for cleaning depends on your individual needs and the specific area you’re cleaning. For high-traffic areas or surfaces that get dirty quickly, you may need to clean with salt more frequently. For example, you might clean your kitchen sink with salt every day or every other day. For other areas, such as your oven or garbage disposal, you may only need to clean with salt every few weeks or months. Pay attention to the cleanliness of your home and adjust your cleaning schedule accordingly.
What are some other uses for salt in cleaning?
Beyond the uses mentioned in the article, salt can also be used to:
* Remove rust from metal objects.
* Clean cast iron cookware.
* Brighten faded fabrics.
* Deodorize shoes.
* Clean cutting boards.
* Remove stains from carpets and upholstery.
The possibilities are endless! Experiment with different uses and discover the many ways that salt can help you keep your home clean and fresh.
Leave a Comment