

Soil bag carrots: who knew growing your own delicious, crunchy carrots could be so incredibly easy and space-saving? Forget tilling a huge garden plot! I’m about to share a game-changing DIY trick that will have you harvesting a bounty of vibrant carrots right from repurposed soil bags.
For centuries, cultivating carrots has been a cornerstone of gardens worldwide, dating back to ancient Persia. These vibrant root vegetables weren’t always the orange delights we know today; they came in shades of purple, white, and yellow! But regardless of color, carrots have always been prized for their nutritional value and versatility in the kitchen.
Now, let’s face it, not everyone has the luxury of a sprawling backyard. Apartment dwellers, balcony gardeners, and those with limited mobility often miss out on the joy of growing their own food. That’s where this soil bag carrot growing hack comes in! It’s the perfect solution for anyone who wants fresh, homegrown carrots without the hassle of traditional gardening. Plus, it’s incredibly budget-friendly and eco-conscious, giving those old soil bags a new lease on life. So, get ready to ditch the store-bought carrots and embrace the satisfaction of harvesting your own delicious, organically grown soil bag carrots!

DIY Soil Bag Carrot Garden: Grow Your Own Deliciousness!
Hey there, fellow gardening enthusiasts! Ever dreamed of harvesting your own crunchy, sweet carrots but lack the space for a traditional garden bed? Well, I’ve got the perfect solution for you: a soil bag carrot garden! It’s easy, affordable, and surprisingly productive. Plus, it’s a fantastic way to recycle those empty soil bags. Let’s dive in!
What You’ll Need:
* Empty soil bag (the larger, the better – aim for at least a 20-gallon bag)
* Carrot seeds (choose your favorite variety! Nantes and Chantenay are great for shorter spaces)
* Potting mix (or a blend of compost, peat moss, and perlite)
* Drill or sharp knife
* Watering can or hose
* Optional: Slow-release fertilizer
Why Soil Bag Gardening is Awesome:
* Space-Saving: Perfect for balconies, patios, or small yards.
* Easy Drainage: The bag naturally provides good drainage, preventing root rot.
* Portable: You can move the bag around to follow the sun or protect it from harsh weather.
* Recycling: Gives those empty soil bags a new lease on life!
* Beginner-Friendly: A simple and rewarding way to start gardening.
Step-by-Step Guide: Creating Your Carrot Paradise
1. Prepare the Soil Bag:
* First, make sure your soil bag is completely empty. Give it a good shake to remove any lingering soil clumps.
* Next, lay the bag flat on the ground.
* Now, grab your drill or sharp knife. We need to create drainage holes. I usually drill about 10-15 holes, spaced evenly across the bottom of the bag. If you’re using a knife, be careful! Make small slits instead of large holes to prevent the soil from escaping.
* Flip the bag over and repeat the process on the other side. Good drainage is key to healthy carrot growth.
2. Prepare the Soil:
* While the soil bag method is great, the soil inside is even more important. Carrots need loose, well-draining soil to grow long and straight. Heavy clay soil will result in stunted and misshapen carrots.
* I recommend using a good quality potting mix. If you want to save some money, you can create your own blend. A mix of equal parts compost, peat moss (or coco coir), and perlite works wonders. The compost provides nutrients, the peat moss retains moisture, and the perlite improves drainage.
* If you’re using a slow-release fertilizer, now’s the time to mix it in according to the package directions. This will provide your carrots with a steady supply of nutrients throughout the growing season.
3. Fill the Soil Bag:
* Now comes the fun part! Carefully start filling the soil bag with your prepared soil mix.
* As you fill, gently pat down the soil to remove any air pockets. Don’t pack it too tightly, though, as this can hinder root growth.
* Leave about 4-6 inches of space at the top of the bag. This will make watering easier and prevent soil from splashing out.
4. Sowing the Carrot Seeds:
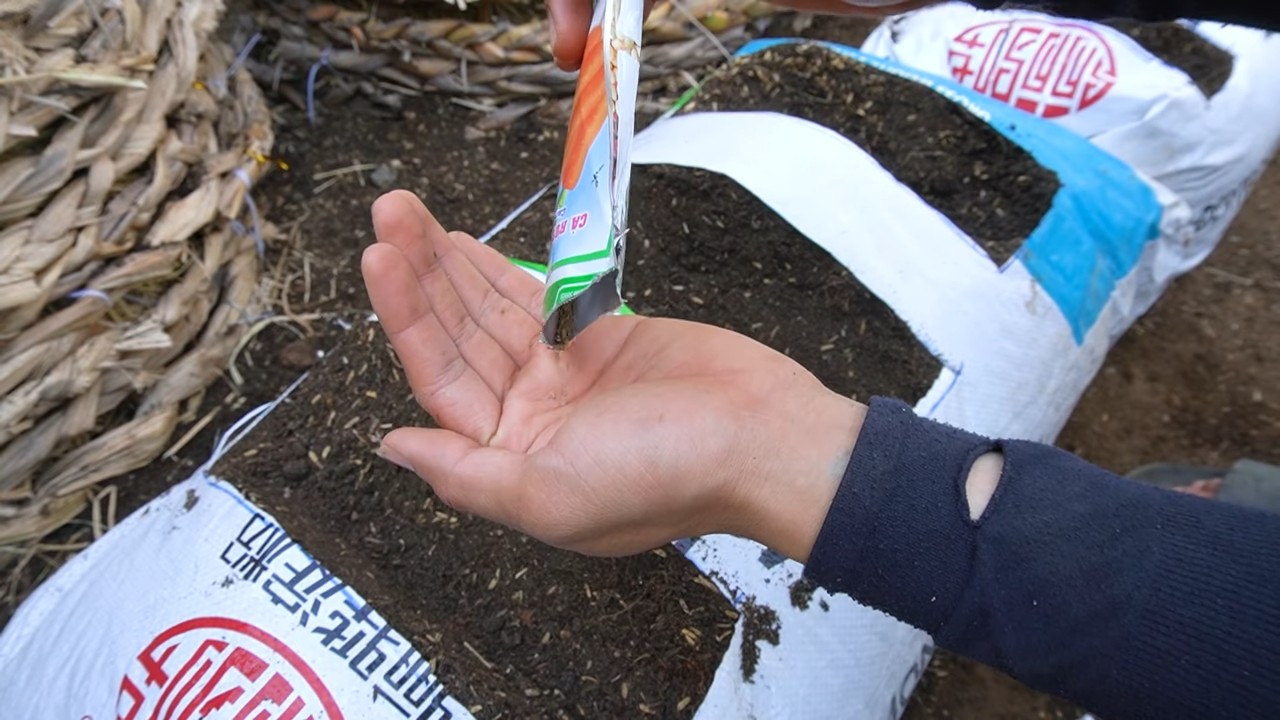
* Carrot seeds are tiny, so it’s easy to sow them too thickly. To avoid overcrowding, I like to mix the seeds with a bit of sand before sowing. This helps to space them out more evenly.
* Sprinkle the seeds evenly over the surface of the soil. Aim for about 1-2 inches between seeds.
* Gently press the seeds into the soil. You can use your fingers or the back of a spoon.
* Cover the seeds with a thin layer of soil (about ¼ inch).
* Gently water the soil using a watering can with a rose attachment. This will prevent the seeds from being washed away.
5. Watering and Maintenance:
* Keep the soil consistently moist, but not soggy. Carrots need plenty of water to germinate and grow.
* Water deeply whenever the top inch of soil feels dry to the touch.
* Be careful not to overwater, as this can lead to root rot.
* Once the seedlings emerge (usually in 1-3 weeks), thin them out to about 2-3 inches apart. This will give the carrots enough space to develop properly.
* Weed regularly to prevent competition for nutrients and water.
* If you didn’t add slow-release fertilizer initially, you can side-dress the carrots with a liquid fertilizer every few weeks.
6. Sunlight:
* Carrots need at least 6 hours of sunlight per day to thrive. Place your soil bag in a sunny location.
* If you live in a hot climate, you may need to provide some afternoon shade to prevent the soil from drying out too quickly.
7. Pest Control:
* Carrot rust flies can be a problem. Cover your soil bag with a row cover to prevent them from laying their eggs.
* Slugs and snails can also damage carrot seedlings. Use slug bait or handpick them off the plants.
Harvesting Your Carrots:
* Carrots are typically ready to harvest in 60-80 days, depending on the variety.
* You can tell when they’re ready by checking the size of the carrot tops. They should be about 1/2 to 3/4 inch in diameter.
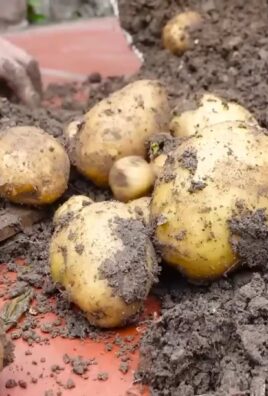
* To harvest, gently loosen the soil around the carrot and pull it straight up.
* If the soil is dry, water it well before harvesting to make it easier to pull the carrots.
* Enjoy your homegrown carrots! They’re delicious raw, roasted, or added to soups and stews.
Troubleshooting Tips:
* Carrots are forking or splitting: This is usually caused by uneven watering or rocks in the soil. Make sure to water consistently and remove any rocks before planting.
* Carrots are stunted: This could be due to poor soil, lack of nutrients, or overcrowding. Amend the soil with compost, fertilize regularly, and thin out the seedlings.
* Carrot tops are wilting: This could be due to underwatering, heat stress, or pests. Water deeply, provide shade, and check for pests.
* Poor germination: Carrot seeds can be tricky to germinate. Make sure the soil is consistently moist and the seeds are not buried too deeply. You can also try pre-sprouting the seeds indoors before planting.
Choosing the Right Carrot Variety:
* Nantes: These are classic, cylindrical carrots that are sweet and tender. They’re a good choice for beginners.
* Chantenay: These are shorter, thicker carrots that are good for heavy soils.
* Danvers: These are long, tapered carrots that are good for storage.
* Round carrots (Parisian): These are small, round carrots that are perfect for growing in containers.
* Rainbow carrots: These are a fun and colorful option that come in a variety of colors, including purple, yellow, and white.
Extra Tips for Success:
* Rotate your crops: Don’t plant carrots in the same spot every year. This can help to prevent soilborne diseases.
* Companion planting: Plant carrots with onions, garlic, or rosemary. These plants can help to repel pests.
* Succession planting: Sow carrot seeds every few weeks to ensure a continuous harvest throughout the growing season.
* Don’t be afraid to experiment: Try different varieties of carrots and different soil mixes to see what works best for you.
Making the Most of Your Harvest:
* Store your carrots properly: Cut off the green tops and store the carrots in a cool, dark place. They can last for several weeks in the refrigerator.
* Preserve your carrots: You can freeze, can, or dehydrate carrots to enjoy them throughout the year.
* Share your harvest: Share your homegrown carrots with friends and neighbors!
I hope this guide has inspired you to create your own soil bag carrot garden. It’s a fun, rewarding, and delicious way to grow your own food, even if you have limited space. Happy gardening!
Conclusion
So, there you have it! Transforming a humble soil bag into a thriving carrot garden is not just a fun project; it’s a game-changer for anyone looking to enjoy fresh, homegrown produce, regardless of space constraints. We’ve walked you through the simple steps, highlighting the ease and accessibility of this method. But why is this DIY trick a must-try?
Firstly, it’s incredibly space-efficient. Whether you have a sprawling backyard or a tiny balcony, the soil bag method allows you to cultivate a surprisingly large number of carrots in a compact area. This is perfect for urban gardeners or anyone with limited outdoor space. Secondly, it’s cost-effective. Reusing a soil bag is a fantastic way to recycle and reduce waste, saving you money on expensive planters. Plus, you have complete control over the soil composition, ensuring your carrots receive the nutrients they need to flourish. Thirdly, it’s a rewarding experience. There’s nothing quite like the satisfaction of harvesting your own vegetables, knowing you nurtured them from seed to table.
But the benefits don’t stop there. Growing carrots in a soil bag also offers better drainage compared to traditional garden beds, reducing the risk of root rot. The elevated position can also deter some pests, making it easier to maintain a healthy crop. And let’s not forget the educational aspect – it’s a fantastic way to teach children about gardening and where their food comes from.
Now, let’s talk about variations. While we’ve focused on carrots, this method can be adapted for other root vegetables like radishes, beets, and even potatoes (though you’ll need a larger bag for the latter). You can also experiment with different carrot varieties, from the classic orange Nantes to colorful heirloom options like purple or yellow carrots. Consider adding companion plants like marigolds or basil around the base of the bag to deter pests and attract beneficial insects. You can even create a tiered effect by cutting multiple holes at different levels on the bag, maximizing your planting space.
Don’t be afraid to get creative! The beauty of this DIY project is its flexibility. Tailor it to your specific needs and preferences. Use organic soil, add compost for extra nutrients, and choose a location that receives ample sunlight.
We’re confident that you’ll be amazed by the results. Imagine the taste of freshly harvested, sweet, and crunchy carrots, grown right in your own backyard (or balcony!). It’s a culinary delight that’s hard to beat.
So, what are you waiting for? Grab a soil bag, some carrot seeds, and get started! We encourage you to try this DIY trick and share your experience with us. Post photos of your carrot-filled soil bags on social media using #SoilBagCarrots and let us know how it went. We’re eager to see your creations and learn from your experiences. Happy gardening! This method is a great way to get started with soil bag carrots.
Frequently Asked Questions (FAQ)
What kind of soil should I use for growing carrots in a soil bag?
The best soil for growing carrots in a soil bag is a well-draining, loose, and fertile mix. Carrots need room to grow downwards, so avoid heavy clay soils that can restrict their development. A good starting point is a mix of equal parts compost, potting soil, and sand or perlite. The compost provides essential nutrients, the potting soil offers a good base, and the sand or perlite improves drainage. Ensure the soil is free of rocks and debris, as these can cause the carrots to fork or become misshapen. You can also amend the soil with a slow-release fertilizer specifically formulated for root vegetables. Remember to check the pH level of your soil; carrots prefer a slightly acidic to neutral pH of around 6.0 to 7.0.
How often should I water my soil bag carrots?
Watering frequency depends on several factors, including the weather, the type of soil you’re using, and the size of your soil bag. Generally, you should aim to keep the soil consistently moist but not waterlogged. Check the soil moisture level regularly by sticking your finger about an inch or two into the soil. If it feels dry, it’s time to water. During hot, dry weather, you may need to water daily, while in cooler, wetter conditions, you can water less frequently. When watering, do so deeply, ensuring the water penetrates the entire soil bag. Avoid overhead watering, as this can lead to fungal diseases. Instead, water at the base of the plants. A good rule of thumb is to water until you see water draining from the bottom of the bag.
How much sunlight do soil bag carrots need?
Carrots need at least six hours of direct sunlight per day to thrive. Choose a location for your soil bag that receives ample sunlight throughout the day. If you live in a particularly hot climate, you may want to provide some afternoon shade to prevent the soil from drying out too quickly. Insufficient sunlight can result in stunted growth and smaller, less flavorful carrots. If you don’t have a sunny spot, you can supplement with grow lights. Place the grow lights a few inches above the plants and provide them with 12-14 hours of light per day.
How do I prevent pests from attacking my soil bag carrots?
There are several ways to prevent pests from attacking your soil bag carrots. One of the most effective methods is to use row covers. These lightweight fabrics create a physical barrier that prevents pests from reaching your plants. You can also use companion planting to deter pests. Marigolds, for example, are known to repel nematodes and other harmful insects. Another option is to use organic pest control methods, such as neem oil or insecticidal soap. These products are safe for use on vegetables and can effectively control a variety of pests. Regularly inspect your plants for signs of pests, such as chewed leaves or holes in the carrots. If you spot any pests, take action immediately to prevent them from spreading.
When is the best time to harvest my soil bag carrots?
The best time to harvest your soil bag carrots depends on the variety you’re growing and your personal preference. Generally, carrots are ready to harvest when they reach the size specified on the seed packet. You can also check the maturity of your carrots by gently pulling back the soil around the top of the carrot to expose the root. If the carrot is the desired size, it’s ready to harvest. To harvest, simply grasp the carrot at the base and gently pull it out of the soil. If the soil is dry, you may need to water it beforehand to make it easier to pull the carrots. You can also use a garden fork to loosen the soil around the carrots before pulling them. Harvest your carrots on a dry day to prevent them from rotting.
Can I reuse the soil bag for another crop?
Yes, you can reuse the soil bag for another crop, but it’s important to replenish the nutrients in the soil first. After harvesting your carrots, remove any remaining plant debris and amend the soil with compost or other organic matter. You may also want to add a slow-release fertilizer to provide the new crop with the nutrients it needs. If you had any pest or disease problems with your carrot crop, it’s best to sterilize the soil before reusing it. You can do this by solarizing the soil (covering it with clear plastic for several weeks during the hottest part of the year) or by using a soil sterilant. Consider rotating your crops to prevent the buildup of soilborne diseases. Avoid planting the same type of vegetable in the same soil bag year after year.

Leave a Comment