

Soil bag chili trick: Ever dreamt of harvesting fiery chilies right from your own backyard, or even your balcony? I know I have! There’s something incredibly satisfying about growing your own food, and chilies, with their vibrant colors and bold flavors, are a fantastic place to start. But let’s be honest, sometimes gardening can feel a little intimidating, especially when you’re dealing with limited space or less-than-ideal soil.
For centuries, cultures around the globe have cultivated chilies, using them not only for culinary purposes but also for medicinal and even spiritual practices. From the ancient Aztecs to modern-day Thai cuisine, the chili pepper has held a prominent place. Now, you can easily bring that rich history and flavor into your own home with a simple, yet effective, DIY trick.
That’s where this soil bag chili trick comes in! Forget about complicated gardening setups or expensive equipment. This method is perfect for beginners, apartment dwellers, or anyone looking for a quick and easy way to grow their own chilies. I’m going to show you how to transform a simple bag of soil into a thriving chili garden. Why spend money on store-bought chilies when you can have a constant supply of fresh, organic peppers right at your fingertips? Let’s get started and unlock the secrets to a bountiful chili harvest!
DIY Chili Peppers in a Soil Bag: A Beginner’s Guide
Hey there, fellow gardening enthusiasts! Ever dreamed of having a vibrant chili pepper plant bursting with fiery goodness, but felt intimidated by traditional gardening methods? Well, I’m here to tell you that growing chili peppers can be surprisingly easy, even if you’re short on space or experience. This guide will walk you through a simple and effective method: growing chili peppers directly in a soil bag! It’s a fantastic way to get started, and I promise, you’ll be amazed at the results.
Why Grow Chili Peppers in a Soil Bag?
Before we dive in, let’s talk about why this method is so great:
* Space-Saving: Perfect for balconies, patios, or small gardens. You don’t need a raised bed or a large plot of land.
* Easy Drainage: The bag naturally provides excellent drainage, preventing root rot, a common problem with potted plants.
* Minimal Weeding: The enclosed environment reduces weed growth significantly.
* Portability: You can easily move the bag around to follow the sun or protect it from harsh weather.
* Cost-Effective: It’s a budget-friendly way to grow your own chili peppers.
* Beginner-Friendly: This method is incredibly simple, making it perfect for first-time gardeners.
Materials You’ll Need
Okay, let’s gather our supplies. Here’s what you’ll need to get started:
* A Bag of Potting Mix: Choose a high-quality potting mix specifically formulated for vegetables. I recommend a bag that’s at least 20-30 gallons in size. Look for one that contains slow-release fertilizer for added nutrients.
* Chili Pepper Seedlings: You can either start your own seeds indoors (which takes a bit longer) or purchase seedlings from a local nursery. Choose varieties that you enjoy and that are suitable for your climate. Jalapeños, Serrano, and Thai chili peppers are all great options for beginners.
* A Sharp Knife or Scissors: For making drainage holes and planting holes in the bag.
* Watering Can or Hose: For watering your chili pepper plants.
* Fertilizer (Optional): While the potting mix usually contains some fertilizer, you might want to supplement it with a liquid fertilizer specifically designed for tomatoes or peppers later in the growing season.
* Gardening Gloves (Optional): To keep your hands clean.
* Stakes or Tomato Cages (Optional): For supporting the plants as they grow, especially if you’re growing taller varieties.
Step-by-Step Instructions: Planting Your Chili Peppers
Alright, let’s get our hands dirty! Here’s how to plant your chili peppers in a soil bag:
1. Prepare the Soil Bag:
* First, lay the bag of potting mix flat on the ground in the location where you want to grow your chili peppers. Remember, it will be heavy once it’s watered, so choose a spot that gets at least 6-8 hours of sunlight per day.
* Next, using your sharp knife or scissors, carefully cut several drainage holes in the bottom of the bag. These holes are crucial for preventing waterlogging. I usually make about 6-8 holes, spaced evenly across the bottom.
* Now, flip the bag over so the top is facing up.
2. Create Planting Holes:
* Decide how many chili pepper plants you want to grow in the bag. A 20-30 gallon bag can typically accommodate 2-3 plants, depending on the variety.
* Using your knife or scissors, cut circular holes in the top of the bag, spaced evenly apart. Make the holes large enough to accommodate the root balls of your chili pepper seedlings. I usually aim for holes that are about 4-6 inches in diameter.
3. Plant Your Chili Pepper Seedlings:
* Gently remove a chili pepper seedling from its container. If the roots are tightly bound, gently loosen them with your fingers.
* Carefully place the seedling into one of the planting holes. Make sure the top of the root ball is level with the surface of the potting mix.
* Fill in the space around the root ball with potting mix from the bag. Gently pat the soil down to secure the plant.
* Repeat this process for each of your chili pepper seedlings.
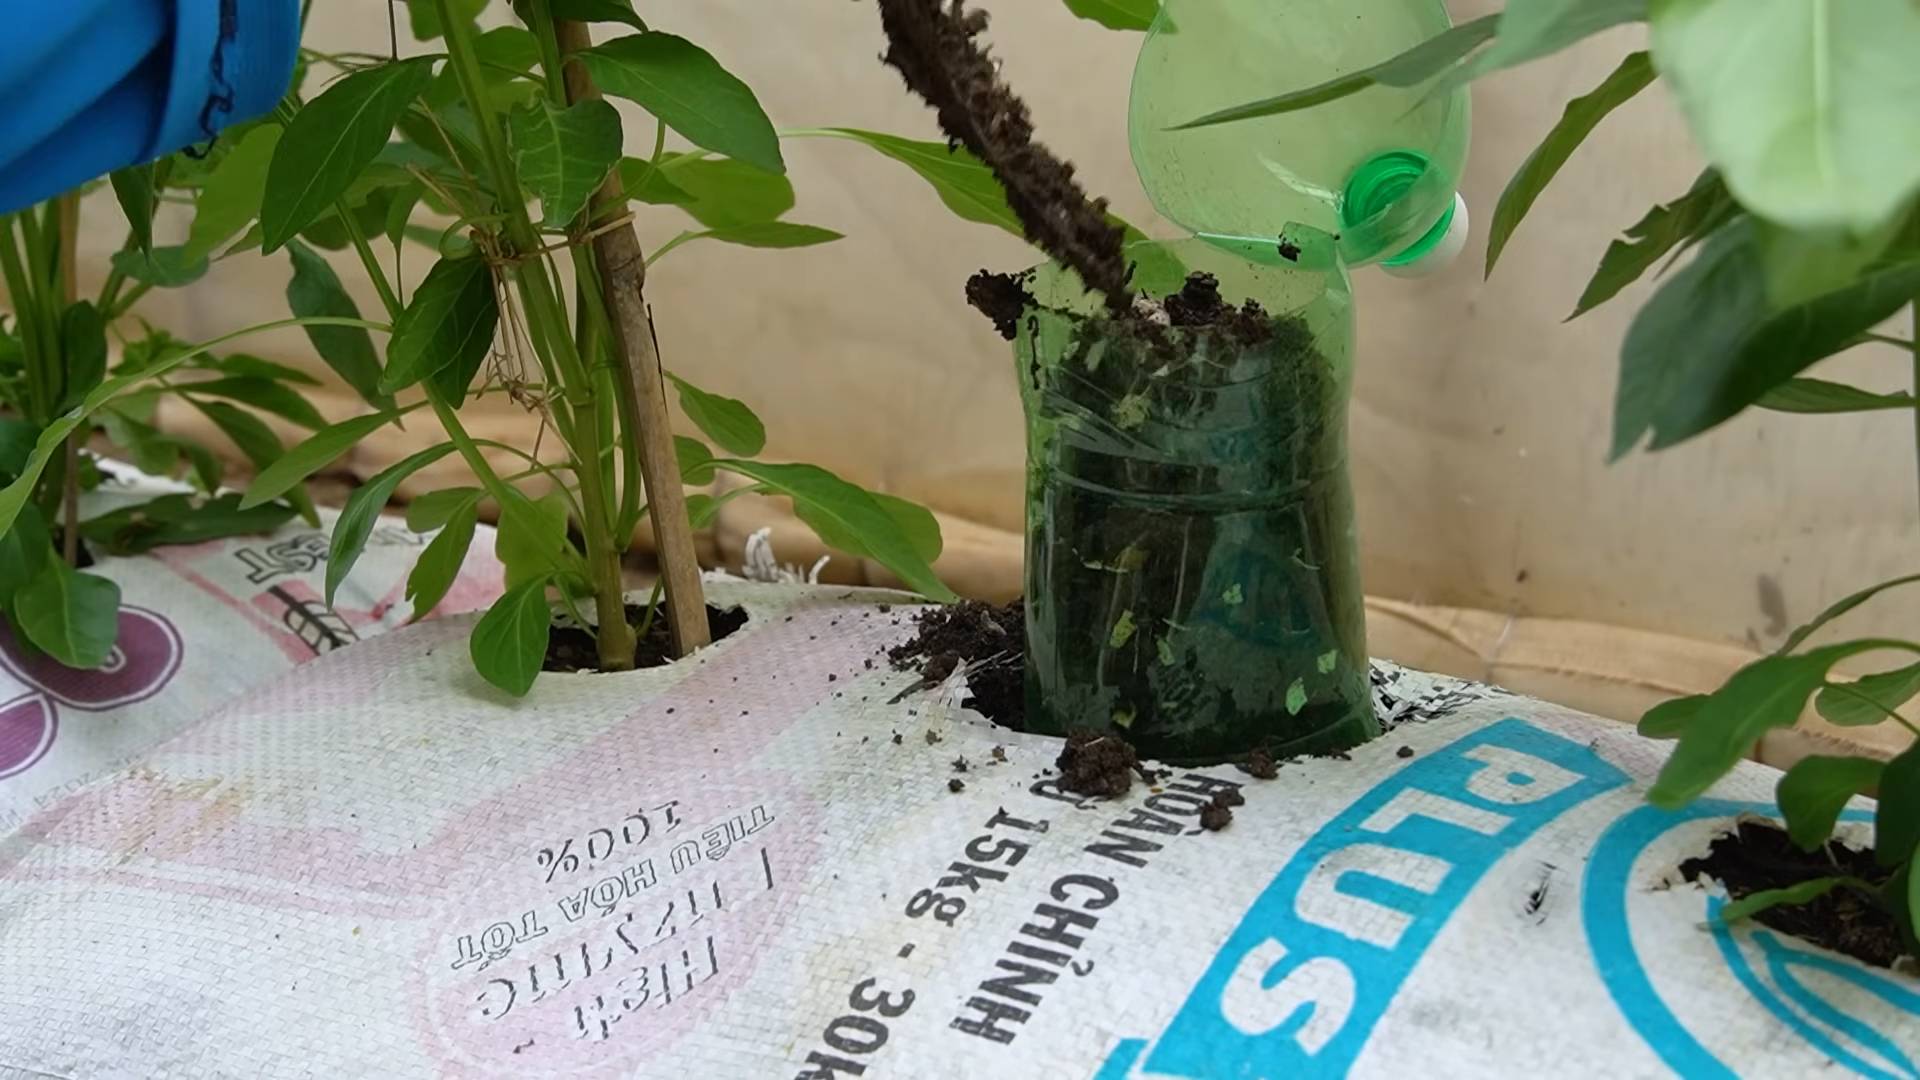
4. Water Thoroughly:
* Once all of your seedlings are planted, water the bag thoroughly until water drains out of the drainage holes at the bottom. This will help settle the soil and ensure that the roots are well-hydrated.
5. Add Support (Optional):
* If you’re growing taller varieties of chili peppers, now is a good time to add stakes or tomato cages to provide support as the plants grow. Insert the stakes or cages into the soil near the base of each plant.
Caring for Your Chili Pepper Plants
Now that your chili peppers are planted, it’s time to learn how to care for them. Here are some essential tips:
* Watering: Chili peppers need consistent moisture, but they don’t like to be waterlogged. Water deeply whenever the top inch of soil feels dry to the touch. The frequency of watering will depend on the weather and the drainage of your soil. In hot, dry weather, you may need to water daily.
* Fertilizing: While the potting mix usually contains some fertilizer, you’ll need to supplement it as the plants grow. Start fertilizing about 2-3 weeks after planting, using a liquid fertilizer specifically designed for tomatoes or peppers. Follow the instructions on the fertilizer label. I usually fertilize every 2-3 weeks throughout the growing season.
* Sunlight: Chili peppers need at least 6-8 hours of sunlight per day to thrive. Make sure your soil bag is located in a sunny spot.
* Pruning: Pruning can help improve air circulation and encourage bushier growth. Remove any yellowing or dead leaves. You can also pinch off the tips of the branches to encourage more branching.
* Pest Control: Keep an eye out for common pests like aphids, whiteflies, and spider mites. If you notice any pests, you can try spraying the plants with insecticidal soap or neem oil.
* Pollination: Chili peppers are self-pollinating, but you can help them along by gently shaking the plants or using a small brush to transfer pollen from one flower to another. This is especially important if you’re growing your chili peppers indoors.
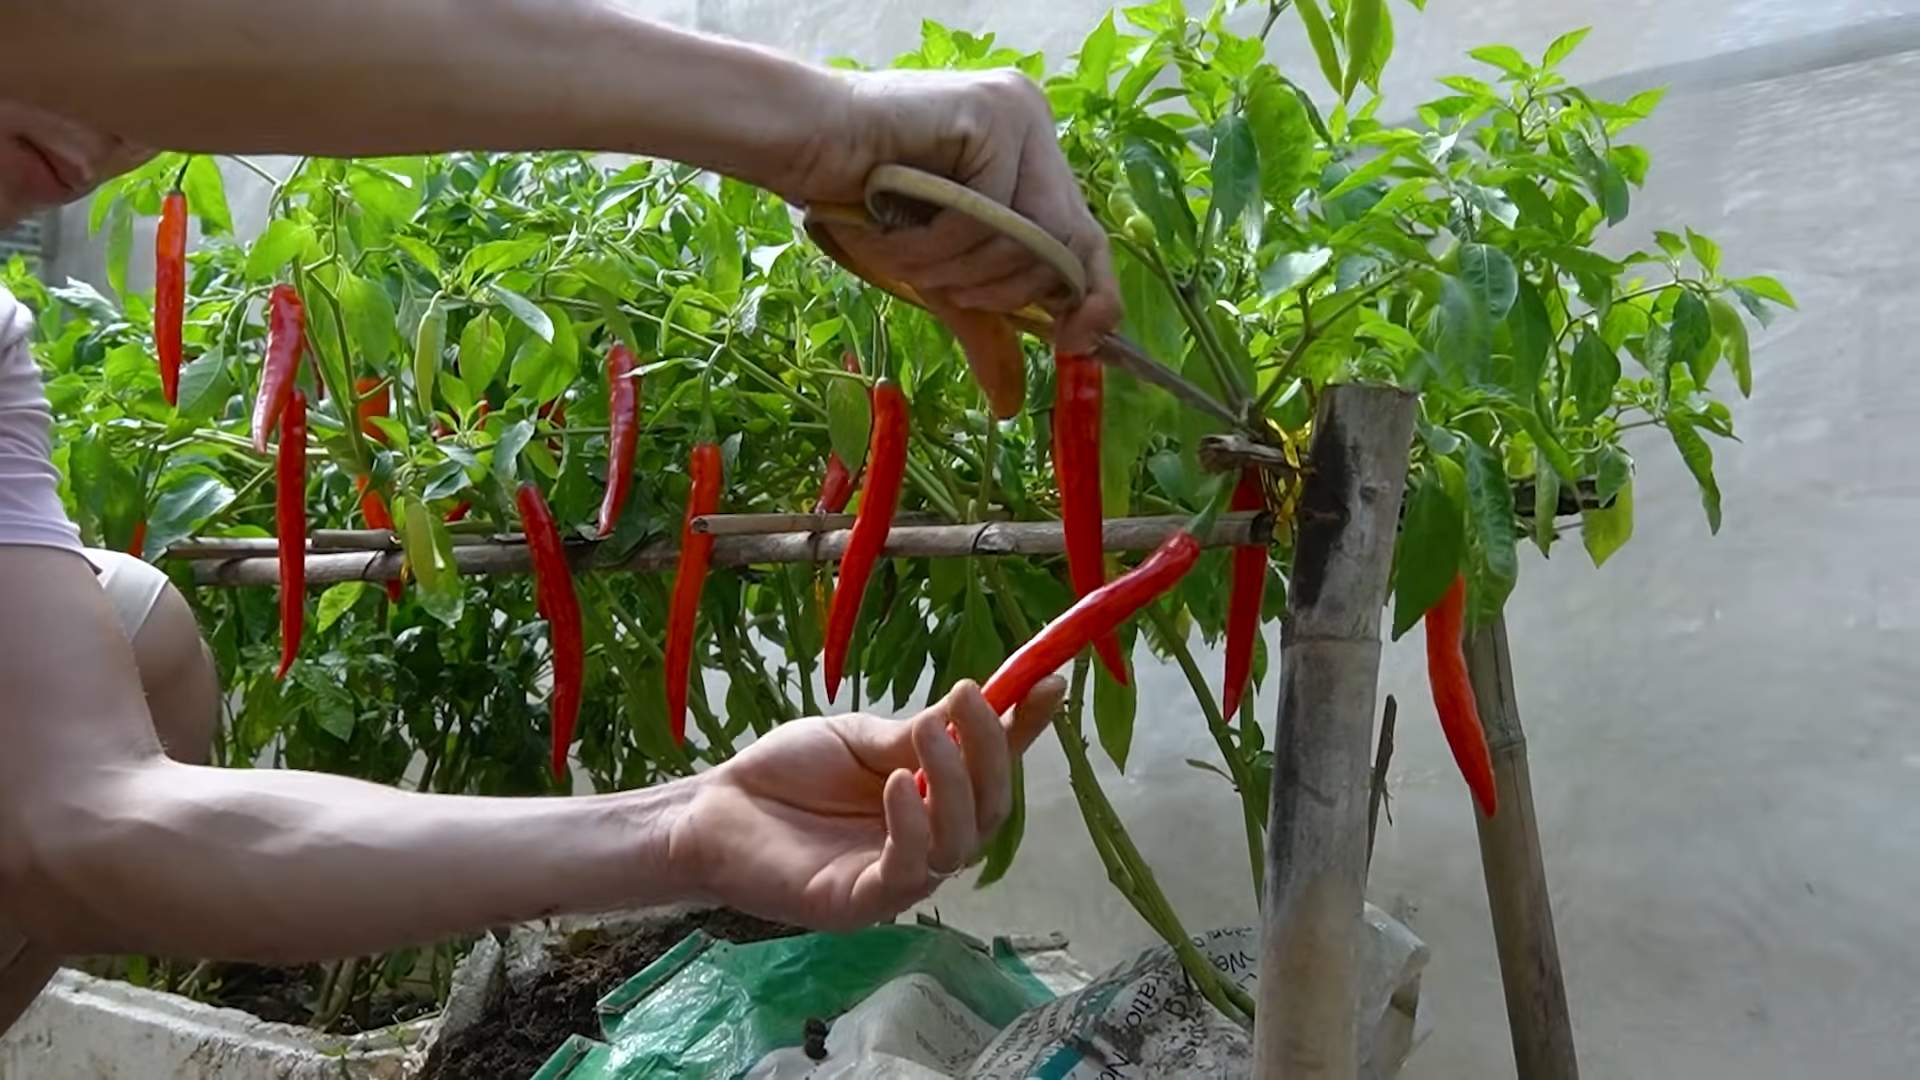
Harvesting Your Chili Peppers
The best part of growing chili peppers is, of course, harvesting them! Here’s what you need to know:
* When to Harvest: The time it takes for chili peppers to mature will depend on the variety. Generally, you can start harvesting when the peppers have reached their mature size and color. The color will vary depending on the variety, but common colors include green, red, yellow, and orange.
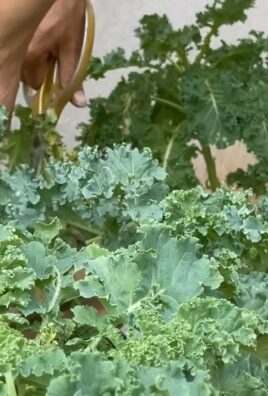
* How to Harvest: Use a sharp knife or scissors to cut the peppers from the plant. Be careful not to damage the plant.
* Enjoy Your Harvest: Use your fresh chili peppers in your favorite recipes! You can also dry them, freeze them, or pickle them for later use.
Troubleshooting
Even with the best care, you might encounter some problems while growing your chili peppers. Here are some common issues and how to address them:
* Yellowing Leaves: This can be caused by overwatering, underwatering, nutrient deficiencies, or pests. Check the soil moisture and adjust your watering accordingly. Fertilize the plants if necessary. Inspect the plants for pests and treat them as needed.
* Blossom End Rot: This is a condition where the bottom of the pepper turns black and rotten. It’s usually caused by a calcium deficiency. You can prevent blossom end rot by adding calcium to the soil or using a fertilizer that contains calcium.
* Lack of Fruit: This can be caused by insufficient sunlight, poor pollination, or nutrient deficiencies. Make sure your plants are getting enough sunlight. Hand-pollinate the flowers if necessary. Fertilize the plants with a fertilizer that’s high in phosphorus.
* Pests: As mentioned earlier, keep an eye out for common pests like aphids, whiteflies, and spider mites. Treat them with insecticidal soap or neem oil.
Tips for Success
Here are a few extra tips to help you succeed with your chili pepper growing adventure:
* Choose the Right Variety: Select chili pepper varieties that are well-suited to your climate and growing conditions.
* Start with Healthy Seedlings: If you’re buying seedlings, choose plants that are healthy and vigorous. Avoid plants that are yellowing, wilting, or have signs of pests or diseases.
* Provide Adequate Support: Use stakes or tomato cages to support the plants as they grow, especially if you’re growing taller varieties.
* Don’t Overwater: Overwatering
Conclusion
So, there you have it! The soil bag chili trick isn’t just a clever gardening hack; it’s a game-changer for anyone looking to boost their chili pepper production and overall plant health. We’ve explored how this simple method can unlock a treasure trove of benefits, from providing essential nutrients and beneficial microbes to improving soil structure and drainage. It’s a cost-effective, sustainable, and incredibly rewarding way to nurture your chili plants and witness them thrive like never before.
Think about it: instead of relying solely on synthetic fertilizers, you’re harnessing the power of organic matter to create a living, breathing ecosystem right within your soil. This not only feeds your plants but also enriches the soil for future growing seasons. The improved drainage prevents root rot, a common problem for chili plants, while the added nutrients fuel vigorous growth and abundant pepper production.
But the beauty of this DIY trick lies in its versatility. Feel free to experiment with different types of chili peppers. Some gardeners swear by using this method for hotter varieties like habaneros and scotch bonnets, claiming it intensifies their flavor and heat. Others have found success with milder peppers like jalapenos and poblanos, resulting in larger, more flavorful fruits.
Consider adding other organic amendments to your soil bag mixture. A handful of bone meal can provide an extra boost of phosphorus for flower and fruit development. A sprinkle of Epsom salts can address magnesium deficiencies, which can manifest as yellowing leaves. Just remember to research the specific needs of your chili pepper variety and adjust your mixture accordingly.
Don’t be afraid to get creative with your container choices, too. While a standard soil bag works perfectly well, you can also use large pots, raised beds, or even repurposed containers. The key is to ensure adequate drainage and enough space for your chili plants to grow.
The soil bag chili trick is more than just a gardening technique; it’s an invitation to connect with nature and experience the joy of growing your own food. It’s a chance to learn about the intricate relationships between plants, soil, and microbes, and to witness the transformative power of organic gardening.
We wholeheartedly encourage you to give this DIY trick a try. Whether you’re a seasoned gardener or a complete beginner, you’ll be amazed at the results. And most importantly, we want to hear about your experience! Share your photos, tips, and stories with us in the comments below. Let’s build a community of chili pepper enthusiasts who are passionate about sustainable gardening practices. Let us know what kind of soil bag you used, what kind of chili you planted, and how the results were. Your insights could inspire others to embark on their own chili-growing adventures.
So, grab a soil bag, gather your chili pepper seeds or seedlings, and get ready to witness the magic of this simple yet effective gardening trick. Happy growing!
Frequently Asked Questions (FAQ)
What exactly is the “soil bag chili trick”?
The soil bag chili trick is a simple DIY gardening method where you grow chili pepper plants directly in a bag of potting soil. You cut holes in the bag for drainage and planting, and then nurture the plants as you would in a traditional garden bed or container. The bag acts as both a container and a source of nutrients for the plants.
What are the benefits of using this method?
There are several benefits:
* **Improved Drainage:** The holes in the bag allow for excellent drainage, preventing waterlogging and root rot.
* **Nutrient-Rich Environment:** The potting soil provides a readily available source of nutrients for the chili plants.
* **Cost-Effective:** It’s a relatively inexpensive way to grow chili peppers, especially if you already have potting soil on hand.
* **Easy to Move:** The bag is lightweight and easy to move around, allowing you to position your plants in the sunniest spot.
* **Weed Control:** The bag helps to suppress weed growth, reducing the need for weeding.
* **Soil Health:** The soil bag chili trick helps to improve soil health by adding organic matter and beneficial microbes to the soil.
What kind of soil bag should I use?
Use a high-quality potting soil mix specifically designed for container gardening. Avoid using garden soil, as it can be too heavy and doesn’t drain well. Look for a mix that contains ingredients like peat moss, perlite, vermiculite, and compost. The size of the bag will depend on the number of chili plants you want to grow. A standard 20-quart bag is usually sufficient for one or two plants.
What kind of chili peppers can I grow using this method?
You can grow virtually any type of chili pepper using the soil bag method. Popular choices include jalapenos, serranos, habaneros, scotch bonnets, and cayenne peppers. Consider the size of the mature plant when choosing your variety, as some chili peppers can grow quite large.
How do I prepare the soil bag for planting?
First, lay the soil bag flat on the ground. Then, cut several drainage holes in the bottom of the bag. Next, cut circular or rectangular holes in the top of the bag, spacing them according to the mature size of your chili plants. Gently loosen the soil inside the bag to improve aeration.
How do I plant the chili peppers in the soil bag?
Carefully remove the chili pepper seedlings from their containers and gently loosen the roots. Plant the seedlings in the holes you’ve created in the soil bag, ensuring that the top of the root ball is level with the soil surface. Water the plants thoroughly after planting.
How often should I water the chili peppers in the soil bag?
Water the chili peppers regularly, especially during hot, dry weather. Check the soil moisture by sticking your finger into the soil. If the top inch of soil feels dry, it’s time to water. Avoid overwatering, as this can lead to root rot.
Do I need to fertilize the chili peppers in the soil bag?
Yes, chili peppers are heavy feeders and will benefit from regular fertilization. Use a balanced fertilizer specifically formulated for vegetables. Follow the instructions on the fertilizer package for application rates and frequency. You can also supplement with organic fertilizers like compost tea or fish emulsion.
How much sunlight do chili peppers need?
Chili peppers need at least 6-8 hours of direct sunlight per day to thrive. Choose a sunny location for your soil bag garden. If you live in a particularly hot climate, you may need to provide some afternoon shade to prevent the plants from overheating.
What are some common problems that can affect chili peppers?
Some common problems include aphids, spider mites, whiteflies, blossom end rot, and fungal diseases. Inspect your plants regularly for signs of pests or diseases. Treat any problems promptly with appropriate organic or chemical controls.
Can I reuse the soil bag for future plantings?
Yes, you can reuse the soil bag, but it’s important to amend the soil with fresh compost and fertilizer before planting again. Over time, the soil will become depleted of nutrients. You may also need to add some perlite or vermiculite to improve drainage.
How do I know when my chili peppers are ready to harvest?
The time it takes for chili peppers to mature will vary depending on the variety. Generally, chili peppers are ready to harvest when they have reached their mature size and color. The peppers should also be firm to the touch. Use scissors or pruning shears to cut the peppers from the plant, leaving a small stem attached.
Leave a Comment