

Soil-free coriander growing might sound like something out of a sci-fi movie, but trust me, it’s totally achievable and incredibly rewarding! Have you ever dreamt of snipping fresh, fragrant coriander right from your kitchen counter, even if you don’t have a garden or a green thumb? Well, get ready to make that dream a reality with this super simple DIY guide.
Coriander, also known as cilantro, has a rich history, dating back thousands of years. Evidence suggests it was cultivated in ancient Egypt and used for medicinal purposes. Today, it’s a staple in cuisines worldwide, adding a vibrant zest to everything from Mexican salsas to Indian curries. But let’s face it, buying coriander from the store can be a gamble. Sometimes it wilts before you even get a chance to use it all!
That’s where this DIY trick comes in. Soil-free coriander growing offers a fantastic solution for anyone who wants a constant supply of fresh herbs without the hassle of traditional gardening. Imagine saving money, reducing food waste, and enjoying the satisfaction of growing your own food – all in a small space. I’m going to show you how to bypass the soil altogether and cultivate this flavorful herb using just a few simple materials. Get ready to unlock the secrets to fresh, homegrown coriander, no garden required!
Growing Coriander Without Soil: A DIY Hydroponic Adventure!
Hey there, fellow plant enthusiasts! Ever dreamt of having fresh coriander (cilantro for my American friends!) right at your fingertips, without the mess of soil? Well, you’ve come to the right place! I’m going to walk you through a super fun and surprisingly easy DIY hydroponic setup that will have you harvesting fragrant coriander in no time. Get ready to ditch the dirt and embrace the future of herb gardening!
What You’ll Need: The Supply List
Before we dive in, let’s gather our supplies. Don’t worry, you probably have a lot of this stuff lying around already!
* A Container: This can be anything from a plastic storage bin to a repurposed bucket. I personally love using a dark-colored container to prevent algae growth, but you can always paint the outside if you prefer a clear one. Size depends on how much coriander you want to grow, but something around 10-15 liters is a good starting point.
* Net Pots: These are small, slotted pots that will hold your coriander seedlings. You can find them at most garden centers or online. The size will depend on the holes you make in your lid.
* Growing Medium: Forget soil! We’re going hydroponic. I recommend using coco coir, perlite, or a mix of both. These are inert mediums that provide support for the roots without adding any nutrients.
* Hydroponic Nutrients: This is crucial! Your coriander needs food, and since it’s not getting it from soil, we need to provide it in the water. Look for a balanced hydroponic nutrient solution specifically formulated for leafy greens.
* Air Pump and Air Stone: These will oxygenate the water, which is essential for healthy root growth. A small aquarium air pump and a standard air stone will do the trick.
* pH Testing Kit: Maintaining the correct pH is vital for nutrient absorption. You can use a liquid pH testing kit or a digital pH meter. I prefer the digital meter for accuracy, but the liquid kit is a more budget-friendly option.
* pH Up and pH Down Solutions: To adjust the pH of your nutrient solution.
* Drill and Hole Saw (Optional): For creating holes in the container lid to hold the net pots. A sharp knife can also work, but a hole saw makes cleaner cuts.
* Seed Starting Tray and Dome (Optional): For starting your coriander seeds indoors. You can also direct sow into the net pots, but starting them indoors gives them a head start.
* Coriander Seeds: Obviously! Choose a variety that you like. Slow-bolt varieties are great for hydroponics as they are less prone to going to seed quickly.
* Water: Use filtered or dechlorinated water for best results. Tap water can contain chlorine and other chemicals that can harm your plants.
Phase 1: Setting Up Your Hydroponic System
Okay, let’s get our hands dirty (well, not really, since there’s no soil!). This is where we build the foundation for our coriander paradise.
1. Prepare the Container: Clean your container thoroughly with soap and water. Rinse it well to remove any residue. If you’re using a clear container, consider painting the outside with a dark color to prevent algae growth.
2. Create the Lid: This is where the net pots will sit. Place the lid on top of the container and mark the locations for your net pots. Make sure to space them evenly to allow for adequate growth. Use a hole saw or a sharp knife to cut the holes. The holes should be slightly smaller than the diameter of the net pots so they sit snugly.
3. Assemble the Air Pump and Air Stone: Connect the air tubing to the air pump and the air stone. Place the air stone at the bottom of the container. The air pump should be placed outside the container, preferably above the water level to prevent back-siphoning.
4. Prepare the Growing Medium: If you’re using coco coir, rinse it thoroughly with water to remove any excess salts. This is important to prevent nutrient imbalances. If you’re using perlite, no pre-treatment is necessary.
5. Fill the Net Pots: Fill each net pot with your chosen growing medium. Leave a little space at the top for the coriander seedlings.
Phase 2: Starting Your Coriander Seeds
Now for the fun part – planting the seeds! You have two options here: starting the seeds indoors or direct sowing into the net pots. I prefer starting them indoors for a higher success rate.
1. Starting Seeds Indoors (Recommended): Fill a seed starting tray with a seed starting mix. Sow the coriander seeds about 1/4 inch deep. Water gently and cover the tray with a dome to create a humid environment. Place the tray in a warm, bright location. Keep the soil moist but not soggy. Once the seedlings have developed a few true leaves (usually after 1-2 weeks), they’re ready to be transplanted into the net pots.
2. Direct Sowing: Moisten the growing medium in the net pots. Sow 2-3 coriander seeds in each net pot, about 1/4 inch deep. Gently cover the seeds with the growing medium. Keep the growing medium moist but not soggy.
Phase 3: Setting Up the Nutrient Solution
This is where the magic happens! The nutrient solution is what will feed your coriander and help it thrive.
1. Prepare the Nutrient Solution: Fill the container with water. Follow the instructions on your hydroponic nutrient solution to mix the correct concentration. Start with a lower concentration than recommended and gradually increase it as the plants grow.
2. Adjust the pH: Use your pH testing kit to measure the pH of the nutrient solution. Coriander prefers a pH between 6.0 and 6.5. If the pH is too high, add a small amount of pH Down solution. If the pH is too low, add a small amount of pH Up solution. Always add pH adjusters gradually and re-test the pH after each addition.
3. Place the Net Pots: Carefully place the net pots into the holes in the lid. Make sure the bottom of the net pots is submerged in the nutrient solution. The water level should be high enough to keep the growing medium moist, but not so high that it drowns the roots.
Phase 4: Caring for Your Hydroponic Coriander
Congratulations! You’ve successfully set up your hydroponic coriander system. Now it’s time to provide the care it needs to flourish.
1. Light: Coriander needs plenty of light to grow well. Place your hydroponic system in a location that receives at least 6 hours of direct sunlight per day. If you don’t have enough natural light, you can supplement with a grow light.
2. Watering: Since the roots are constantly submerged in the nutrient solution, you don’t need to water the plants directly. However, you will need to monitor the water level in the container and add more nutrient solution as needed.
3. Nutrient Solution Changes: Change the nutrient solution every 1-2 weeks to prevent nutrient imbalances and the buildup of harmful bacteria. When changing the solution, rinse the container and the net pots with fresh water.
4. pH Monitoring: Check the pH of the nutrient solution regularly (at least once a week) and adjust it as needed.
5. Air Pump Maintenance: Make sure the air pump is functioning properly and that the air stone is producing bubbles. Clean the air stone periodically to remove any buildup.
6. Pest Control: Hydroponic systems are generally less susceptible to pests than soil-based gardens. However, it’s still important to monitor your plants for any signs of pests. If you find any pests, you can treat them with an organic insecticide.
7. Temperature: Coriander prefers temperatures between 18°C and 24°C (65°F and 75°F). Avoid placing your hydroponic system in a location that is too hot or too cold.
Phase 5: Harvesting Your Coriander
The moment you’ve been waiting for! You can start harvesting your coriander once it has reached a height of about 4-6 inches.
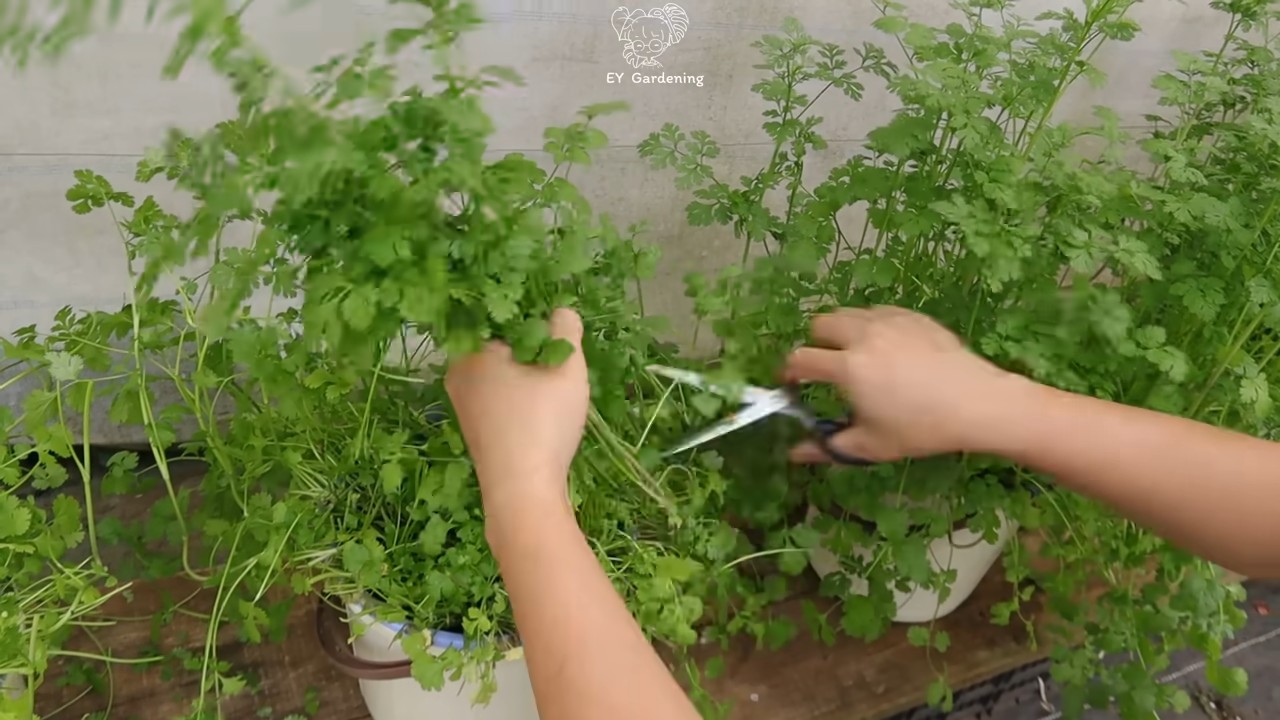
1. Harvesting: Use scissors or shears to cut the coriander leaves. Harvest from the outer leaves first, leaving the inner leaves to continue growing.
2. Enjoy! Use your fresh coriander in your favorite dishes. It’s delicious in salads, soups, salsas, and more!
Troubleshooting Tips
Even with the best planning, sometimes things don’t go exactly as expected. Here are a few common problems you might encounter and how to fix them:
* Yellowing Leaves: This could be a sign of nutrient deficiency. Make sure you’re using a balanced hydroponic nutrient solution and that the pH is within the correct range.
* Slow Growth: This could be due to insufficient light, incorrect pH, or nutrient deficiency. Make sure your plants are getting enough light and that the

Conclusion
So, there you have it! Growing coriander, that vibrant and essential herb, without soil might seem like a futuristic gardening technique, but it’s surprisingly simple and incredibly rewarding. This DIY method offers a fantastic alternative for those with limited space, challenging soil conditions, or simply a desire to experiment with innovative gardening practices. Forget the messy soil, the unpredictable watering schedules, and the constant battle against pests that often plague traditional coriander cultivation. This soil-free approach streamlines the process, making fresh, flavorful coriander accessible to everyone, regardless of their gardening experience.
Why is this a must-try? Because it’s efficient, clean, and yields impressive results. You’ll be amazed at how quickly your coriander sprouts and thrives in this controlled environment. The consistent moisture and nutrient supply, provided by the hydroponic setup, promotes rapid growth and intensifies the herb’s characteristic aroma and taste. Imagine the satisfaction of snipping fresh coriander leaves right from your kitchen counter, ready to add a burst of flavor to your favorite dishes.
But the beauty of this DIY trick lies not only in its simplicity but also in its adaptability. Feel free to experiment with different nutrient solutions to find the perfect balance for your coriander. You can also adjust the lighting conditions to optimize growth, especially during the darker months. Consider using different types of containers, from repurposed plastic bottles to elegant glass jars, to create a visually appealing hydroponic garden that complements your home décor.
For a spicier twist, try growing different varieties of coriander, such as the slow-bolting cilantro, which is known for its prolonged leaf production. You can also experiment with companion planting by placing your soil-free coriander near other herbs like basil or mint, which can help deter pests and enhance the overall flavor profile.
We wholeheartedly encourage you to give this soil-free coriander growing method a try. It’s a fun, educational, and ultimately delicious experience that will transform the way you think about growing herbs. Once you’ve harvested your first batch of fresh, flavorful coriander, we’re confident you’ll be hooked.
Don’t be shy! Share your experiences with us. We’d love to hear about your successes, your challenges, and any variations you’ve discovered along the way. Post pictures of your soil-free coriander gardens on social media using #SoilFreeCoriander and tag us so we can celebrate your green thumb achievements. Let’s create a community of soil-free coriander enthusiasts and inspire others to embrace this innovative and sustainable gardening technique. This method of **soil free coriander growing** is truly a game changer.
Frequently Asked Questions (FAQ)
What exactly is soil-free coriander growing, and how does it work?
Soil-free coriander growing, often referred to as hydroponics, is a method of cultivating coriander plants without using traditional soil. Instead, the plants receive their essential nutrients from a water-based solution. This solution contains all the necessary minerals and elements that coriander needs to grow and thrive. The roots of the coriander plants are either suspended in the nutrient solution or supported by an inert medium like perlite or vermiculite, which provides stability without contributing any nutrients. This method allows for precise control over the plant’s environment, leading to faster growth and higher yields.
What are the benefits of growing coriander without soil?
There are numerous advantages to growing coriander without soil:
* **Space Efficiency:** Hydroponic systems require significantly less space than traditional soil-based gardens, making them ideal for urban dwellers or those with limited outdoor space.
* **Faster Growth:** Plants grown hydroponically typically grow faster because they have direct access to nutrients and water, eliminating the need for them to search for these resources in the soil.
* **Reduced Pest and Disease Problems:** Soil can harbor pests and diseases that can harm coriander plants. By eliminating soil, you significantly reduce the risk of these problems.
* **Water Conservation:** Hydroponic systems often use less water than traditional gardening methods because the water is recirculated and reused.
* **Year-Round Growing:** With the right lighting and temperature control, you can grow coriander indoors year-round, regardless of the weather conditions outside.
* **Cleanliness:** Soil-free growing is cleaner and less messy than traditional gardening, making it a great option for indoor cultivation.
* **Control over Nutrients:** You have complete control over the nutrient solution, ensuring that your coriander plants receive the precise amount of nutrients they need for optimal growth.
What kind of nutrient solution should I use for soil-free coriander growing?
You can purchase commercially available hydroponic nutrient solutions specifically formulated for herbs or leafy greens. These solutions typically contain a balanced blend of macronutrients (nitrogen, phosphorus, potassium) and micronutrients (iron, manganese, zinc, etc.). Alternatively, you can create your own nutrient solution using readily available ingredients. A common recipe involves dissolving Epsom salts, calcium nitrate, and a general-purpose fertilizer in water. It’s crucial to follow the instructions on the nutrient solution packaging or recipe carefully to avoid over- or under-fertilizing your plants. Regularly monitor the pH of the nutrient solution and adjust it as needed to maintain a slightly acidic range (around 6.0-6.5) for optimal nutrient absorption.
How much light does soil-free coriander need?
Coriander requires ample light to thrive. Ideally, it needs at least 6-8 hours of direct sunlight per day. If you’re growing coriander indoors, you’ll likely need to supplement natural light with artificial grow lights. LED grow lights are a popular choice because they are energy-efficient and provide the full spectrum of light that plants need for photosynthesis. Position the grow lights close enough to the plants to provide adequate illumination, but not so close that they burn the leaves. A good rule of thumb is to keep the lights about 6-12 inches above the plants.
How often should I change the nutrient solution?
The frequency of changing the nutrient solution depends on the size of your hydroponic system and the growth rate of your coriander plants. As the plants grow, they absorb nutrients from the solution, which can lead to imbalances and the buildup of salts. A general guideline is to change the nutrient solution every 1-2 weeks. However, it’s essential to monitor the nutrient levels and pH of the solution regularly and adjust the changing schedule accordingly. If you notice signs of nutrient deficiencies (e.g., yellowing leaves) or imbalances, it’s a good idea to change the solution more frequently.
Can I use tap water for my nutrient solution?
Tap water can be used, but it’s essential to check its quality first. Some tap water contains high levels of chlorine or other minerals that can be harmful to plants. If your tap water is heavily chlorinated, let it sit out for 24 hours to allow the chlorine to dissipate before using it in your nutrient solution. Ideally, use filtered or distilled water to ensure that your plants are receiving the purest possible water source.
How do I harvest soil-free coriander?
Harvesting soil-free coriander is similar to harvesting traditionally grown coriander. Simply snip off the leaves as needed, starting with the outer leaves. Avoid cutting more than one-third of the plant at a time to allow it to continue growing. Regular harvesting encourages the plant to produce more leaves, resulting in a continuous supply of fresh coriander.
What are some common problems I might encounter when growing soil-free coriander, and how can I fix them?
Some common problems include:
* **Nutrient Deficiencies:** Yellowing leaves, stunted growth, or other unusual symptoms can indicate nutrient deficiencies. Adjust the nutrient solution according to the plant’s needs.
* **Algae Growth:** Algae can grow in the nutrient solution, especially if it’s exposed to light. Use opaque containers to block light and prevent algae growth.
* **Root Rot:** Overwatering or poor aeration can lead to root rot. Ensure that the roots are not constantly submerged in water and that there is adequate air circulation.
* **Pests:** Although soil-free growing reduces the risk of pests, they can still occur. Inspect your plants regularly and treat any infestations promptly with appropriate pest control methods.
Can I grow other herbs using the same soil-free method?
Yes, absolutely! Many herbs, such as basil, mint, parsley, and chives, can be successfully grown using the same soil-free method. Each herb may have slightly different nutrient requirements, so it’s essential to research the specific needs of each plant.
Leave a Comment