

Sugarcane growing recycled bottles – sounds intriguing, right? I’m so excited to share this incredibly rewarding and eco-friendly DIY project with you! Forget sprawling fields; we’re bringing the sweet taste of sugarcane right to your balcony or backyard using something you probably already have lying around: recycled bottles!
Sugarcane has a rich history, dating back thousands of years to Southeast Asia. It’s been a vital crop, fueling economies and sweetening lives across the globe. While traditionally grown on a large scale, the beauty of this project is that it democratizes sugarcane cultivation. You don’t need acres of land to enjoy the fruits (or stalks!) of your labor.
Why should you try sugarcane growing recycled bottles? Well, for starters, it’s a fantastic way to reduce waste and give those plastic bottles a new lease on life. Plus, imagine the satisfaction of harvesting your own sugarcane, knowing exactly where it came from and how it was grown. In a world increasingly concerned with sustainability and knowing the source of our food, this DIY project offers a tangible connection to nature and a delicious reward. Beyond the environmental benefits, growing your own sugarcane can be a fun and educational experience for the whole family. So, let’s dive in and discover how to transform those discarded bottles into mini sugarcane farms!
Growing Sugarcane in Recycled Bottles: A Sweet DIY Project
Hey there, fellow gardening enthusiasts! Ever thought about growing your own sugarcane? It might sound like a tropical dream, but with a little ingenuity and some recycled bottles, you can absolutely do it, even if you don’t live in a tropical paradise. I’m going to walk you through the entire process, from prepping your bottles to harvesting your very own sweet stalks. Get ready to roll up your sleeves and get your hands dirty!
What You’ll Need
Before we dive in, let’s gather our supplies. This is a pretty low-cost project, especially since we’re focusing on recycling!
* Recycled Plastic Bottles: The bigger, the better! Think 2-liter soda bottles, juice bottles, or even larger water bottles. Make sure they’re clean and free of any residue. You’ll need at least one bottle per sugarcane stalk you want to grow.
* Sugarcane Stalks: You can usually find these at Asian markets, some grocery stores with international sections, or even online. Look for healthy stalks with visible nodes (the little bumps where roots and shoots will emerge).
* Potting Mix: A good quality potting mix is crucial for healthy growth. I recommend a mix that’s well-draining and rich in organic matter.
* Perlite or Vermiculite: This will help improve drainage and aeration in your potting mix.
* Water: Essential for, well, everything!
* Sharp Knife or Scissors: For cutting the sugarcane stalks and modifying the bottles.
* Gloves: To protect your hands.
* Optional: Rooting Hormone: This can help speed up the rooting process, but it’s not strictly necessary.
* Optional: Fertilizer: A balanced fertilizer can give your sugarcane a boost.
Preparing the Bottles
This is where the recycling magic happens! We’re going to transform those bottles into mini sugarcane nurseries.
* Cleaning the Bottles: First things first, give your bottles a good scrub with soap and water to remove any lingering residue. Rinse them thoroughly.
* Creating Drainage Holes: This is super important! Sugarcane needs well-draining soil to prevent root rot. Use your knife or scissors to carefully poke several drainage holes in the bottom of each bottle. I usually aim for at least 5-6 holes.
* Optional: Creating a Self-Watering System (Advanced): If you’re feeling ambitious, you can create a simple self-watering system. Cut the bottle in half. Invert the top half (the part with the bottle cap) and place it inside the bottom half. You’ll need to drill a small hole in the bottle cap to allow water to wick up. Fill the bottom half with water, and the potting mix in the top half will draw moisture as needed. This is great if you tend to forget to water your plants!
Preparing the Sugarcane Stalks
Now, let’s get those sugarcane stalks ready for planting.
* Selecting Healthy Stalks: Choose stalks that are firm, plump, and free of any signs of disease or damage. The nodes should be prominent and healthy-looking.
* Cutting the Stalks: Using your sharp knife, cut the sugarcane stalks into sections, each containing at least two or three nodes. These sections are called “setts.” Make sure your cuts are clean and angled.
* Optional: Applying Rooting Hormone: If you’re using rooting hormone, dip the cut ends of the setts into the powder or liquid. This will encourage root development.
Planting the Sugarcane
Time to get those setts into their new homes!
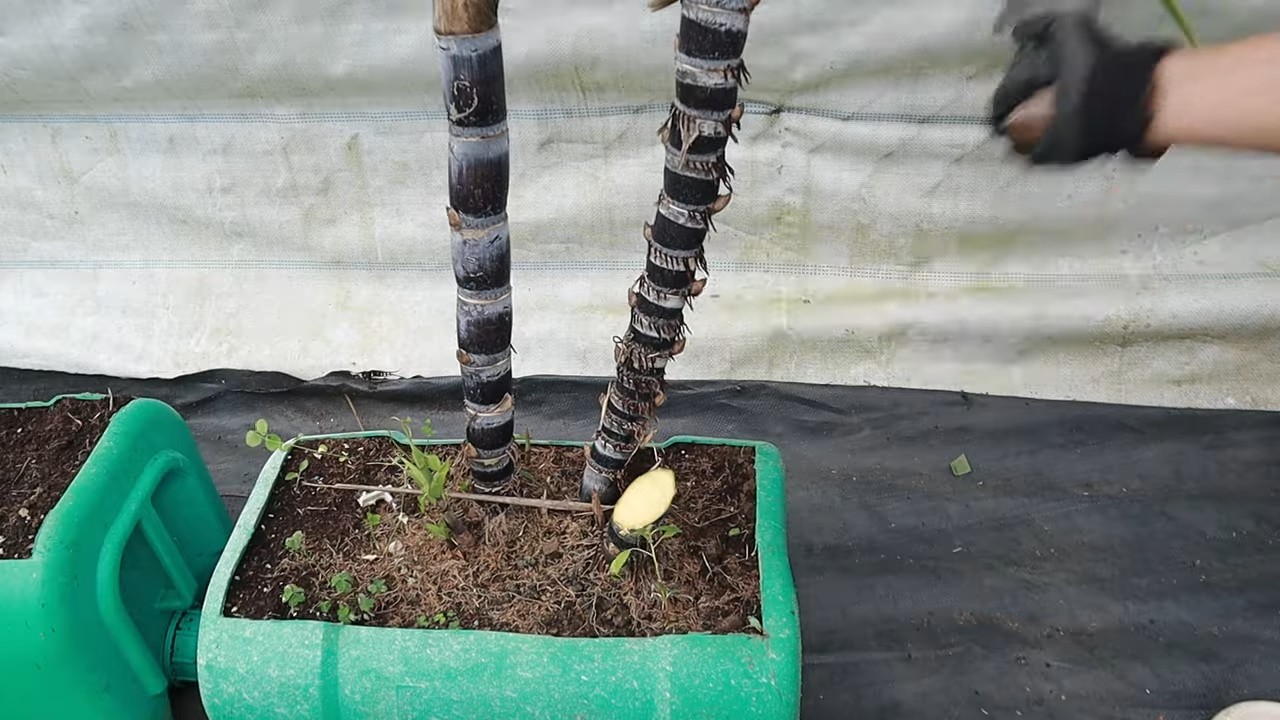
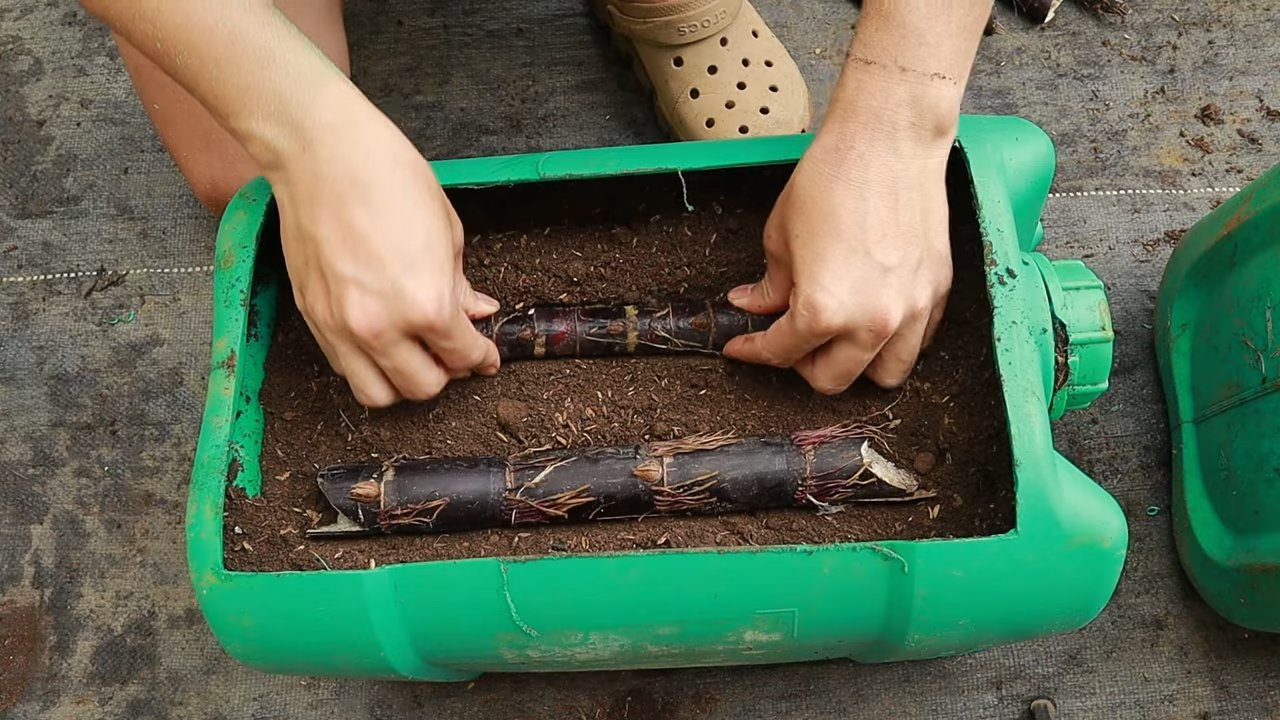
1. Filling the Bottles: Fill each prepared bottle with your potting mix, leaving about an inch or two of space at the top.
2. Planting the Setts: Lay the sugarcane setts horizontally on top of the potting mix. Gently press them down so that they’re partially buried, with the nodes facing upwards.
3. Covering the Setts: Cover the setts with a thin layer of potting mix, about half an inch thick.
4. Watering Thoroughly: Water the bottles thoroughly until water drains out of the drainage holes. This will help settle the soil and provide moisture for the setts to start rooting.
Caring for Your Sugarcane
Now comes the waiting game, but don’t worry, it’s not all passive! Your sugarcane needs some TLC to thrive.
* Location, Location, Location: Sugarcane loves sunshine! Place your bottles in a location that receives at least 6-8 hours of direct sunlight per day. A south-facing window or a sunny balcony is ideal.
* Watering: Keep the soil consistently moist, but not waterlogged. Water when the top inch of soil feels dry to the touch. Remember, good drainage is key!
* Fertilizing: Feed your sugarcane with a balanced fertilizer every 2-3 weeks during the growing season (spring and summer). Follow the instructions on the fertilizer package.
* Temperature: Sugarcane thrives in warm temperatures, ideally between 70-90°F (21-32°C). Protect your plants from frost and cold drafts.
* Pest Control: Keep an eye out for pests like aphids or spider mites. If you spot any, treat them with an insecticidal soap or neem oil.
* Repotting (Eventually): As your sugarcane grows, it may outgrow its bottle. If you notice the roots circling the bottom of the bottle, it’s time to repot it into a larger container. You can even transplant it into the ground if you live in a warm climate.
Harvesting Your Sugarcane
After several months of care, your sugarcane should be ready for harvest! This is the most rewarding part of the process.
* When to Harvest: Sugarcane is typically ready to harvest in 9-12 months, depending on the climate and growing conditions. The stalks will be thick and mature, and the leaves may start to turn brown.
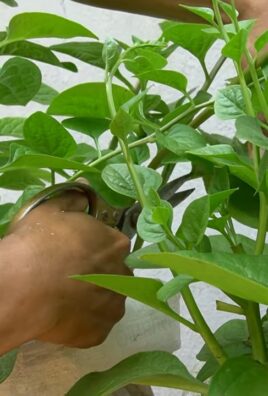
* How to Harvest: Using a sharp knife, cut the sugarcane stalks close to the base.
* Enjoying Your Harvest: You can chew on the sugarcane stalks to extract the sweet juice, or you can use the juice to make sugarcane juice, molasses, or even sugar!
Troubleshooting
Even with the best care, you might encounter some challenges along the way. Here are a few common issues and how to address them:
* Yellowing Leaves: This could be a sign of overwatering, underwatering, or nutrient deficiency. Check the soil moisture and adjust your watering accordingly. Fertilize your plants if they’re lacking nutrients.
* Slow Growth: This could be due to insufficient sunlight, cold temperatures, or poor soil. Make sure your plants are getting enough sunlight and warmth. Repot them into fresh potting mix if the soil is compacted.
* Root Rot: This is caused by overwatering and poor drainage. Make sure your bottles have adequate drainage holes and avoid overwatering. If you suspect root rot, repot your plants into fresh potting mix and remove any affected roots.
* Pests: As mentioned earlier, keep an eye out for pests and treat them promptly.
Final Thoughts
Growing sugarcane in recycled bottles is a fun and rewarding project that’s perfect for gardeners of all levels. It’s a great way to recycle, learn about plant propagation, and enjoy the sweet taste of homegrown sugarcane. So, grab some bottles, get your hands dirty, and start growing! I hope you found this guide helpful, and happy gardening!
Conclusion
So, there you have it! Growing sugarcane in recycled bottles isn’t just a quirky gardening project; it’s a sustainable, space-saving, and surprisingly effective way to cultivate your own sweet supply. We’ve explored the simplicity of the process, the environmental benefits of repurposing plastic, and the sheer joy of watching your sugarcane thrive in a container you might otherwise have discarded.
But why is this DIY trick a must-try? Beyond the obvious environmental advantages, consider the accessibility. Whether you live in an apartment with a small balcony or have a sprawling backyard, this method allows you to enjoy fresh sugarcane regardless of your living situation. It’s also a fantastic educational opportunity, especially for children, to learn about plant growth, recycling, and sustainable living. Plus, let’s be honest, there’s a certain satisfaction in knowing you’re enjoying something you grew yourself, from a plant nurtured in a recycled bottle.
This method offers a unique blend of sustainability, accessibility, and educational value.
Now, let’s talk variations. While we’ve focused on using plastic bottles, you can experiment with other recycled containers like large yogurt tubs or even repurposed buckets. Just ensure they have adequate drainage. For those in colder climates, consider bringing your sugarcane indoors during the winter months to protect it from frost. You can also experiment with different sugarcane varieties to find the one that best suits your taste and climate. Some varieties are sweeter, while others are more fibrous, so do a little research to find your perfect match.
Don’t be afraid to get creative with your setup! You can paint the bottles to add a splash of color to your garden or even create a vertical sugarcane garden by hanging the bottles from a trellis. The possibilities are endless!
We wholeheartedly encourage you to give this DIY sugarcane growing method a try. It’s a rewarding experience that connects you with nature, promotes sustainability, and provides you with a delicious and healthy treat. And most importantly, it’s a fun and engaging project that anyone can undertake.
Once you’ve embarked on your sugarcane growing adventure, we’d love to hear about your experience! Share your photos, tips, and challenges in the comments section below. Let’s create a community of sugarcane enthusiasts who are passionate about sustainable gardening and the sweet rewards it brings. Your insights could inspire others to take the plunge and discover the joys of growing their own sugarcane in recycled bottles. Let’s turn our waste into a resource and cultivate a greener, sweeter future, one recycled bottle at a time.
Ready to Grow Your Own Sugarcane?
Don’t wait any longer! Gather your recycled bottles, sugarcane cuttings, and get ready to embark on this exciting and rewarding journey. Remember, every small step towards sustainability makes a big difference. Let’s grow together!
Frequently Asked Questions (FAQ)
Q: What type of sugarcane is best for growing in recycled bottles?
A: While many sugarcane varieties can be grown in containers, some are better suited than others. Look for varieties that are known to be relatively compact and adaptable to container gardening. Some popular choices include ‘CP 72-2086’ and ‘Lal Pahari’. Local nurseries or agricultural extension offices can provide recommendations for varieties that thrive in your specific climate. Consider the sweetness level and fiber content you prefer when making your selection. Remember to research the specific needs of your chosen variety to ensure optimal growth.
Q: How often should I water my sugarcane plants in recycled bottles?
A: Watering frequency depends on several factors, including the climate, the size of the bottle, and the stage of growth. Generally, sugarcane needs consistent moisture, especially during the growing season. Check the soil moisture regularly by sticking your finger about an inch into the soil. If it feels dry, it’s time to water. Water deeply until you see water draining from the bottom of the bottle. Avoid overwatering, as this can lead to root rot. In hot, dry weather, you may need to water daily, while in cooler, wetter weather, you may only need to water every few days. Adjust your watering schedule accordingly.
Q: What kind of soil should I use for growing sugarcane in recycled bottles?
A: Sugarcane thrives in well-draining, fertile soil. A good potting mix specifically formulated for containers is ideal. You can also create your own mix by combining equal parts of garden soil, compost, and perlite or vermiculite. The compost provides nutrients, while the perlite or vermiculite improves drainage. Avoid using heavy clay soil, as it can become waterlogged and hinder root growth. Ensure the soil is slightly acidic to neutral, with a pH between 6.0 and 7.0.
Q: How much sunlight does sugarcane need when grown in recycled bottles?
A: Sugarcane is a sun-loving plant and requires at least 6-8 hours of direct sunlight per day to thrive. Choose a location that receives ample sunlight throughout the day. If you live in a particularly hot climate, you may need to provide some afternoon shade to prevent the leaves from scorching. If you’re growing sugarcane indoors, supplement with grow lights if necessary to ensure adequate light exposure. Insufficient sunlight can lead to stunted growth and reduced sugar production.
Q: How do I fertilize sugarcane grown in recycled bottles?
A: Sugarcane is a heavy feeder and benefits from regular fertilization. Use a balanced fertilizer with an NPK ratio of 10-10-10 or 14-14-14. Apply the fertilizer according to the package instructions, typically every 4-6 weeks during the growing season. You can also use organic fertilizers like compost tea or fish emulsion. Avoid over-fertilizing, as this can damage the roots. Monitor the plant’s growth and adjust the fertilization schedule as needed. Yellowing leaves can indicate a nutrient deficiency.
Q: How long does it take for sugarcane to mature when grown in recycled bottles?
A: The time it takes for sugarcane to mature depends on the variety, climate, and growing conditions. Generally, it takes about 9-12 months for sugarcane to reach maturity. You’ll know it’s ready to harvest when the stalks become thick and the leaves start to dry out. The sugar content will also increase as the plant matures. Be patient and allow the sugarcane to fully mature before harvesting for the best flavor and yield.
Q: How do I harvest sugarcane grown in recycled bottles?
A: To harvest sugarcane, use a sharp knife or machete to cut the stalks close to the base of the plant. Remove the leaves and any dried or damaged portions of the stalk. You can then chew on the stalks to extract the juice or use a sugarcane juicer to extract the juice for other purposes. Store the harvested sugarcane in a cool, dry place.
Q: Can I grow sugarcane in recycled bottles in colder climates?
A: Yes, you can grow sugarcane in recycled bottles in colder climates, but you’ll need to take extra precautions to protect the plants from frost. Bring the bottles indoors during the winter months and place them in a sunny location. You may also need to provide supplemental heat to keep the plants warm. Alternatively, you can treat sugarcane as an annual and replant it each spring.
Q: What are some common pests and diseases that affect sugarcane grown in recycled bottles?
A: Some common pests that can affect sugarcane include aphids, mealybugs, and sugarcane borers. Diseases include red rot and smut. Regularly inspect your plants for signs of pests or diseases. Treat infestations with insecticidal soap or neem oil. Ensure good air circulation to prevent fungal diseases. Remove any infected leaves or stalks promptly.
Q: How can I use the sugarcane I grow in recycled bottles?
A: The possibilities are endless! You can chew on the stalks for a sweet treat, extract the juice for making sugarcane juice, use the juice to sweeten beverages or desserts, or even use the stalks as mulch in your garden. Sugarcane juice is a refreshing and healthy drink that is packed with vitamins and minerals. Get creative and explore the many ways to enjoy your homegrown sugarcane.
Leave a Comment