

Sweet Potato Bag Gardening: Ever dreamt of harvesting a bounty of sweet potatoes without needing a sprawling garden? I know I have! Forget back-breaking digging and endless rows – I’m about to let you in on a little secret that will transform your patio, balcony, or even a sunny corner indoors into a sweet potato paradise.
Growing sweet potatoes isn’t just a modern trend; these vibrant tubers have a rich history, dating back thousands of years in Central and South America. They’ve nourished civilizations and continue to be a staple in cuisines worldwide. But what if I told you that you could bring this ancient tradition into your own home, regardless of your space constraints?
That’s where sweet potato bag gardening comes in! In today’s fast-paced world, many of us lack the time, space, or resources for traditional gardening. This DIY trick offers a simple, cost-effective, and incredibly rewarding way to grow your own food. Imagine the satisfaction of harvesting your own sweet potatoes, knowing exactly where they came from and how they were grown. Plus, it’s a fantastic way to reduce your carbon footprint and connect with nature, even in the heart of the city. So, grab your supplies, and let’s get started on this exciting gardening adventure together!
DIY Sweet Potato Bag Garden: Grow Your Own Spuds!
Hey there, fellow gardening enthusiasts! I’m so excited to share this super easy and rewarding DIY project with you: growing sweet potatoes in a bag! It’s perfect for small spaces, beginners, and anyone who wants to try something a little different. Trust me, there’s nothing quite like harvesting your own homegrown sweet potatoes. Let’s get started!
What You’ll Need
Before we dive in, let’s gather all the necessary supplies. This will make the whole process smoother and more enjoyable.
* A Large, Sturdy Bag: Think burlap, heavy-duty plastic (like a feed bag), or even a strong reusable shopping bag. The bigger, the better! Aim for at least 20 gallons. I’ve had great success with old potting soil bags.
* Sweet Potato Slips: These are sprouts grown from sweet potatoes. You can buy them online, at a local nursery, or even grow your own (more on that later!).
* Potting Mix: A good quality potting mix is crucial for healthy sweet potato growth. Avoid using garden soil, as it can be too heavy and compact.
* Compost: Adding compost to your potting mix will provide extra nutrients and improve drainage.
* Water: Essential for keeping your sweet potatoes hydrated.
* Sunlight: Sweet potatoes need plenty of sunshine, so choose a sunny spot for your bag garden.
* Scissors or a Knife: For making drainage holes in the bag.
* Optional: Fertilizer: A balanced, slow-release fertilizer can give your sweet potatoes an extra boost.
Getting Started: Preparing Your Bag
Okay, let’s get our hands dirty! The first step is preparing the bag to be a happy home for our sweet potatoes.
1. Drainage is Key: Using your scissors or knife, carefully poke several drainage holes in the bottom of the bag. This is super important to prevent waterlogging, which can rot the sweet potatoes. I usually make about 6-8 holes, spaced evenly.
2. Roll Down the Sides: Roll down the top edges of the bag a few times. This will make it easier to fill and will also help the bag stand upright.
3. Mix Your Soil: In a large container or wheelbarrow, combine your potting mix and compost. I usually go for a ratio of about 2 parts potting mix to 1 part compost. Mix it all together thoroughly.
4. Fill ‘Er Up (Partially): Fill the bag with your soil mixture, leaving about 4-6 inches of space at the top. Don’t pack the soil down too tightly.
Planting Your Sweet Potato Slips
Now for the fun part – planting those slips! This is where the magic begins.
1. Water the Soil: Before planting, give the soil in the bag a good watering. This will help settle the soil and provide moisture for the slips.
2. Gently Separate the Slips: Carefully separate the sweet potato slips. If the roots are tangled, gently tease them apart.
3. Planting Time: Make a small hole in the soil for each slip. The hole should be deep enough to bury the roots and about half of the stem.
4. Space Them Out: If you’re planting multiple slips in one bag, space them out evenly. I usually plant 3-4 slips in a 20-gallon bag.
5. Cover and Water: Gently cover the roots with soil and water the newly planted slips thoroughly.
Caring for Your Sweet Potato Bag Garden
Now that your sweet potatoes are planted, it’s time to give them the TLC they need to thrive.
1. Sunlight is Your Friend: Place your bag garden in a location that receives at least 6-8 hours of sunlight per day. Sweet potatoes love the sun!
2. Watering Wisely: Water your sweet potatoes regularly, especially during hot and dry weather. The soil should be consistently moist, but not soggy. Check the soil moisture by sticking your finger into the soil. If it feels dry an inch or two down, it’s time to water.
3. Fertilizing (Optional): If you choose to fertilize, use a balanced, slow-release fertilizer according to the package directions. I usually fertilize every few weeks during the growing season.
4. Keep an Eye Out for Pests: Sweet potatoes are generally pest-resistant, but keep an eye out for common garden pests like aphids or spider mites. If you spot any pests, treat them with an appropriate organic insecticide.
5. “Hilling” the Soil: As the sweet potato vines grow, you can add more soil to the bag. This is called “hilling” and it encourages more sweet potatoes to form along the buried stems. Simply add a few inches of soil to the bag every few weeks, covering the lower parts of the vines.
Growing Your Own Sweet Potato Slips (Optional)
Want to save some money and grow your own slips? It’s easier than you think!
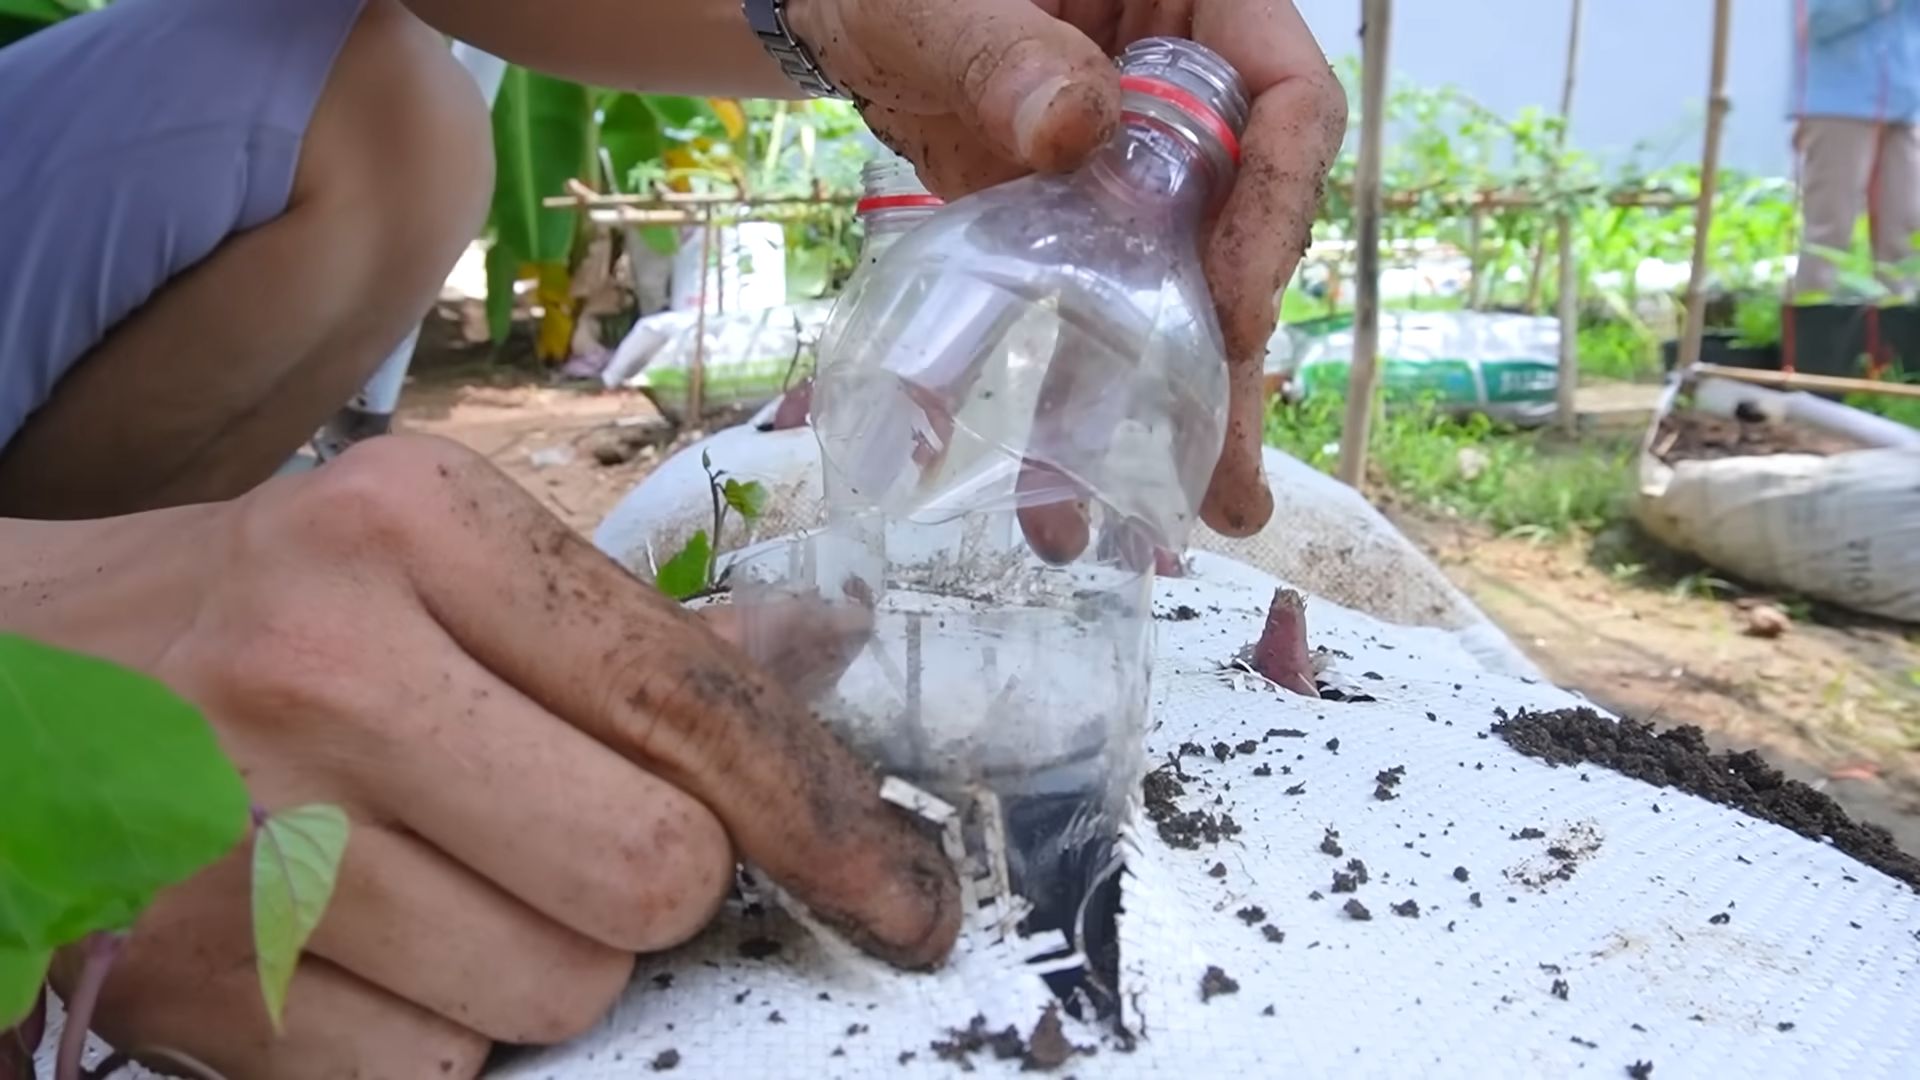
1. Choose a Healthy Sweet Potato: Select a healthy, organic sweet potato from your local grocery store or farmer’s market.
2. Suspension Method: Suspend the sweet potato in a jar or glass of water, using toothpicks to hold it in place. The bottom half of the sweet potato should be submerged in water.
3. Patience is Key: Place the jar in a warm, sunny location and wait for the magic to happen. It can take several weeks for the slips to start growing.
4. Harvesting the Slips: Once the slips are about 6-8 inches long, gently twist them off the sweet potato.
5. Rooting the Slips: Place the slips in a glass of water and allow them to develop roots. This usually takes a few days.
6. Planting the Rooted Slips: Once the slips have developed roots, they’re ready to be planted in your bag garden!
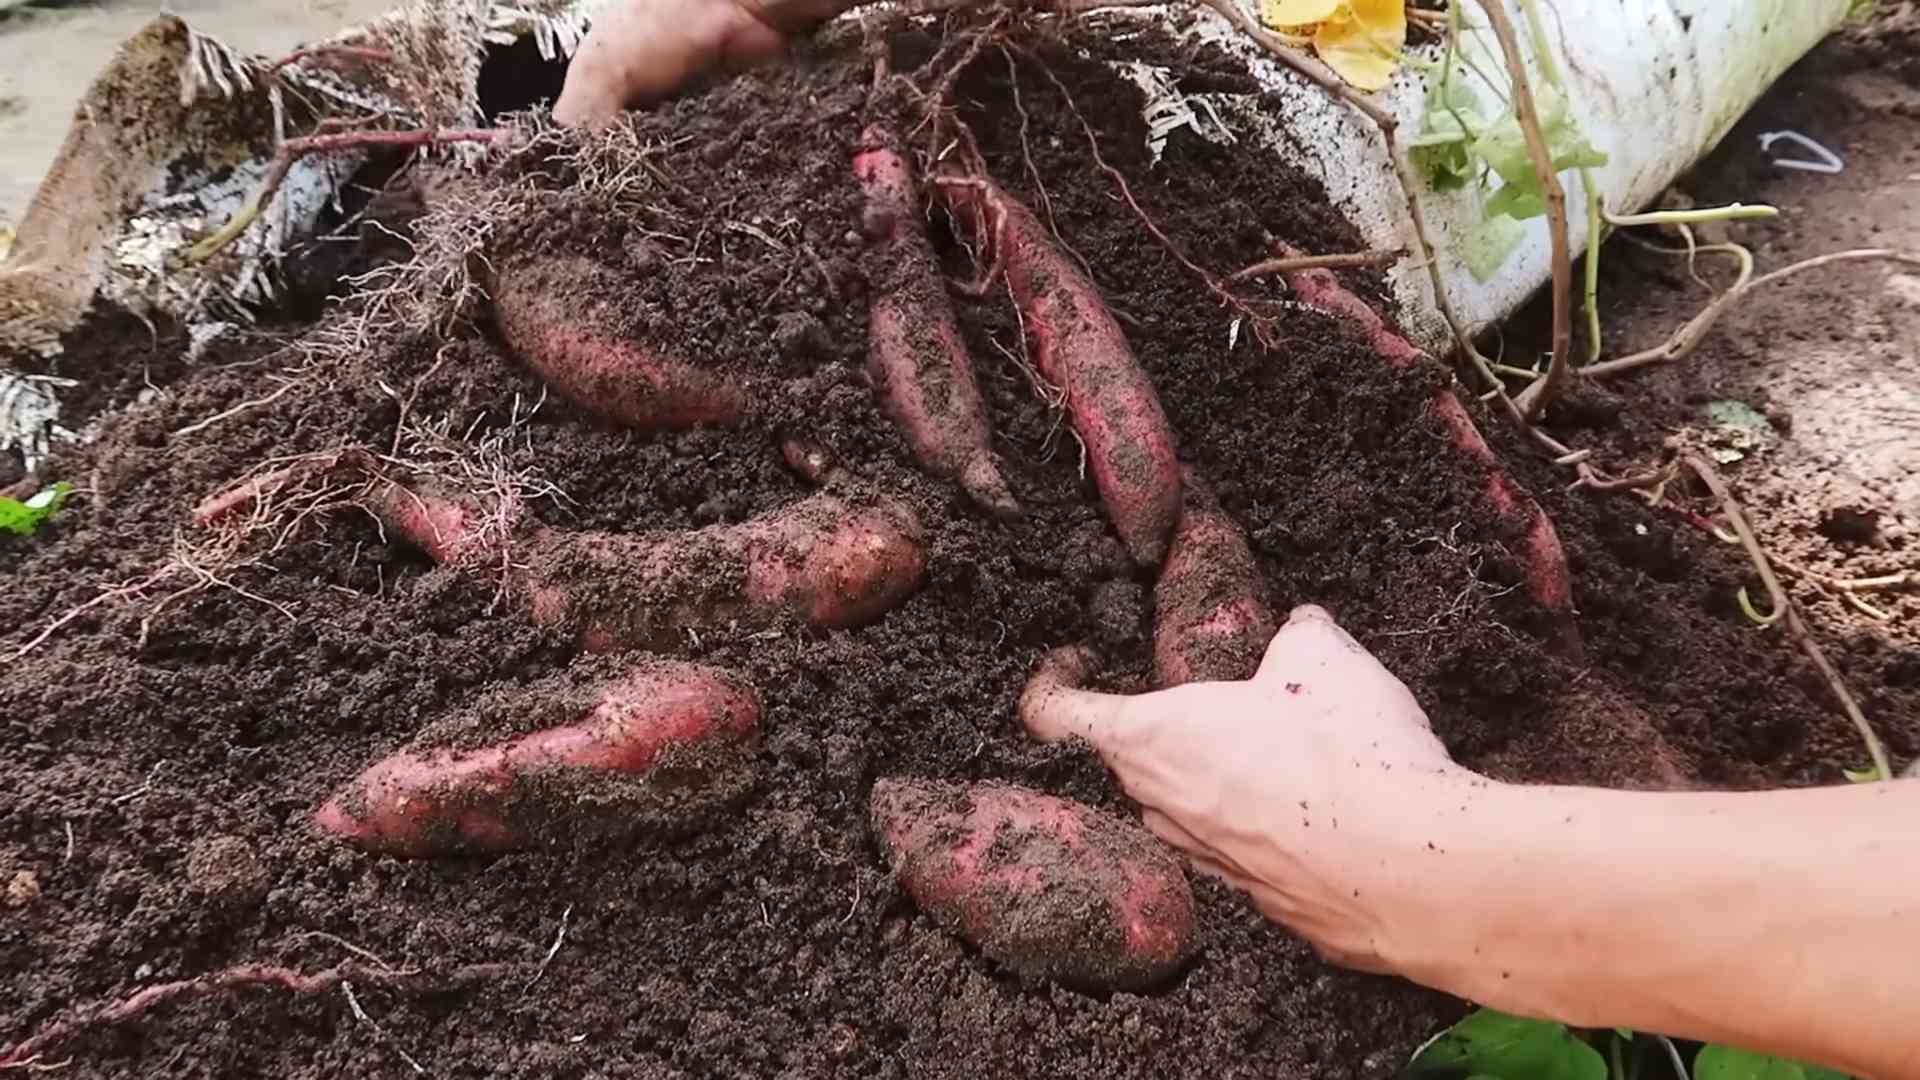
Harvest Time!
This is the moment we’ve all been waiting for! Harvesting your own sweet potatoes is incredibly rewarding.
1. Timing is Everything: Sweet potatoes are typically ready to harvest in the fall, about 90-120 days after planting. The leaves will start to turn yellow and the vines will begin to die back.
2. Gently Dig Around: Carefully dig around the base of the plant to loosen the soil.
3. Tip the Bag: Gently tip the bag over and carefully remove the sweet potatoes.
4. Curing Your Sweet Potatoes: After harvesting, cure your sweet potatoes for about a week in a warm, humid place. This will help them develop their sweetness and improve their storage life.
5. Enjoy Your Harvest! Now you can enjoy your delicious, homegrown sweet potatoes in all sorts of recipes!
Troubleshooting
Even with the best planning, sometimes things don’t go exactly as expected. Here are a few common issues you might encounter and how to address them:
* Yellowing Leaves: This could be a sign of overwatering, underwatering, or nutrient deficiency. Check the soil moisture and adjust your watering accordingly. If you suspect a nutrient deficiency, fertilize with a balanced fertilizer.
* Slow Growth: This could be due to insufficient sunlight, poor soil, or cool temperatures. Make sure your sweet potatoes are getting enough sunlight and that the soil is well-draining and nutrient-rich.
* Pests: As mentioned earlier, keep an eye out for pests and treat them with an appropriate organic insecticide.
* Rotting Sweet Potatoes: This is usually caused by overwatering. Make sure your bag has adequate drainage and avoid overwatering.
Why Grow Sweet Potatoes in a Bag?
You might be wondering, why go to all this trouble to grow sweet potatoes in a bag? Well, there are several advantages:
* Space-Saving: Bag gardening is perfect for small spaces like balconies, patios, or even rooftops.
* Easy to Move: You can easily move your bag garden to follow the sun or protect it from frost.
* Improved Drainage: Bag gardens typically have better drainage than traditional garden beds.
* Fewer Weeds: Bag gardens are less prone to weeds than traditional garden beds.
* Fun and Rewarding: Growing your own sweet potatoes is a fun and rewarding experience!
Varieties to Try
There are many different varieties of sweet potatoes to choose from. Here are a few popular options:
* Beauregard: A classic orange-fleshed sweet potato with a sweet, moist flavor.
* Jewel: Another popular orange-fleshed variety with a slightly drier texture.
* Garnet: A deep red-skinned sweet potato with a sweet, moist flavor.
* Japanese: A white-fleshed sweet potato with a nutty flavor.
* Okin
Conclusion
So, there you have it! Sweet potato bag gardening: a simple, space-saving, and incredibly rewarding way to grow your own delicious and nutritious sweet potatoes. This isn’t just about saving money at the grocery store; it’s about connecting with nature, understanding where your food comes from, and experiencing the pure joy of harvesting something you’ve nurtured from a slip to a bountiful crop.
Why is this DIY trick a must-try? Because it democratizes gardening. You don’t need acres of land or expensive equipment. All you need is a bag, some soil, sweet potato slips, and a little bit of sunshine. It’s perfect for apartment dwellers, balcony gardeners, or anyone with limited space who still craves the taste of homegrown goodness. Plus, the visual appeal of a thriving sweet potato bag is undeniable – a lush, green oasis right outside your door.
But the benefits extend beyond convenience and aesthetics. Sweet potatoes are packed with vitamins, minerals, and antioxidants, making them a nutritional powerhouse. Growing your own ensures you know exactly what’s going into your food, free from harmful pesticides or herbicides. You’re in control of the entire process, from planting to plate.
Ready to take your sweet potato bag gardening to the next level? Consider these variations:
* Vertical Stacking: If you’re truly limited on space, try stacking multiple bags on top of each other to create a vertical garden. Just make sure the bottom bags are sturdy enough to support the weight.
* Companion Planting: Plant herbs like basil or rosemary around the base of your sweet potato bag. These herbs can help deter pests and attract beneficial insects.
* Different Varieties: Experiment with different varieties of sweet potatoes! Beauregard, Covington, and Japanese sweet potatoes all have unique flavors and textures.
* Container Choice: While grow bags are ideal, you can also use large plastic containers or even repurposed burlap sacks. Just ensure they have adequate drainage.
Don’t be intimidated if you’ve never gardened before. Sweet potato bag gardening is incredibly forgiving. Even if you make a few mistakes along the way, you’re likely to still end up with a decent harvest. The key is to be patient, observant, and willing to learn.
We wholeheartedly encourage you to give this DIY trick a try. It’s a fun, educational, and ultimately delicious experience. Once you’ve harvested your first batch of homegrown sweet potatoes, you’ll be hooked!
And most importantly, we want to hear about your experience! Share your photos, tips, and stories with us in the comments below. Let’s build a community of sweet potato bag gardening enthusiasts and inspire others to get their hands dirty. What worked for you? What challenges did you face? What delicious recipes did you create with your homegrown sweet potatoes? Your insights can help others succeed and make this DIY trick even more accessible to everyone. Happy gardening!
Frequently Asked Questions (FAQ)
What kind of bag should I use for sweet potato bag gardening?
The best type of bag to use is a grow bag made of breathable fabric. These bags allow for good drainage and aeration, which are crucial for healthy root development. Look for bags that are at least 20 gallons in size, preferably larger. You can also use large plastic containers, but make sure they have plenty of drainage holes. Burlap sacks are another option, but they may decompose more quickly than grow bags. Avoid using non-breathable plastic bags, as they can lead to waterlogging and root rot.
Where can I get sweet potato slips?
Sweet potato slips can be purchased from local nurseries, garden centers, or online retailers. You can also grow your own slips from a sweet potato you already have. To do this, suspend the sweet potato in a jar of water, with the bottom half submerged. Place the jar in a warm, sunny location. After a few weeks, sprouts will begin to emerge from the potato. Once the sprouts are several inches long, you can gently twist them off and plant them in a seed starting mix. Keep the soil moist until the slips develop roots, then transplant them into your sweet potato bag.
What kind of soil should I use?
Sweet potatoes prefer well-draining soil that is rich in organic matter. A good mix would be equal parts compost, potting soil, and perlite or vermiculite. Avoid using heavy clay soil, as it can become waterlogged and inhibit root growth. You can also amend your existing garden soil with compost and other organic materials to improve its drainage and fertility.
How often should I water my sweet potato bag?
Water your sweet potato bag regularly, especially during hot, dry weather. The soil should be kept consistently moist, but not soggy. Check the soil moisture by sticking your finger into the soil a few inches deep. If the soil feels dry, it’s time to water. Avoid overwatering, as this can lead to root rot.
How much sunlight do sweet potatoes need?
Sweet potatoes need at least 6-8 hours of direct sunlight per day. Choose a location for your sweet potato bag that receives plenty of sunshine. If you live in a particularly hot climate, you may need to provide some afternoon shade to prevent the plants from overheating.
When should I harvest my sweet potatoes?
Sweet potatoes are typically ready to harvest about 90-120 days after planting. The leaves of the plant will start to turn yellow and die back when the potatoes are mature. To harvest, gently dig around the base of the plant and lift the potatoes out of the soil. Be careful not to damage the potatoes during harvesting. Cure the sweet potatoes for 7-10 days in a warm, dry place before storing them. This will help to toughen the skins and improve their flavor.
What are some common pests and diseases that affect sweet potatoes?
Some common pests that can affect sweet potatoes include aphids, flea beetles, and sweet potato weevils. Diseases that can affect sweet potatoes include fusarium wilt, black rot, and scurf. To prevent pests and diseases, choose disease-resistant varieties of sweet potatoes, practice good sanitation, and avoid overwatering. You can also use organic pesticides and fungicides to control pests and diseases if necessary.
Can I grow sweet potatoes in a container indoors?
While it’s possible to grow sweet potatoes indoors, it’s more challenging than growing them outdoors. Sweet potatoes need a lot of sunlight, so you’ll need to provide supplemental lighting if you’re growing them indoors. You’ll also need a very large container and plenty of space for the vines to spread. It’s generally easier and more rewarding to grow sweet potatoes outdoors in a bag or container.
How do I store my harvested sweet potatoes?
After curing your sweet potatoes for 7-10 days, store them in a cool, dry, and dark place. The ideal storage temperature is around 55-60 degrees Fahrenheit. Avoid storing sweet potatoes in the refrigerator, as this can cause them to develop a hard core. Properly stored sweet potatoes can last for several months.
What can I do with the sweet potato vines after harvesting the potatoes?
The sweet potato vines are edible and can be used in salads, stir-fries, or soups. They are a good source of vitamins and minerals. You can also compost the vines to add nutrients to your garden soil.
Leave a Comment