

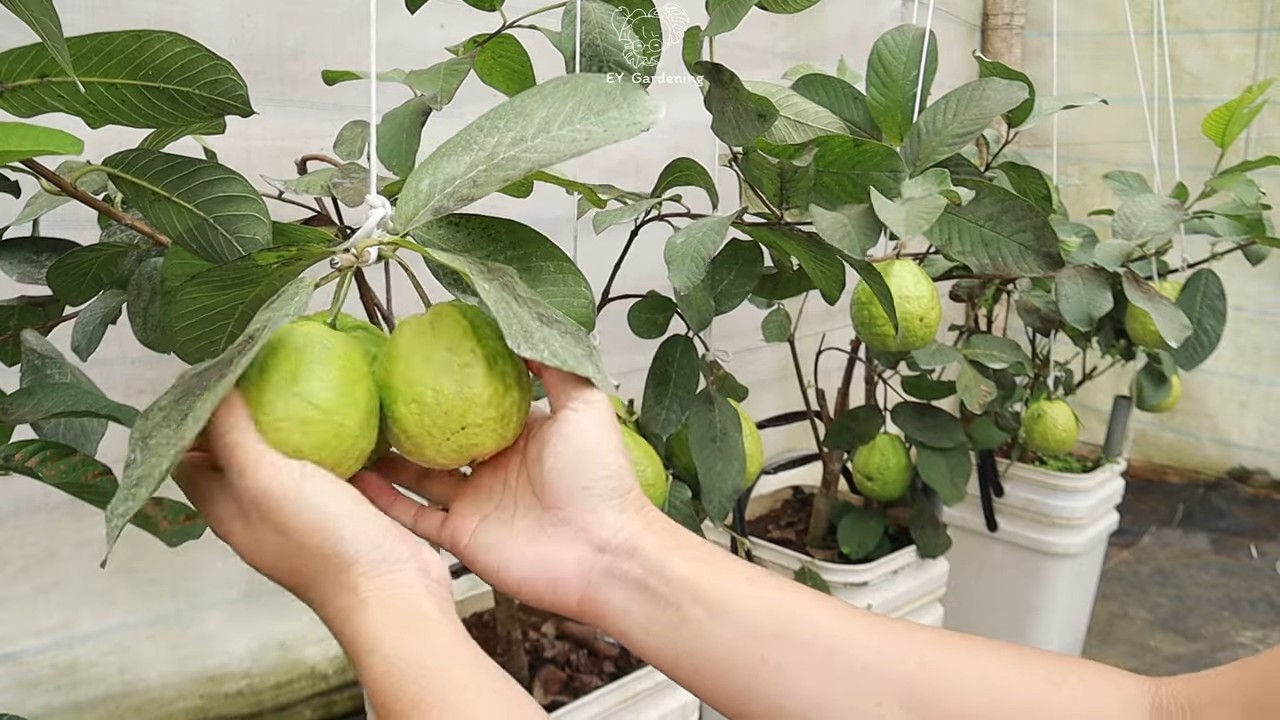
Terrace Guava Tree Fruit – imagine plucking a juicy, sun-ripened guava straight from your own terrace garden! Sounds like a tropical dream, right? Well, it’s more achievable than you might think. For centuries, cultivating fruit trees in limited spaces has been a cherished practice, from the rooftop gardens of ancient Babylon to the balcony orchards of modern-day urban dwellers. There’s something incredibly satisfying about nurturing a plant and reaping its delicious rewards, especially when space is at a premium.
But let’s be honest, growing a guava tree, especially on a terrace, can feel a little daunting. That’s where these DIY tricks and hacks come in! I’m here to share my tried-and-true methods for maximizing your chances of a bountiful harvest. We’ll cover everything from choosing the right variety for container gardening to mastering the art of pruning for optimal fruit production.
Why do you need these tips? Because everyone deserves the joy of fresh, homegrown fruit, regardless of their garden size. Plus, growing your own terrace guava tree fruit is not only rewarding but also a sustainable way to enjoy this tropical delight. So, grab your gardening gloves, and let’s get started on transforming your terrace into a guava paradise!
Growing Guava on Your Terrace: A DIY Guide to Bountiful Harvests
Hey there, fellow gardening enthusiasts! Dreaming of juicy, homegrown guavas right outside your door? You’re in the right place! Growing guava on your terrace is totally achievable, even if you’re a beginner. I’m going to walk you through everything you need to know, from choosing the right variety to harvesting your delicious rewards. Let’s get started!
Choosing the Right Guava Variety
First things first, not all guava trees are created equal, especially when it comes to container gardening. You’ll want to pick a variety that’s naturally dwarf or semi-dwarf, or one that responds well to pruning. Here are a few of my favorites:
* ‘Mexican Cream’ (also known as ‘White Indian’): This one is a classic! It produces creamy, sweet fruit with a delightful aroma. It’s relatively compact and adapts well to container life.
* ‘Ruby Supreme’: If you love pink guavas, this is your go-to. The fruit is incredibly flavorful and the tree is known for its good production.
* ‘Thai Maroon’: This variety is known for its beautiful maroon-colored flesh and sweet, slightly tart taste. It’s also relatively disease-resistant.
* ‘Red Indian’: Another pink-fleshed variety, ‘Red Indian’ guavas are known for their rich, sweet flavor and relatively small size, making them suitable for containers.
* ‘Dwarf Hawaiian’: As the name suggests, this is a naturally dwarf variety, perfect for smaller terraces or balconies. It produces small, sweet fruit.
Important Tip: When buying your guava tree, make sure it’s grafted onto a suitable rootstock. This will ensure better disease resistance and fruit production. Ask your nursery about the rootstock used.
Preparing Your Guava Tree’s Home: Potting and Soil
Okay, now that you’ve chosen your guava superstar, let’s get its home ready! The right pot and soil are crucial for success.
* Choosing the Right Pot:
* Size Matters: Start with a pot that’s at least 18-24 inches in diameter and depth. As your tree grows, you’ll likely need to repot it into a larger container (24-36 inches) after a few years.
* Drainage is Key: Guava trees hate soggy roots, so make sure your pot has plenty of drainage holes.
* Material: Terracotta, plastic, or even a large grow bag will work. Terracotta pots are porous and allow for better aeration, but they can dry out faster. Plastic pots retain moisture better, but you need to be extra careful not to overwater.
* Creating the Perfect Soil Mix:
* Well-Draining is Essential: A good soil mix should be well-draining but also retain enough moisture to keep your guava tree happy.
* My Go-To Recipe: I like to use a mix of equal parts:
* Good quality potting soil
* Compost (for nutrients and moisture retention)
* Perlite or vermiculite (for drainage and aeration)
* Optional Boosters: You can also add a handful of bone meal (for phosphorus) and a slow-release fertilizer to the mix.
Planting Your Guava Tree: A Step-by-Step Guide
Alright, let’s get that guava tree planted!
1. Prepare the Pot: Place a layer of gravel or broken pottery at the bottom of the pot to improve drainage.
2. Add Soil: Fill the pot about one-third full with your prepared soil mix.
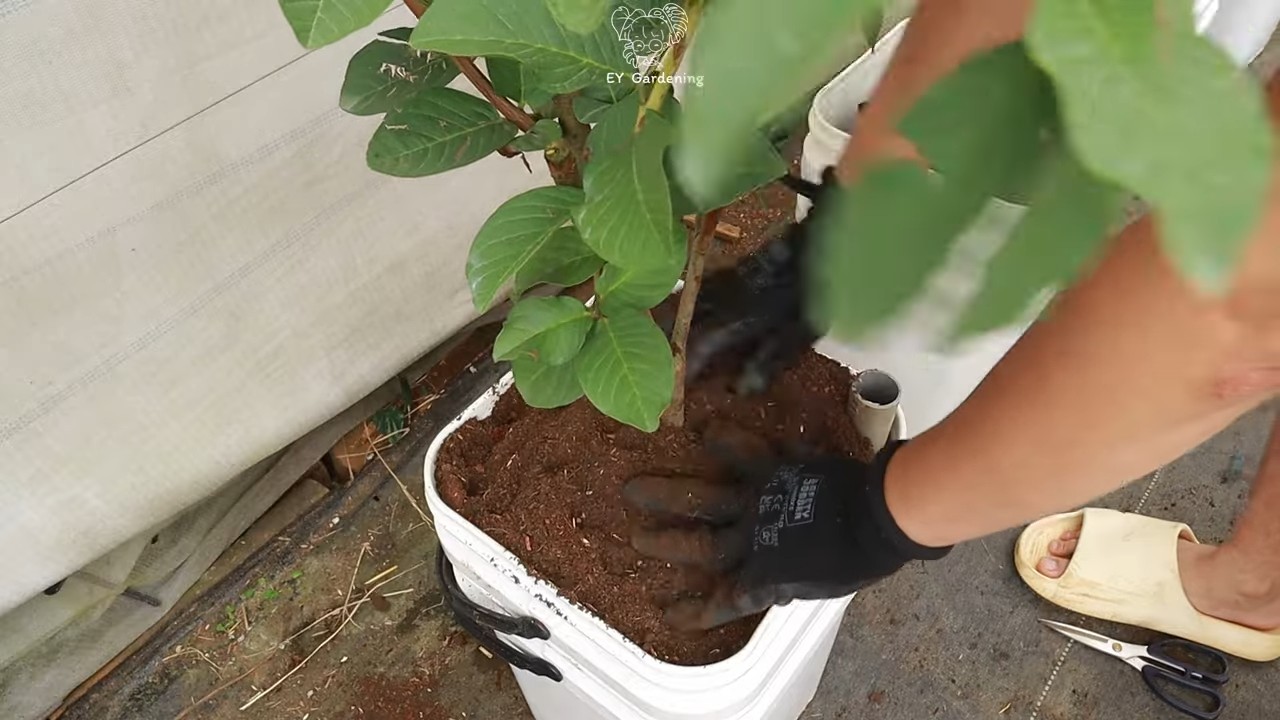
3. Remove the Tree from its Nursery Container: Gently loosen the root ball by tapping the sides of the container. If the roots are tightly bound, carefully tease them apart with your fingers.
4. Position the Tree: Place the guava tree in the center of the pot, making sure the top of the root ball is level with the soil surface.
5. Fill with Soil: Add more soil mix around the root ball, gently firming it as you go. Leave about an inch or two of space between the soil surface and the rim of the pot.
6. Water Thoroughly: Water the newly planted tree deeply until water drains out of the drainage holes. This will help settle the soil and remove any air pockets.
7. Mulch (Optional): Add a layer of organic mulch, such as wood chips or shredded bark, around the base of the tree. This will help retain moisture, suppress weeds, and regulate soil temperature.
Caring for Your Guava Tree: Sunlight, Watering, and Fertilizing
Now that your guava tree is planted, it’s time to give it the TLC it needs to thrive.
* Sunlight: Guava trees are sun-worshippers! They need at least 6-8 hours of direct sunlight per day to produce abundant fruit. Choose a sunny spot on your terrace for your tree. If you live in a particularly hot climate, some afternoon shade might be beneficial.
* Watering:
* Consistency is Key: Water your guava tree regularly, especially during the growing season (spring and summer).
* Check the Soil: The best way to determine if your tree needs water is to check the soil moisture. Stick your finger about an inch or two into the soil. If it feels dry, it’s time to water.
* Deep Watering: When you water, water deeply until water drains out of the drainage holes. This encourages deep root growth.
* Avoid Overwatering: Overwatering can lead to root rot, so be careful not to let the soil stay soggy.
Hey there, fellow gardening enthusiasts! Dreaming of juicy, homegrown guavas right outside your door? You’re in the right place! Growing guava on your terrace is totally achievable, even if you’re a beginner. I’m going to walk you through everything you need to know, from choosing the right variety to harvesting your delicious rewards. Let’s get started!
Choosing the Right Guava Variety
First things first, not all guava trees are created equal, especially when it comes to container gardening. You’ll want to pick a variety that’s naturally dwarf or semi-dwarf, or one that responds well to pruning. Here are a few of my favorites:
* ‘Mexican Cream’ (also known as ‘White Indian’): This one is a classic! It produces creamy, sweet fruit with a delightful aroma. It’s relatively compact and adapts well to container life.
* ‘Ruby Supreme’: If you love pink guavas, this is your go-to. The fruit is incredibly flavorful and the tree is known for its good production.
* ‘Thai Maroon’: This variety is known for its beautiful maroon-colored flesh and sweet, slightly tart taste. It’s also relatively disease-resistant.
* ‘Red Indian’: Another pink-fleshed variety, ‘Red Indian’ guavas are known for their rich, sweet flavor and relatively small size, making them suitable for containers.
* ‘Dwarf Hawaiian’: As the name suggests, this is a naturally dwarf variety, perfect for smaller terraces or balconies. It produces small, sweet fruit.
Important Tip: When buying your guava tree, make sure it’s grafted onto a suitable rootstock. This will ensure better disease resistance and fruit production. Ask your nursery about the rootstock used.
Preparing Your Guava Tree’s Home: Potting and Soil
Okay, now that you’ve chosen your guava superstar, let’s get its home ready! The right pot and soil are crucial for success.
* Choosing the Right Pot:
* Size Matters: Start with a pot that’s at least 18-24 inches in diameter and depth. As your tree grows, you’ll likely need to repot it into a larger container (24-36 inches) after a few years.
* Drainage is Key: Guava trees hate soggy roots, so make sure your pot has plenty of drainage holes.
* Material: Terracotta, plastic, or even a large grow bag will work. Terracotta pots are porous and allow for better aeration, but they can dry out faster. Plastic pots retain moisture better, but you need to be extra careful not to overwater.
* Creating the Perfect Soil Mix:
* Well-Draining is Essential: A good soil mix should be well-draining but also retain enough moisture to keep your guava tree happy.
* My Go-To Recipe: I like to use a mix of equal parts:
* Good quality potting soil
* Compost (for nutrients and moisture retention)
* Perlite or vermiculite (for drainage and aeration)
* Optional Boosters: You can also add a handful of bone meal (for phosphorus) and a slow-release fertilizer to the mix.
Planting Your Guava Tree: A Step-by-Step Guide
Alright, let’s get that guava tree planted!
1. Prepare the Pot: Place a layer of gravel or broken pottery at the bottom of the pot to improve drainage.
2. Add Soil: Fill the pot about one-third full with your prepared soil mix.
3. Remove the Tree from its Nursery Container: Gently loosen the root ball by tapping the sides of the container. If the roots are tightly bound, carefully tease them apart with your fingers.
4. Position the Tree: Place the guava tree in the center of the pot, making sure the top of the root ball is level with the soil surface.
5. Fill with Soil: Add more soil mix around the root ball, gently firming it as you go. Leave about an inch or two of space between the soil surface and the rim of the pot.
6. Water Thoroughly: Water the newly planted tree deeply until water drains out of the drainage holes. This will help settle the soil and remove any air pockets.
7. Mulch (Optional): Add a layer of organic mulch, such as wood chips or shredded bark, around the base of the tree. This will help retain moisture, suppress weeds, and regulate soil temperature.
Caring for Your Guava Tree: Sunlight, Watering, and Fertilizing
Now that your guava tree is planted, it’s time to give it the TLC it needs to thrive.
* Sunlight: Guava trees are sun-worshippers! They need at least 6-8 hours of direct sunlight per day to produce abundant fruit. Choose a sunny spot on your terrace for your tree. If you live in a particularly hot climate, some afternoon shade might be beneficial.
* Watering:
* Consistency is Key: Water your guava tree regularly, especially during the growing season (spring and summer).
* Check the Soil: The best way to determine if your tree needs water is to check the soil moisture. Stick your finger about an inch or two into the soil. If it feels dry, it’s time to water.
* Deep Watering: When you water, water deeply until water drains out of the drainage holes. This encourages deep root growth.
* Avoid Overwatering: Overwatering can lead to root rot, so be careful not to let the soil stay soggy.
* Reduce Watering in Winter: During the dormant season (fall and winter), reduce watering frequency.
* Fertilizing:
* Regular Feeding: Guava trees are heavy feeders and benefit from regular fertilization.
* Balanced Fertilizer: Use a balanced fertilizer (e.g., 10-10-10) or a fertilizer specifically formulated for fruit trees.
* Fertilizing Schedule: I like to fertilize my guava tree every 2-3 months during the growing season. Follow the instructions on the fertilizer label for application rates.
* Organic Options: You can also use organic fertilizers, such as compost tea or fish emulsion.
* Foliar Feeding: Consider foliar feeding with seaweed extract or diluted liquid fertilizer to provide micronutrients.
Pruning Your Guava Tree: Shaping and Encouraging Fruit Production
Pruning is essential for maintaining the shape of your guava tree, promoting air circulation, and encouraging fruit production.
* Timing is Important: The best time to prune guava trees is in late winter or early spring, before new growth begins.
* Basic Pruning Techniques:
* Remove Dead, Diseased, or Damaged Branches: This is the first step in any pruning session.
* Thin Out Crowded Branches: Remove branches that are crossing or rubbing against each other to improve air circulation and sunlight penetration.
* Shape the Tree: Prune to maintain a desired shape and size. For container-grown guavas, you’ll want to keep them relatively compact.
* Encourage Fruit Production: Guava trees fruit on new growth, so prune to encourage new growth. You can prune back the tips of branches to stimulate branching and fruit production.
* Specific Pruning Tips for Guava:
* Heading Cuts: Heading cuts involve cutting back a branch to a bud. This encourages branching and bushier growth.
* Thinning Cuts: Thinning cuts involve removing an entire branch at its point of origin. This improves air circulation and sunlight penetration.
* Remove Suckers: Suckers are shoots that grow from the base of the tree or from the roots. Remove them as soon as you see them.
* Remove Water Sprouts: Water sprouts are vigorous, upright shoots that grow from the trunk or branches. Remove them as well.
Dealing with Pests and Diseases
Even with the best care, your guava tree might encounter some pests or diseases. Here’s what to watch out for and how to deal with them:
* Common Pests:
* Aphids: These tiny insects suck sap from leaves and stems. You can control them with a strong spray of water, insecticidal soap, or neem oil.
* Scale: These insects look like small bumps on the leaves and stems. You can scrape them off with your fingernail or use horticultural oil.
* Fruit Flies: Fruit flies can damage the fruit. Use fruit fly traps or cover the fruit with netting.
* Mealybugs: These cottony insects suck sap from leaves and stems. You can control them with insecticidal soap or neem oil.
Conclusion
So, there you have it! Transforming your terrace guava tree fruit from potentially bland and uninspiring to a burst of tropical sunshine is easier than you might think. This simple DIY trick, focusing on strategic ripening and flavor enhancement, is a game-changer for anyone growing guavas at home. No longer will you have to settle for fruit that doesn’t quite live up to its potential.
This isn’t just about making your guavas taste better; it’s about maximizing the reward for your gardening efforts. You’ve nurtured your guava tree, provided it with the right conditions, and patiently waited for the fruit to mature. Now, with this easy-to-implement method, you can ensure that every single guava you harvest is a testament to your dedication.
Think of the possibilities! Imagine biting into a perfectly ripe guava, bursting with sweetness and that characteristic tropical aroma. Picture sharing these delicious fruits with friends and family, impressing them with your gardening prowess and the incredible flavor you’ve unlocked. This DIY trick isn’t just a recipe; it’s an experience.
But don’t stop there! Feel free to experiment with variations to tailor the process to your specific preferences. For example, if you prefer a slightly tangier guava, you can shorten the ripening period by a day or two. If you’re a fan of sweeter guavas, consider adding a touch of honey or agave nectar during the final stages of ripening. You could even try infusing the guavas with different herbs or spices, such as mint or ginger, for a unique and exciting flavor profile.
This method is particularly beneficial for terrace guava trees, where environmental factors can sometimes impact fruit quality. By taking control of the ripening process, you can overcome these challenges and consistently produce delicious, high-quality guavas, regardless of the weather conditions.
We’re confident that this DIY trick will revolutionize the way you enjoy your terrace guava tree fruit. It’s simple, effective, and allows you to customize the flavor to your liking. So, go ahead and give it a try! We’re eager to hear about your experiences and see the amazing results you achieve.
Don’t forget to share your photos and stories with us in the comments below. Let us know what variations you’ve tried, what worked best for you, and any tips or tricks you’ve discovered along the way. Together, we can unlock the full potential of our terrace guava trees and enjoy a bounty of delicious, homegrown fruit. We encourage you to share this article with other guava enthusiasts so they too can benefit from this simple yet effective technique. Happy harvesting and happy eating!
Frequently Asked Questions (FAQ)
What if my guavas are already starting to ripen on the tree? Can I still use this method?
Yes, absolutely! Even if your guavas are showing signs of ripening on the tree, you can still benefit from this DIY trick. Simply harvest them slightly before they reach their peak ripeness on the tree. Look for guavas that have started to change color but are still firm to the touch. Then, follow the steps outlined in the article to control the final stages of ripening and enhance their flavor. This method allows you to ensure that the guavas ripen evenly and develop the desired sweetness and aroma, even if they’ve already started the process on the tree. It’s a great way to salvage guavas that might otherwise become overripe or attract pests.
How do I know when my guavas are ready to harvest from the tree in the first place?
Determining the optimal time to harvest your guavas is crucial for achieving the best flavor and texture. There are several key indicators to look for. First, pay attention to the color of the fruit. As guavas ripen, they typically change from a deep green to a lighter green, yellow, or even pinkish hue, depending on the variety. Second, gently press the fruit. A ripe guava will yield slightly to gentle pressure, but it shouldn’t be too soft or mushy. Third, consider the aroma. Ripe guavas often emit a sweet, fragrant smell. Finally, check the stem. If the guava is easily detached from the stem with a gentle tug, it’s likely ready to be harvested. Remember that these are general guidelines, and the specific characteristics of ripe guavas may vary depending on the variety and growing conditions.
What’s the best way to store guavas after they’ve been ripened using this method?
Proper storage is essential for preserving the quality and flavor of your ripened guavas. If you plan to eat them within a day or two, you can store them at room temperature in a cool, dry place. However, if you want to extend their shelf life, the refrigerator is your best bet. Place the guavas in a single layer in a container lined with paper towels. This will help absorb excess moisture and prevent them from becoming soggy. Avoid storing them in a sealed plastic bag, as this can trap moisture and accelerate spoilage. When stored properly in the refrigerator, ripened guavas can last for up to a week. Before eating, allow them to come to room temperature for about 30 minutes to enhance their flavor.
Can I use this method for other types of fruit besides guavas?
While this DIY trick is specifically tailored for enhancing the flavor of terrace guava tree fruit, the underlying principles can be applied to other types of fruit as well. The key is to understand the ripening process of the specific fruit you’re working with and adjust the method accordingly. For example, you can use a similar technique to ripen avocados, mangoes, or even tomatoes. The use of a paper bag or container helps to trap ethylene gas, which is a natural ripening agent produced by fruits. By controlling the environment and monitoring the fruit’s progress, you can often improve its flavor and texture. However, it’s important to research the specific ripening requirements of each fruit to ensure the best results.
What if I don’t have a paper bag? What else can I use?
If you don’t have a paper bag readily available, don’t worry! There are several alternative options you can use to create a similar ripening environment. A cardboard box works just as well, as it also allows for some air circulation while trapping ethylene gas. You can also use a large bowl covered with a clean kitchen towel. The towel will help to retain moisture and ethylene gas while still allowing for some ventilation. Another option is to use a plastic container with a lid, but be sure to leave the lid slightly ajar to prevent excessive moisture buildup. The key is to create an enclosed space that traps ethylene gas without suffocating the fruit. Experiment with different options to see what works best for you and your guavas.
My guavas are turning brown inside. Is there something wrong?
Browning inside guavas can be due to several factors. One common cause is oxidation, which occurs when the fruit is exposed to air. This is a natural process and doesn’t necessarily mean the guava is spoiled. However, if the browning is accompanied by a mushy texture or an off-putting smell, it could indicate that the guava is overripe or has started to rot. Another possible cause is chilling injury, which can occur if guavas are stored at temperatures that are too cold. This can damage the fruit’s cells and lead to browning. To prevent browning, store your guavas properly, avoid exposing them to excessive air, and consume them promptly after ripening. If you notice browning inside your guavas, inspect them carefully for other signs of spoilage before eating them.
How does this DIY trick help with guavas that are grown on a terrace?
Terrace guava trees, while offering the joy of homegrown fruit in limited spaces, can sometimes face unique challenges. These challenges often stem from inconsistent sunlight exposure, fluctuating temperatures, and limited soil volume compared to trees grown in the ground. These factors can impact the fruit’s ability to ripen evenly and develop its full flavor potential. This DIY trick addresses these challenges by providing a controlled environment for ripening. By harvesting the guavas slightly before they’re fully ripe on the tree and then ripening them indoors, you can ensure that they receive consistent conditions and develop the desired sweetness and aroma. This is particularly beneficial for terrace-grown guavas, as it allows you to overcome the limitations of the terrace environment and consistently produce delicious, high-quality fruit.
Can I add other fruits, like bananas or apples, to the bag to help with ripening?
Yes, adding other fruits like bananas or apples to the bag can actually accelerate the ripening process of your guavas. This is because bananas and apples are known to produce high levels of ethylene gas, which, as mentioned earlier, is a natural ripening agent. By placing these fruits in the bag with your guavas, you’ll increase the concentration of ethylene gas and speed up the ripening process. However, be sure to monitor the guavas closely, as they may ripen more quickly than usual. You may need to shorten the ripening period by a day or two to prevent them from becoming overripe. This is a great trick to use if you’re in a hurry to ripen your guavas or if you want to ensure that they ripen evenly.
Leave a Comment