

Umbrella Upcycling DIY Project: Don’t toss that broken umbrella just yet! I know, I know, it’s tempting to just chuck it in the trash and forget about it. But before you do, let me tell you, you’re sitting on a goldmine of crafting potential! Think about it – that umbrella bravely shielded you from countless downpours, and now it deserves a stylish second act.
For centuries, resourceful individuals have found creative ways to repurpose everyday items. From turning old clothes into quilts to crafting furniture from salvaged wood, the spirit of upcycling is deeply ingrained in our history. It’s a testament to our ingenuity and our desire to reduce waste. And when it comes to umbrella upcycling DIY projects, the possibilities are truly endless!
Why should you bother with this DIY trick? Well, for starters, it’s incredibly satisfying to transform something destined for the landfill into something beautiful and useful. Plus, it’s a fantastic way to save money and add a unique, personal touch to your home and wardrobe. In a world of mass-produced goods, creating something yourself is a refreshing and empowering experience. So, grab that broken umbrella, unleash your inner artist, and let’s dive into some amazing umbrella upcycling DIY projects that will inspire you!
Upcycling Your Old Umbrella: From Rain Protector to Stylish Tote Bag
Okay, so you’ve got an old umbrella lurking in the corner, probably missing a spoke or two, or maybe just looking a little sad and faded. Don’t toss it! We’re going to give it a fabulous new life as a stylish and surprisingly durable tote bag. Trust me, this project is easier than you think, and the result is a unique bag that’s perfect for groceries, books, or anything else you need to carry.
Materials You’ll Need
Before we dive in, let’s gather our supplies. This will make the whole process smoother.
* An old umbrella (the bigger, the better for a larger bag)
* Sewing machine (a sturdy one is helpful, but a regular one will work too)
* Matching thread (or a contrasting color for a fun pop!)
* Scissors (sharp ones are essential)
* Seam ripper (for those inevitable little mistakes)
* Pins (lots of them!)
* Measuring tape or ruler
* Fabric for lining (optional, but recommended for a more polished look) – about 1/2 yard
* Fabric for handles (optional, if you don’t want to use the umbrella handle) – about 1/4 yard
* Iron and ironing board
* Chalk or fabric marker
* Safety glasses (especially when cutting the umbrella fabric)
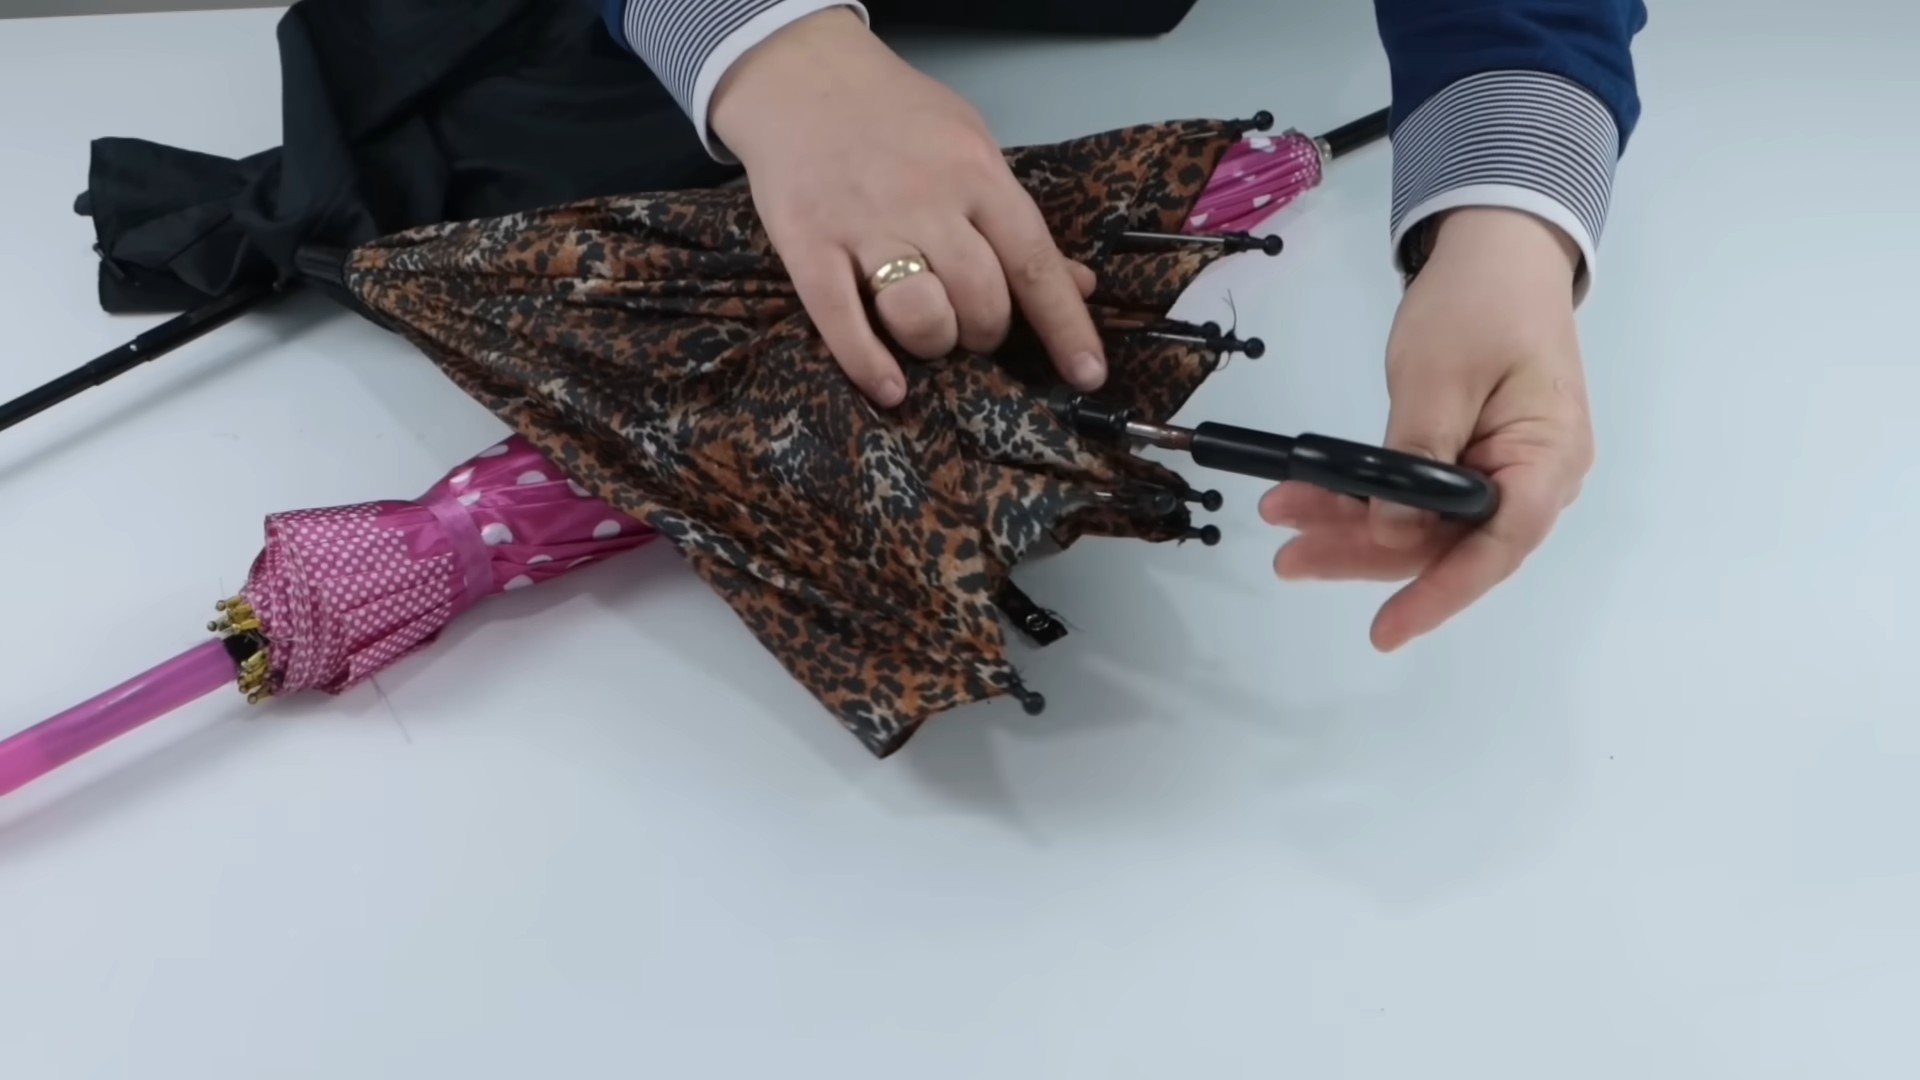
Disassembling the Umbrella
This is where we take the umbrella apart and get ready to work with the fabric.
1. Remove the Fabric from the Frame: Carefully detach the umbrella fabric from the metal frame. A seam ripper is your best friend here. Go slowly and avoid tearing the fabric. You’ll want to remove all the little caps and ties that hold the fabric to the ribs. This can be a bit tedious, but it’s important to get the fabric off cleanly.
2. Cut off the Metal Tips: Once the fabric is completely detached, carefully cut off the metal tips that were attached to the ribs. These are sharp, so be careful! Safety glasses are a good idea here.
3. Wash and Dry the Fabric: I highly recommend washing the umbrella fabric before you start sewing. This will remove any dirt or grime and also pre-shrink the fabric, which is important for preventing puckering later on. Use a gentle cycle and hang it to dry. Avoid putting it in the dryer, as it might melt or damage the waterproof coating.
Creating the Tote Bag Body
Now for the fun part – transforming the umbrella fabric into the main body of our tote bag!
1. Lay the Fabric Flat: Once the fabric is dry, lay it flat on your work surface. You’ll notice it’s probably in a circular or multi-panel shape.
2. Cut into Rectangles: We need to create two rectangular pieces for the front and back of the bag. The size of these rectangles will determine the size of your tote bag. I usually aim for rectangles that are about 16 inches wide and 18 inches tall, but you can adjust this to your liking. Use your measuring tape and chalk or fabric marker to mark the rectangles, then carefully cut them out. Try to use the existing seams of the umbrella panels to your advantage – this will save you some sewing later on!
3. Sew the Sides Together: Place the two rectangular pieces right sides together (meaning the sides you want to be on the outside of the bag are facing each other). Pin along both long sides and the bottom edge. Sew along these three sides with a 1/2-inch seam allowance. Remember to backstitch at the beginning and end of each seam to secure the stitches.
4. Box the Corners (Optional but Recommended): Boxing the corners will give your tote bag a nice, flat bottom. To do this, flatten one of the bottom corners so that the side seam and the bottom seam line up. This will create a triangle. Measure down from the point of the triangle along the seam a distance of 2-3 inches (depending on how wide you want the bottom of your bag to be). Draw a line across the triangle at this point, perpendicular to the seam. Sew along this line. Repeat for the other corner. Trim off the excess fabric, leaving about 1/2 inch seam allowance.
Adding the Lining (Optional)
A lining adds durability and a professional touch to your tote bag.
1. Cut the Lining Fabric: Use the same rectangular dimensions you used for the umbrella fabric to cut two pieces of lining fabric.
2. Sew the Lining Together: Sew the lining pieces together in the same way you sewed the umbrella fabric – right sides together, sewing along both long sides and the bottom edge with a 1/2-inch seam allowance. Box the corners of the lining in the same way you boxed the corners of the umbrella fabric.
3. Leave an Opening: When sewing the lining, leave a 6-8 inch opening along the bottom seam. This opening will be used to turn the bag right side out later. Remember to backstitch at the beginning and end of the opening.
4. Attach the Lining to the Bag: Place the umbrella fabric bag inside the lining, with right sides together. The top edges of the bag and the lining should be aligned. Pin around the top edge. Sew around the top edge with a 1/2-inch seam allowance.
5. Turn the Bag Right Side Out: Reach through the opening in the lining and pull the entire bag right side out.
6. Close the Opening: Fold the edges of the opening in the lining inward and pin them together. Sew the opening closed by hand using a slip stitch or by machine using a very narrow seam allowance.
7. Press the Top Edge: Press the top edge of the bag with an iron to create a crisp, clean finish.
Creating and Attaching the Handles
Now, let’s add the handles so you can actually carry your awesome new bag! You have a couple of options here: you can reuse the umbrella handle, or you can create fabric handles.
Option 1: Reusing the Umbrella Handle
This is a great way to incorporate the original umbrella into the design.
1. Attach the Handle: Position the umbrella handle on the inside of the bag, centered on one of the side panels. Pin it in place.
2. Sew the Handle Securely: Sew around the base of the handle several times, using a strong stitch. You want to make sure the handle is securely attached, as it will be carrying the weight of the bag.
Option 2: Creating Fabric Handles
This gives you more control over the style and length of the handles.
1. Cut the Fabric Strips: Cut two strips of fabric for the handles. I usually make them about 4 inches wide and 24 inches long, but you can adjust the length to your preference.
2. Fold and Press: Fold each strip in half lengthwise, wrong sides together, and press. Open the strip and fold each long edge in towards the center crease, and press again. Fold the strip in half again along the original crease, and press. This will create a sturdy, multi-layered handle.
3. Sew the Handles: Sew along both long edges of each handle, close to the edge. This will secure the layers of fabric together and create a clean finish.
4. Attach the Handles to the Bag: Position the handles on the outside of the bag, evenly spaced apart. I usually place them about 4-5 inches from the side seams. Pin them in place.
5. Sew the Handles Securely: Sew the handles to the bag, using a strong stitch. Sew a square around the base of each handle, and then sew an “X” through the square for extra reinforcement.
Final Touches
Almost there! Just a few finishing touches to make your tote bag perfect.
1. Topstitch Around the Top Edge: Topstitch around the top edge of the bag, close to the edge. This will give the bag a more polished look and help to keep the lining in place.
2. Inspect Your Work: Take a good look at your bag and make sure all the seams are secure and there are no loose threads.
3. Enjoy Your Upcycled Tote Bag! You did it! You’ve transformed an old umbrella into a stylish and functional tote bag. Go show it off!
Tips and Tricks:
* Reinforce Stress Points: Pay extra attention to reinforcing the handles and the corners of the bag, as these are the areas that will experience the most stress.
* Use a Walking Foot: If you have a walking foot for your sewing machine, it can be helpful when sewing through multiple layers of fabric.
* Experiment with Embellishments: Once you’ve mastered the basic tote bag, you can experiment with adding embellishments like pockets, zippers, or decorative stitching.
* Don’t Be Afraid to Improvise: This is a DIY project, so don’t be afraid to get creative and make it your own!
I
Conclusion
So, there you have it! Transforming a broken umbrella into something beautiful and functional is not only incredibly satisfying but also a fantastic way to reduce waste and embrace sustainable living. This umbrella upcycling DIY project is more than just a craft; it’s a statement about creativity, resourcefulness, and our commitment to a greener planet.
Why is this a must-try? Because it’s simple, cost-effective, and yields surprisingly impressive results. Instead of tossing that damaged umbrella into the landfill, you’re giving it a second life, turning trash into treasure. The possibilities are truly endless. Imagine crafting stylish tote bags, durable shopping bags, unique raincoats for your pets, or even eye-catching wall art. The water-resistant fabric of the umbrella makes it perfect for projects that need to withstand the elements.
Feeling adventurous? Consider these variations:
* Patchwork Power: Combine fabric from multiple umbrellas to create a vibrant, multi-colored masterpiece. This is a great way to use up even the smallest scraps.
* Accessorize It: Add embellishments like buttons, ribbons, or embroidery to personalize your upcycled creation.
* Interior Lining: Use a contrasting fabric to line your upcycled bag or garment, adding a touch of luxury and durability.
* Kids’ Corner: Get the kids involved! Umbrella fabric is perfect for making play tents, capes, or even reusable snack bags.
* Seasonal Flair: Tailor your projects to the seasons. Think festive holiday decorations or summery beach bags.
Don’t be intimidated if you’re new to sewing or crafting. This project is adaptable to all skill levels. Start with something small and simple, like a reusable shopping bag, and gradually work your way up to more complex designs. The key is to have fun and experiment!
We are confident that you’ll be amazed by what you can create with a little imagination and a broken umbrella. The satisfaction of transforming something destined for the trash into a useful and beautiful object is truly rewarding.
So, grab that old umbrella, gather your supplies, and get ready to unleash your inner artist. We can’t wait to see what you create! Share your upcycled umbrella projects with us on social media using #UmbrellaUpcyclingDIY. We’re eager to be inspired by your ingenuity and creativity. Let’s spread the word about the power of upcycling and inspire others to join the movement! This umbrella upcycling DIY project is a testament to the fact that sustainability can be stylish, fun, and incredibly rewarding.
Frequently Asked Questions (FAQ)
What kind of umbrella is best for upcycling?
Ideally, you want an umbrella with a relatively intact canopy. While small tears and holes can be patched or incorporated into the design, a severely damaged umbrella might be more challenging to work with. Look for umbrellas with interesting patterns or colors that you find appealing. Both manual and automatic umbrellas can be used, but be sure to remove any sharp or potentially hazardous parts of the frame before you begin. The larger the umbrella, the more fabric you’ll have to work with, so consider that when making your selection. Also, check the fabric type. Polyester is common and easy to work with, but other materials like nylon can also be upcycled.
What tools and materials do I need for this project?
The essential tools and materials include:
* A broken umbrella
* Scissors or a rotary cutter
* A sewing machine (optional, hand sewing is also possible)
* Thread that matches the umbrella fabric
* Pins or clips
* A seam ripper (for removing the fabric from the frame)
* A ruler or measuring tape
* Fabric chalk or a marker
* Optional: Embellishments like buttons, ribbons, or patches
Depending on the specific project you’re undertaking, you might also need additional materials like lining fabric, zippers, or handles.
How do I safely remove the fabric from the umbrella frame?
The key is to use a seam ripper to carefully detach the fabric from the frame. Start by identifying the points where the fabric is attached to the ribs of the umbrella. Gently insert the seam ripper under the stitches and pull upwards to cut the thread. Be patient and avoid tearing the fabric. Work your way around the entire umbrella, detaching the fabric from each rib. Once all the attachments are removed, you should be able to easily separate the fabric from the frame. Dispose of the frame responsibly, recycling it if possible.
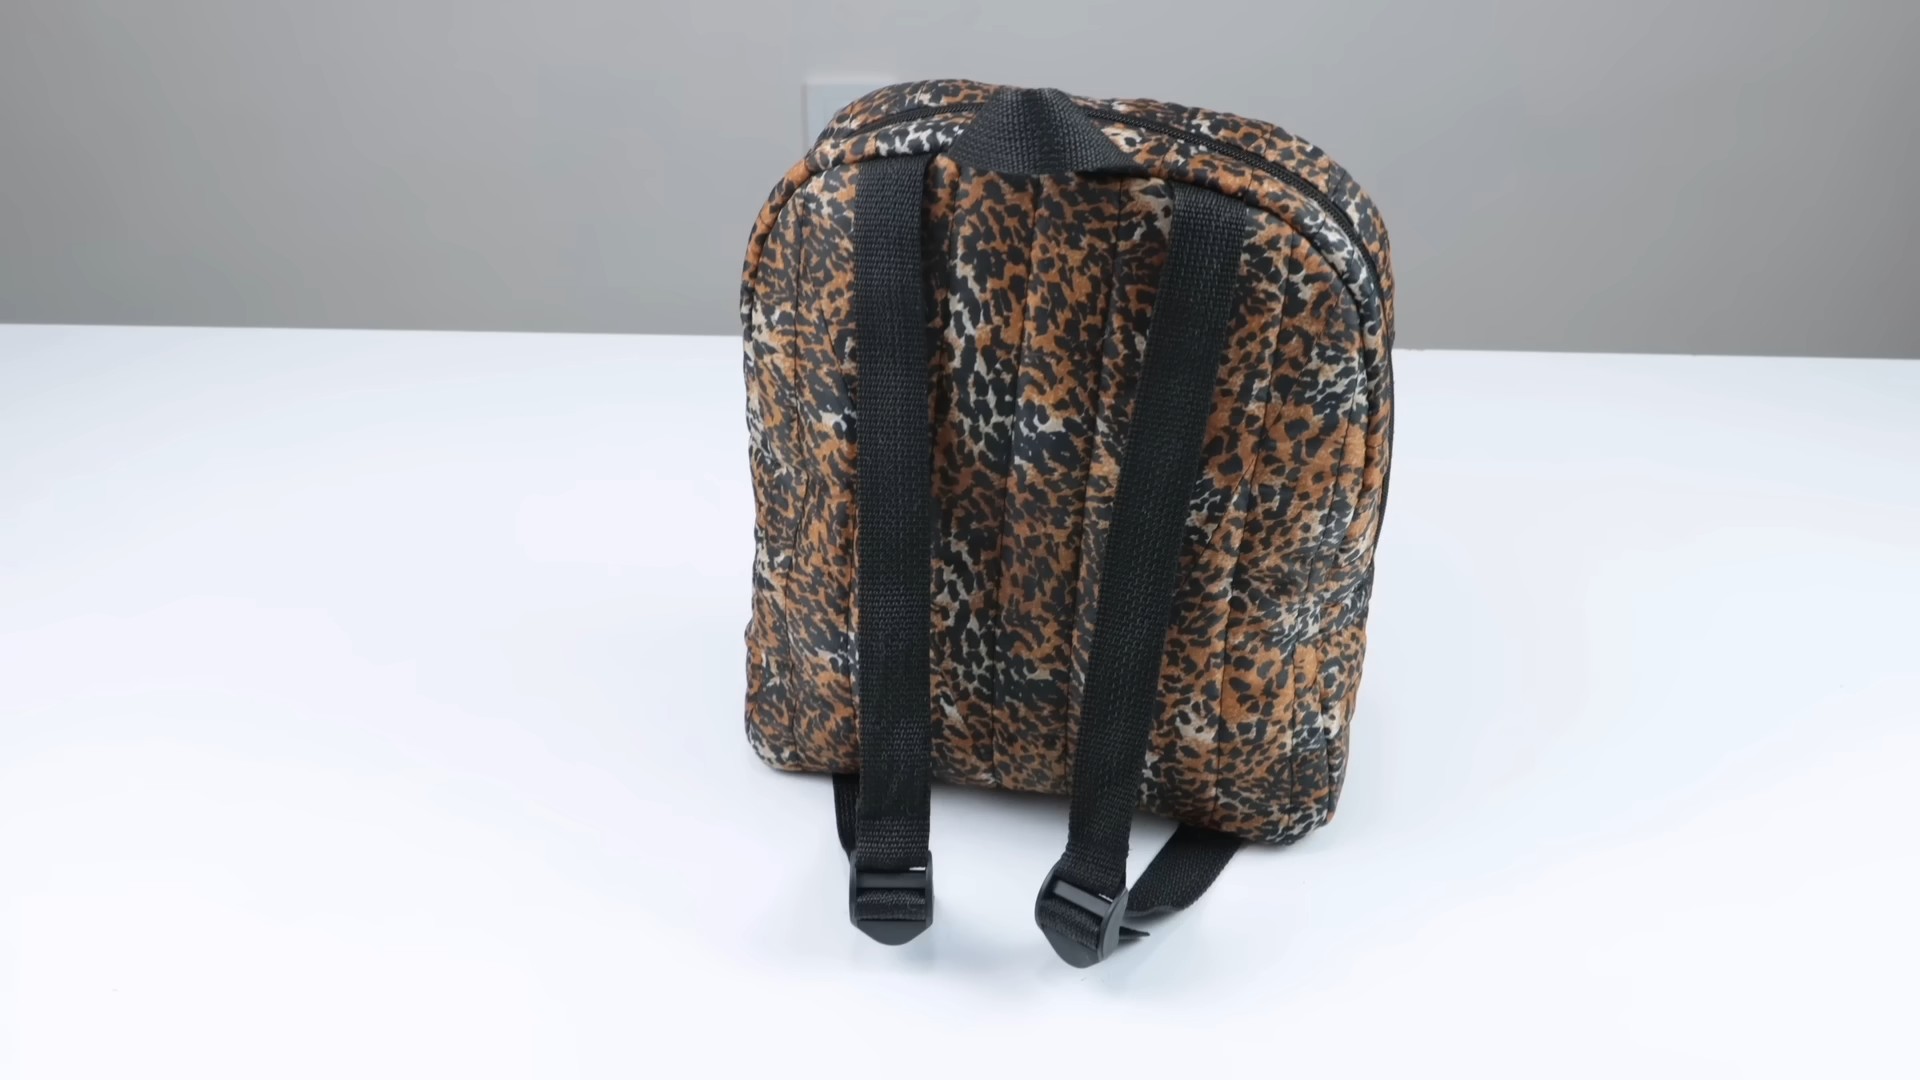
What can I make with upcycled umbrella fabric?
The possibilities are virtually endless! Here are a few ideas to get you started:
* Reusable shopping bags
* Tote bags
* Raincoats for pets
* Waterproof picnic blankets
* Cosmetic bags
* Pencil cases
* Aprons
* Wall art
* Patches for clothing
* Small pouches
* Kids’ play tents or capes
Let your imagination guide you! The water-resistant nature of the umbrella fabric makes it ideal for projects that need to withstand moisture.
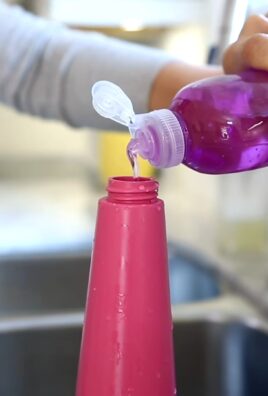
How do I clean the umbrella fabric before upcycling?
Before you start your project, it’s a good idea to clean the umbrella fabric. You can hand wash it with mild soap and water, or machine wash it on a gentle cycle. Be sure to remove any dirt or debris before washing. If machine washing, place the fabric in a mesh laundry bag to protect it from damage. Hang the fabric to dry, avoiding direct sunlight, which can fade the colors. Iron the fabric on a low setting to remove any wrinkles.
Is umbrella fabric easy to sew?
Umbrella fabric, typically polyester or nylon, can be a bit slippery to work with. Using pins or clips to hold the fabric in place is essential. A walking foot on your sewing machine can also help prevent the fabric from slipping. Use a universal needle and a medium stitch length. If you’re hand sewing, use a sharp needle and take your time to ensure neat and even stitches. Practice on a scrap piece of fabric before starting your main project.
What if the umbrella fabric has small holes or tears?
Small holes and tears can often be patched or incorporated into the design. You can use fabric scraps from the same umbrella or from other sources to create decorative patches. Alternatively, you can strategically position the holes or tears in areas where they won’t be noticeable or where they can add to the unique character of the project. For example, a small hole could be used as a buttonhole or as part of a decorative design.
How can I make my upcycled umbrella project more durable?
To enhance the durability of your project, consider adding a lining fabric. This will provide extra support and prevent the umbrella fabric from stretching or tearing. Use a sturdy thread and reinforce seams with multiple rows of stitching. When choosing embellishments, opt for durable materials that can withstand wear and tear. For bags, consider adding reinforced handles or straps.
Where can I find inspiration for upcycled umbrella projects?
Pinterest, Instagram, and other social media platforms are excellent sources of inspiration. Search for terms like “upcycled umbrella,” “umbrella crafts,” or “recycled umbrella projects” to find a wealth of ideas and tutorials. Online craft forums and blogs are also great resources for finding inspiration and connecting with other upcyclers. Don’t be afraid to experiment and develop your own unique designs!
What should I do with the umbrella frame after removing the fabric?
The umbrella frame can often be recycled as scrap metal. Check with your local recycling center for specific guidelines. Alternatively, you can repurpose the frame for other creative projects. The ribs can be used to create sculptures, garden trellises, or even decorative lighting fixtures. The handle can be used as a walking stick or as part of a costume.

Leave a Comment