

Water spinach low maintenance growing is easier than you might think! Imagine harvesting fresh, vibrant greens right from your backyard, ready to add a delicious and nutritious boost to your meals. Forget complicated gardening routines and endless hours toiling in the sun. This guide is your key to unlocking a bountiful harvest with minimal effort.
For centuries, water spinach, also known as kangkong, has been a staple in Asian cuisine, gracing tables with its delicate flavor and impressive nutritional profile. From stir-fries to soups, this versatile vegetable has been cherished for its adaptability and ease of cultivation. Now, you can bring this culinary tradition to your own home, regardless of your gardening experience.
In today’s fast-paced world, finding time for hobbies can be challenging. That’s why water spinach low maintenance growing is so appealing. It allows you to enjoy the satisfaction of growing your own food without sacrificing precious time and energy. Plus, with rising grocery costs, cultivating your own vegetables is a fantastic way to save money and ensure access to fresh, healthy produce. I’m excited to share these simple DIY tricks and hacks that will transform your garden into a thriving oasis of water spinach, even if you’re a complete beginner!
Wasserspinat Anbauen: Dein Einfacher DIY-Leitfaden für üppige Ernte
Hey Gartenfreunde! Habt ihr Lust auf eine Pflanze, die nicht nur super lecker, sondern auch unglaublich pflegeleicht ist? Dann ist Wasserspinat (auch bekannt als Kangkong oder Morning Glory) genau das Richtige für euch! Ich zeige euch, wie ihr diesen asiatischen Liebling ganz einfach selbst anbauen könnt, egal ob im Garten, im Topf oder sogar im Wasser. Los geht’s!
Was du für den Wasserspinat-Anbau brauchst
Bevor wir loslegen, hier eine Liste mit allem, was du brauchst:
* Wasserspinat-Samen oder Stecklinge: Samen sind leicht online oder in Gartencentern zu finden. Stecklinge kannst du von Freunden oder aus dem Asialaden bekommen.
* Geeignetes Pflanzgefäß: Ein Topf, Kübel, oder sogar ein Eimer mit Drainagelöchern. Wenn du ihn hydroponisch anbauen möchtest, brauchst du ein wasserdichtes Gefäß.
* Erde: Eine nährstoffreiche, gut durchlässige Erde ist ideal. Du kannst auch eine Mischung aus Gartenerde, Kompost und Sand verwenden.
* Wasser: Wasserspinat liebt Feuchtigkeit, also halte ihn gut bewässert.
* Dünger: Ein organischer Flüssigdünger oder Komposttee hilft beim Wachstum.
* Sonnenlicht: Wasserspinat braucht mindestens 6 Stunden Sonnenlicht pro Tag.
* Optional: Ein Rankgitter oder Stäbe, wenn du ihn klettern lassen möchtest.
Wasserspinat Anbauen: Schritt-für-Schritt Anleitung
Hier ist eine detaillierte Anleitung, wie du deinen eigenen Wasserspinat anbaust. Ich zeige dir beide Methoden: Anbau in Erde und hydroponischer Anbau.
Anbau in Erde
1. Samen vorbereiten (optional): Um die Keimung zu beschleunigen, kannst du die Samen vor dem Pflanzen 24 Stunden in lauwarmem Wasser einweichen. Das macht die Samenschale weicher.
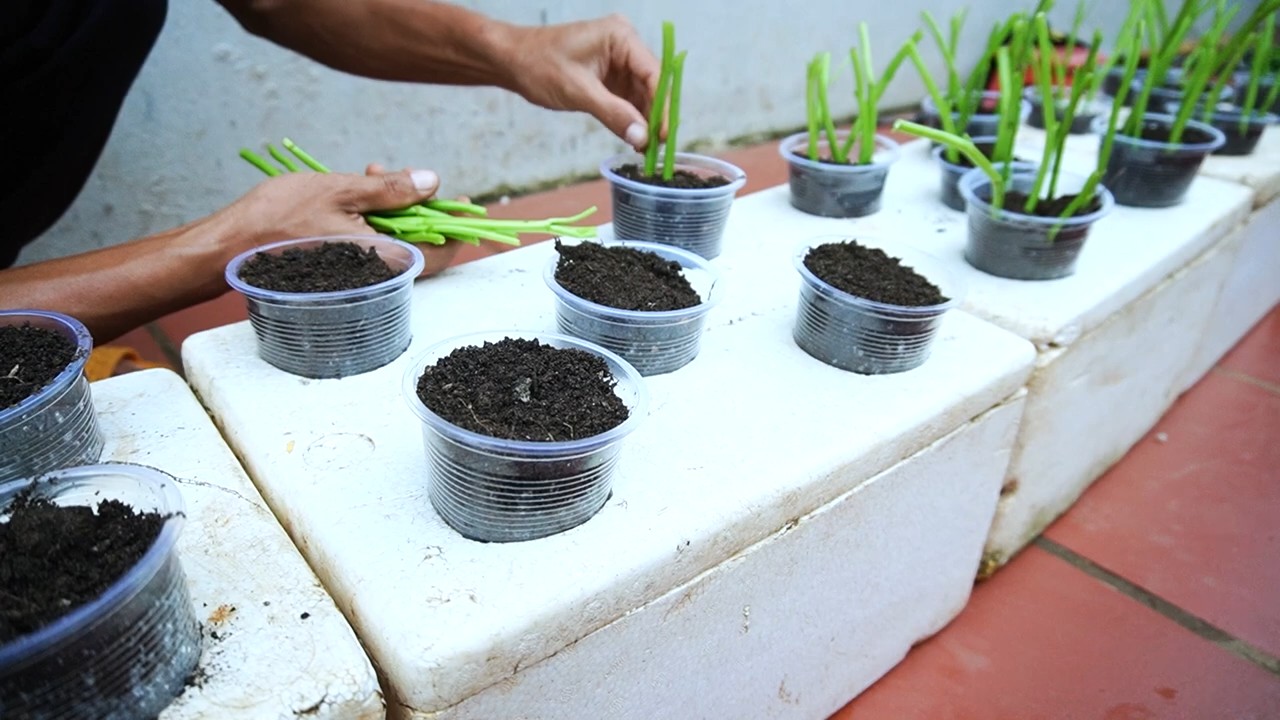
2. Aussaat: Fülle dein Pflanzgefäß mit Erde. Säe die Samen etwa 1 cm tief und 2-3 cm auseinander. Bedecke sie leicht mit Erde und gieße sie vorsichtig an.
3. Standort wählen: Stelle das Pflanzgefäß an einen sonnigen Ort. Wasserspinat liebt Wärme und Licht!
4. Bewässerung: Halte die Erde stets feucht, aber nicht durchnässt. Wasserspinat mag es feucht, aber Staunässe sollte vermieden werden.
5. Keimung: Die Samen keimen normalerweise innerhalb von 7-14 Tagen.
6. Vereinzeln (optional): Wenn die Sämlinge zu dicht stehen, kannst du sie vereinzeln, sodass sie genügend Platz zum Wachsen haben.
7. Düngen: Beginne etwa 2-3 Wochen nach der Keimung mit dem Düngen. Verwende einen organischen Flüssigdünger oder Komposttee gemäß den Anweisungen auf der Verpackung.
8. Rankhilfe (optional): Wenn du möchtest, dass dein Wasserspinat klettert, kannst du ihm eine Rankhilfe anbieten.
9. Ernte: Du kannst mit der Ernte beginnen, sobald die Stängel etwa 20-30 cm lang sind. Schneide die Stängel einfach mit einer Schere ab. Der Wasserspinat wird weiterwachsen und neue Triebe bilden.
Hydroponischer Anbau (im Wasser)
Diese Methode ist besonders spannend, weil sie zeigt, wie anpassungsfähig Wasserspinat ist!
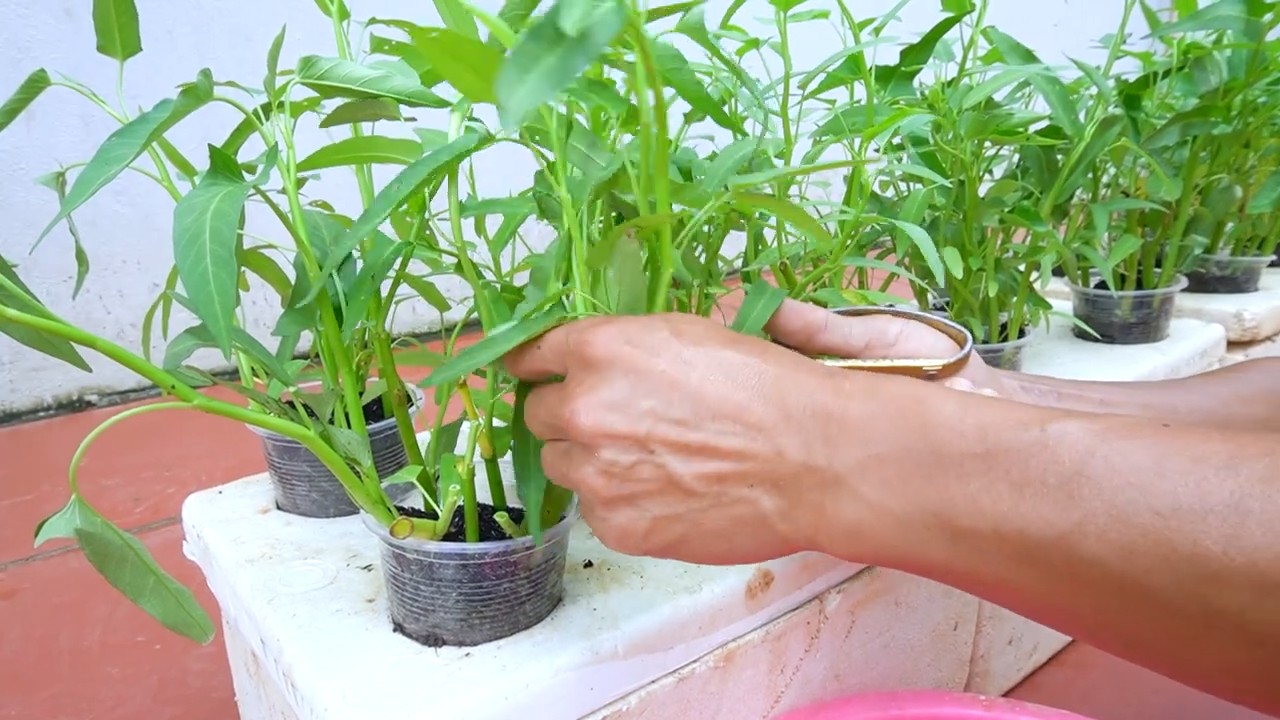
1. Stecklinge vorbereiten: Schneide gesunde Stängel von einem bestehenden Wasserspinat ab. Die Stecklinge sollten etwa 10-15 cm lang sein und mindestens 2-3 Blattknoten haben.
2. Bewurzelung: Stelle die Stecklinge in ein Glas Wasser. Achte darauf, dass die Blattknoten unter Wasser sind. Stelle das Glas an einen hellen Ort, aber nicht in die direkte Sonne.
3. Wurzelbildung: Innerhalb von wenigen Tagen sollten sich Wurzeln bilden. Wechsle das Wasser alle paar Tage, um Algenbildung zu vermeiden.
4. Vorbereitung des Wassergefäßes: Wähle ein wasserdichtes Gefäß. Du kannst einen Eimer, eine Wanne oder sogar ein Aquarium verwenden.
5. Nährlösung: Fülle das Gefäß mit Wasser und füge eine hydroponische Nährlösung hinzu. Diese Nährlösung versorgt den Wasserspinat mit allen wichtigen Nährstoffen. Du findest spezielle Nährlösungen für Blattgemüse im Gartencenter oder online.
6. Einsetzen der Stecklinge: Sobald die Stecklinge ausreichend Wurzeln gebildet haben, kannst du sie in das Wassergefäß setzen. Du kannst sie entweder direkt ins Wasser stellen oder sie in kleine Netztöpfe mit Blähton oder Kokosfasern pflanzen, die dann ins Wasser gehängt werden.
7. Standort wählen: Stelle das Wassergefäß an einen sonnigen Ort.
8. Pflege: Wechsle die Nährlösung regelmäßig gemäß den Anweisungen auf der Verpackung. Achte darauf, dass die Wurzeln immer mit Wasser bedeckt sind.
9. Ernte: Du kannst mit der Ernte beginnen, sobald die Stängel etwa 20-30 cm lang sind. Schneide die Stängel einfach mit einer Schere ab. Der Wasserspinat wird weiterwachsen und neue Triebe bilden.
Tipps und Tricks für eine reiche Ernte
Hier sind noch ein paar zusätzliche Tipps, die dir helfen werden, eine üppige Ernte zu erzielen:
* Regelmäßiges Gießen: Wasserspinat liebt Feuchtigkeit. Gieße ihn regelmäßig, besonders an heißen Tagen.
* Düngen: Regelmäßiges Düngen sorgt für ein gesundes Wachstum und eine reiche Ernte.
* Schädlinge: Wasserspinat ist relativ resistent gegen Schädlinge. Gelegentlich können Blattläuse auftreten. Diese kannst du einfach mit einem Wasserstrahl abspülen oder mit einem biologischen Insektizid bekämpfen.
* Erntezeitpunkt: Ernte den Wasserspinat regelmäßig, um das Wachstum neuer Triebe zu fördern.
* Überwinterung: Wasserspinat ist nicht winterhart. In kälteren Regionen kannst du ihn im Herbst ernten und die Samen für das nächste Jahr aufbewahren. Du kannst ihn auch in einem beheizten Gewächshaus oder im Haus überwintern.
* Sonneneinstrahlung: Achte darauf, dass der Wasserspinat genügend Sonnenlicht bekommt. Mindestens 6 Stunden pro Tag sind ideal.
* Luftfeuchtigkeit: Wasserspinat mag eine hohe Luftfeuchtigkeit. Du kannst die Luftfeuchtigkeit erhöhen, indem du die Blätter regelmäßig mit Wasser besprühst.
* Bodenqualität: Eine gute Bodenqualität ist wichtig für ein gesundes Wachstum. Verwende eine nährstoffreiche Erde oder verbessere die Bodenqualität mit Kompost.
* Abwechslung: Probiere verschiedene Sorten von Wasserspinat aus. Es gibt verschiedene Sorten mit unterschiedlichen Blattfarben und Geschmacksrichtungen.
* Beobachtung: Beobachte deine Pflanzen regelmäßig, um Probleme frühzeitig zu erkennen und zu beheben.
Wasserspinat in der Küche
Wasserspinat ist unglaublich vielseitig in der Küche! Hier sind ein paar Ideen, was du damit anfangen kannst:
* Gebraten: Wasserspinat ist köstlich gebraten mit Knoblauch, Chili und Sojasauce.
* Suppen: Er ist eine tolle Ergänzung zu Suppen und Eintöpfen.
* Salate: Junge Blätter können roh in Salaten verwendet werden.
* Currys: Wasserspinat passt hervorragend zu Currys.
* Gedünstet: Gedünsteter Wasserspinat ist eine gesunde und leckere Beilage.
Häufige Fragen (FAQ)
* Wie oft muss ich Wasserspinat gießen?
Wasserspinat liebt Feuchtigkeit, also gieße ihn regelmäßig, besonders an heißen Tagen. Die Erde sollte immer feucht sein, aber nicht durchnässt.
* Welchen Dünger soll ich verwenden?
Ein organischer Flüssigdünger oder Komposttee ist ideal. Du kannst auch einen
Conclusion
So, there you have it! Growing your own water spinach, also known as ong choy or kangkong, doesn’t require a green thumb or a sprawling garden. This simple, low-maintenance DIY trick unlocks a world of fresh, delicious, and nutritious greens right at your fingertips. Forget expensive grocery store prices and questionable freshness; with a little water and some sunlight, you can cultivate a thriving patch of this versatile vegetable.
Why is this a must-try? Because it’s incredibly rewarding to harvest something you’ve nurtured from practically nothing. The taste of homegrown water spinach is noticeably superior to store-bought varieties – crisper, more flavorful, and bursting with vitality. Plus, you have complete control over the growing process, ensuring it’s free from harmful pesticides and chemicals.
But the benefits extend beyond just taste and health. This DIY project is also incredibly sustainable. You’re reducing your carbon footprint by eliminating transportation costs and packaging waste. And let’s not forget the sheer joy of connecting with nature, even in a small way. Watching your water spinach flourish is a therapeutic and fulfilling experience.
Looking for variations? Absolutely! While the basic method we’ve outlined is incredibly effective, feel free to experiment. Try different containers – from repurposed buckets to decorative planters. You can also explore different growing mediums, such as coco coir or even just plain water. For those with limited space, consider vertical gardening techniques to maximize your yield. If you live in a cooler climate, you can start your water spinach indoors and transplant it outdoors once the weather warms up. Remember that water spinach thrives in warm, humid conditions, so providing adequate moisture and sunlight is key.
Don’t be afraid to get creative and adapt the method to suit your specific needs and preferences. The beauty of this DIY trick is its simplicity and adaptability.
We wholeheartedly encourage you to give this a try. It’s a fun, easy, and rewarding project that will provide you with a constant supply of fresh, delicious water spinach. Once you’ve harvested your first batch, you’ll be amazed at how easy it is to maintain a continuous supply.
And most importantly, we want to hear about your experience! Share your photos, tips, and tricks in the comments below. Let us know what worked for you, what challenges you faced, and any creative variations you came up with. Your feedback will help others discover the joy of growing their own water spinach and build a thriving community of home gardeners. Let’s spread the word about this fantastic and easy way to grow your own water spinach!
Frequently Asked Questions (FAQ)
What exactly is water spinach, and what does it taste like?
Water spinach (Ipomoea aquatica), also known as ong choy, kangkong, or swamp cabbage, is a semi-aquatic leafy green vegetable popular in Southeast Asian cuisine. It has long, hollow stems and arrow-shaped leaves. The taste is mild and slightly sweet, with a subtle earthy flavor. The texture is crisp and slightly crunchy when cooked properly. It’s often compared to spinach or morning glory, but with a unique flavor profile all its own.
How much sunlight does water spinach need?
Water spinach thrives in full sun, requiring at least 6-8 hours of direct sunlight per day. If you’re growing it indoors, supplement with grow lights to ensure adequate light exposure. Insufficient sunlight can lead to leggy growth and reduced yields.
What kind of water should I use?
Tap water is generally fine for growing water spinach, but it’s best to let it sit for 24 hours to allow chlorine to dissipate. You can also use rainwater or well water. Avoid using water that is heavily chlorinated or contains high levels of minerals, as this can harm the plants. Regularly changing the water is important to prevent stagnation and the buildup of algae.
How often should I change the water?
Change the water every 2-3 days, or more frequently if it becomes cloudy or develops an odor. This helps prevent the growth of algae and keeps the water oxygenated, which is essential for healthy root development.
How long does it take for water spinach to grow?
Water spinach is a fast-growing vegetable. You can typically start harvesting leaves within 3-4 weeks of planting. The plants will continue to produce new growth for several months, providing a continuous supply of fresh greens.
How do I harvest water spinach?
Harvest water spinach by cutting the stems about 4-6 inches above the water line. This encourages new growth and allows you to harvest multiple times from the same plant. You can harvest individual leaves or entire stems, depending on your preference.
Can I grow water spinach in soil?
Yes, you can grow water spinach in soil, but it requires consistently moist soil. Choose a well-draining soil mix and water regularly to keep it from drying out. Growing it in water is generally easier and requires less maintenance.
What are some common problems when growing water spinach?
Some common problems include algae growth, nutrient deficiencies, and pest infestations. Algae growth can be prevented by changing the water regularly and providing adequate sunlight. Nutrient deficiencies can be addressed by adding a small amount of liquid fertilizer to the water. Pests such as aphids and spider mites can be controlled with insecticidal soap or neem oil.
Is water spinach safe to eat?
Yes, water spinach is safe to eat when grown properly. However, it’s important to ensure that the water source is clean and free from contaminants. Avoid growing water spinach in areas that may be polluted with heavy metals or other toxins. Thoroughly wash the leaves before eating to remove any dirt or debris.
Can I grow water spinach indoors year-round?
Yes, you can grow water spinach indoors year-round, provided you have adequate light and warmth. Use grow lights to supplement natural sunlight and maintain a consistent temperature of around 70-80°F (21-27°C).
What are some ways to cook water spinach?
Water spinach is a versatile vegetable that can be used in a variety of dishes. It’s commonly stir-fried with garlic and chili, added to soups and stews, or used in salads. It can also be steamed, boiled, or grilled.
Can I save seeds from my water spinach plants?
Yes, you can save seeds from your water spinach plants, but it requires allowing the plants to flower and produce seeds. This can be challenging in some climates. The seeds can then be dried and stored for future planting. However, note that plants grown from saved seeds may not be true to type.
What kind of fertilizer should I use?
A balanced liquid fertilizer, such as a 20-20-20 formula, is suitable for water spinach. Use it sparingly, following the instructions on the label. Over-fertilizing can lead to excessive algae growth.
My water spinach is turning yellow. What could be the problem?
Yellowing leaves can indicate several issues, including nutrient deficiencies, overwatering, or underwatering. Check the water quality, ensure the plants are receiving adequate sunlight, and adjust your watering schedule as needed. Adding a small amount of fertilizer can also help.
Is water spinach good for my health?
Yes, water spinach is a nutritious vegetable that is rich in vitamins, minerals, and antioxidants. It’s a good source of vitamin A, vitamin C, iron, and calcium. It’s also low in calories and fat. Incorporating water spinach into your diet can contribute to overall health and well-being.


Leave a Comment